Parmesan custards

Not only do I love cooking and eating, I love reading recipes and articles about cooking and eating. I’m a great snipper and copier out of recipes that I think will be worth doing, or that interest me. I’m always on the lookout for recipes that can be made in advance – we lived in an apartment in Nottingham where the upper floor was an open space for the kitchen, dining and living area and here, in Malaysia, we have much the same layout. That’s lovely when everything is tidy and ready to go but if you have guests sitting around with drinks it’s not so great for them to see you juggling pans and plates, cursing mildly and getting hot and bothered.

I like to have things ready to bring out – for one thing, it gives me time to brush my hair and wipe flour, sweat and splashes off my shiny, red face.

In my folder of Things I Really Must Make, I found this article, from Olive Magazine, dated June 2008,  but searching the site now, there’s no recipe listed. You’ll just have to follow what I write out.

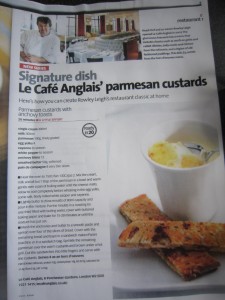
Rowley Leigh, of Le Cafe Anglais has, amongst the many wonderful dishes he makes, a classic starter, Parmesan Custards – creamy, cheesey, savoury set custard served with thin fingers of toast, spread with a thin smear of anchovies, perfect as a simple, yet stunning, make ahead starter.

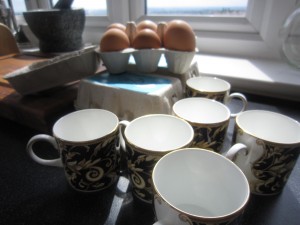
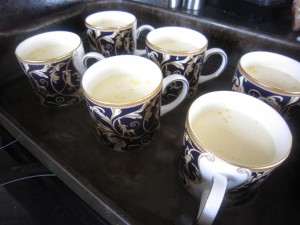
I have a set of espresso cups that are just about the right size and as they are part of my Wedgwood Cornucopia dinner service, they were going to look perfect at the table. We  were having good friends round to dinner and I wanted to make sure everything was as lovely as possible. There’s no point in keeping things ‘for best ‘- my motto is, if you’ve got it, use it! If you haven’t got espresso cups, little ramekins or china moulds (they need to hold around 80 ml) will do just as well.

I needed 4 egg yolks; 300ml of single cream; 300ml of milk; 12 anchovy fillets; 100g of finely grated parmesan for the custard and another 150g for some parmesan crisps I was going to make as an extra; 50g of softened butter; 8 slices of good bread ( I used thinly sliced No Knead Bread) plus cayenne and white pepper to season everything with. The recipe said this would make 8 small pots but the six espresso cups took slightly more than the recommended 80 ml so everything evened out. Besides, there were going to be six of us eating.

This really is quick and easy – so easy, that the first thing you do is get the oven turned on to 150°C/300ºF/gas mark 2.

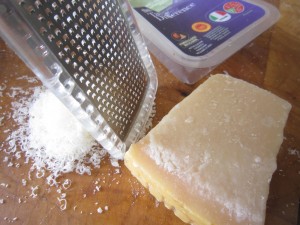
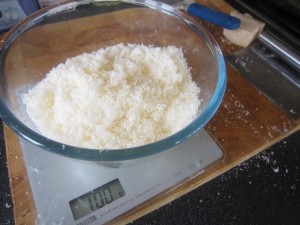
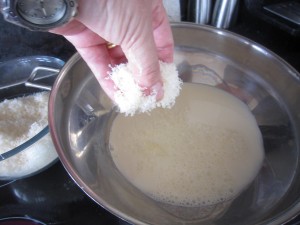
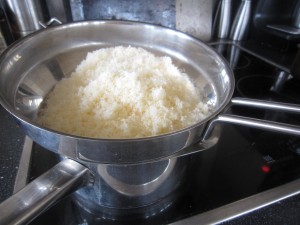
Then, grate the parmesan finely so it makes a lovely, light and airy mound

Remember that this is for the custard…. I need the rest of the parmesan for crisps, later.

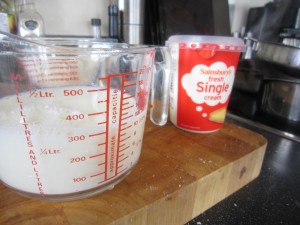
Mix 300ml each of the milk and the cream together

….then add in all but a tablespoon of the parmesan, if you are using ramekins.  You save this because you can sprinkle this last bit on top and then grill your pots to make a crisp topping.  I was going to make parmesan crisps instead because I didn’t want to put my lovely Wedgwood under the grill.

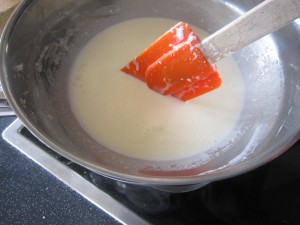
…and heat gently in a bowl or a bain marie, over a pan of boiling water until the parmesan melts.

Allow this to cool completely

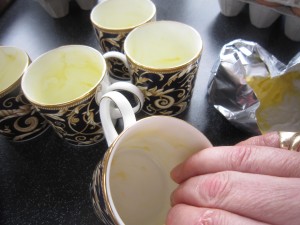
While the mix is cooling, butter your cups or little bowls.

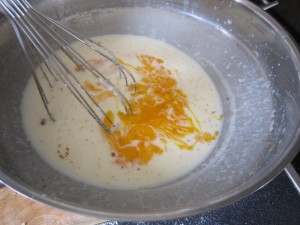
Once your mix is cool,  whisk in the four egg yolks, a pinch of cayenne, the same of finely ground white pepper and maybe a pinch of salt. You must let it coolproperly because otherwise you will end up with cheesey scrambled egg.

Put the cups in a roasting tin, then fill them with equal amounts of the custard mix, then put the tin on the oven racck before you add boiling water. You need enough to come maybe one third of the way up the cups. Doing it this way prevents the mix slopping about and you pouring boiling water over your feet. Always a plus point in my book.

Cover the  top of this with some buttered baking parchment or a silicone sheet and then let everything bake for about 15-20 minutes, when they will be just set.

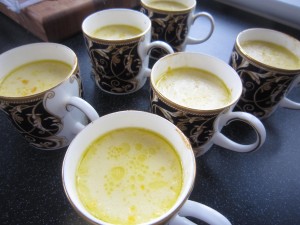
They emerge, looking gorgeous. I put them to one side while I made the toasts and the crisps……

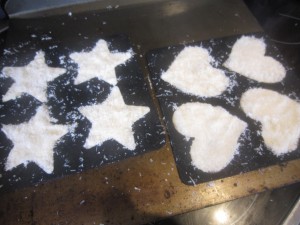
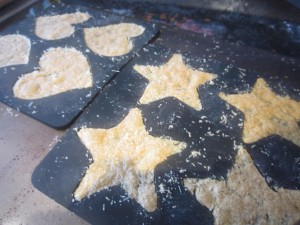
My sister gave me some Curtis Stone silicone wafer baker molds as a Christmas present and I really wanted to try them out  –  you simply pack them with the rest of the finely grated parmesan and put in a low oven, on a baking tray

.. until they turn a soft, golden brown. Leave them to cool and you can get started on the anchovy toasts.

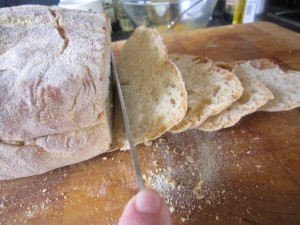
Thinly slice some good bread – each person will need a slice – and cut the crusts off to make lovely, neat, evenly sized rectangles

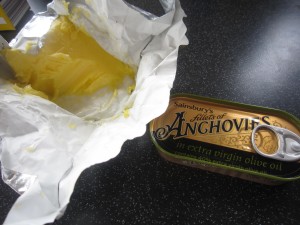
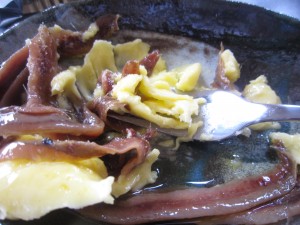
Then take your softened butter and the anchovies (drain them – you don’t want the oil)

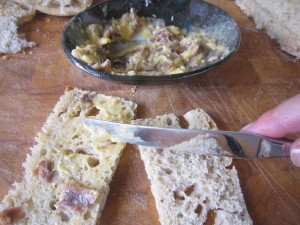
….and mash them into a smooth paste

Lightly spread half of the slices of  bread – and I do mean lightly. You don’t want to overpower everything with too much anchovy.


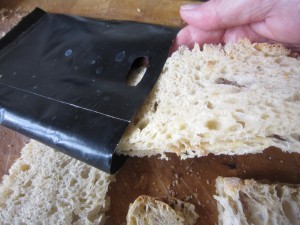
Lay a slice of unbuttered bread over the spread ones to make dainty sandwiches. The easiest way to toast them is in a toasted sandwich bag and then pop them in the toaster for a short time. You don’t want to make them too toasty and crisp – you have to slice them into fingers after that…


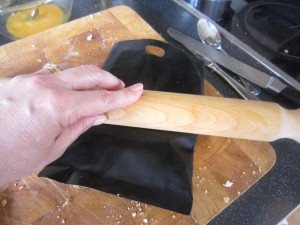
A good way to get very thin toasts is to roll them, still in the bag, with a rolling pin to get them nice and smooth, then toast them. When they are done they can easily be cut into fine fingers.


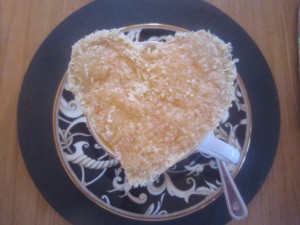
By now, the parmesan crisps are cool and can be gently lifted from the molds. How fantastic is that?

And then… well, then you are nearly ready.


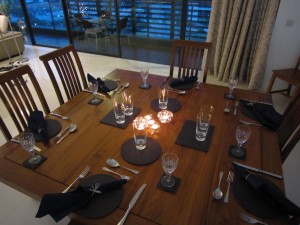
Wipe down the kitchen and set the table….


When you are ready to serve, if you are using ramekins or china molds, sprinkle the last of the parmesan on top of the custards and brown gently under a hot grill. I had my parmesan crisps to place on top, instead.

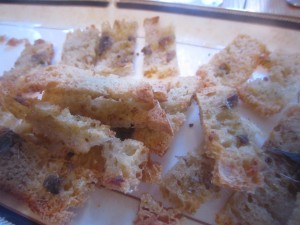
The fingers of anchovy toast were piled onto a plate

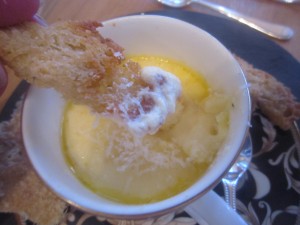
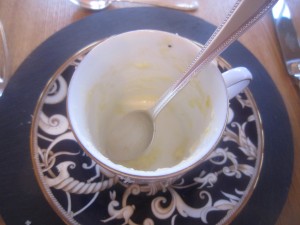
The starter was served…..

The crispness of the toast fingers contrasted deliciously with the soft, savoury custard.

The parmesan wafers added a gorgeous crisp bite.

Successful? Yes.

Tasty? Very much so.

Easy to do? Yes, so much so that this, with its comforting creaminess and rich, savoury flavour, would be a great dish to do when you needed some lovely comfort food.

In fact, the more I think about this, the more I want to make it again. It will remind me of a wonderfully happy night in Nottingham and I can introduce it to my new friends here in Malaysia.  What a good reason to invite people round to supper!


Pineapple and Prawn Curry

I know… I know…. it’s been so long since I wrote anything but there’s been so much going on. We’ve had guests staying and we’ve been on trips abroad and time just slips on by. It didn’t help that twice I wrote out this recipe and twice something went wrong. I saved everything, both times, but half of the post still went missing. Technology, eh?

So, I’ll start again. Things have changed a lot since we moved in here with just a couple of suitcases. While we waited for the container to arrive, I did go and buy us the bare minimum of stuff to see us through…

And when I say the bare minimum, that’s what I mean.Thank goodness for IKEA. That balcony table and chairs were all we had to eat at unless we wanted to sit on the bed, which was the only other thing we had. Mind you, that gave me time to think about what I really wanted…

Having friends round to eat with us is a big part of our life. We love to share evenings and food with people and  we wanted to make sure that when we did get a table, we’d get the perfect table.

We wanted a square table because if we got a rectangular one, it meant there was someone sitting at the head of that table and for us, there’s no head of the table. Everyone eating around it is equal. We also didn’t want legs either, as someone on the corner (me, usually) always ended up banging knees on the legs. But finding the perfect table… well, that was the hard part.  I looked everywhere and there was nothing I could find that was right for us.

And then I found Teakia, where all they asked was what was it that I wanted…. square? Yes, certainly. Five feet square should be large enough? A central pedestal? Of course, what carving would I like on the pedestal? Teak? Naturally. Chairs? Try this chair… or that? What suits you? Ten chairs would fit round that perfectly.

You have no idea how happy I was. Everything made to my specification. This was the ultimate customer service.

And then it arrived…. the beautiful, solid, central pedestal

.. the square table top

… and ten lovely chairs!

No excuse now… I had to cook for our friends. I wanted us to sit down together, laughing, eating and drinking; celebrating our new start in Malaysia.

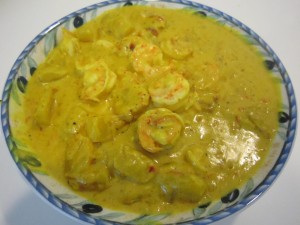
One of the first things I cooked was something I’d had a local restaurant – pineapple and prawn curry. I don’t think I’d had anything like that before but it was the most lovely dish – the pineapple was sweet and sharp while the prawns added a salty savouriness to a spicy sauce.

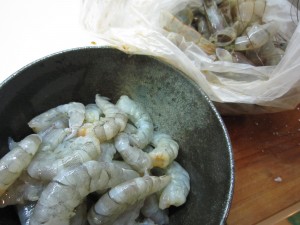
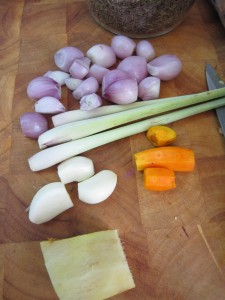
I went and got a big bag of prawns ( weighing them, cleaned and peeled later, they came to about 300g) ; a pineapple (you could use a tin of good pineapple in its own juice); a stalk of lemongrass, some mild red chillies, a piece of turmeric root, although ground turmeric will work as well; shallots; garlic; dried shrimp paste; coriander seeds and coconut cream. I can buy coconut cream, freshly squeezed in bags but if you don’t have access to that, a can will do just as well.


First of all, peel and de-vein the prawns, running a knife down their backs and pulling out the black cord of their intestines.  Put them into the fridge to keep cool, as you will add them at the end of the cooking.

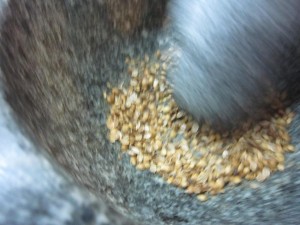
The next thing to do is also something that will be needed later but it makes sense to do it straightaway and besides, you will need the pestle and mortar to do other stuff…. so, grind three tablespoons of coriander seeds and put them to one side. I’m quite fond of pounding away with a pestle and mortar as it gets the tension out of me….. If you have no tension, you could, of course, use ground coriander. Maybe three teaspoons would do.

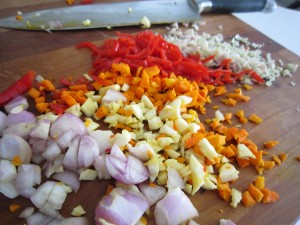
Now, chop all of the other ingredients  – the lemongrass stalk; the shallots (maybe five or six); three or so cloves of garlic; about an inch or so or turmeric root ( a teaspoon and a half if you used ground powder) and three or four red chillies. This makes them easier to pound… or grind if you want to blitz them.


Once everything is in a smoothish paste  add in chopped soaked, dried chillies and pound some more. Remove the seeds from the chillies first and they add a lovely soft and rich taste to the spice mix, without overpowering everything. Using a pestle and mortar gives you a rougher mix than if you blitz it all,  and I like the difference in textures, but a  quick blitz will give the same results.

Then, heat a frying pan and add some oil – you have to fry the spice mix for a few minutes to let all the flavours blend properly

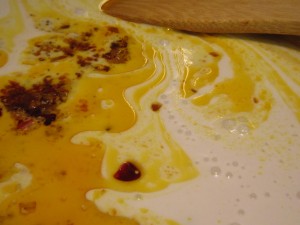
Adding some of the coconut cream, maybe half of the can, if that is what you are using, and it will stop it burning.

Add in the ground coriander and a quarter or half teaspoon of dried shrimp paste and stir it round gently before adding the rest of the coconut cream

Look at how it all swirls together. It smells really good, too.

The pineapple goes in now and needs to cook  gently so it softens.

Some Maldon salt needs to be added to balance the flavour

Then… throw in those fresh prawns, Grey now, because they are raw, but stir gently and watch them turn a beautiful rosy pink.

Five more minutes of simmering and then it will be ready

All we needed was some rice and to get up to the table

Dinner was served.

The sweet sharpness of the pineapple was balanced by the rich smoothness of the coconut cream and the salty, savoury prawns in that spicy gravy made it into a perfect supper dish.

Perfect dish at a perfect table. It was worth the wait.


Home thoughts from abroad…… Whisky toffee almond tart

Sometimes, you know, my thoughts go back to the UK and I think of my family and friends there that I miss so much. Right now, they tell me, the weather is icy, frost lines the branches of trees and the grass has turned to thick white, iced strands. I miss the beauty of an English winter, even if I don’t miss the aching pain of frozen feet. Nor do I miss having to chip ice from the inside of my windscreen, as I had to do last winter when the temperatures were regularly -5° to -9° C.

I do have other problems here….  I get out of my air conditioned car and my specs steam up; here, my hair is permanently limp in the humid heat. Minor, I know, but constant. That’s the thing about the Tropics. We have no seasons, no changes… sunrise and sunset are at much the same time every day, twelve hours apart and the weather is pretty constant. Sometimes it rains a bit more than other times but, generally, one day is much like any other.


When you are inside, with air conditioning however, the weather can look very different… I looked out at this, dark and stormy skies and the promise of a thunderstorm and rain later. It looked like November in the UK. Yet I knew that once I was outside on the balcony it would feel hot and humid. It’s quite disconcerting at times.

It did make me think of cold days in the UK and I remembered the last meal I cooked for friends in Nottingham before we left for Malaysia. It was a fabulous night where we laughed till we cried, we ate till we were fit to burst, we drank cocktails and wine and then moved on to whisky and we even danced across the floor in the early hours of the morning…. we finally said our goodnights at about 4am.

Maybe it was all the drinking. I blame one of the puddings for that as I am sure we wouldn’t have had the whisky if we hadn’t had a tot to go with the Whisky Toffee Almond Tart….

I’d seen the recipe in Delicious a couple of years or so ago (maybe even more) and I’d saved it, wanting to cook it for a special occasion. Us leaving the country seemed pretty special to me and besides, one of our lovely guests is Scottish and he loves whisky… and even more to the point, we were moving somewhere we couldn’t take our whisky anyway! Waste not, want not, I thought.

All I had to do (and it was a pretty simple recipe – always a plus point when you are cooking lots of things)  was make some pastry. 200g of plain flour, with 100g of chilled and chopped unsalted butter needed to be rubbed through (or, easier still, whizzed on pulse in a processor) until everything comes together into fine crumbs.

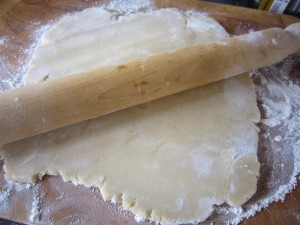
Add about four tablespoons of cold water and mix it together so it comes into a ball, then roll it out into a circle


I’m pretty useless at rolling evenly as you can see, so if you are the same, don’t worry, it works even if you have to piece bits together when you put it into a 23cm/9 inch fluted flan tin.


Don’t handle it too much and leave the edges hanging over. You can trim them off later so it is all neat and anyway, pastry shrinks when it cooks, so you get a better fit.

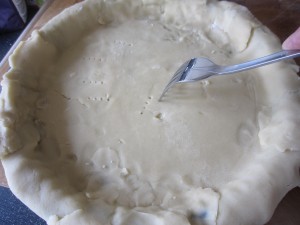
Prick the bottom with a fork so that when it cooks the steam can escape and you have a flat bottom to it and just put it in the fridge to chill right down for 30 minutes.

After you have wiped up the mess you will have made after dusting the board to roll the pastry on, you have plenty of time to get the rest done. Put the oven on to heat at 200°C/fan 180°C/390°F.

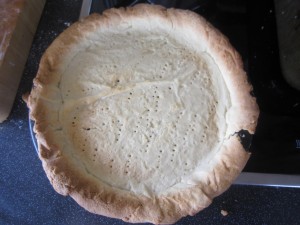
You can put the pastry shell into the oven, lined with baking paper and baking beans to weigh it down, for fifteen minutes. After that, take the paper and beans off and put it back in to bake until golden… but no more than five minutes. Take it out and let it cool.


Now for the good stuff…. you’ll need 300g flaked almonds, a 284ml carton of double cream, 225g granulated sugar and some single malt whisky. You don’t need much, so before the whisky lover in your family shrieks at the thought of cooking with fine whisky, assure them it is for the best of reasons and anyway, you only need 4 tablespoons….


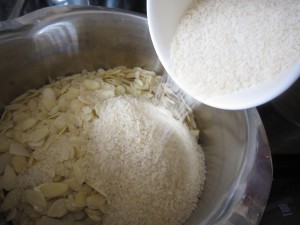
Put the almonds into a pan and add the sugar


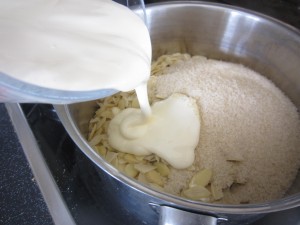
Add the cream….


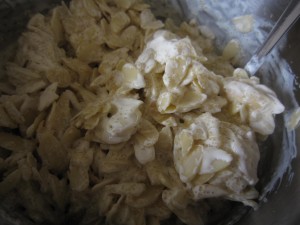
Stirring it all round


And mix it together. It’s looking good so far……


Ancnoc whisky


And then, select your whisky…. I chose anCnoc,  a smooth and almost sweet Speyside single malt.


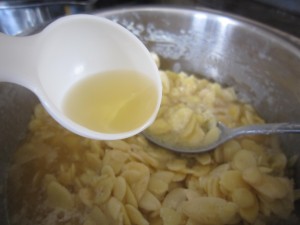
Measure 4 tablespoons of the good stuff, pour it in and then just stir it all round and add a pinch of salt to round out the flavours…


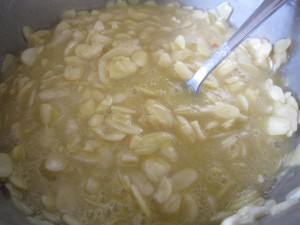
… and then heat it all through, gently, until the sugar dissolves and it thickens slightly. This will take about twenty minutes and you will see it turn a beautifully pale golden colour. Take it off the heat and put to one side.

Turn the oven down to 180°C/fan 160°C/355°F.


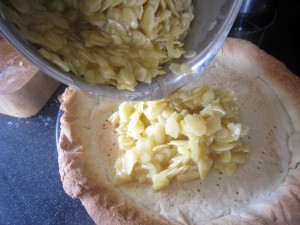
Pour the filling into the pastry shell


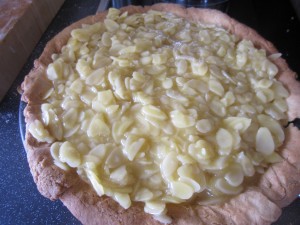
… and then smooth it out. (Yes, the mixture DOES taste delicious) and then bake it for another ten minutes or so until it looks golden. Don’t overdo it and don’t worry if it looks like it hasn’t set. It does that as it cools.


After you have put it on a tray to cool slightly, drizzle it with just a little more whisky so it sinks in as the filling cools and firms up.

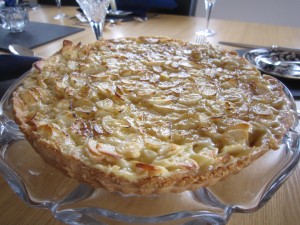
Let everything cool completely before you trim off the edges to make it look neat and put on a cake stand, ready for serving.


And then, of course, you are ready to serve it with a wee dram to go alongside it at the end of the meal..


Slice it…..


… and serve it with a dollop of really good, thick cream.


It really was lovely.


Was it a success? Well, that picture was taken after we’d had the whisky toffee and almond tart, at the end of the meal. I think the blurring of the shot says it all.

I can’t blame the tart for that, I suppose, but it certainly was a fine ending to a lovely meal with our friends.

A fitting goodbye to those we were leaving behind us and an excellent start to the laughing and dancing that followed.

Maybe you could make this? Not necessarily because you are leaving the country… but how about as a dessert for a Burns’ Night supper? Then the whisky is justified… not only justified but essential.

Sambal santan udang… probably the best prawn curry in the world

When I first met the Bear, I knew he was pretty special. I knew, in that deep down way, that he was someone I wanted to spend my life with. There was this sense of recognition. I know people always say you will KNOW when you meet the right person, but I suppose I never really believed them…. except, it’s true. I knew when I met him that he was the one for me. He was perfect.

Well…. almost perfect. He had some pretty fixed ideas about food……and that didn’t suit me. Broccoli? He’d get a stubborn look on his face and turn his head away. Shellfish? Nope. He wouldn’t eat that either.

Well, ask yourself, do you really think I was going to let him get away with that? I was determined that my life’s mission would be to make him truly omnivorous. I wanted him to know how wonderful fresh and tasty prawns were… what about the joy of eating oysters fresh off the boat? By refusing shellfish he was refusing so much.

I had a plan… and it was a plan that worked, too. He said he would refuse broccoli forever but when I made Broccoli that a Bear will eat  he not only ate it without complaint but actually asked for it at other times. The Broccoli and Stilton Pastryless Pie was a winner in his eyes and he liked having it in his lunchbox to take to work. When I made Baked Polenta Pie he loved it…..and all of those dishes had broccoli in them. How did I get round his stubborn refusal? I suppose you could say that I hid the broccoli. Whenever I served the dreaded vegetable it was covered in either a deliciously light creamy sauce, or baked into other delicious stuff. It got him to eat broccoli and while he still won’t eat plain, steamed broccoli, he will eat it without complaint and a certain enjoyment. Maybe that’s what you will have to do if you have equally stubborn food-faddists.

So, I had success on the broccoli front. What I needed to work on was shellfish. We started by making him eat one prawn – just one – whenever I ordered prawns. He admitted that he was missing out on stuff and if we ever ended up living somewhere where shellfish was freely available then it would be a waste if he didn’t try.  He wasn’t really enjoying it at first but he persevered. One prawn at a time. Then one day, he ‘phoned me from a trip abroad to say that he had eaten a prawn, voluntarily without me having to make him do it….. he was on the way to liking prawns!

He still wasn’t really convinced though… and then we moved here, to Malaysia. Here I can buy beautifully fresh king prawns for very little and so I started, in earnest, searching for the perfect prawn recipe that would make him love prawns. And you know what? I found it.

I’d bought a marvellous little recipe book by Betty Saw, a really well known Malaysian cook and writer, called ‘Malaysian’. It’s where I found that recipe for rendang that everyone likes. In it was this recipe for sambal santan udang, or prawn curry… it sounded delicious.

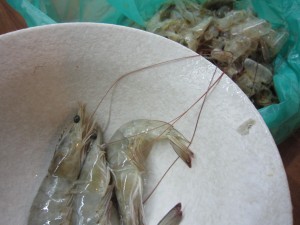
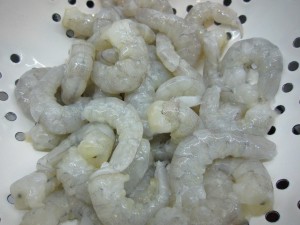
I bought 600g of king prawns (that’s 1lb 5½ ounces) and they needed to be cleaned and peeled.  That’s simple enough, just tear off the head and peel off the shell

… and then once that’s done, take a sharp knife and run it down the curved back of the prawn and pull out the black vein… you can see it there. That’s the intestinal tract and you don’t want that in there.

Then, put them in a bowl in the fridge and get on with the rest of the preparation. Of course, if you can’t get fresh prawns, use prepared frozen ones. And if this makes it too expensive for an everyday meal, save this for a special occasion. You’ll thank me for it later.

As with all Malaysian cooking, the next bit involves ingredients to be ground.

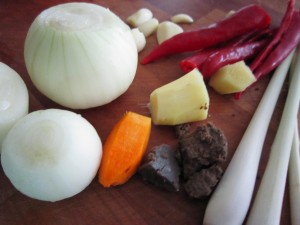
The recipe book said two onions, but as a couple of mine were really small, I used three of them.  Five chillies needed to be deseeded and sliced, four fat cloves of garlic had to be peeled along with four stems of lemongrass and one inch pieces of ginger and turmeric needed to be peeled. The turmeric is the bright orange piece in the middle there…. it looks like a piece of carrot.


When I first bought some, I thought it was just a differently coloured ginger… I mean, it’s not as if the label suggests anything else, is it? Anyway… if you can get some, I’d suggest you wear gloves when preparing it. Otherwise, your fingers, like mine, will turn a bright yellow and stay like that for days. If you can’t get fresh turmeric, you’ll have to use dried… maybe just under a teaspoonful will do it.

The other ingredient is belacan, which is dried shrimp or prawn paste. I know you can get this in the UK, so there’s no excuse for not getting some. I think the Malaysian belacan is a bit milder, so whereas I am using a half inch square piece, you may want to use a quarter of a teaspoon or so.


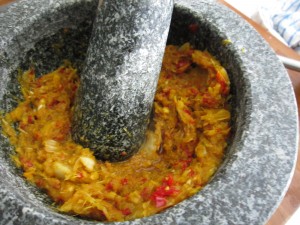
And then, as they say, have at it with a pestle and mortar. Or, if you want to, give it all a quick whizz with a blender, but don’t reduce it to a smooth paste… you need it to still have bits. (Remember, you can do this quickly and easily if you use the jars of ready prepared spices)

Now you are ready….


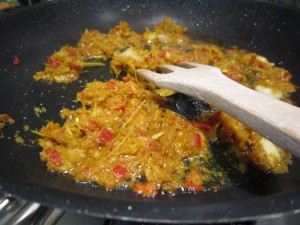
Start by frying the ground ingredients in three tablespoons of oil. This will take five minutes or so and you’ll smell everything coming together and the oil separates.

Pour in a can of coconut milk and stir everything round, bringing it to the boil.


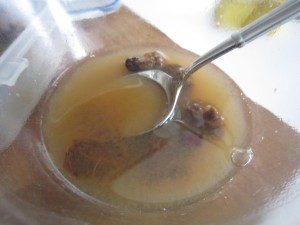
Now, if you were to taste the creamy coconut and spice sauce you’d like it, but what it needs is something to lift it… and you get that from tamarind. Here, I buy tamarind paste that still has seeds in it and what I have to do is mix a dessertspoonful of the paste with four tablespoons of water and then strain it out. You might be able to get paste without seeds, so that makes it a bit easier.

The sharpness fromn the tamarind really brightens the taste of the sauce… it is still rich and delicious but it isn’t cloying.

Then… add the prawns….chuck in a pinch of salt….simmer for five minutes….and you’re done. The best prawn curry ever.


I served it over basmati rice that I’d added a handful of grated coconut to. I do that because I like it and because I can. Served over plain rice this would be just as delicious.

And that was it. Simple and quick. The finished curry is not mouth searingly hot, but well spiced. The flavour is rich and creamy but not cloying. In fact, it is delicious.

So delicious that Bear is now a convert to prawns. And he’d said it couldn’t be done…..all I have to work on now is spinach.


At last, cooking and internet… chicken Malaysian style – Ayam Golek

Finally, we have a half decent internet connection. It’s still slow to load pages but we can cope now, after Unifi finally arrived to install our internet connection. For the last six weeks or so we have been trying to manage on a mobile router device, or going to sit down at the poolside, where there’s a free wifi zone.

That’s fine, you know, in fact, that is gorgeous, but as a place to try and work? Well, it was too hot in the daytime. We used to go down at night and try and catch up with things. Thing is… it took forever to upload any pictures. The other thing is that the mosquitoes caught up with me. The Bear, of course, wasn’t troubled at all but I ended up with huge, horrible bites. I suppose it says something about the tastiness of my blood….

In the end we went and bought the mobile router so we could at least sit in the apartment and use the internet.

Of course, our other problem was that the container hadn’t arrived and all of our pots and pans , cutlery and crockery, knives and tools were miles from us and weeks from delivery. I did go out and buy the bare minimum…and when I say the bare minimum, that’s what I mean. I wasn’t going to replace everything when I had boxes and boxes of kitchen stuff on its way to me, so I ended up with a chopping board; one knife for cutting and one for bread; a colander and a pan. It was fine. It worked and I kept to the simplest of dishes. I steamed fish by wrapping it in tinfoil and adding ginger and garlic, adding a few drops of water and putting it in the oven. In my pan, I cooked rice and stirred shredded coconut through it (oh, the bliss of finding fresh, shredded coconut in the local food market!) and then quickly sauteed baby kailan leaves… we ate on the balcony, sitting at the only table and chairs we had. Thank goodness for IKEA, otherwise we would have been sitting on the floor!

Eventually, after many excuses by the shipping company, we got our container and the kitchen was filled with all of my lovely things… time, I thought, for a decent meal to celebrate. I sat on the balcony at dawn and started to consider what I could cook. Isn’t that a fabulous view? I sit there every morning with my coffee and plan what I am going to do while the Bear is at work.

I had been out and bought a small Malaysian recipe book and I really wanted to try a recipe I had seen in there – Ayam Golek – chicken boiled in coconut milk and spices and then roasted in the oven so the skin crisps up beautifully.

Malaysians love chicken… there are stalls at the roadside cooking chicken and the hawker stalls at the back of most shopping areas always have a fried chicken stand.  Everywhere you go you will find chicken cooked in various ways and this recipe sounded perfect.

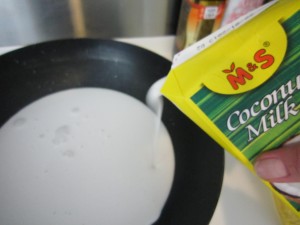
First, get your chicken. That was easy. I went to the local food market and picked up a chicken and all the ingredients I needed to make ayam golek.  I bought coconut milk ( it did say make it yourself from fresh coconut but there were no further instructions, so I ended up buying three cartons to make the 750ml I needed); some shallots; garlic; three stalks of lemon grass; a knob of galangal; a knob of ginger; some cumin seeds; white peppercorns and fennel seeds.

I came back and started to sort out the ingredients so I could prepare the meal ready for the Bear to get home from work…..


Oh dear. That will teach me to wear my specs when I go shopping….


What the heck was I going to do with that? There was nothing in the recipe book about chicken heads!


Nor feet! I know I had seen chicken feet for sale… but I’d  never wanted to eat them. The horrible claws… like long fingernails…oh it made me shudder.


And the neck….it just stuck out horribly and I had to hack away at it.  Just shows how sanitised everything is in the West. Our chickens come prepared  and all we have to do is start cooking. Well, I got it ready but maybe next time I will look  more carefully at what I am buying. Maybe I will wear my specs.

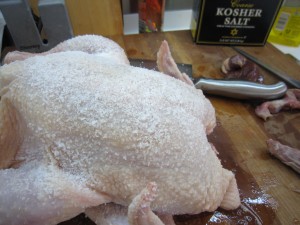
First of all, then, I rubbed the chicken with salt and put it to one side while I started on the rest of the recipe.


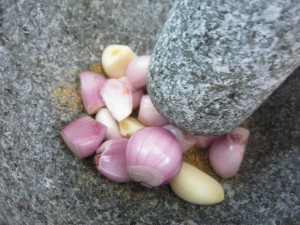
Malaysians set great store by grinding everything in a pestle and mortar, so I started off…


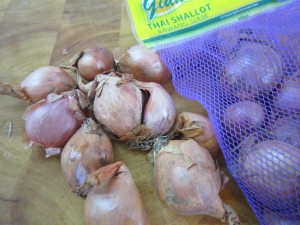
I peeled twelve small shallots


and then got the ginger out to start peeling that… and discovered I’d made my first mistake


Yellow ginger ISN’T ginger of an attractive hue…it’s tumeric. My fingers and nails were stained for days.


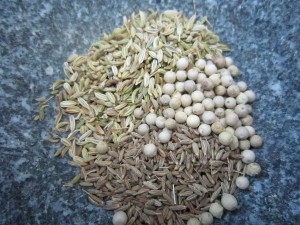
I decided that grinding the seeds and peppercorns would be easier if I did that first, so into the mortar went one teaspoon each of white peppercorns and cumin and one tablespoon of fennel seeds.


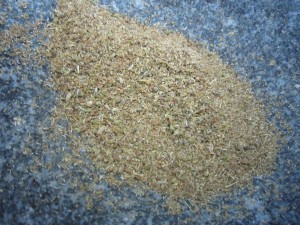
… and bashed away until I had a smooth mix. I don’t think I’m going to need a gym membership because that gives you one heck of a work out.


I’d got the other ingredients ready – the twelve shallots; three cloves of garlic; three stalks of lemon grass and the peeled ginger….and decided that I wouldn’t put that ‘yellow ginger’ in after all.


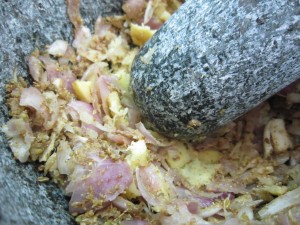
So everything else went in and I bashed away


That’s hard work, that is.. Maybe if you aren’t looking to create a truly authentic dish, you could give everything a whizz with a blender? I think I might do that next time….


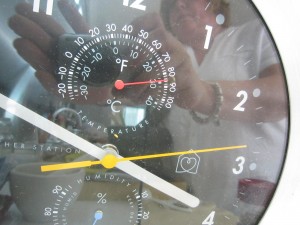
Especially when this was the temperature in the kitchen. That’s our kitchen clock, which helpfully confirmed what I thought – it was hot in there.


Finally, I was ready… 750 ml of coconut milk was added to a wok…


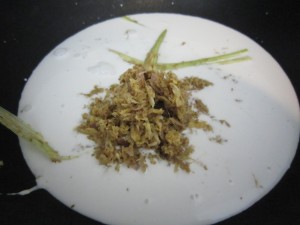
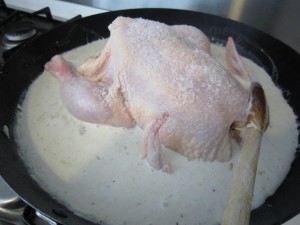
…..and the ground spices and bashed lemongrass stalks were added and everything  was heated to a slow boil before I added the chicken and a teaspoon of salt.


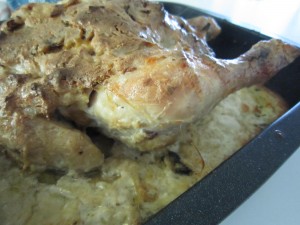
I was on Easy Street now… all I had to do was simmer that chicken for thirty minutes, turning it half way through so both sides got poached. The coconut milk and spices thickened at that point and it was time to put the chicken  into a roasting dish and then into a preheated oven (175°C/350°F) for another thirty minutes……the skin crisps up and the chicken browns…


Ohhh… the smell was divine!


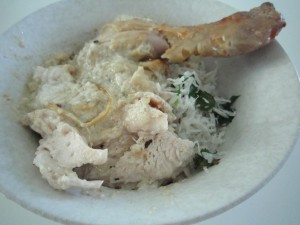
The chicken was moist and succulent and fell apart as I tried to serve it. Just the way it should be if it is cooked properly.

I made boiled rice and stirred a handful of fresh grated coconut through it, with a few bits of chopped coriander (or, as they call it here, Chinese Parsley. I spend lots of time in the food markets sticking my nose into things to work out what things are)

Was it worth it? Very definitely. I’d suggest that if you do it, you use a blender unless you want a real work out.  That would be so quick and easy and if you were to get the ready prepared chopped garlic, ginger and lemongrass (because not everyone has access to the fresh ingredients) no one would blame you. Be as authentic as you like or as lazy as you like, but do try making it because the flavours are delicious. The simmering in coconut milk make for the most incredibly moist and juicy chicken while the roasting crisps the outside and adds a final layer of taste to it all.

Oh… and maybe don’t buy a chicken with its head and feet…….


Beans, yellow tomatoes, sage and sausages

Right then, I said, as I was surrounded by a tumbling wall of tinned tomatoes and beans, we really need to get through some of that store cupboard.

When I go shopping I will often pick up tins of tomatoes or beans because you can always make a meal, very quickly, from them. You never know when people may suddenly arrive and need feeding, or when you really just can’t face going to the supermarket at the end of a long day at work. I like to plan ahead – after all, what if there is a crisis and we are trapped, at the top of our apartment building,  with only the contents of the kitchen?  I need to be sure we can eat , at least. What if the shops are suddenly and mysteriously emptied of everything? I’d better have stuff in that won’t go off. Be prepared is my motto. The thing is, I’d kept on doing it and we were now reaching a shelf overload situation in the larder.

I’d gone into the larder to get some stuff out for baking and realised that the wild and fanciful imagined crises had not happened, unexpected guests had not turned up without warning but with an empty belly and I had managed, after all, to shop on a pretty regular basis and provide meals for the two of us without using the stores of beans and tomatoes. I noticed all that because there seemed to be a wall of tomatoes and beans blocking my way to my baking tins.

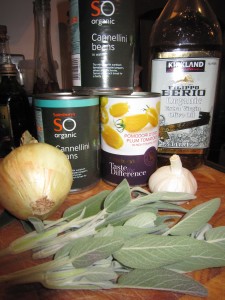
The fact that it was a pretty substantial wall, many tins deep made me think that I really ought to do something with them. The thing about beans and tomatoes is that you can do so much… the butter beans, softly mashed, make a quick and lovely alternative to mashed potato, the tomatoes can be used in the rich and soothing Tomato Rice soup or to make a ragu base for the indulgent, quick and easy lasagne, or in the vegetarian squash and goat’s cheese lasagne. The cannellini beans can be transformed into the Bear’s very favourite, Italian derived Beans on toast. I have borlotti beans and haricot beans, I have plum tomatoes and yellow tomatoes…..they were all just waiting for me. They were all just waiting to fall on me, apparently.

I decided to delay the baking session and make something to eat instead from the cans that were now falling off the shelves because I had balanced them precariously, one on top of another, after every shopping trip and then tried to shove them to one side so I could get at my shortbread mold. Falling with a clatter and bouncing off my bare feet. So… beans and tomatoes…..

Yellow tomatoes….

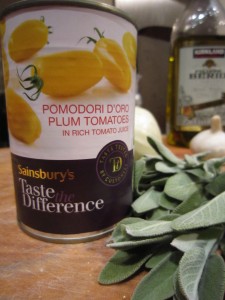
I’d seen these and thought I would have to try them… and now, it seemed, I was going to do it. They would be a change from the richness of red plum tomatoes…. I had some fresh sage as well.

So, two tins of cannellini beans were also removed from the now collapsed wall of tins and I looked around to see what else I had. The baking could wait for a while. I was going to make something for supper.

I love sage – not only the smell of it and the depth of flavour it adds to a dish (perfect with pork or tomatoes) but I also love the beautiful softness of its leaves and the delicate colour. All of which will disappear in cooking, I know, but I do like to rub it between my fingers and appreciate its soft silkiness and the smell as it bruises….

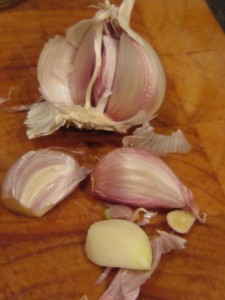
I had plenty of fresh garlic, too.

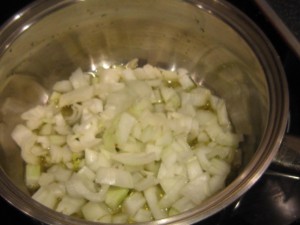
The first step, as with so many dishes, is to soften a chopped onion in a little oil. Adding salt makes the onion soften gently and release its flavour as it turns translucent. If you don’t add salt you are more likely to end up with bronzed, fried onions.

The next step is to open your tins of beans and rinse off the gloopy liquid surrounding them – this will be a mixture of the water they were packed in and any stray bits of starchiness from the beans themselves.

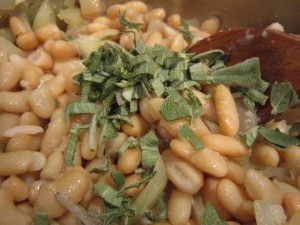
Toss the beans in the soft and glistening onions and add some chopped sage.

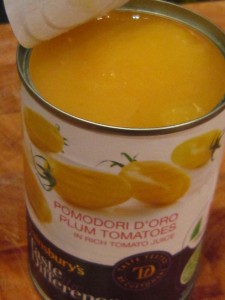
And then… those tomatoes. I’d not seen tins of yellow tomatoes before and I’d been curious to find out what they tasted like. They were certainly yellow. A beautiful, vibrant, cheerful yellow.

How pretty they were! They tasted nice too – sharper and yet sweeter than a tin of red tomatoes. Almost a cleaner taste in a way – you know how red tomatoes have a rich deepness to them? These seemed lighter, but just as flavourful. I added them to the beans, sage and onion.

I’d been at the  Farm shop and they had been doing Italian style sausages – what this means is that they were sausages with some red wine and fennel added so I reckoned they would be perfect with my beans and tomatoes. While the beans and tomatoes cooked together, I started frying the sausages.

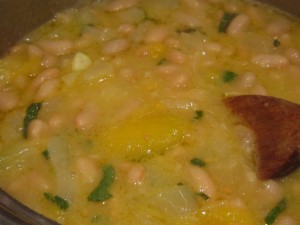
And look how gorgeous the beans and tomato was!

Those sausages fried beautifully, with the red wine helping make that deliciosuly sticky and brown, glistening skin.

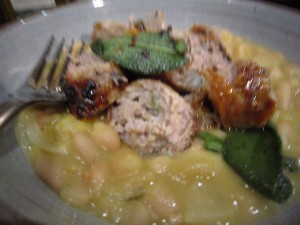
The tomato and beans were a light and delicious mix and the perfect base to serve the sauasages on.

I fried some sage leaves separately – just quickly – until they were crisp.

It was the perfect mouthful – the softness of the beans, the sweet sharpness of the tomatoes and the meaty richness of the sausage….. Delicious. Quick, simple, inexpensive. What more could I want?

Well, I could want the larder to be tidy … but at least three tins had been removed. That’s a start, right?

Making Butter.. how to have luxury in a credit crunch kitchen

As I look out of the window I see greyness everywhere…the skies are grey, the pavements are grey and even the people look grey. It’s the Age of Austerity, say the Government and the financial whizz kids who got us all into this mess.

Time to tighten our belts… cut back…spend less. We have to suffer….

The papers are full of articles on the cost of living and how food bills are soaring, utilities bills are going through the roof and how the ordinary person must make sacrifices.

Well, I agree. I agree on the cutting back, anyway. If we cook at home with care we can all produce marvellous meals for much less than you would spend on a takeaway or a pizza, or even fish and chips.  I have made a habit of cooking carefully and spending very little and, truth be told, have often turned out meals that are better and tastier than many meals I have had in restaurants. Look through the Credit Crunch section and you’ll see recipes for Beef Cheeks (the most wonderfully tender beef casserole you will ever eat); delicious soups like Roast Garlic and Marrow or Puy Lentil and Pumpkin or the gorgeous Tomato Rice Soup – simple, inexpensive ingredients made into food that you are glad you are at home for. There’s recipes using polenta, that staple of Italian peasant cooking made into Baked Polenta Pie and rice…. risottos made with Black Pudding and Apple and Bacon – just scraps of things added to a basic ingredient and transformed into something you’d be proud to serve to guests.

I don’t really believe in too many sacrifices though. I always like to use butter in my cooking – I certainly won’t use margarine or some cheap, chemically concocted spread, where dubious oils are treated with this and that to make them go solid and spreadable. Butter is better. I don’t use too much and it doesn’t feature in every dish but when I need it, it’s there.

Butter is just milk shaken until it is solid. What could be simpler?

What could be better than calling in at the supermarket and spotting, in the marked down section, a large pot of cream that you know, with very little work indeed, can be made into lovely fresh butter? That appeals to my penny pinching ways and my love of luxury.

I’ve written before about making butter, way back at the start of this blog, when I did it by using marbles in a tupperware box. I still say this is a fun way to make butter and a most excellent way of entertaining children. I don’t suppose you could get them to do it all the time, but as a one-off? A Saturday afternoon’s entertainment? It’s a brilliant way to keep them occupied and then, of course, you can make them buttered toast for tea. 

This time, however, I had plenty to do and didn’t need to entertain myself unnecessarily, so I was going to do it the quick way. It’s probably the way you will end up doing it, too.

I had been shopping to get some ricotta as I was going to make ravioli and as I walked past the Dairy section, I spotted a large pot of double cream… the really thick double cream. It had been reduced  as it had reached the sell by date. This doesn’t mean that it was going off at all, just that the date they had set for it still to be in peak condition was today. Fresh cream, still perfect and at a reduced price?

Well, I had planned to be doing other cooking and I had plenty to do in the kitchen but this was a bargain, calling out to me. And it just shows how easy it is to do if I was going to do it in between making three different sorts of bread and pasta.

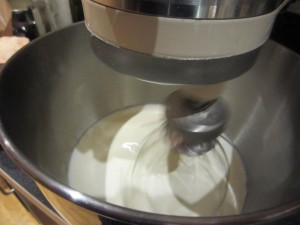
I put the cream into the mixer (you can do it with a hand mixer if you haven’t got a standing mixer… it doesn’t take long) and started to whip it.

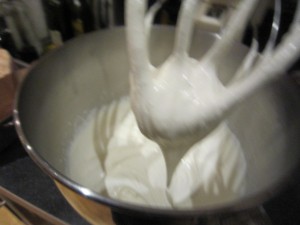
It thickens quickly.

And you keep whipping.

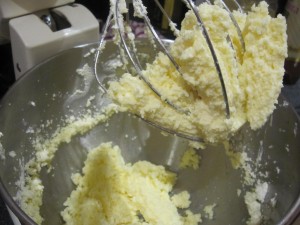
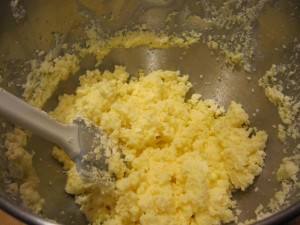
All of a sudden it transforms from a white, whipped mound to a lumpy, granular and yellowy mass. This is not great if you were looking for a topping for a dessert… but it is just what you want to see if you are making butter.

Perfect.

Look at it. Granular and yellow. That’s the butterfat.

Now, if you were using a thinner cream than I was, you would see quite a bit of buttermilk separating out from the creamy globules. The cream I was using was almost solid it was so thick, so there was less liquid.

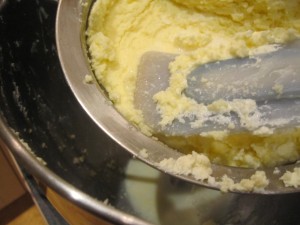
Pop the lot into a sieve and wash it inder a tap. I gave it a squish with a flexible spatula to get more of the buttermilk out.

You can save the buttermilk for baking, or adding to soups – yet another credit crunch saving.

The Bear came over to help at this point… not because it is difficult but because I needed him to take the picture for you to see.

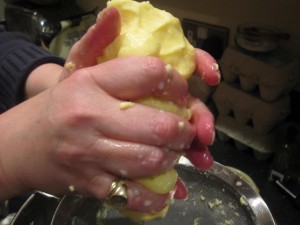
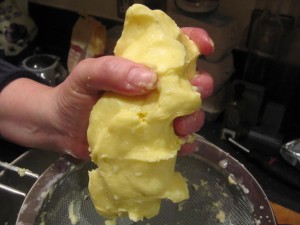
I got the butter out of the sieve and squeezed it together. More buttermilk ran out.

That’s butter, that is!

The next thing to do was to add salt.

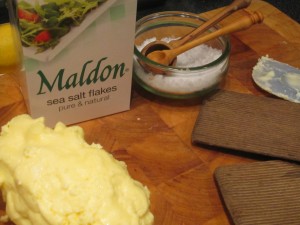
I’m a great fan of Maldon sea salt and a pinch or so of that, scattered over my hand squished butter and then squished some more meant I would have a beautifully salted butter.

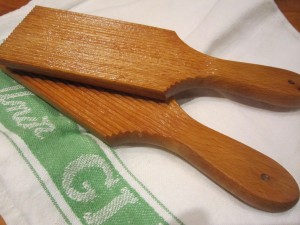
I do happen to have some old wooden butter pats  which are ideal for flattening the butter and getting the last of the buttermilk out. It also adds to the fantasy playing in my head that I am the consummate housewife and cook….

If you don’t have any, don’t worry. I just like them, that’s all.

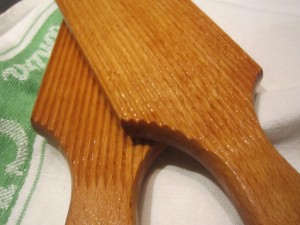
If you look at them you can see they are finely ridged to help force the liquid out.

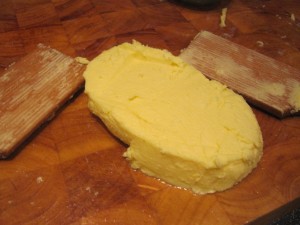
It helps make the shape of your butter. Again, it doesn’t matter if you haven’t got any, just shape your butter neatly.

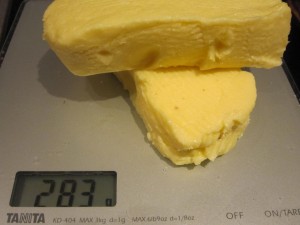
And look what I ended up with…283g of best butter.

Surely that counts as being careful with cash? A credit crunch success?

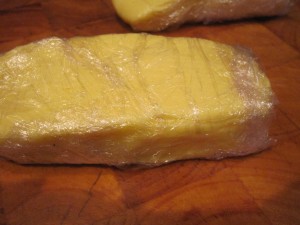
The butter can be frozen if you wrap it carefully…. you can flavour it with whatever you fancy….

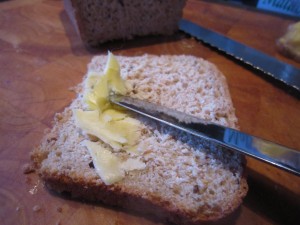
Or you can spread it on bread that you made and just enjoy it.

How simple was that?

That was made, while I did other things, in less than half an hour.

Now, as I said,  you can do it in a more relaxed fashion, getting young helpers to shake it about in a jar or a tupperware box, but you know what? This is just as satisfying and oh, so delicious.

Credit crunch money saving at its best.

Ravioli with a soft egg

I love weekends….I love the fact that although I may still wake up at 6 am, I don’t have to start rushing about, getting ready for work.

I love the fact that the Bear goes to make my coffee because I always do it during the week… I love being able to relax in bed, with the pillows plumped up behind me, reading the news online and checking up with any gossip on Facebook. Even though I can happily spend a couple of hours doing all that and it feels like I have had a complete morning off, when I get up there’s still most of the day stretching ahead of me.

I’d been thinking of what other treats I could have that day….what I could cook that would make me happy.

Before the Bear and I got married, I’d bought a pasta machine and, in the first optimistic rush of enthusiasm, we decided to make ravioli. Perhaps we should have started with something easier than that if we’d never used a machine before, because what we turned out was an utter disaster. We hadn’t got the seasoning right, we hadn’t sealed the ravioli, we weren’t quite confident with the machine…oh it was a sad and soggy meal that we sat down to.

It quite put me off until I decided to start again and make something simple. Like tagliatelli or papardelle, simple strips of pasta. And you know what? It really was simple. It turned out really well and the two of us have had great times – one feeding the pasta and the other winding the handle. It is, actually, simple enough to do by yourself but we do like to work together.

It’s simple enough that when I was playing Cookery Lotto (where those of you who are reading the blog at the time choose a random cookery book and then a random page and I have to cook the recipe) and pappardelle was chosen as the random recipe, I decided to make it with the help of a nearly two year old and a ten year old and, you know what? It was fantastic… they loved making it and felt such a sense of achievement when they produced beautiful tagliatelli to take home to their brothers. Now, if I can get two little girls, (one of whom was very little indeed) to set to and produce pasta I think that shows how easy it can be.

I decided that this would be a day where I made pasta and when I asked the Bear what he fancied, he reminded me of something we had seen on a cooking programme on TV (and no, we can’t remember which one it was) where the ravioli filling was a mix of ricotta and herbs and an egg yolk. When you cut into the ravioli the egg yolk was still soft and delicious….

There were several plus points to having a go at this: firstly the ravioli were going to be large as they had to contain an egg yolk, which meant they would be easier to deal with; secondly, we had lots of wonderfully fresh eggs from the Farm Shop and thirdly, it pandered to my intense yearning to be messing about in the kitchen trying something new.

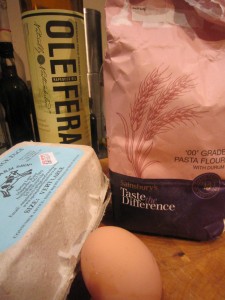
Making pasta is a cinch – all you need is decent ’00’ flour (and most supermarkets sell it nowadays), good oil (I had chosen Oleifera, a delicious cold-pressed rapeseed oil) and fresh eggs.

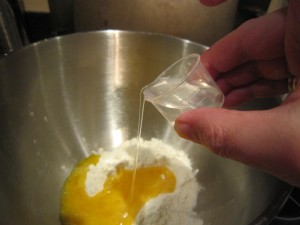
Weigh out 140g of flour and put it in a mixing bowl with a  lightly whisked egg, add three teaspoons of good oil (I was using my new organic rapeseed oil) and 15 ml of water.

You know how I was ill all over Christmas? I survived on bottles of cough and cold cure and they all came with a handy little measuring cup…. which, as it turns out, are perfect for keeping for baking adventures and measuring out, accurately, small amounts of liquids. Waste not, want not.

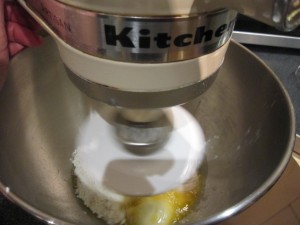
All you do then is mix it together. Obviously, if I was trying to recreate a true home made pasta in the style of an Italian housewife, I would have rolled up my sleeves and set to, mixing and kneading the dough. As I wanted all of the fun and less of the hard work, I let the mixer deal with it while I had a cup of coffee.

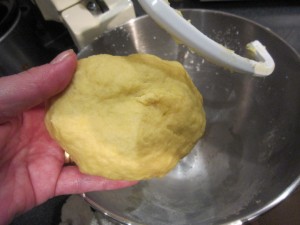
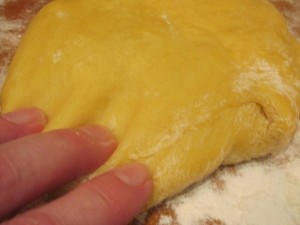
See how it comes together, looking golden from the egg yolk? When you feel it, it is almost hard and tough.

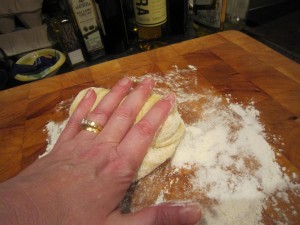
Dust a board with flour and start to knead it. You then need to let it rest and relax, so cover  it lightly in cling film and leave it to relax. It doesn’t take long, maybe ten minutes or so, but if you want to leave it for longer, you can.

While the pasta is relaxing, you may as well get on with the filling. If we are going to use an egg yolk then I needed something to nestle the yolk into and usually soft cheese, flavoured with herbs or even truffles is used. Strangely, my cupboards seem bare of truffles so I had to make do with a mixture of Parmesan cheese, ricotta and whatever else I could find in the fridge.

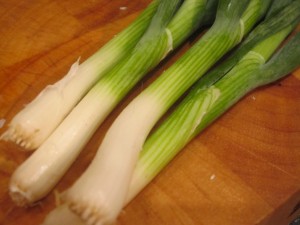
And what was in the fridge were some spring onions.

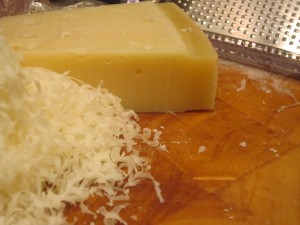
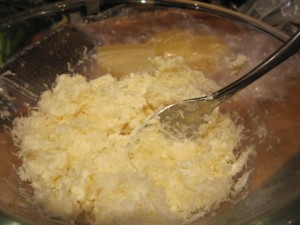
I put a tub of ricotta into a bowl and grated a good chunk of parmesan into it. (As I didn’t have a recipe to work from I thought I’d make a bowl of filling and whatever wasn’t used I would make into a cheese savoury sandwich)

The amount of parmesan added was enough to make the ricotta and parmesan mix taste good to me…. you do what you fancy.

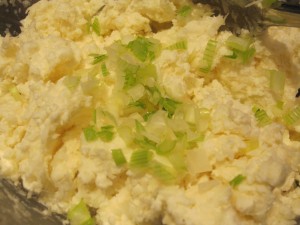
Then I added some of the finely chopped spring onion. Now it really did taste good.

Once I’d done the cheese mix and wiped down the benches, I looked at the pasta dough. Whereas before it had seemed tough and unyeilding, now it was soft and giving. Perfect.

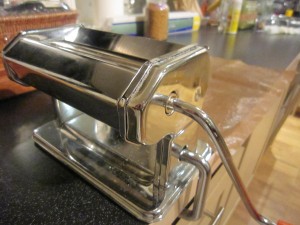
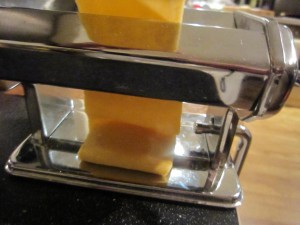
The pasta machine needs to be clamped onto the bench before you can start whizzing the dough through.

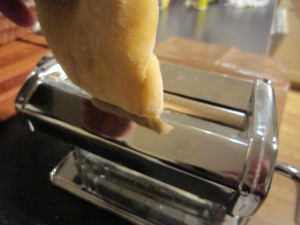
I rolled out the dough lightly and set the machine to the widest setting and then started feeding through the dough.

With each go through, I reduced the setting, making each rolled piece thinner and thinner.

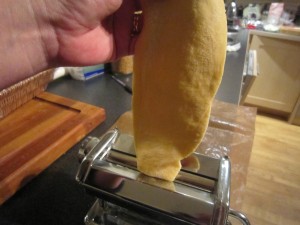
After the first couple of goes you’ll need to cut the dough in half because it becomes too long to handle.

Remember to dust it with flour to stop it sticking and by the time you reach the lowest setting, you will have beautifully thin and smooth pasta.

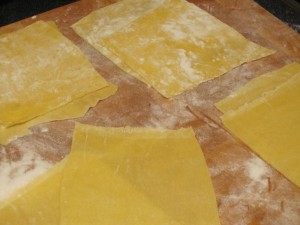
And that’s it… well that’s it for how you make the pasta. For the ravioli you will need squares of pasta because you are going to put the filling and the egg on them, so dust your board and cut… it doesn’t matter if it isn’t perfectly neat as you will be serving two to a plate and they look wonderfully handmade. If you were serving more, you’d need them to be smaller and neater, I think.

I cut eight squares of pasta for the two of us.

Remember you will need an equal number of pasta squares – one for the top and one for the bottom. One set of four was slightly larger than the other set because that was going to be the top layer and it would have to stretch over the cheeses and egg.

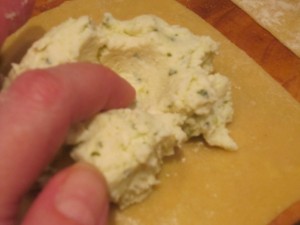
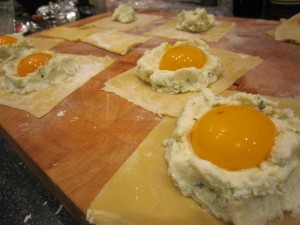
On the bottom, smaller piece put a spoonful of the ricotta, parmesan and spring onion mix and, using your finger, make a hollow in the cheese.

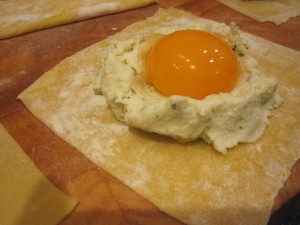
This is going to be the nest the egg yolk sits in.

It’s a lot easier to separate the egg yolk by cracking it onto your fingers and letting the white of the egg drain away. When you do it by tipping the egg from half shell to half shell there’s a greater danger of breaking the yolk. 

See how it sits snugly in its little cheesey nest?

And as quickly as anything the other squares were filled.

I realised that not only had I got some cheese left over but I also had plenty of pasta, so thought I would make us a simple cheese ravioli with the left overs. So much for a sandwich filling, eh?

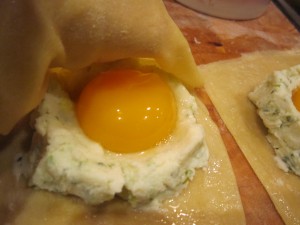
The ravioli had to be covered now, so having whisked up some of the egg white, I pasted it round the edges of the bottom layer and covered the filling with the top square which, if you remember was cut slightly larger all round. The egg white will act as a glue and stick the two pieces of pasta together.

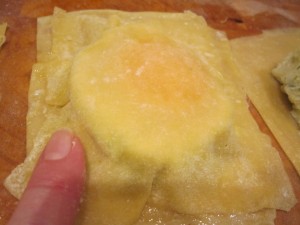
Carefully press down the edges of the pasta so they stick firmly. Make sure there are no air bubbles as that will burst the ravioli when they are in the pan.

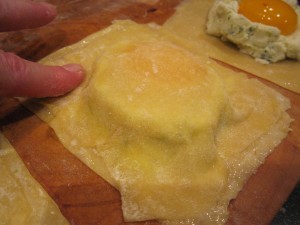
You can see what gorgeously generously sized ravioli they are going to be.

I trimmed them neatly and they were ready for the pasta pot.

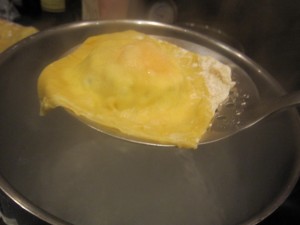
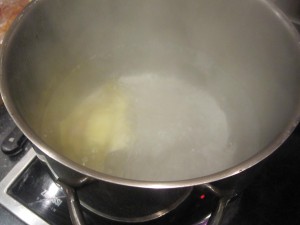
The water needs to be boiling and you’ll need a slotted spoon to get them in and out of the water.

And… and it worked!

Two, maybe three minutes in the pan and the ravioli floated on the top of the water. The first one didn’t burst and neither did any of the remaining ones.

I drained them on the slotted spoon and got ready to serve them….

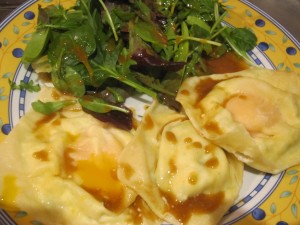
I’d got some leaves to make a salad and made a tangy balsamic vinegar dressing which I sprinkled over the leaves and the ravioli.

Two soft egg ravioli and a little cheese filled ravioli…..

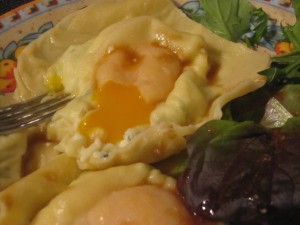
The soft egg ravioli looked like yellowy fried eggs.

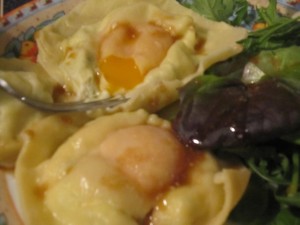
But were the yolks soft?

They were.

It was delicious.

The pasta was soft and tender, the cheese filling was tasty and fresh and the yolk…. oh, that yolk was delicious, running out and covering everything like a golden tasty sauce….

That was, the Bear and I concluded, a ravioli triumph.

I’m going to do it again – it would make a marvellous starter for a meal with friends because you could get everything ready and then leave them in the fridge for a while and then cook them at the last minute. Imagine the surprise when you serve that to people because it does look as if it would have been more bother to make than it really was.

Simple, delicious and spectacular – can you really ask for anything more?

Cauliflower and apple soup

Now that autumn is here we are starting to see the arrival of our glorious winter vegetables. As the seasons change, our food does too – we no longer want cooling salads or light and fresh meals, we need something to fill us and warm us against the chill winds and the leaves fall and the skies turn a constant grey.

When I walked up to the local shops I saw beautiful white cauliflowers, grown in local fields, stacked in the greengrocer’s barrow outside his shop. How could I resist them?

There was a time, you know, when I did resist them. When they appeared in school dinners… overboiled, smelling slightly and looking rather grey. If your teacher forced you to eat them you’d get a mouthful of hot water and the grey and tasteless, soft but weirdly sort of granular vegetable mush would dissolve in your mouth and slide down your throat. I was a picky child and I could be very stubborn. There was many a school lunchtime when I would sit there, with my jaws clamped shut, refusing to eat, while my teachers tried to make me.

Now, obviously, this isn’t a picture of me at a school dinner table (even the Grim North isn’t cold enough to make me wear an anorak indoors) but this is pretty typical of my sideways, scowling look when faced with something I didn’t want to do. I could be very determined. Cauliflower? No. And I mean no. Make me? I don’t think so. I mean no. I meant no for years.

Years and years went by until I finally discovered, as with so many things, that it is not the food itself that is the problem, it’s just the way you cook it.  Cauli can be good….. I discovered the joys of Cauliflower Puree and realised that if you cooked it carefully and didn’t overload the poor vegetable with water, you would end up with a beautifully rich and almost earthy tasting, interestingly textured dish that really was gorgeous to eat.

Anyway, I’m over it now. I like cauliflower. I like it raw and I like it cooked and after I saw all of those crisp cauli’s I decided I’d like it, this week, in a soup.

I bought a couple of cauliflowers and then, because apples are in season as well, I got a couple of  Bramley apples and a Braeburn.

I had an idea.

I would make a rich cauliflower soup but I’d add a Bramley apple to cook with it and add a sharp sweetness to the soup and as an extra apple boost, I’d caramelise an eating apple with chillies to go on the top. Bramleys are cooking apples and are generally too sharp to eat raw but when cooked they almost dissolve into a delicious mushy smoothness. That’s perfect when you are adding them to something like this soup or you’re making a sauce.

The Braeburn I got to go with it is an eating apple – sharp, crunchy, juicy and sweet. If you cook that it keeps it’s shape. If you can’t get a Braeburn, find something else that is like that.

So, to make soup, start like you always do with soup – peeling and chopping onions and then softening them in a knob of butter with a pinch of salt. The salt will keep the onions white and stop them from burning. You want them to be soft and almost translucent, so start them on a medium heat.

While they are gently cooking, cut up the cauliflowers, separating the florets. The hard stem, chopped into small pieces,  can go in first with the onions as this will cook faster than the lacy florets.

When a cauli is fresh, the florets are crisp and hard and a beautiful creamy white.

Add them to the pan with a couple of pints of water and some good stock cubes.

The next thing is to peel, core and segment the Bramleys. They will take less time to cook so you can do this while the florets soften.

Add the pieces of apple to the cauliflower and let everything cook, still on a medium heat.

It won’t take long, so while that’s glugging away, start on the Braeburn. This is going to be turned into a deliciously sweet, sharp and spicy apple dressing to be served with the soup…

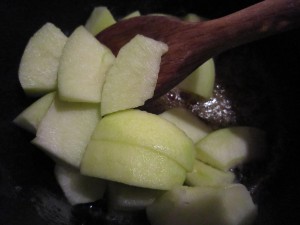
Peel your sweet, juicy, sharp and crunchy eating apple. Core it and cut into pieces.

I cut into segments and then cut those bits in half.

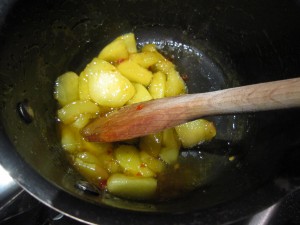
Then, in a non-stick pan, heat a couple of tablespoons of butter and a couple of tablespoons of golden granulated sugar over a medium heat. As this melts and dissolves into an almost caramelised buttery deliciousness, add some chopped chilli.

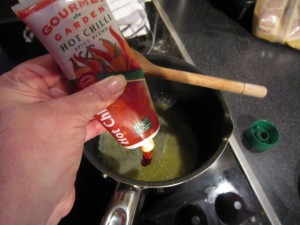
My chilli harvest this year has been an utter disaster, so tubes of prepared chopped chillies, which can be kept in the fridge, have been a marvellous help.  An inch squeezed out – which would, I suppose, be about a teaspoonful – needs to be stirred into the sweetened butter.

Next, add the segmented bits of the Braeburn and stir it all round so the pieces are covered and let it cook gently. The apple will keep it’s shape even though it is cooked.

By now, the cauliflower will have cooked and when you poke at it with a knife, it is tender. If you were to just have this as the soup it would taste rather thin. The thing to do next is to add richness…

But richness can mean adding extra calories when you might be wanting to cut back. Why not save some calories but still get a rich and creamy taste?

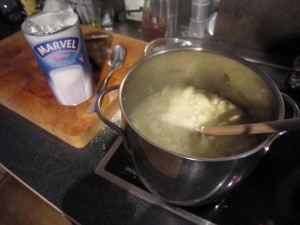
This is where I add skimmed milk powder. If you were to start the cooking off with milk (skimmed or not) you would have to be very careful because there is every chance that the milk would catch and burn on the bottom of the pan. Starting the cooking off with water and stock means that the vegetables can cook with scorching but if you later then add milk to enrich it, you end up with too much liquid to the vegetables.

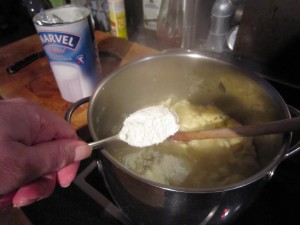
So, I use Marvel skimmed milk powder. No added fat (and no added liquid) but if you add a good scoop of it you get a lovely, creamy taste. 4 heaped tablespoons are the equivalent to a pint of milk.

Stir it round… yes, it will be lumpy but that doesn’t matter because you are going to blend it all into a smooth and creamy soup.

I use a stick blender because it is quick and easy.

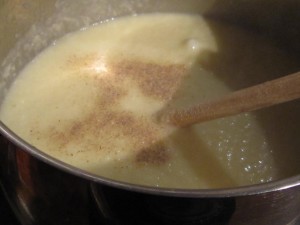
Once it is smooth, add a good shaking of ground white pepper. I say white, because it does have a different taste to black pepper and it also looks better. You  are making a beautifully pale and creamy soup….check the seasoning and and add a pinch more salt if you need to. The big thing is checking that the soup tastes good to you.

By now the Braeburn has softened. It still has its shape but it has turned a lovely golden colour. If you happen to taste it, the sauce is not too hot from the chillies and not too sweet from the sugar. There’s just emough salt from the butter to make it almost savoury. It just tastes divine.

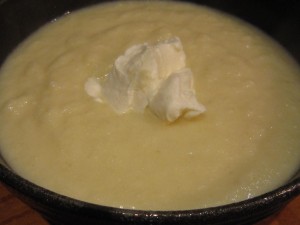
A scoop of natural, thick Greek yoghurt can go in the middle…. the sharpness of the yoghurt is perfect against the smoothness of the cauliflower…..

And on top of that… a spoonful of the chillied and caramelised apples.

That was, as the Bear will tell you, absolutely delicious.

Minimal calories for a most delicious fresh and tasty soup. You can cut back further on the calorie count by not doing the chillied and caramelised apples but there’s a limit you know. Why not enjoy yourself?

Now if they’d served this at school there would have been a race to the tables to sit down and scoff….

Honey and thyme roasted parsnips and apple butter roast potatoes

When I made the delicious roast pork and crackling, I didn’t just eat the pork by itself (although I could have done…. could have done quite easily, actually), I did, in fact,  behave like a civilised person and served it with vegetables.  

I really like to make the most of what we have and I always believe that adding something as simple as a few fresh herbs or spices or other flavourings, moves the finished dish up from the level of plain boiled vegetables (and how uninspiring that sounds) to something really delicious and which, if necessary can be eaten alone and still make the diner feel happy. It’s a policy that has served me well, as the Bear has been known to present me with extra people for dinner at short notice.

That’s not a bad thing as I love cooking and I always have more than enough for extras….at home we set an extra place for the Unexpected Guest…just in case. If they do arrive then they won’t feel like they are causing a problem. If they don’t, well, at least we were ready for them.

The only problem that can arise is that the extra guest might turn out to be vegetarian or (as happened on one fraught evening, less than an hour before a meaty, buttery, cheesey, creamy extravaganza of a dinner was served) a vegan. If the meal is based around a meat dish then the side dishes and vegetables should be delicious enough that it is no hardship to make a meal just from them.

As a family we have always been strong on side dishes. We had a cousin of my father’s who would come to stay at Christmas or other family occasions and she would take great delight in counting the amount of separate dishes we had produced. That, of course, is because she lived through the war years when food was scarce and then later she lived alone. You never really make as much effort when you are cooking for one and a big selection of side dishes highlights the fact that first of all there’s plenty to eat and share and secondly,  it is a celebration.

I remember there was one famous occasion when Cousin Joan was almost beside herself  as she counted that there were over twenty separate dishes. OK, I admit several of them were potato dishes – roast potatoes, new potatoes boiled with mint, creamed potatoes and mini baked potatoes but even so, it was a triumph! My mother and aunt had excelled themselves. Everyone of us could choose something they particularly liked. Not one person felt left out and everyone felt full…..

So, as you see, I have a lot to live up to. This day, though, I wasn’t going for twenty or more vegetable and side dishes… just two. I was going to roast parsnips in honey and thyme and make roast potatoes with apple butter. Sweetly savoury vegetable dishes that would be perfect with the roast pork… or just by themselves!

The two can be cooked together, so read through this  because I will tell you about each, separately.

Honey and Thyme Roasted Parsnips

I had been shopping for vegetables and spotted some small parsnips labelled “Heritage variety parsnips”. They looked small and dainty and were, the greengrocer assured me, sweet and delicious. There was no other indication of what variety they were but it took it on trust and bought some.

I prefer my parsnips boiled then whizzed to a puree with some cream and horseradish but these were too small and dainty to do that to. Besides, the Bear adores roasted parsnips and as I was roasting pork anyway, it made life a lot easier to roast them alongside the joint.

They were topped and tailed, scrubbed and then rubbed in some garlic and oil. This is where using a tube of smooth garlic puree works well – it’s easy to get a smooth blend of oil and garlic so everything is coated consistently.

Parsnips with honey

Squeezing some honey over those baby roots will really work with the garlic and, when cooked, add a rich and tasty glaze.

Don’t go mad… just a drizzle over them will do.

Sprinkle some thyme over the parsnips as they cook – the stems will dry and the leaves fall off so don’t worry about trying to just get leaves, which is what everyone tells you to do. All you have to do then is pick out the by now hard and dried stems and the leaves stay behind. Cut the hardier stems from lower down on the thyme bush and just put them on top. (You will need the baby soft tender ends of the newest growth later) As they cook they will add another lovely layer of flavour.

The parsnips can go in the oven about half an hour, forty minutes before you take the meat out.  The temperature will be relatively low because of the meat so you won’t burn them.

 Then, when everything is ready  you can sprinkle some of the soft and tender baby thyme leaves over the parsnips.

They were delicious – parsnip is sweet and earthy by itself, the honey and thyme brightened that and the garlicky oil baste at the start brought everything together into a lovely sweet and savoury dish.

Apple Butter Roast Potatoes

I also had some baby potatoes and rather than just have them as steamed or boiled, I thought I might as well use the heat of the oven and roast them as well. Cost saving and efficient, as I’m sure you will agree.

Remember at the end of August we went foraging for apples in that abandoned orchard? I’d made lots of apple butter and used them in cakes and crumbles. I still had some left and they were really in need of being used up.

Pork and apple is a heavenly mix but rather than making an apple sauce, I thought I would roast them with the potatoes.

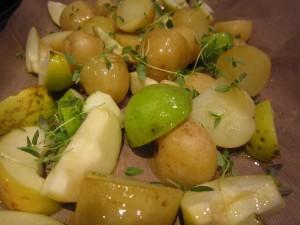
I didn’t peel them because I wasn’t going to peel the potatoes… I just cored and segmented them.

I cut the baby potatoes in half so they were roughly the size of the apple bits and sprinkled some thyme and oil over everything.

Using the same herb in the cooking process ties the dishes together well and makes them fit coherently. You don’t want them to taste overpoweringly of thyme – this just adds a hint, more of an echo really so they don’t clash with the parsnips.

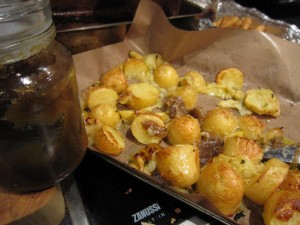
Into the oven they go, alongside the parsnips so they can roast gently with the meat.

A spoonful or so of apple butter, towards the end of the cooking melts over the potatoes and adds a lovely appley, cinnamon, clove tasting glaze. Do this in the last ten minutes or so, after the potatoes have started to turn golden.

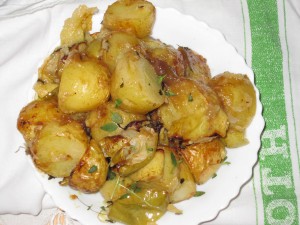
The apple has roasted to a soft, sweet mouthful and the potatoes have that delicious roasted taste, glazed over with the spiced apple butter.

Perfect to serve with roast meat.

Both of those dishes took just a few minutes to prepare and then they were left to do their thing in the oven. Much easier in my eyes than boiling or steaming. Much tastier too.

If a vegetarian had arrived that night – or even a vegan – they could have had , at least potatoes and parsnips and not felt too badly done by.

Cousin Joan would have approved though I am sure she would have wondered why I couldn’t have served at least another four or five dishes to accompany them……