Potato Focaccia

One of the big loves of my life is reading. I can do without television quite easily but I could not manage if I couldn’t occupy myself with something to read. I have shelves groaning with books and magazines are stacked in piles… I have an  eReader so I can read when I can’t carry piles of books with me and when I can’t read, (because I’m driving, say) I listen to audio books. So maybe it’s not reading? Maybe it is that I don’t need the visual stimulus of pictures… I just need the words and my mind fills in the gaps.  So, maybe I should say one of the big loves of my life is writing.. that is, writing done by others.

It has to be good writing though, so that I stay interested. I will, honestly, read almost anything, from any genre, but as you’d imagine a big part of my reading involves food – cooking it, eating it, growing it, preparing it… telling stories about it.

I have shelf after shelf of cookery books. When I’m in the north, I love to sit in that chair, with a cup of green tea, steaming quietly beside me as I read recipes or books on food writing –  from Brillat-Savarin’s “The Physiology of Taste,  or transcendental gastronomy”  – he, who famously wrote, “tell me what you eat and I will tell you who you are” and described the first version of what became, in essence, the low-carb diet. Brillat-Savarin (1755-1826) believed that white flour and sugar made you fat and prescribed protein rich meals. If you haven’t read him yet and you’re curious you can read it for free online, thanks to the University of Adelaide or on Project Gutenberg, or, you can do as I did, and buy a copy.

I love reading modern cookery writing too and I have shelves of that in the apartment… that’s a picture of the shelves when I had only half unpacked and there’s 132 books there. The shelves are full now. Those shelves are half way up the stairs and I sit there, leaning against the wall, reading whatever takes my fancy.  Probably my favourite book of all time, MFK Fisher’s The Art of Eating, an anthology of all her works is on that bottom shelf  and I regularly take it out and start reading it again. There are  fascinating books that the Bear finds on his travels and brings back for me because he knows I will love them. He found Laurie Colwin’s Home Cooking when he was travelling through the USA and I know I wouldn’t have stumbled on that easily but it is now one of my dearly loved books. He also brought home the wonderful Ruth Reichl’s  Comfort me with Apples and that started me on a search through Amazon for more books like that.  The whole point of it is, I love to read something that makes me think, that captures my imagination and makes me explore just what it was they felt, what they tasted and what it meant to them.

When I’m not reading books, I’m looking on line and reading blogs and searching out great writers there, too. I was reading the fabulous Gin and Crumpets and something she wrote made me stop and think….it made my mouth water. Potato Focaccia, or as she says, a fancy chip butty. Who doesn’t like a chip butty? Well, apart from Brillat-Savarin and his purely protein meals, but he’s long gone, so it doesn’t matter…

A soft and savoury focaccia with potato…. perfect. Imagine how that tastes…

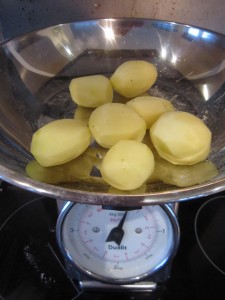
Gin and Crumpets had used, so I surmised from the photographs, smaller potatoes than I had and she’d left the skins on. I had a bag of my favourite Rooster potatoes  (excellent all rounders, good as either chips or mash or roast) so I washed and peeled 250g of them and cooked them in gently simmering water. You need them still to have some body about them as they are going to be cooked again on top of the focaccia, so don’t boil them to death.

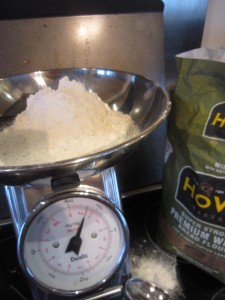
The next thing was to start on the focaccia so 350g of strong bread flour was mixed with one 7g sachet of fast action dried yeast, a teaspoon of caster sugar and two teaspoons of Maldon sea salt.

Four tablespoons of olive oil and roughly 150ml-200ml of lukewarm water need to be added to bring it together into a loose dough.

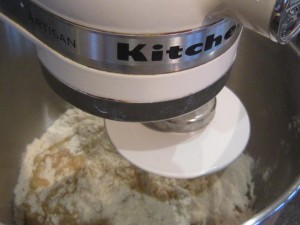
If you haven’t got a mixer with a dough hook, just use your hands.  Drop it onto a floured board and upend the bowl over it to stop it drying out. Let it rest for a few minutes.

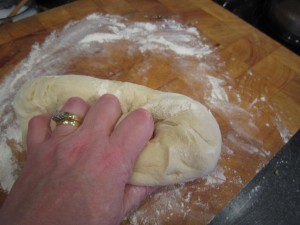
Then knead it… you’ll feel it change into a beautifully bouncy, smooth and silky dough.

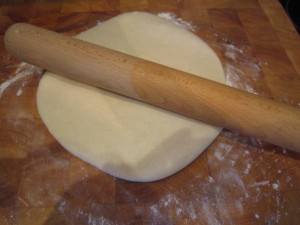
You need to roll it into a smooth oval

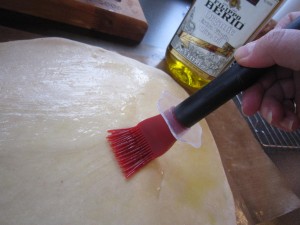
And then lie it on a silicone sheet, ontop of a baking sheet and brush yet more lovely olive oil over it.

Lay a loose piece of clingfilm over it and leave it to rise gently. That depends, of course, on how warm your room is but it shouldn’t take too long.

Start the oven pre-heating to 210°C or 410°F and check the potatoes.

They should be tender so drain them and leave them to cool and then have a quick wipe round while you are waiting…

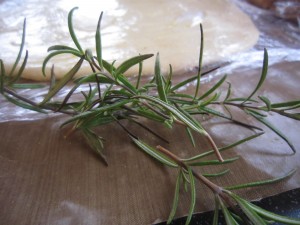
A sprig of rosemary would be good to add, so strip the leaves off the harder stems and chop them lightly.

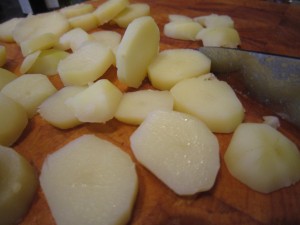
By now the potatoes are cool enough to slice without burning your fingers…

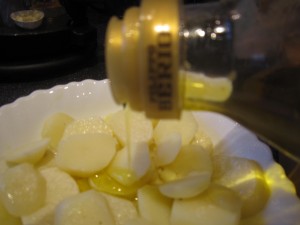
I drizzled the oil over the potato, in a bowl, so I got an even covering and each piece was glistening, then laid them on top of the puffy dough, sprinkling it all with the chopped rosemary and a sprinkle of salt…and into the oven it went.

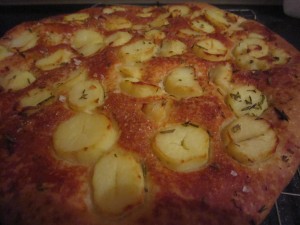
Just under half an hour later and this emerged… golden and glistening, smelling deliciously sweet and savoury – you know just what I mean…

The focaccia bread was light and aerated and the potato on top? It was heavenly… it really was like the best chip butty ever. The taste? The taste was sublime. The potatoes were soft with that sweetness that comes from being cooked properly and then baked, the salt and the rosemary made it savoury, the focaccia was warm and delicious. People looked at it, sniffed it and then tore at it…all of them saying how wonderful it was.

This is what you need to make for parties – it’s warm and delicious and it will to help soak up the alcohol and keep people happy and cheerful….

…this is what you need to make it when there’s just the two of you and a bottle of wine to share as you curl up on the sofa….

… and you need to make it when there’s just you, needing something to sustain you through upset or cheer you through gloom or give you a much deserved treat on a cold Saturday night.

This is heaven.  Really, it is.

Purple Majesty

I think you could safely say that I am a fan of the spud.

I love baby salad potatoes boiled and with a lovely lump of salted butter melting slowly over them…or with a rich mayonnaise …or just steamed with salt and herbs.

I love floury potatoes baked slowly in the oven so they smell rich and delicious and cracking that hard outer skin reveals a steaming and fluffy middle.

I love chips either  eaten from newspaper on the sea front or par-boiled and then baked with a light tossing of oil in the oven in my attempt to lighten the fat load.

I love mash, passed through the ricer and whipped with butter and cream. I can eat it by itself as an antidote to sadness, exhaustion or disappointment.

I love roast potatoes, crisped and crackling from the oven to eat with meat, glistening and delicious.

I love fried potatoes in any of a myriad of ways… frittatas, say or as  sauté potatoes.

I love potatoes in a soup.

Or even in bread.

I think it’s safe to say that if a potato can be used in a recipe, I want to  try it. And I probably have.

And then one day….

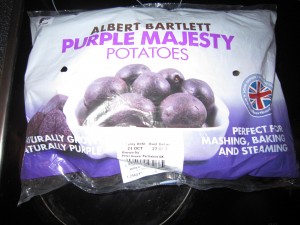
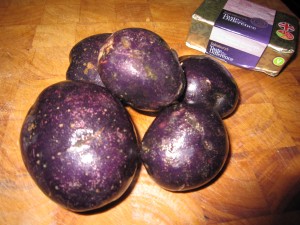
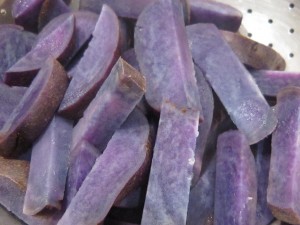
I saw these. Purple potatoes… and by golly, they were purple. Albert Bartlett’s Purple Majesty.

I had to try them because a) they were a potato and b) because they were pretty and purple. Also, I have to say, because Albert Bartlett’s Rooster potatoes are my favourite all rounders. They are marvellous for mashing, baking and frying so I was assuming that if they had another kind of potato they would be worth trying.

I didn’t use them the night I bought them and I thought I would try one of the recipes on the bag when I had a bit more time.

The next day was a day from hell, it really was. Work was piling up, I was tired and what was worse, the Bear was away so I got back to an empty apartment. I really couldn’t be bothered to do anything at all and in a sulky, bad tempered fashion I looked at what was in the kitchen…. which was a bag of potatoes.

Now, I am normally very strict on how I treat potatoes – if they are to be turned into mash then they must be gently boiled  and then passed through a potato ricer to get mounds of fluffy potato that butter or cream can be mixed through. If they are going to be baked in their jackets then they must be scrubbed, pricked, rubbed with oil and salt and baked slowly in the oven so you get a beautifully almost dry potato when you break it open.

I’d never cook a potato in its skin in the microwave – that makes it wet  and solid. It doesn’t smell right. And it certainly doesn’t taste right. So I’d never do that. Never.

Except that night I was tired and evil tempered and quite frankly, my dear, I didn’t give a damn. Besides, it was only me… and I desperately needed something quickly, so I washed a couple of the purple beauties, jabbed them with a knife and set them away in the microwave. I’d eat them and get to bed and maybe the next day would be better.

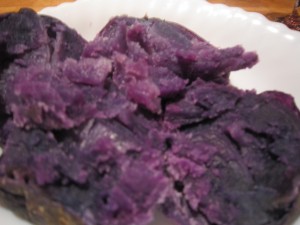
And then I got them out of the microwave and split them open. They weren’t wet.

They were, in fact, almost dry (you know what I mean) like a proper baked potato. They certainly smelled nice…

They were purple… definitely purple… and they tasted delicious. They have a lovely rich flavour.

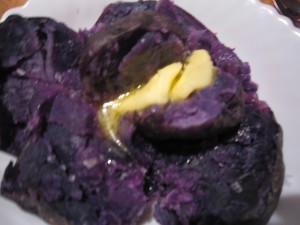
I stuck a great big lump of butter in them and started to eat. I was wrong about microwaving potatoes.  I was so wrong that I put another one in the microwave and ate that after I finished the first bowl.

I really don’t know how they do it, or how these potatoes are different  but this is the fastest way to have lovely jacket potatoes. So I did it the next night too….and the next. I finished the bag.

Next time you need a rapid baked potato fix, this could be the answer.

Then, when I had bought another bag and the Bear was home so I needed to do something more than just hand him a bowl of potato (no matter how delicious, he would want something to go with it) he asked if we could have chips.

Now I won’t have a deep fat fryer because it scares me a bit – the danger of fire and all that. It would also smell and living in an apartment means that the smell of frying gets everywhere. Thing is, there’s something quite delicious about chips…

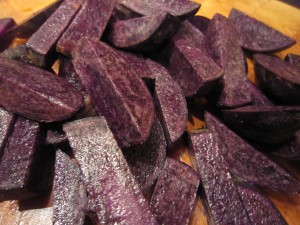
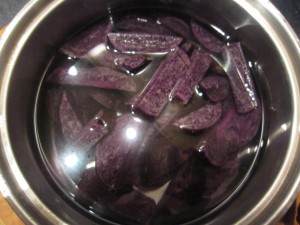
So what we do is cut them and then par-boil them for a few minutes till they are beginning to get tender.

(Look at the gorgeous colour of them.. I really do love that colour. Filled with antioxidants, apparently)

Drain them and shake them so the majority of the water is off them, although the heat will allow the moisture to evaporate.

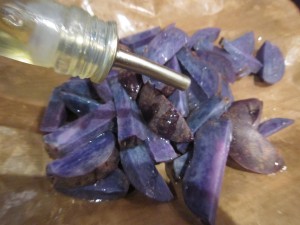
If you use a silcone sheet it makes cleaning up so much faster…. just lay the chips on a piece, which is itself spread over a baking sheet and sprinkle the chips with oil and then put them straight into a preheated oven say, 200°C or 390°F, to cook and to crisp up.

They need a stir or a shake to make sure that they are evenly cooked…

But when they are done?

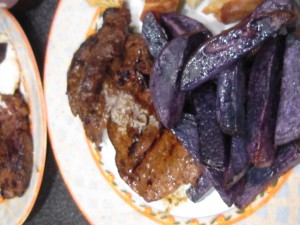
They were lovely! Again they had that fluffy and very definitely not water logged middle, the outside was crisped and they have a really potatoey taste. I know that sounds a bit silly, but, you know, some potatoes don’t taste of anything much. These had a depth of flavour that was almost rich.

The Bear, of course, looked at them oddly when I handed him his supper but he tried them… and ate them and asked if there were any more.

So, if you see a bag of purple potatoes, snap them up. Try them microwaved in their skins – you’ll be surprised. Try them as chips….you’ll love them. They are so tasty that we finished that bag by doing more chips and more microwaved potatoes…..I’m going to have to get another bag so I can go onto mash.

And then of course, another bag so I can start on the recipes….

Mushroom pâté

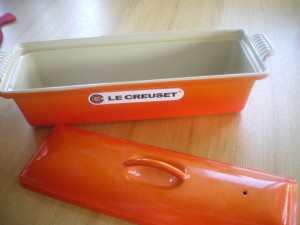
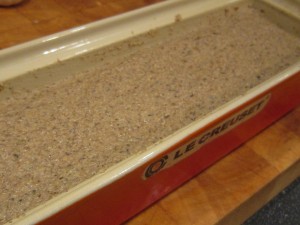
Here we are in January again. The excitement of Christmas and the New Year celebrations are over and we are all back to work. This time last year I was rather happy at finding a Le Creuset cast iron terrine dish at less than half price. The Bear, of course, was asking if I really needed a terrine dish and, if I had one,  would I use it enough to justify even the half price… well, the answer is yes.

I have made bread in it… I made a ham hock terrine, I’ve made numerous chicken liver parfaits in…and now I decided I needed to make a mushroom pâté in it.

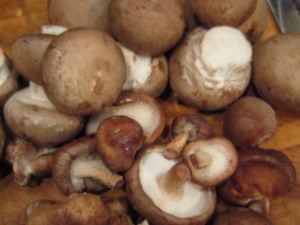
I needed mushroom pâté because I had a wonderful loaf of No Knead Bread on the go (ready to be baked the following day) and I had the soft, sweetly savoury and delicious caramelised red onions that would be perfect with the bread and the pâté…. and I also had a large bag of chestnut and shitake mushrooms. 

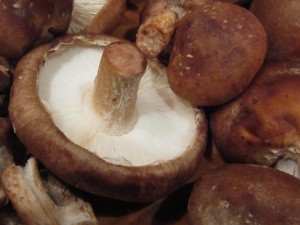
There’s something so rich and tasty about both chestnut  and shitake mushrooms. They’re almost meaty in their texture and the flavour is deep and earthy.

Shitake always seem so substantial for a mushroom – you know how some mushrooms seem to disappear when you cook them, becoming small and almost translucent and frail? Shitake don’t. They are firm and lovely and the flavour  is perfect for making a pâté with.

I’d been out when I spotted the mushrooms, piles of them, looking gorgeous. I really had no plan at the time to make pâté but it all seemed to come together.

If you see mushrooms in the peak of perfection you really should buy them and think of what to do with them while you walk home with your bag of goodies. When I picked the mushrooms, I just put handfuls into bags – when I weighed them at home (yes, the shop did that but I wasn’t paying attention and the only reason I weighed them again was so I could tell you) there were roughly 25og of chestnut mushroom and half that of shitake and together they cost me £2.40.

I knew I had everything else I would need at home – 250g of butter and the remnants of a pot of cream, maybe 125ml or so.

All a pâté is (and what the literal meaning is) is a paste of something. You need the main ingredient and something to stick it all together. Butter and cream are the logical choices as they melt into whatever you are using then chill down, making a beautiful, spreadable paste.

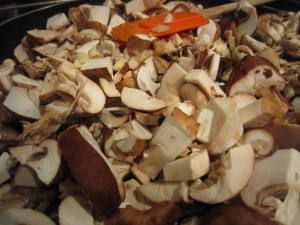
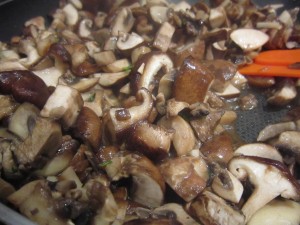
Back in the kitchen, I chopped them roughly and started to sweat them down with a knob of butter and a pinch of salt.

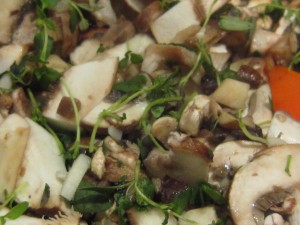
Thyme added to mushrooms

I had some soft thyme growing in a pot on the windowsill so I tore off the baby fine shoots and added them. If you are using thyme that is growing outside then you must strip the leaves off – an outside hardened plant has very tough stems. When it is as soft and tender as this is, it isn’t a problem.

A couple of finely chopped garlic cloves added at the same time  will cook down well making an aromatic  layer of flavour. It won’t be overpowering because it will cook long and slowly so the pungency of the garlic softens beautifully.

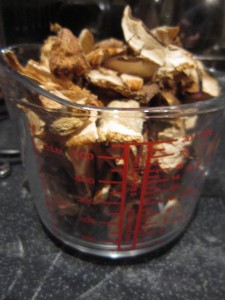
I knew I had a box of dried wild mushrooms and I decided to add some of them to the mix. I put a handful into a pyrex jug and added boiling water to hydrate them. If you haven’t got any don’t worry… but the funny thing is, people always tend to have a box in the back of the larder. Maybe it is because we all think we will make risottos with them… then go and buy the fresh mushrooms anyway.

By now the fresh mushrooms were softening nicely. Keep them on a gentle heat and keep stirring them every so often.

You want them to be cooked and to have concentrated their flavour. If you are in the mood for it, you can add a splash or so of cognac just to add in yet another layer of flavour. It doesn’t matter if you don’t want to, it’s just an option. This is such an easy thing to make that you just change and adapt until it pleases you.

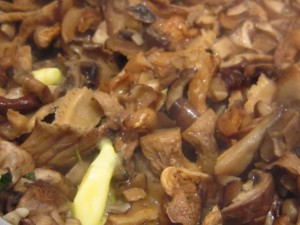
The dried wild mushrooms will have plumped up beautifully by this stage so you can squeeze out the excess water and add them to the mix so they can cook through and absorb the buttery, mushroomy juices.

If you are planning on doing something else with mushrooms the rehydrating water could be used as a stock, but really, there’s not that much there and with dried mushrooms you have to be wary of any little bits of sand or grit that might have been in there. For once, much though I try and make sure there’s no waste in my kitchen, I didn’t see the benefit in saving the water.

An extra knob of butter won’t go amiss….

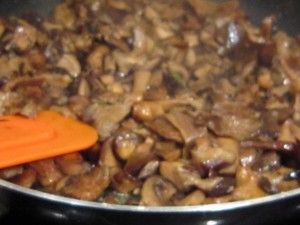
Look at how they all mix together – that’s not the clearest picture but I kept getting the lens steamed up, so that’s the picture that was taken.

Now then, it’s time to make the pâté.

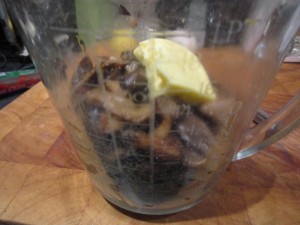
Put the mushrooms into a processor or, if you are like me and find it just as fast to use a hand blender, put them into a jug with maybe 50g of butter. It’s the butter and cream that hold this together and when it has been chilled in the fridge you end up with a beautifully smooth pâté.

Don’t be afraid of the amount of butter because the amount of pâté you eat in a serving is not that much.

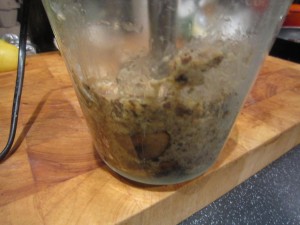
Start whizzing it smooth.

Keep going till you have whizzed all the mushrooms smooth and with each whizzing you have added more butter. Of course if you had bothered to get to the back of the cupboard where the food processor is, you could have done it all in one go….. I didn’t. So I had to keep whizzing in a jug and putting the smooth blend in a bowl.

Look at it…. rich and smooth….

Stir in the cream and make sure it is all blended properly.

You should check the taste of it to see if it is well seasoned – you might need to add in some salt. I put in a pinch or so and stirred it all round.

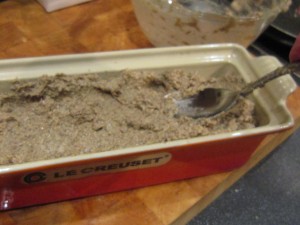
Then, all you have to do is spoon the thick and rich blend into the terrine dish.

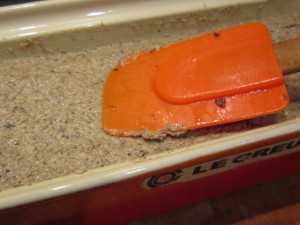
A silicone scraper makes an excellent flexible smoother.

Look how beautifully smooth it is…..

And all you have to do now is to chill it.

The mushrooms were cooked in the pan and the butter and cream were blended in, now the butter needs to set again so the pâté becomes firm and you can slice it.

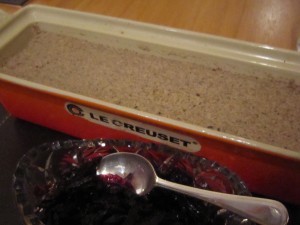
Put the terrine into the fridge and leave it to set and chill. I usually leave it overnight, unless, of course, I can’t wait.

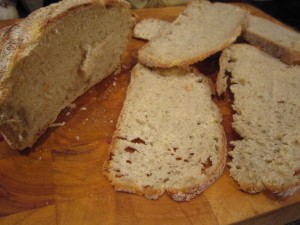
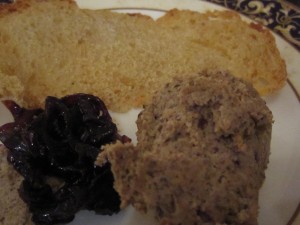
The next day, I sliced some No Knead bread thinly and baked it for ten minutes in a moderate oven. Not enough to toast it but just enough to to dry it out. This was going to be my Melba toast that I would serve with the pâté and the rest of the caramelised onions that had been waiting patiently in a jar in the fridge.

This was going to be a lovely light meal….

And it was.

It was rich and smooth and made the perfect starter when some friends came round for supper.

It keeps well in the fridge and you can, if necessary, freeze it, if you wrap it tightly in cling film. That’s good news because, as ever, I had made far too much.

I cut it into portions, and wrapped it well. One word of advice though… do remember to label it!

So, two bags of mushrooms, a block of butter and some cream and you end up with possibly the best mushroom pâté you have ever tasted. What more do you need, except a glass of wine and company to share it with?

Cauliflower and apple soup

Now that autumn is here we are starting to see the arrival of our glorious winter vegetables. As the seasons change, our food does too – we no longer want cooling salads or light and fresh meals, we need something to fill us and warm us against the chill winds and the leaves fall and the skies turn a constant grey.

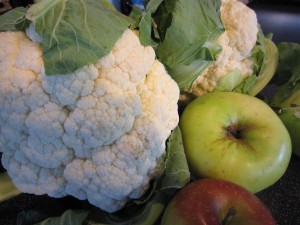
When I walked up to the local shops I saw beautiful white cauliflowers, grown in local fields, stacked in the greengrocer’s barrow outside his shop. How could I resist them?

There was a time, you know, when I did resist them. When they appeared in school dinners… overboiled, smelling slightly and looking rather grey. If your teacher forced you to eat them you’d get a mouthful of hot water and the grey and tasteless, soft but weirdly sort of granular vegetable mush would dissolve in your mouth and slide down your throat. I was a picky child and I could be very stubborn. There was many a school lunchtime when I would sit there, with my jaws clamped shut, refusing to eat, while my teachers tried to make me.

Now, obviously, this isn’t a picture of me at a school dinner table (even the Grim North isn’t cold enough to make me wear an anorak indoors) but this is pretty typical of my sideways, scowling look when faced with something I didn’t want to do. I could be very determined. Cauliflower? No. And I mean no. Make me? I don’t think so. I mean no. I meant no for years.

Years and years went by until I finally discovered, as with so many things, that it is not the food itself that is the problem, it’s just the way you cook it.  Cauli can be good….. I discovered the joys of Cauliflower Puree and realised that if you cooked it carefully and didn’t overload the poor vegetable with water, you would end up with a beautifully rich and almost earthy tasting, interestingly textured dish that really was gorgeous to eat.

Anyway, I’m over it now. I like cauliflower. I like it raw and I like it cooked and after I saw all of those crisp cauli’s I decided I’d like it, this week, in a soup.

I bought a couple of cauliflowers and then, because apples are in season as well, I got a couple of  Bramley apples and a Braeburn.

I had an idea.

I would make a rich cauliflower soup but I’d add a Bramley apple to cook with it and add a sharp sweetness to the soup and as an extra apple boost, I’d caramelise an eating apple with chillies to go on the top. Bramleys are cooking apples and are generally too sharp to eat raw but when cooked they almost dissolve into a delicious mushy smoothness. That’s perfect when you are adding them to something like this soup or you’re making a sauce.

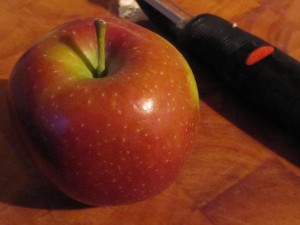
The Braeburn I got to go with it is an eating apple – sharp, crunchy, juicy and sweet. If you cook that it keeps it’s shape. If you can’t get a Braeburn, find something else that is like that.

So, to make soup, start like you always do with soup – peeling and chopping onions and then softening them in a knob of butter with a pinch of salt. The salt will keep the onions white and stop them from burning. You want them to be soft and almost translucent, so start them on a medium heat.

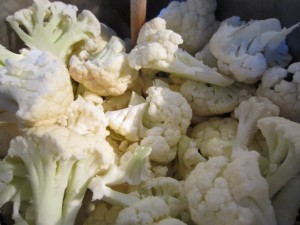
While they are gently cooking, cut up the cauliflowers, separating the florets. The hard stem, chopped into small pieces,  can go in first with the onions as this will cook faster than the lacy florets.

When a cauli is fresh, the florets are crisp and hard and a beautiful creamy white.

Add them to the pan with a couple of pints of water and some good stock cubes.

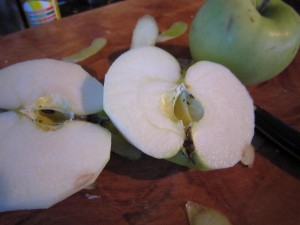
The next thing is to peel, core and segment the Bramleys. They will take less time to cook so you can do this while the florets soften.

Add the pieces of apple to the cauliflower and let everything cook, still on a medium heat.

It won’t take long, so while that’s glugging away, start on the Braeburn. This is going to be turned into a deliciously sweet, sharp and spicy apple dressing to be served with the soup…

Peel your sweet, juicy, sharp and crunchy eating apple. Core it and cut into pieces.

I cut into segments and then cut those bits in half.

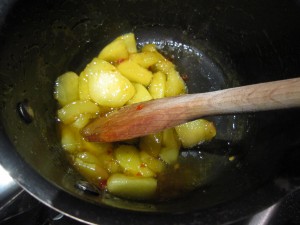
Then, in a non-stick pan, heat a couple of tablespoons of butter and a couple of tablespoons of golden granulated sugar over a medium heat. As this melts and dissolves into an almost caramelised buttery deliciousness, add some chopped chilli.

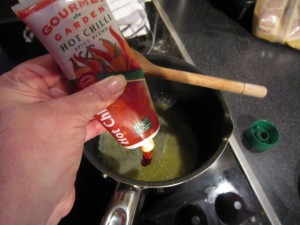
My chilli harvest this year has been an utter disaster, so tubes of prepared chopped chillies, which can be kept in the fridge, have been a marvellous help.  An inch squeezed out – which would, I suppose, be about a teaspoonful – needs to be stirred into the sweetened butter.

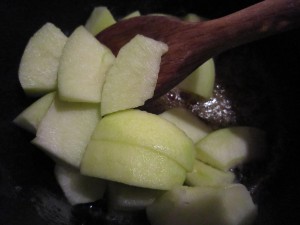
Next, add the segmented bits of the Braeburn and stir it all round so the pieces are covered and let it cook gently. The apple will keep it’s shape even though it is cooked.

By now, the cauliflower will have cooked and when you poke at it with a knife, it is tender. If you were to just have this as the soup it would taste rather thin. The thing to do next is to add richness…

But richness can mean adding extra calories when you might be wanting to cut back. Why not save some calories but still get a rich and creamy taste?

This is where I add skimmed milk powder. If you were to start the cooking off with milk (skimmed or not) you would have to be very careful because there is every chance that the milk would catch and burn on the bottom of the pan. Starting the cooking off with water and stock means that the vegetables can cook with scorching but if you later then add milk to enrich it, you end up with too much liquid to the vegetables.

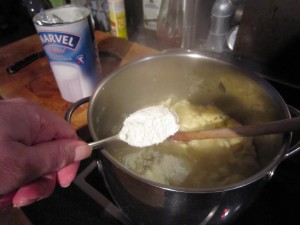
So, I use Marvel skimmed milk powder. No added fat (and no added liquid) but if you add a good scoop of it you get a lovely, creamy taste. 4 heaped tablespoons are the equivalent to a pint of milk.

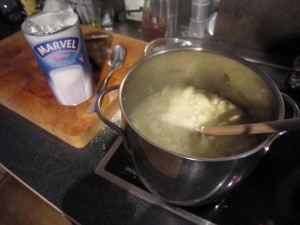
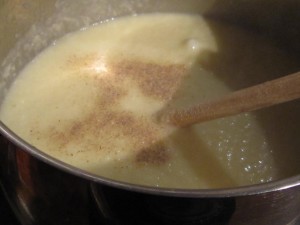
Stir it round… yes, it will be lumpy but that doesn’t matter because you are going to blend it all into a smooth and creamy soup.

I use a stick blender because it is quick and easy.

Once it is smooth, add a good shaking of ground white pepper. I say white, because it does have a different taste to black pepper and it also looks better. You  are making a beautifully pale and creamy soup….check the seasoning and and add a pinch more salt if you need to. The big thing is checking that the soup tastes good to you.

By now the Braeburn has softened. It still has its shape but it has turned a lovely golden colour. If you happen to taste it, the sauce is not too hot from the chillies and not too sweet from the sugar. There’s just emough salt from the butter to make it almost savoury. It just tastes divine.

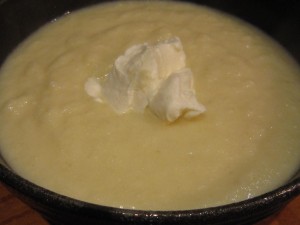
A scoop of natural, thick Greek yoghurt can go in the middle…. the sharpness of the yoghurt is perfect against the smoothness of the cauliflower…..

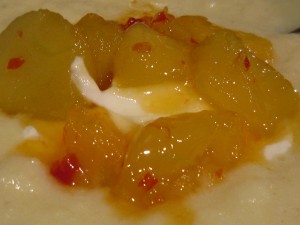
And on top of that… a spoonful of the chillied and caramelised apples.

That was, as the Bear will tell you, absolutely delicious.

Minimal calories for a most delicious fresh and tasty soup. You can cut back further on the calorie count by not doing the chillied and caramelised apples but there’s a limit you know. Why not enjoy yourself?

Now if they’d served this at school there would have been a race to the tables to sit down and scoff….

Honey and thyme roasted parsnips and apple butter roast potatoes

When I made the delicious roast pork and crackling, I didn’t just eat the pork by itself (although I could have done…. could have done quite easily, actually), I did, in fact,  behave like a civilised person and served it with vegetables.  

I really like to make the most of what we have and I always believe that adding something as simple as a few fresh herbs or spices or other flavourings, moves the finished dish up from the level of plain boiled vegetables (and how uninspiring that sounds) to something really delicious and which, if necessary can be eaten alone and still make the diner feel happy. It’s a policy that has served me well, as the Bear has been known to present me with extra people for dinner at short notice.

That’s not a bad thing as I love cooking and I always have more than enough for extras….at home we set an extra place for the Unexpected Guest…just in case. If they do arrive then they won’t feel like they are causing a problem. If they don’t, well, at least we were ready for them.

The only problem that can arise is that the extra guest might turn out to be vegetarian or (as happened on one fraught evening, less than an hour before a meaty, buttery, cheesey, creamy extravaganza of a dinner was served) a vegan. If the meal is based around a meat dish then the side dishes and vegetables should be delicious enough that it is no hardship to make a meal just from them.

As a family we have always been strong on side dishes. We had a cousin of my father’s who would come to stay at Christmas or other family occasions and she would take great delight in counting the amount of separate dishes we had produced. That, of course, is because she lived through the war years when food was scarce and then later she lived alone. You never really make as much effort when you are cooking for one and a big selection of side dishes highlights the fact that first of all there’s plenty to eat and share and secondly,  it is a celebration.

I remember there was one famous occasion when Cousin Joan was almost beside herself  as she counted that there were over twenty separate dishes. OK, I admit several of them were potato dishes – roast potatoes, new potatoes boiled with mint, creamed potatoes and mini baked potatoes but even so, it was a triumph! My mother and aunt had excelled themselves. Everyone of us could choose something they particularly liked. Not one person felt left out and everyone felt full…..

So, as you see, I have a lot to live up to. This day, though, I wasn’t going for twenty or more vegetable and side dishes… just two. I was going to roast parsnips in honey and thyme and make roast potatoes with apple butter. Sweetly savoury vegetable dishes that would be perfect with the roast pork… or just by themselves!

The two can be cooked together, so read through this  because I will tell you about each, separately.

Honey and Thyme Roasted Parsnips

I had been shopping for vegetables and spotted some small parsnips labelled “Heritage variety parsnips”. They looked small and dainty and were, the greengrocer assured me, sweet and delicious. There was no other indication of what variety they were but it took it on trust and bought some.

I prefer my parsnips boiled then whizzed to a puree with some cream and horseradish but these were too small and dainty to do that to. Besides, the Bear adores roasted parsnips and as I was roasting pork anyway, it made life a lot easier to roast them alongside the joint.

They were topped and tailed, scrubbed and then rubbed in some garlic and oil. This is where using a tube of smooth garlic puree works well – it’s easy to get a smooth blend of oil and garlic so everything is coated consistently.

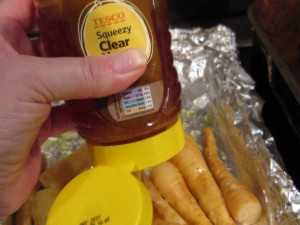
Parsnips with honey

Squeezing some honey over those baby roots will really work with the garlic and, when cooked, add a rich and tasty glaze.

Don’t go mad… just a drizzle over them will do.

Sprinkle some thyme over the parsnips as they cook – the stems will dry and the leaves fall off so don’t worry about trying to just get leaves, which is what everyone tells you to do. All you have to do then is pick out the by now hard and dried stems and the leaves stay behind. Cut the hardier stems from lower down on the thyme bush and just put them on top. (You will need the baby soft tender ends of the newest growth later) As they cook they will add another lovely layer of flavour.

The parsnips can go in the oven about half an hour, forty minutes before you take the meat out.  The temperature will be relatively low because of the meat so you won’t burn them.

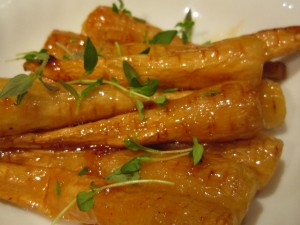
 Then, when everything is ready  you can sprinkle some of the soft and tender baby thyme leaves over the parsnips.

They were delicious – parsnip is sweet and earthy by itself, the honey and thyme brightened that and the garlicky oil baste at the start brought everything together into a lovely sweet and savoury dish.

Apple Butter Roast Potatoes

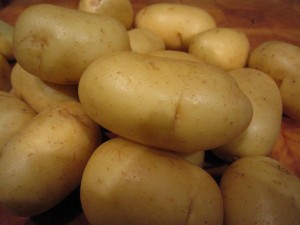
I also had some baby potatoes and rather than just have them as steamed or boiled, I thought I might as well use the heat of the oven and roast them as well. Cost saving and efficient, as I’m sure you will agree.

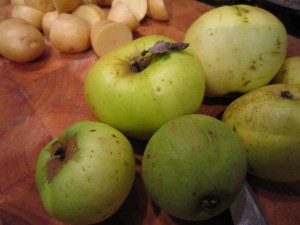
Remember at the end of August we went foraging for apples in that abandoned orchard? I’d made lots of apple butter and used them in cakes and crumbles. I still had some left and they were really in need of being used up.

Pork and apple is a heavenly mix but rather than making an apple sauce, I thought I would roast them with the potatoes.

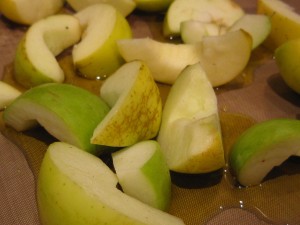
I didn’t peel them because I wasn’t going to peel the potatoes… I just cored and segmented them.

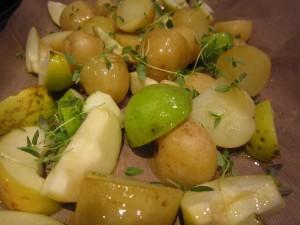
I cut the baby potatoes in half so they were roughly the size of the apple bits and sprinkled some thyme and oil over everything.

Using the same herb in the cooking process ties the dishes together well and makes them fit coherently. You don’t want them to taste overpoweringly of thyme – this just adds a hint, more of an echo really so they don’t clash with the parsnips.

Into the oven they go, alongside the parsnips so they can roast gently with the meat.

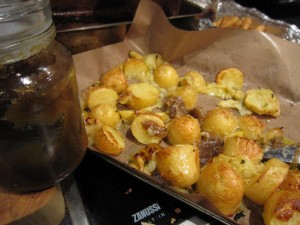
A spoonful or so of apple butter, towards the end of the cooking melts over the potatoes and adds a lovely appley, cinnamon, clove tasting glaze. Do this in the last ten minutes or so, after the potatoes have started to turn golden.

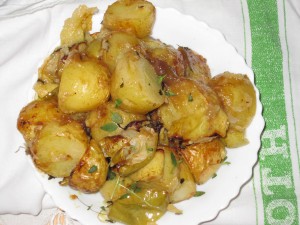
The apple has roasted to a soft, sweet mouthful and the potatoes have that delicious roasted taste, glazed over with the spiced apple butter.

Perfect to serve with roast meat.

Both of those dishes took just a few minutes to prepare and then they were left to do their thing in the oven. Much easier in my eyes than boiling or steaming. Much tastier too.

If a vegetarian had arrived that night – or even a vegan – they could have had , at least potatoes and parsnips and not felt too badly done by.

Cousin Joan would have approved though I am sure she would have wondered why I couldn’t have served at least another four or five dishes to accompany them……

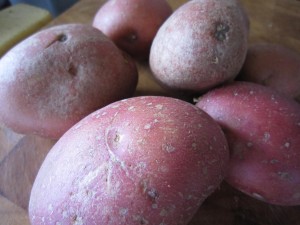
Meatfree Monday – citrus, thyme and garlic potatoes, or dinner from scraps.

We didn’t have much in the apartment – I’d been getting to work early and getting back late and the thought of stopping to buy food was just too much. Crawl through rush-hour traffic and pull off the main road, then fight through shoppers and then try and get back to the main road? No thanks.

I knew there were a few potatoes left and I could do something with them….

I had some polenta pie left so that would go with them.

I needed to liven them up a bit so as I drove back I worked through what else we had in the apartment… or what else we had growing outside the apartment.

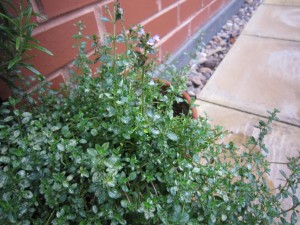
There was a lovely, healthy bush of thyme, just outside the french doors. I could use that…..

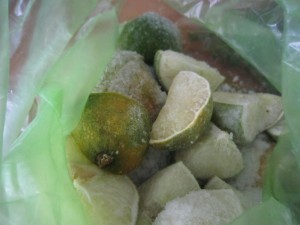
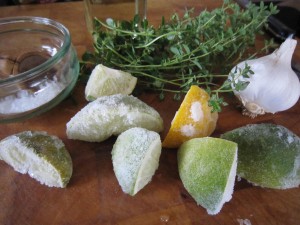
And in the freezer there was a bag of quartered lemons and limes. Whenever I have lemons and limes left over, rather than letting them dry out and go to waste, I quarter them and freeze them. That way I have a marvellous ice cube for a G&T or other drink. But if I used them for the potatoes… well… they would go perfectly with thyme.

So I had a plan.

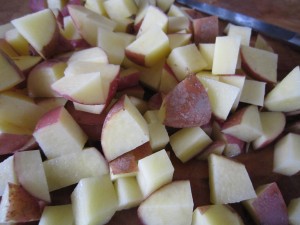
The potatoes were washed and  cubed and the oven put on at 180 degrees C/160 degrees C, fan assisted/350 degrees F.

I put the cubed potato in a bowl with some water and salt – minimal water – and microwaved them for 5 minutes. You could parboil them but this was faster and I was tired, hungry and didn’t want to wash any pans.

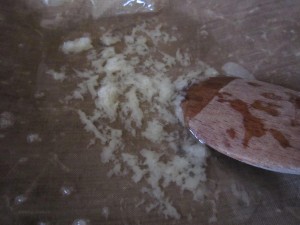
In a lined baking tray, I mixed crushed garlic with oil and salt

and grabbed a handful of thyme and lemon and lime pieces.

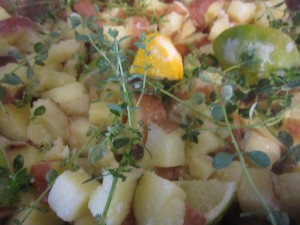
The potato cubes were thrown into the baking tin with the thyme and the frozen lemon and lime and everything was tossed in the garlicky oil.

Into the oven for twenty to thirty minutes while I went to get changed out of my work clothes and into something more comfortable.

The thyme leaves fall off the stem so all you have to do is pick out the stems and Bob’s your uncle.

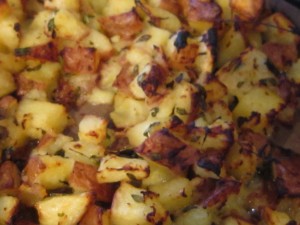
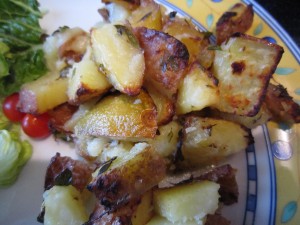
The potatoes had that lovely, almost sweet, savoury taste, crunchy on the edges and deliciously soft in the middle. The lemon and lime had cooked slowly from frozen solid to soft, almost caramenlised roastedness, which gave everything a lovely sharpness and the garlic and thyme worked wonderfully. With a few salad leaves from the box on the balcony and a couple of tiny tomatoes and the remnants of the polenta pie, I had a marvellous meal in less than 40 minutes.

Now, look at that photograph more carefully…. guess who didn’t spot that lime quarter nestling amongst her potatoes?

What have I learned from this?

That a delicious meal can be made from scraps, that freezing lemons and limes are not just for gin…. and that wearing your glasses when dishing up is a good idea.

Meatfree Monday – Baked Butternut Squash Gnocchi

The weather had changed. It was blustery and rainy (and can you believe that this morning the weather forecast included the possibility of hail? Hail?? In August?) I wanted something that would make us feel happy. We needed comfort food… but not too comforting. It was still warm so I needed something that didn’t generate too much heat. Something that I could have with salad. I wanted to have it on Meat free Monday so it needed to be vegetarian. And then, I thought of something I had first made a couple of years ago.
Baked butternut squash gnocchi… it was a comfort food, so that was good… it is great served with salad, so that, too, is good and best of all, it is only 280 calories per serving. And no meat… so perfect for Meat free Monday.
I could have delicious comfort food and still stay on a diet!

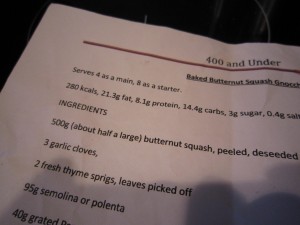
When I see recipes that provide, per serving, less than 400 calories, I save them in a folder called 400 and Under so that I can make a delicious supper that leaves room for manoeuvre with side dishes or even a glass of wine.
This recipe first featured in “delicious.” in September 2008, by the equally delicious Jean-Christophe Novelli. Just as well that I copied it out and saved it because I can’t find it online now. Anyway, doing it like that means I can print it out and take it with me when I shop for the ingredients and then work with it at the kitchen bench.
Also, it means I can then insert it, in its entirety, at the end of this post, something that some of you have been asking for.
Anyway, I did this on my return home from work… supper was delayed slightly as I had to roast the squash first, but not by much. This can be done easily as a weekday meal but if you were feeling efficient, the best way would be to roast the squash the day before while you were cooking something else.
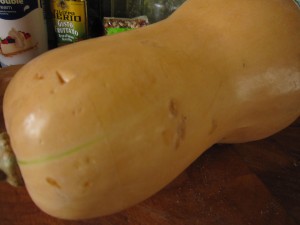
No worries though… it was no problem to peel and dice a butternut squash
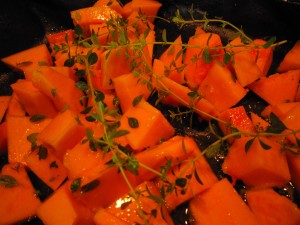
I put it onto a silicone sheet and drizzled it with oil, garlic puree and sprigs of thyme. Jean-Christophe says to take the leaves off the sprigs of thyme but that is so fiddly because the stems are soft… if you pull off as many as possible, that’s good and any that are left on the sprigs… well, don’t worry about it. Once everything roasts in the oven, the leaves fall off and the stems are hard and bare – you just remove them from the dish at the end! (See, Jean-Christophe is a chef and he does it properly. Me? I am someone who cooks when she gets in, tired from work. I find shortcuts. I have to.)
The covered roasting pan went into the oven at 180 degrees C/160 degrees if it is a fan assisted oven… and for those of you who use Fahrenheit, that is 356 degrees. 45 minutes was enough to soften the gorgeous squash.
I picked off the stems of thyme and then whizzed the squash to a smooth puree.
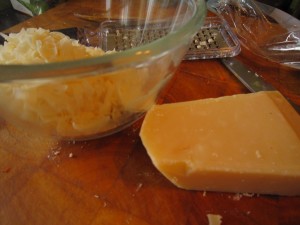
While the squash was roasting, I grated 40 g or thereabouts of Parmesan cheese
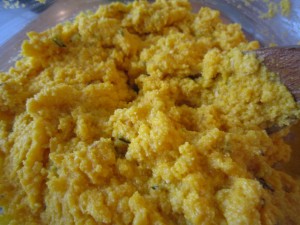
And added it to 9og of polenta (that’s grits to those of you in America!) , stirring it round to make an even mix before I added the (still hot) butternut squash puree and 65g of  butter.
The heat started to melt the butter…you could tell this was going to be delicious.
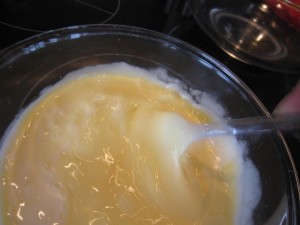
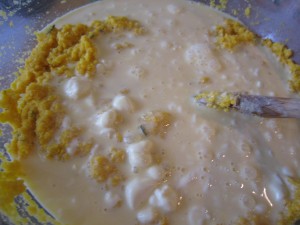
In another bowl I mixed three lovely eggs with 125ml of double cream and then added that to the polenta/squash mix.
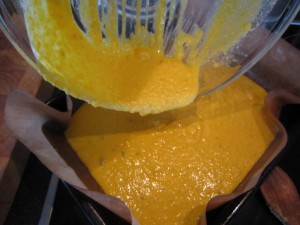
I lined a baking tin with a silicone sheet and poured in the mix….
Back into the oven, covered with tin foil to stop it burning,  for thirty minutes
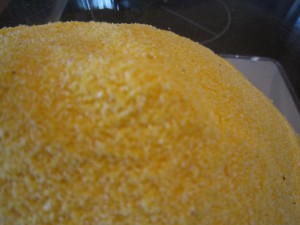
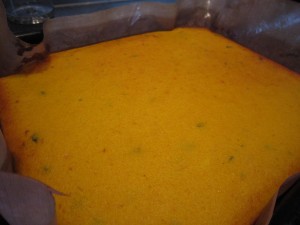
When it emerged, all golden and flecked with thyme leaves. It feels firmish, if you press it… firmish but not solid. This is the joy of this gnocchi…it uses no flour so it is suitable for those on who are coeliac or who are on gluten free diets (I shall make this for my dear friend Angela if she ever returns from America)  and it has no potato in in it so it is light and fresh.
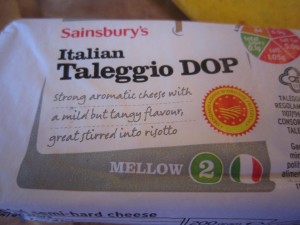
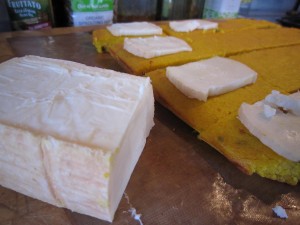
Let it cool enough so you can handle it – while you are waiting, cut slices of Tallegio cheese (and if you can’t find this, get some other cheese that would melt well)
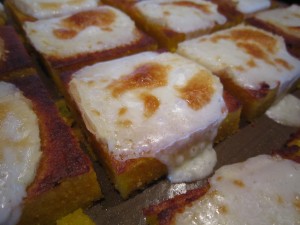
I didn’t bother with a cookie cutter, as suggested, I just cut the gnocchi into squares and laid slices of Tallegio on top.
And then put it under the grill to melt the cheese…
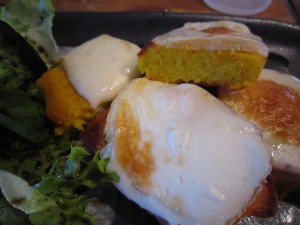
Then serve with a light green salad…
Perfect.
The texture of the gnocchi is light and delicious – you can tell it is polenta rather than potato or flour. The taste of the cheeses blended together is rich and satisfying and even better, you can eat it cold. Perfect to put in a packed lunch and take it to work. Immensely satisfying and just right for a blustery day…
And now – here’s the recipe, exactly as it was in delicious.
Baked Butternut Squash Gnocchi
Serves 4 as a main course, 8 as a starter
280 calories, 21.3g fat, 8.1g protein, 14.4 carbs, 3g sugar, 0.4g salt
INGREDIENTS
500g – about half of a large butternut squash – peeled, deseeded and cubed
3 garlic cloves
2 sprigs of fresh thyme, leaves picked off
95g  semolina or polenta
40g grated Parmesan or Gran padano
65g butter, softened
3 medium free range eggs
125ml double cream
Tallegio or other melting cheese to serve.
Preheat oven to 180C/fan 160C. Place squash, garlic and thyme in a roasting tin, cover with foil and roast for 45 minutes. Leave the oven on.
Transfer to a food processor and whizz until smooth. Spoon into a bowl and add semolina/polenta, Parmesan and butter. Whisk eggs and cream together and add to the mix. Season.
Spread in an 18cmx24cm roasting tin, lined with baking parchment or silicone sheet and cover with foil. Bake for 30 minutes.
Cool slightly in the tin then cut into rounds using a cookie cutter – or squares if you don’t have a cutter. Preheat the grill to high, while you put the gnocchi on the grill, covered with slices of Taleggio. When melted, serve with a green salad.

Jean-Christophe Novelli, French Horn. Published in “delicious. magazine” September 2008

Try it… it’s another Meat free Monday success!
(Oh, and in case you are wondering why I haven’t got spaces between paragraphs and decent formatting – well, so am I!
WordPress seems to be refusing to do what I want and no matter how many times I change everything – it just goes back to cramming everything together. If anyone has any idea on how to fix it, let me know!)

Meatfree Monday – Chargrilled peppers in oil

There’s a movement gaining increased acceptance across the globe – Meatless Monday – if you  give up meat for one day a week, it cuts consumption by 15%. It started in the USA as non-profit initiative of The Monday Campaigns Inc. in association with the Johns Hopkins School of Public Health Center for a Livable Future.

“According to the United Nations’ Food and Agriculture Organization the meat industry generates nearly one fifth of the man-made greenhouse gas emissions that lead to climate change. Geophysicists at the Bard Center and the University of Chicago estimate that curbing meat consumption by 20% (which could be achieved through Meatless Mondays) would lower greenhouse gas emissions as dramatically as every American switching to an ultra-efficient hybrid vehicle.

The United Nations also found that current meat production methods cause nearly half of all stream and river pollution. Meat also requires a great deal of fresh water to manufacture. The production of a pound of beef takes approximately 2,500 gallons of water, compared to a pound of soy, which requires only 220 gallons.  By switching to soy on Mondays each individual could save about 890 gallons of water a week.

As of 2006, forty calories of fossil fuel energy go into every calorie of U.S. feed lot beef (manufacture, transport and storage included). By comparison, a calorie of plant-based protein only requires 2.2 calories of fossil fuel. If the population of the United States went meatless every Monday for a year, 12 billion gallons of gasoline would be saved.

Now, those figures are based on American calculations but the maths is probably as relevant, proportionally,  to those of us in the UK. As a committed carnivore, I could never give up meat all together, though I do know how delicious meat free meals are. I justify it to myself by eating as much of the animal as possible (I don’t hold back from innards, guts and glands)  and making the most of every morsel. I could (and often do) serve meatless meals. Perhaps the formality of sticking to a meatless meal on Mondays would concentrate my mind?

Even if I don’t want to save the planet (how very mean of me) or care about the the welfare of animals (how callous would that be?) then I should care about my health …

“On average Americans consume 8 ounces of meat per day, 45% more than the USDA recommends. Meat typically contains higher levels of saturated fat than plant based foods. Saturated fat intake has been linked to multiple preventable illnesses, including heart disease, stroke, diabetes and various cancers.  By removing meat once a week, the average American reduces saturated fat intake by 15%, diminishing the risk of these diseases.

A ten year longitudinal study has also linked rates of personal meat consumption to age of death. The results of this research suggest that the deaths of 1.5 million Americans over a ten year period can be attributed to excessive consumption of red and processed meats.

Chronic preventable illnesses—including those associated with excessive saturated fat intake—cause 70% of all deaths in the United States. In 2007 alone Americans spent 1.7 trillion dollars on health care related to preventable illnesses”

Following on from that, here in the UK, Paul, Stella and Mary McCartney started Meatfree Monday , saying “In the future we are all going to have to change the way we eat. We believe that it is possible to do things like changing our diets with a sense of optimism, joy and the satisfaction that you are really helping to make a difference in the world.”.

It’s not just about saving the world.  It’s also about saving our purses. Cutting back on meat provides a good cost saving as well. It is a return to the way our families ate in years gone by. Nowadays we are (in the main) lucky enough to be able to buy meat, if we want to, every day. In previous centuries meat was seen as a luxury and what meat there was had to be eked out.  (One of my favourite books, Elisabeth Luard’s “European Peasant Cookery” would be a good thing to read if you were interested in finding out more. There’s a whole world of recipes just waiting to be explored.)

Anyway, on to what I am going to do. I will make that effort. I will make Monday my meat free day.

Now…. I said it would be meat free Monday. I said nothing about the Sunday….which wasn’t meat free. Not meat free by any means.

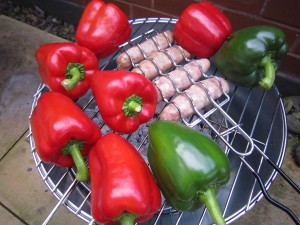
I was doing a barbecue and realised that the glowing embers of the charcoal would be perfect for chargrilling peppers.

I love chargrilled peppers – they are a wonderful addition to salads and for those of us who take packed lunches to work, they are truly gorgeous in sandwiches. I like to use red peppers best of all as they are sweeter but this time I had some green ones to add in.

Vegetarians.. look away! Yes they are sausages. Now, the success of the peppers does not rely on sausages being grilled next to them. It’s just, as you know, we only have a small balcony so I have to have a small bucket barbecue. I have to put on what I can, when I can.

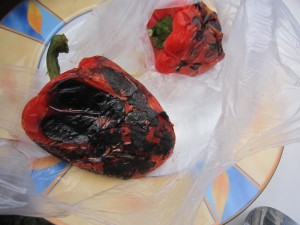
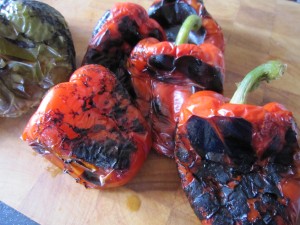
Anyway, on they go and they are turned on the grill to get good and charred

Once that’s done and they are charred all round, pop the peppers (mind your fingers!) into a plastic bag so they can cool down.

As they cool, they steam and the skin loosens and is easy to peel off. Once they are cool, tip them out of the bag.

They will be juicy and dribble a lot so make sure you do this over a plate. It’s a messy job but oh-so-worth it.

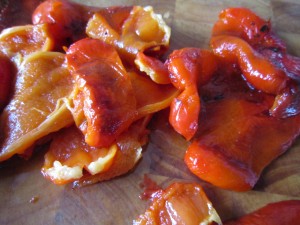
Peel off the skin and scoop out the seeds – you will be left with just the glisteningly soft flesh of the peppers.

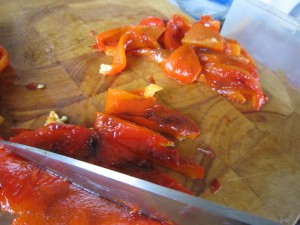
I cut them into slices so they are easier to deal with once they are in oil.

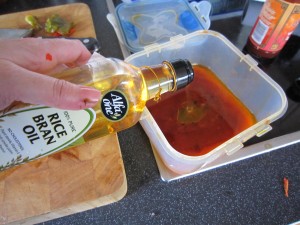
All you do then is get an air tight box and pour in some oil – I was using (because I had some left and I needed to finish the bottle) Rice Bran oil and olive oil

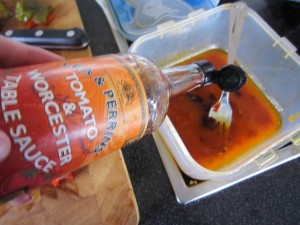
and I mixed it with some Lea and Perrins Tomato and Worcester Sauce.

Use whatever you like to flavour the oil slightly. The peppers have a lovely sweet and smokey flavour to them but adding just a hint of flavour to the oil really makes them special.

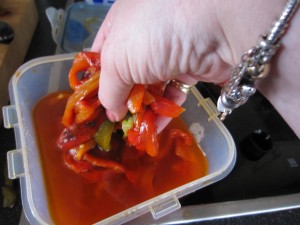
And then, all you do is add the sliced char grilled peppers.

And chill.

Actually, that could be an instruction to you as well as what you do with your box of peppers!  Because that’s all there is to it.

Into the fridge with the box and you have the perfect ingredient for salads or sandwiches.

Oh, and I use it in meat dishes too…… one of our favourites is Pork and Pepper Goulash 

I’m adding this bit in here because the lovely Lorraine added it to the Comment section after this was initially posted and unless you read through the comments you might not spot what she says. Lorraine lives in Canada and is married to Sonny, who is Italian…..

“As far as the grilled peppers, we grill a bushel of them every September when we get them cheap from the farmer’s market. My dear old mother-in-law (now l0l) got me into this a number of years ago as they are a staple in the Italian household. They appear on plates at every family meal. However, being only two of us, we grill the peppers and after cleaning them all, place them on paper towelling and then we place in small freezer bags and freeze for the winter. We take out a bag or two, place in a container and add olive oil, glove of garlic, dash of balsamic and if you like, some hot pepper flakes. Great on sandwiches and with grilled MEAT. Not a fan of the green ones – but the Yellow and Orange Bell Peppers are great – you must try.”

What a great idea that is. If you leave the peppers in oil for too long they soften too much. The way forward is, obviously, to do it Lorraine’s way and freeze any excess until you need them.

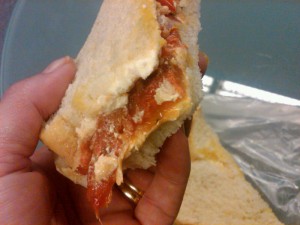
Today, though, is Meatfree Monday and I made sandwiches. Cream cheese and roasted pepper sandwiches…..

Delicious!

I’m on the way to saving the planet, my health and my cash…..pretty much of a result for the start of the week, eh?

High, high above the city – you can still grow your own fruit and vegetables!

Some of you may have picked up on the fact that nowadays the Bear and I live high above the city, in an apartment. We are at the top of the block, which is itself on top of a hill and have the most marvellous views over the city below us. One of the best things about living here is that in the morning the dawns are fantastic

I’ve always been an early riser and I love to make my coffee and look down over the city sleeping below.

Each day the dawn is different… sometimes misty and calm and sometimes outrageously colourful. It probably is the best part of the day.

We have the most incredible views all round because our apartment is on two levels and the top floor has walls of windows on three sides.


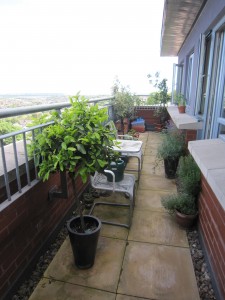
… and running the full length of the apartment is our balcony

It’s not a big balcony – it’s quite narrow, really – but I have managed to make the most of what I have. I knew I would be able to grow something – there were so many things I just didn’t want to be without.


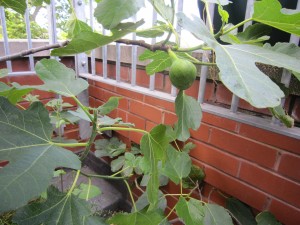
There’s a fig tree in a pot with (so far) over thirty figs, ripening nicely.

Who would have thought you could grow figs so high up? It can get very windy up here but Brown Turkey Figs are very hardy (that tree was with me in the far north, in Durham and fruited well up there too) Figs produce best when their roots are confined so keeping it in a pot is the best thing for it.

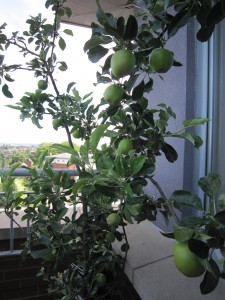
I even have an apple tree up there – if you buy the single stem fruit trees, specifically grown for containers, it is amazing what you can get away with in the smallest of spaces. Despite being told that I should keep the balcony clear………

Of course, the Bear is forever on at me as I smuggle more and more onto the balcony. I just wait until he is travelling and then I bring something more from the north… Of course he was going to notice a five and a half feet tall apple tree. And as for that fig tree – well, that is in a terracotta pot and it half killed me getting it up to the top floor. Still, he is going to be happy when he can just wander outside and pick a fresh apple or ask for a juicy fig…

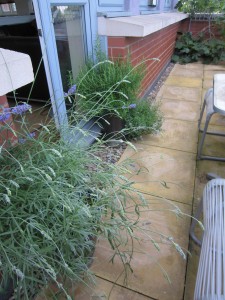
I have herbs, of course, there’s thyme and rosemary standing next to a pot of lavender on either side of the french doors and a large pot of sage. When I walk out onto the balcony when I get in from work, I brush past the plants and smell their gorgeous perfumes.

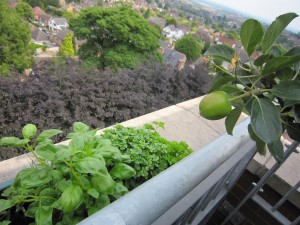
We have herb pots (carefully attached to the railings) all along the top of the wall, so I can go and cut fresh sweet basil, coriander, parsley (both curly and flat leaved), mint, chives, garlic chives, a huge selection of salad leaves that I can cut at and go back for more almost daily.

It’s where I grow pots of chillies, ready for cooking with

or preserving in oil

This year, my brother has given me three chilli plants – Pinocchio, Decayenne and Heatwave, all grown from seed. I really should get some jalapeno chillies going as well, though at this time of year I’ll have to buy a seedling.


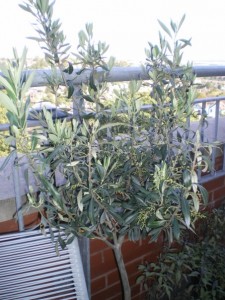
And that’s not all I have up there… there’s a bay tree and an olive tree growing there too. OK, I use the bay leaves but somehow I don’t think I will be brining my own olives.

It’s flowering now and it did have fruit on it last year but they were small and didn’t amount to much.

 The top of an apartment block in the Midlands just isn’t the same as a sun scorched hillside in Greece.

My cousin has her own allotment and always starts her seeds off in time and sends me the seedlings… this year her gorgeous french beans and a couple of sunflowers.  I like to snap off a bean and eat it as I water the pots. There’s a sweetness about them, straight from the stem.

My wild garlic grows up there in a pot

and it is the first thing I can eat from my balcony garden.

I’d love to grow more, of course, but what I do grow is pretty good for such a small space. I would love an allotment but the ones nearest to our apartment, St Ann’s Allotments, have a waiting list as long as your arm. I’ve been on the list for a couple of years now and I suppose I shall be on there for a few years yet.

When I moved here, to be with the Bear, I remember thinking there would be so much I would miss and so much I wouldn’t be able to do if we lived in apartment. Do you know what? I probably grow more up here than I did in the north.

No matter how small a space you live in, there is always room for something to grow. And there’s nothing like the wonderful sense of achievement you get when you can just walk outside and bring in something perfectly fresh that you have grown yourself.

What do you grow?  What couldn’t you live without?

Broccoli a Bear will eat

As you know, I wage a constant battle to get the Bear to eat what I want him to eat. All in the interest of health, you know, it’s not just me wanting to assert dominance over my poor, beleagured husband. It makes things easier as well, if you both eat the same things. I am having some success – he is now eating prawns and has started to eat broccoli.

Yes, I know, not everybody loves broccoli and for some the slightly bitter tang puts them off, but my reasoning is that if the Bear can eat raw broccoli with a dip as a crudite, or broccoli and stilton soup, or even the deliciously tasty Broccoli and Stilton Pastryless Pie then he can eat it as a vegetable.

And not complain.

Finally, it seems, I may have cracked it.

I’d made the salt and pepper pork tenderloin for supper and knew we needed something with it. He’d started with a crisp salad of leaves, red and yellow peppers and tomatoes so I reckoned that if he didn’t eat what was served with the pork, that wasn’t going to harm him.

Anyway, I love broccoli.

I had gone to our local farm shop and come back with two gloriously green and hard heads of broccoli. We have been on a high protein and low carb diet and butter (thank God) is allowed. I had a feeling that I could make something delicious – well, delicious for me – and if he was hungry enough then he would eat it.

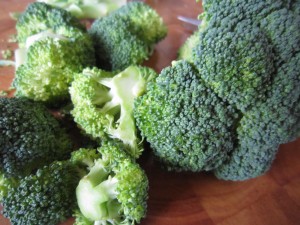
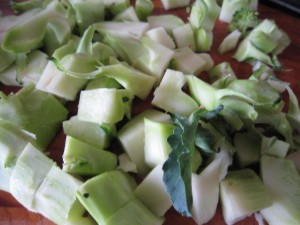
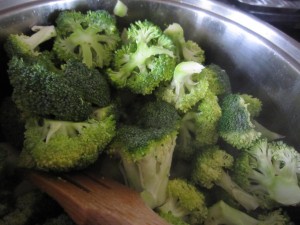
So, I chopped the florets off and sliced the stalks into smaller chunks.

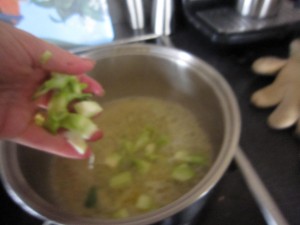
Broccoli stems take longer to cook than the florets so they need to go in a pan first with some butter and a sprinkle of salt. Put it on a medium heat so you don’t burn things.

Give them a couple of minutes to soften slightly before you add the florets.

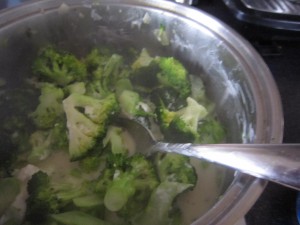
Toss them round in the butter – you want them to soften and cook but not turn to mush.

It still looks green and delicious and it is holding its shape but now there’s a softness about it.

Sooooo… all well and good but I have to get the Bear to eat it.

I need to up the protein level as well so a great big spoonful of Philadelphia cream cheese goes in and melts over the broccoli.

It is now on a low heat, stir it round and let it cover everywhere.

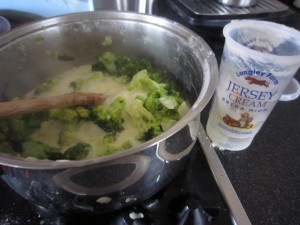
A spoonful of double cream helps loosen things and makes a delicious sauce.

With salt and pepper added to bring everything together, the creamy, faintly coolly-cheese (you know how cream cheese has that sort of taste) sauce the broccoli feels slightly tamed.

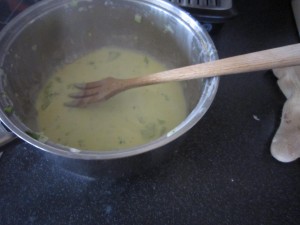
Take the broccoli out and reduce the creamy sauce so it thickens, adding a knob of butter – this makes it taste even more rich and delicious. Just the thing to add to that steaming green goodness.

The bitterness has disappeared and you have a savoury, tasty pile of broccoli, just ready to serve to an unsuspecting Bear.

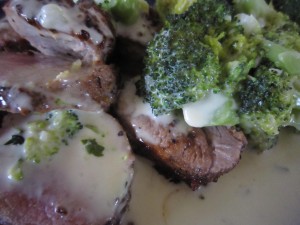
So I did. There was his pork just asking for something to sit along side it… there was that sauce just begging to be poured over everything. I served it up.

After all, he’d already had a lovely big crisp salad… if he didn’t like the broccoli it wouldn’t be so bad.

It was delicious. Utterly, absolutely, totally gorgeous. I had justified giving myself the larger portion because, after all, he doesn’t like broccoli.

“Did you like it?” I asked.

“Yes…. I just wish there was more broccoli…. ”

Drat. There was more and I had my greedy little eyes on that but in the interests of converting the Bear to a love of broccoli, I just had to do it. This was unprecedented in our lives together – my Bear actually asking for broccoli. He got the lot.

Now, once I have got him to eat it like this I can start to cut back on the cream and Philly – not too much, you understand – and it becomes even healthier.

Maybe I won’t though. Maybe it is just delicious as it is.
Oh, and you know what? He’s asked for, and eaten, broccoli cooked like this several times since. So maybe if you have children who find broccoli just too bitter, try it like this. You never know… one day you might hear the magical words “I just wish there was more broccoli”