Parmesan custards

Not only do I love cooking and eating, I love reading recipes and articles about cooking and eating. I’m a great snipper and copier out of recipes that I think will be worth doing, or that interest me. I’m always on the lookout for recipes that can be made in advance – we lived in an apartment in Nottingham where the upper floor was an open space for the kitchen, dining and living area and here, in Malaysia, we have much the same layout. That’s lovely when everything is tidy and ready to go but if you have guests sitting around with drinks it’s not so great for them to see you juggling pans and plates, cursing mildly and getting hot and bothered.

I like to have things ready to bring out – for one thing, it gives me time to brush my hair and wipe flour, sweat and splashes off my shiny, red face.

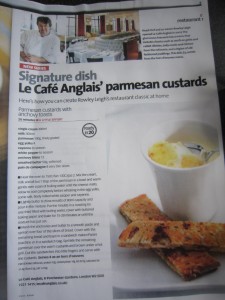
In my folder of Things I Really Must Make, I found this article, from Olive Magazine, dated June 2008,  but searching the site now, there’s no recipe listed. You’ll just have to follow what I write out.

Rowley Leigh, of Le Cafe Anglais has, amongst the many wonderful dishes he makes, a classic starter, Parmesan Custards – creamy, cheesey, savoury set custard served with thin fingers of toast, spread with a thin smear of anchovies, perfect as a simple, yet stunning, make ahead starter.

I have a set of espresso cups that are just about the right size and as they are part of my Wedgwood Cornucopia dinner service, they were going to look perfect at the table. We  were having good friends round to dinner and I wanted to make sure everything was as lovely as possible. There’s no point in keeping things ‘for best ‘- my motto is, if you’ve got it, use it! If you haven’t got espresso cups, little ramekins or china moulds (they need to hold around 80 ml) will do just as well.

I needed 4 egg yolks; 300ml of single cream; 300ml of milk; 12 anchovy fillets; 100g of finely grated parmesan for the custard and another 150g for some parmesan crisps I was going to make as an extra; 50g of softened butter; 8 slices of good bread ( I used thinly sliced No Knead Bread) plus cayenne and white pepper to season everything with. The recipe said this would make 8 small pots but the six espresso cups took slightly more than the recommended 80 ml so everything evened out. Besides, there were going to be six of us eating.

This really is quick and easy – so easy, that the first thing you do is get the oven turned on to 150°C/300ºF/gas mark 2.

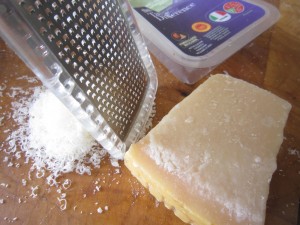
Then, grate the parmesan finely so it makes a lovely, light and airy mound

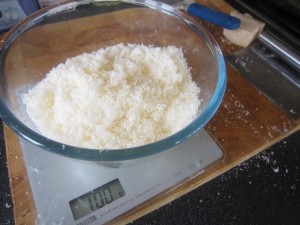
Remember that this is for the custard…. I need the rest of the parmesan for crisps, later.

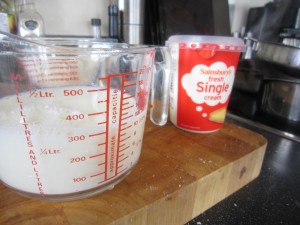
Mix 300ml each of the milk and the cream together

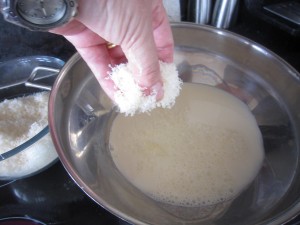
….then add in all but a tablespoon of the parmesan, if you are using ramekins.  You save this because you can sprinkle this last bit on top and then grill your pots to make a crisp topping.  I was going to make parmesan crisps instead because I didn’t want to put my lovely Wedgwood under the grill.

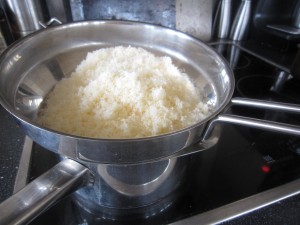
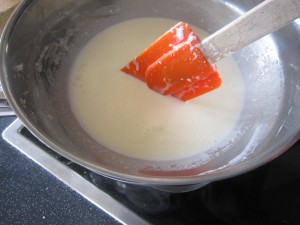
…and heat gently in a bowl or a bain marie, over a pan of boiling water until the parmesan melts.

Allow this to cool completely

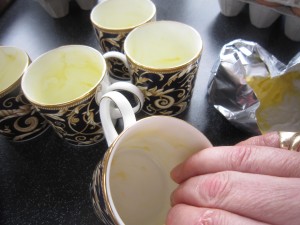
While the mix is cooling, butter your cups or little bowls.

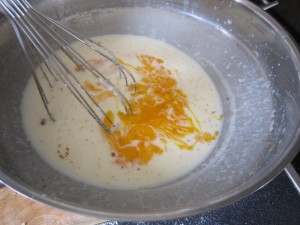
Once your mix is cool,  whisk in the four egg yolks, a pinch of cayenne, the same of finely ground white pepper and maybe a pinch of salt. You must let it coolproperly because otherwise you will end up with cheesey scrambled egg.

Put the cups in a roasting tin, then fill them with equal amounts of the custard mix, then put the tin on the oven racck before you add boiling water. You need enough to come maybe one third of the way up the cups. Doing it this way prevents the mix slopping about and you pouring boiling water over your feet. Always a plus point in my book.

Cover the  top of this with some buttered baking parchment or a silicone sheet and then let everything bake for about 15-20 minutes, when they will be just set.

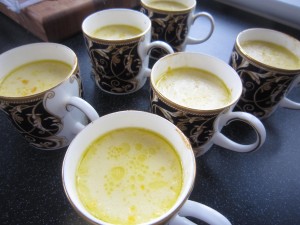
They emerge, looking gorgeous. I put them to one side while I made the toasts and the crisps……

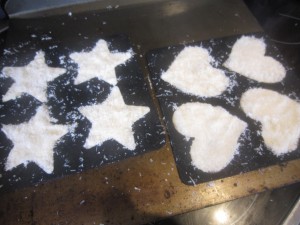
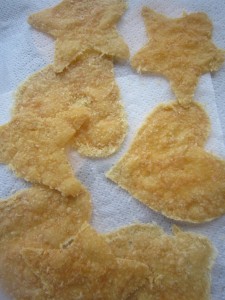
My sister gave me some Curtis Stone silicone wafer baker molds as a Christmas present and I really wanted to try them out  –  you simply pack them with the rest of the finely grated parmesan and put in a low oven, on a baking tray

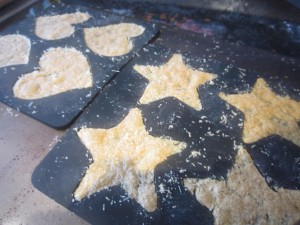
.. until they turn a soft, golden brown. Leave them to cool and you can get started on the anchovy toasts.

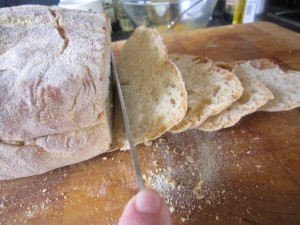
Thinly slice some good bread – each person will need a slice – and cut the crusts off to make lovely, neat, evenly sized rectangles

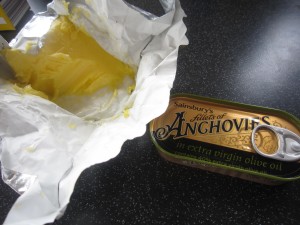
Then take your softened butter and the anchovies (drain them – you don’t want the oil)

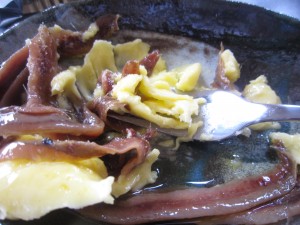
….and mash them into a smooth paste

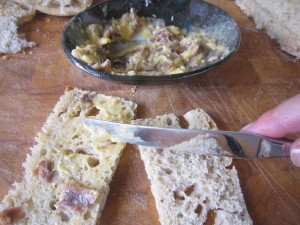
Lightly spread half of the slices of  bread – and I do mean lightly. You don’t want to overpower everything with too much anchovy.


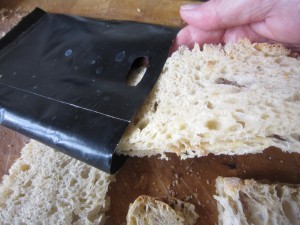
Lay a slice of unbuttered bread over the spread ones to make dainty sandwiches. The easiest way to toast them is in a toasted sandwich bag and then pop them in the toaster for a short time. You don’t want to make them too toasty and crisp – you have to slice them into fingers after that…


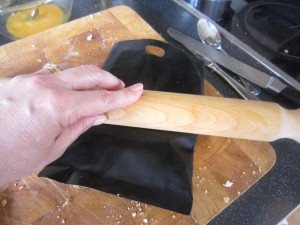
A good way to get very thin toasts is to roll them, still in the bag, with a rolling pin to get them nice and smooth, then toast them. When they are done they can easily be cut into fine fingers.


By now, the parmesan crisps are cool and can be gently lifted from the molds. How fantastic is that?

And then… well, then you are nearly ready.


Wipe down the kitchen and set the table….


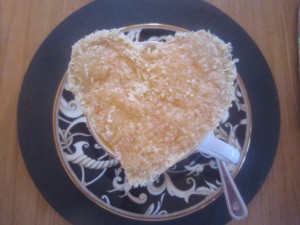
When you are ready to serve, if you are using ramekins or china molds, sprinkle the last of the parmesan on top of the custards and brown gently under a hot grill. I had my parmesan crisps to place on top, instead.

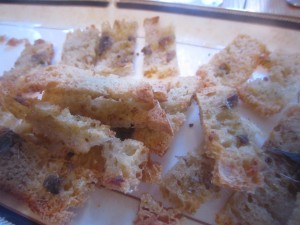
The fingers of anchovy toast were piled onto a plate

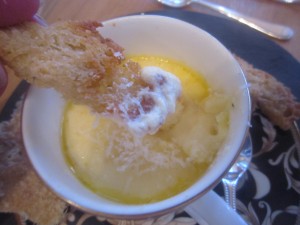
The starter was served…..

The crispness of the toast fingers contrasted deliciously with the soft, savoury custard.

The parmesan wafers added a gorgeous crisp bite.

Successful? Yes.

Tasty? Very much so.

Easy to do? Yes, so much so that this, with its comforting creaminess and rich, savoury flavour, would be a great dish to do when you needed some lovely comfort food.

In fact, the more I think about this, the more I want to make it again. It will remind me of a wonderfully happy night in Nottingham and I can introduce it to my new friends here in Malaysia.  What a good reason to invite people round to supper!


Rendang terlagi-lagi – the best beef rendang recipe

If there’s only one thing you cook from reading my Malaysian adventures then it has to be beef rendang. Unless, of course, you are a vegetarian or a vegan….because, quite frankly, beef just won’t work for you. Or unless you can’t eat coconut because that, too, would mean the beef rendang just isn’t going to be your thing. But let’s not bother with ‘unless’…let’s focus instead on the most delicious Malaysian recipe ever.

Rendang is an iconic Malaysian recipe – a mouth-filling melange of spices, coconut and slow cooked meat making an aromatic dish that has you longing to eat it again and again. The first friends I made in Malaysia, Roger and King, took me to lunch at Madam Kwan’s where we had her delicious rendang. Her version has the beef slow cooked and shredded and it is rich and delicious so little goes a long way with plain rice. King swore that this was the best rendang in Kuala Lumpur and who was I to argue?

I spent a long time looking for a recipe that would give me the right taste – every cook will have their own version. Eventually I came across (in a small, inexpensive Malaysian cookbook by Betty Saw, from Marshall Cavendish, that cost 9.90 ringgit, that’s just under £2) Rendang terlagi-lagi. ‘Lagi’ in Malay means ‘more’ and I was assured that having eaten this dish people would ask for more….and more. That had to be worth trying.

Now, before we go any further, it’s perhaps worth pointing out that authentic Malaysian cooking doesn’t rely on the kitchen gadgets that make our lives so easy. Most recipes involve spice mixes that are ground…and when they say ground they mean that they been pounded into a juicy rubble with a pestle and mortar.

What also might be worth pointing out is that while pounding produces an authentic roughness to the mix (some bits are pounded more finely than others) the pounding itself is hard physical labour. I have done this in an authentic a fashion as possible but in the interests of getting you to try this, I think it will be perfectly acceptable to use a blender to get the spice mix made. Don’t keep pulverising everything to a smooth paste, though, try and keep a certain roughness to it.

Also, if you are trying this and don’t have access to the same fresh ingredients that I can get here in Kuala Lumpur, don’t worry. Do your best. Supermarkets sell jars of ready prepared ginger, lemon grass and garlic. Use them if you can get them…it will be a lot easier than pounding.

The important thing is that you try to make this. If you like it enough you can always attempt pounding on the next go. Or maybe if you like it enough you can carry on using the prepared spices because that will mean you can make it quickly and easily. Just make it, right?

What you’ll need to make this is first of all 600g (1lb 5 oz) of beef.

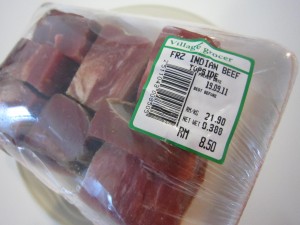
The first time I made it was with deep frozen Indian buffalo which is all I could find in the supermarket and the resulting rendang was delicious but tough. Eventually, I found some nice beef cubes that made a deliciously tender rendang. Rendang is not cooked for a long time so try and avoid those cuts that will need hours of slow cooking.

You’ll need some dried chillies (maybe 8 or 10, say) and some thick dark soy sauce (this has a roasted almost caramel taste)

4 stalks of lemon grass (I think that 4 teaspoons of the prepared lemongrass in a jar would be the equivalent); a can of coconut cream ; some tamarind paste; and some kerisik (essentially grated coconut, roasted in a pan until golden brown and then ground finely. I think you could use desiccated coconut instead. It is important you make this, though there’s no real work involved, because it adds a gloriously rich, deep and sludgy level to the sauce surrounding the meat )

The next set of ingredients are classed as the ones that are to be ground – 300g/11 oz shallots, 4 garlic cloves and a 1 inch knob of ginger, peeled.

So, once you have everything assembled, you’re ready for the off. This is really a simple recipe and now I have done this a few times I can prepare it quickly. I make the ground spice mix first and put it in the fridge so I can split the work. If you were using  prepared spices you’ll be able to do this really quickly.

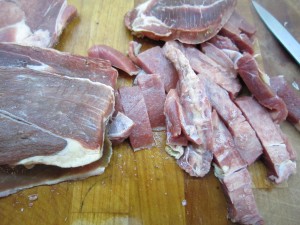
First, cut the beef into strips, maybe a quarter of an inch thick and one and a half inches long.

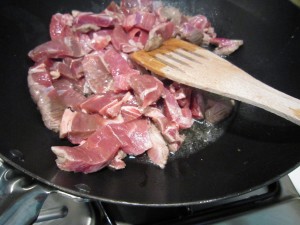
Fry the beef over a moderate heat in 125 ml/4 fl oz/ half a cup of oil, for 15 minutes.

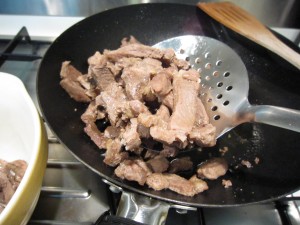
Take the beef out, leaving the oil in the pan as you’ll need this later.

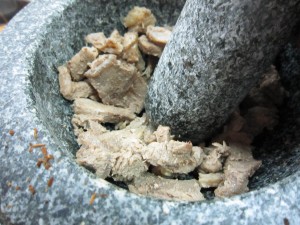
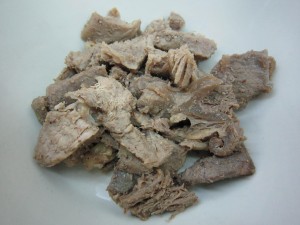
The beef needs to be pounded lightly while it is still hot – I use the pestle that I used in grinding the spices. Use a steak hammer if you have one….what you are aiming for is a flattening of the pieces of beef, breaking down the meat fibres so they can absorb the flavours better and the beef becomes more tender.

This really is just a light pummelling so don’t go mad and destroy the beef pieces.

Then pour a tablespoon of thick, dark soy over the meat, stirring it round so the pieces get covered, then pop the meat into the fridge for at least an hour. I’ve done this the night before when I have been cooking this for guests and it works out pretty well.

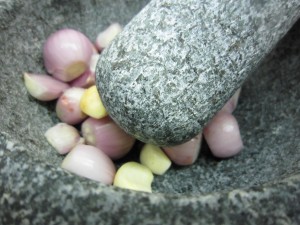
Then, start on preparing the ground ingredients. Either do it with a pestle and mortar or use a blender or use prepared spices. The garlic and shallots and ginger get crushed to a gritty paste. If you use a blender don’t go as far as a smooth mush… part of the joy of this is in the texture of the sauce.

Dried chillies need soaking separately until they are soft and then need pounding or blitzing. It’s easier if you chop them first before pounding them and make sure you keep  your hand over the top of the mortar to keep chilli splashes away from your eyes. I speak from experience.

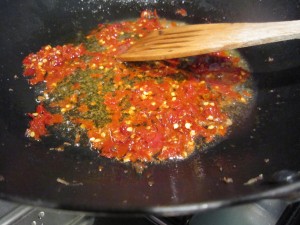
Fry the ground chillies for two to three minutes in the oil left over from the beef

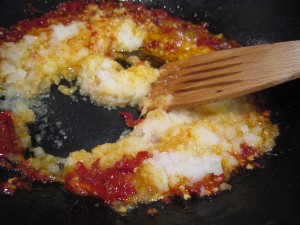
Then add the ground ingredients (shallots, garlic and ginger and the lemongrass).If you decide to pound the lemongrass first, it’s easier if you chop it into little pieces. Otherwise use the prepared lemongrass in a jar. Fry the mix until it is fragrant and the oil starts to separate out. This will take maybe 8 to 10 minutes over a gentle heat.

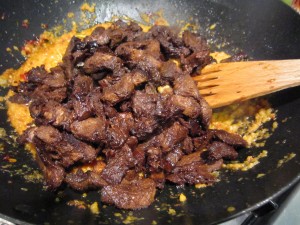
Once this is done, add the beef and stir it round well.

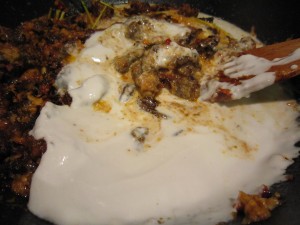
Add the coconut cream.

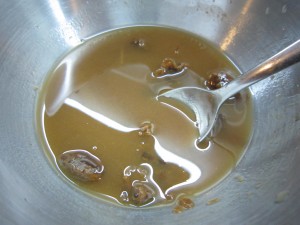
One tablespoon of tamarind paste needs adding to 5 tablespoons of water and stirring round and then strained off, leaving the pulp and stone residue behind. Add that liquid to the beef and stir in. You will probably be able to buy tamarind paste without the seeds in… here, I can’t  get that and I have to sieve out the seeds. You do need the tamarind though because it adds a sharp hint that brightens the deep and satisfying richness of the meat.

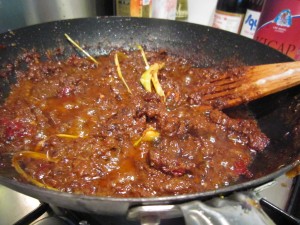
Bring everything to the boil and then reduce the heat and simmer gently until the colour has darkened and it is almost dry. In that picture I had just crushed the lenongrass and I had to pick it out later. It’s better when you either use the ready crushed into a paste version or chop it into small pices and then pound the living daylights out of it.

Next you need the kerisik. This is toasted and ground coconut.

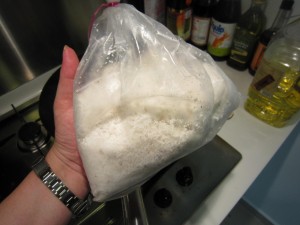
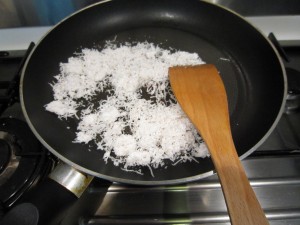
I can buy bags of freshly grated coconut  but you could manage with some dessicated coconut, I reckon. My Malay friends think it will be OK, so I’d go along with that.

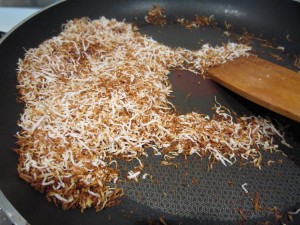
I dry fry a cup full until it browns

Be careful because it can suddenly go from white to burnt, so do stand and stir and keep checking  while you are roasting and toasting the coconut.

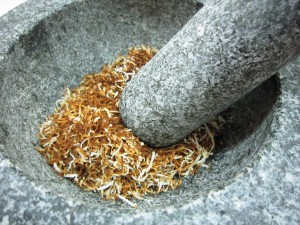
and then I grind it to a fine powder. The first time I did it I used the pestle and mortar….after that I used the Bamix and the spice grinding attachment. Far quicker.

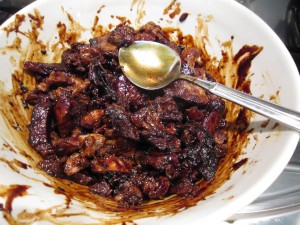
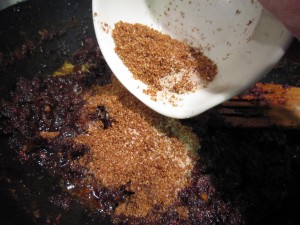
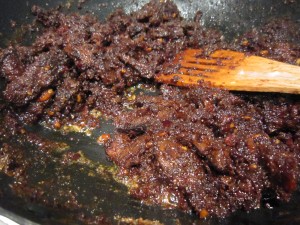
Anyway….add in the kerisik, a teaspoon or so of sugar and some salt to taste. Stir it all in and keep stirring until it begins to look like this….

And that’s it. Taste it. Realise you have made the most delicious rendang…..

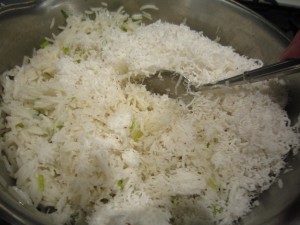
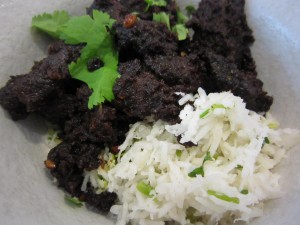
I serve it over plain boiled rice that I have added some of the fresh grated coconut to and some chopped coriander.

And then all I do is hope that there will be some left over to either eat the next day or freeze. It is a rich and deliciously tasting meat with layers of flavour becoming apparent as you eat it.

I think this has become one of our favourite Malaysian dishes and when we get back to the UK I will use (because I’ll have to) the shortcuts I’ve told you about. I’ll do anything, really to keep on eating this. It is rich and delicious, spicy but not mouth burningly so and the simple mix of spices blend together to make a complex, mouth-filling in its intensity, taste. It is deeply satisfying.

Try it… try it then tell me what you think of it. I’ve done my best to make it easy for you… now you do your best to make it!
Potato Focaccia

One of the big loves of my life is reading. I can do without television quite easily but I could not manage if I couldn’t occupy myself with something to read. I have shelves groaning with books and magazines are stacked in piles… I have an  eReader so I can read when I can’t carry piles of books with me and when I can’t read, (because I’m driving, say) I listen to audio books. So maybe it’s not reading? Maybe it is that I don’t need the visual stimulus of pictures… I just need the words and my mind fills in the gaps.  So, maybe I should say one of the big loves of my life is writing.. that is, writing done by others.

It has to be good writing though, so that I stay interested. I will, honestly, read almost anything, from any genre, but as you’d imagine a big part of my reading involves food – cooking it, eating it, growing it, preparing it… telling stories about it.

I have shelf after shelf of cookery books. When I’m in the north, I love to sit in that chair, with a cup of green tea, steaming quietly beside me as I read recipes or books on food writing –  from Brillat-Savarin’s “The Physiology of Taste,  or transcendental gastronomy”  – he, who famously wrote, “tell me what you eat and I will tell you who you are” and described the first version of what became, in essence, the low-carb diet. Brillat-Savarin (1755-1826) believed that white flour and sugar made you fat and prescribed protein rich meals. If you haven’t read him yet and you’re curious you can read it for free online, thanks to the University of Adelaide or on Project Gutenberg, or, you can do as I did, and buy a copy.

I love reading modern cookery writing too and I have shelves of that in the apartment… that’s a picture of the shelves when I had only half unpacked and there’s 132 books there. The shelves are full now. Those shelves are half way up the stairs and I sit there, leaning against the wall, reading whatever takes my fancy.  Probably my favourite book of all time, MFK Fisher’s The Art of Eating, an anthology of all her works is on that bottom shelf  and I regularly take it out and start reading it again. There are  fascinating books that the Bear finds on his travels and brings back for me because he knows I will love them. He found Laurie Colwin’s Home Cooking when he was travelling through the USA and I know I wouldn’t have stumbled on that easily but it is now one of my dearly loved books. He also brought home the wonderful Ruth Reichl’s  Comfort me with Apples and that started me on a search through Amazon for more books like that.  The whole point of it is, I love to read something that makes me think, that captures my imagination and makes me explore just what it was they felt, what they tasted and what it meant to them.

When I’m not reading books, I’m looking on line and reading blogs and searching out great writers there, too. I was reading the fabulous Gin and Crumpets and something she wrote made me stop and think….it made my mouth water. Potato Focaccia, or as she says, a fancy chip butty. Who doesn’t like a chip butty? Well, apart from Brillat-Savarin and his purely protein meals, but he’s long gone, so it doesn’t matter…

A soft and savoury focaccia with potato…. perfect. Imagine how that tastes…

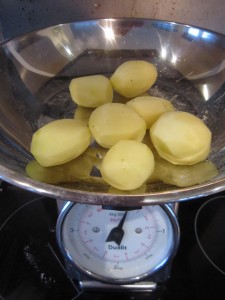
Gin and Crumpets had used, so I surmised from the photographs, smaller potatoes than I had and she’d left the skins on. I had a bag of my favourite Rooster potatoes  (excellent all rounders, good as either chips or mash or roast) so I washed and peeled 250g of them and cooked them in gently simmering water. You need them still to have some body about them as they are going to be cooked again on top of the focaccia, so don’t boil them to death.

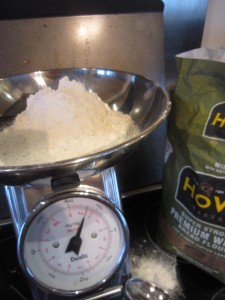
The next thing was to start on the focaccia so 350g of strong bread flour was mixed with one 7g sachet of fast action dried yeast, a teaspoon of caster sugar and two teaspoons of Maldon sea salt.

Four tablespoons of olive oil and roughly 150ml-200ml of lukewarm water need to be added to bring it together into a loose dough.

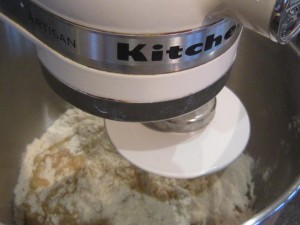
If you haven’t got a mixer with a dough hook, just use your hands.  Drop it onto a floured board and upend the bowl over it to stop it drying out. Let it rest for a few minutes.

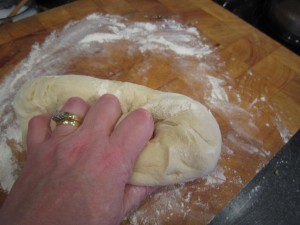
Then knead it… you’ll feel it change into a beautifully bouncy, smooth and silky dough.

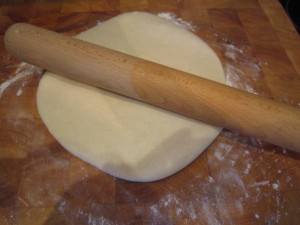
You need to roll it into a smooth oval

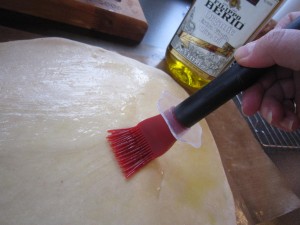
And then lie it on a silicone sheet, ontop of a baking sheet and brush yet more lovely olive oil over it.

Lay a loose piece of clingfilm over it and leave it to rise gently. That depends, of course, on how warm your room is but it shouldn’t take too long.

Start the oven pre-heating to 210°C or 410°F and check the potatoes.

They should be tender so drain them and leave them to cool and then have a quick wipe round while you are waiting…

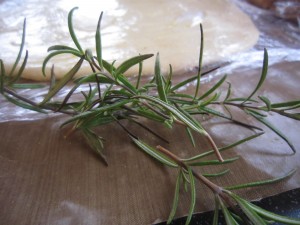
A sprig of rosemary would be good to add, so strip the leaves off the harder stems and chop them lightly.

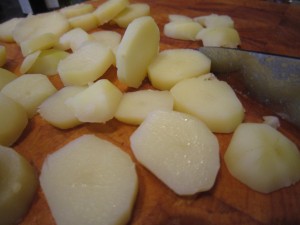
By now the potatoes are cool enough to slice without burning your fingers…

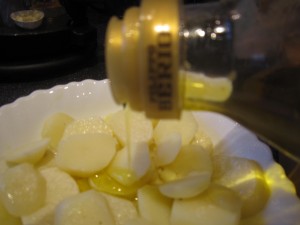
I drizzled the oil over the potato, in a bowl, so I got an even covering and each piece was glistening, then laid them on top of the puffy dough, sprinkling it all with the chopped rosemary and a sprinkle of salt…and into the oven it went.

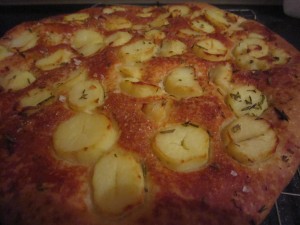
Just under half an hour later and this emerged… golden and glistening, smelling deliciously sweet and savoury – you know just what I mean…

The focaccia bread was light and aerated and the potato on top? It was heavenly… it really was like the best chip butty ever. The taste? The taste was sublime. The potatoes were soft with that sweetness that comes from being cooked properly and then baked, the salt and the rosemary made it savoury, the focaccia was warm and delicious. People looked at it, sniffed it and then tore at it…all of them saying how wonderful it was.

This is what you need to make for parties – it’s warm and delicious and it will to help soak up the alcohol and keep people happy and cheerful….

…this is what you need to make it when there’s just the two of you and a bottle of wine to share as you curl up on the sofa….

… and you need to make it when there’s just you, needing something to sustain you through upset or cheer you through gloom or give you a much deserved treat on a cold Saturday night.

This is heaven.  Really, it is.

Beans, yellow tomatoes, sage and sausages

Right then, I said, as I was surrounded by a tumbling wall of tinned tomatoes and beans, we really need to get through some of that store cupboard.

When I go shopping I will often pick up tins of tomatoes or beans because you can always make a meal, very quickly, from them. You never know when people may suddenly arrive and need feeding, or when you really just can’t face going to the supermarket at the end of a long day at work. I like to plan ahead – after all, what if there is a crisis and we are trapped, at the top of our apartment building,  with only the contents of the kitchen?  I need to be sure we can eat , at least. What if the shops are suddenly and mysteriously emptied of everything? I’d better have stuff in that won’t go off. Be prepared is my motto. The thing is, I’d kept on doing it and we were now reaching a shelf overload situation in the larder.

I’d gone into the larder to get some stuff out for baking and realised that the wild and fanciful imagined crises had not happened, unexpected guests had not turned up without warning but with an empty belly and I had managed, after all, to shop on a pretty regular basis and provide meals for the two of us without using the stores of beans and tomatoes. I noticed all that because there seemed to be a wall of tomatoes and beans blocking my way to my baking tins.

The fact that it was a pretty substantial wall, many tins deep made me think that I really ought to do something with them. The thing about beans and tomatoes is that you can do so much… the butter beans, softly mashed, make a quick and lovely alternative to mashed potato, the tomatoes can be used in the rich and soothing Tomato Rice soup or to make a ragu base for the indulgent, quick and easy lasagne, or in the vegetarian squash and goat’s cheese lasagne. The cannellini beans can be transformed into the Bear’s very favourite, Italian derived Beans on toast. I have borlotti beans and haricot beans, I have plum tomatoes and yellow tomatoes…..they were all just waiting for me. They were all just waiting to fall on me, apparently.

I decided to delay the baking session and make something to eat instead from the cans that were now falling off the shelves because I had balanced them precariously, one on top of another, after every shopping trip and then tried to shove them to one side so I could get at my shortbread mold. Falling with a clatter and bouncing off my bare feet. So… beans and tomatoes…..

Yellow tomatoes….

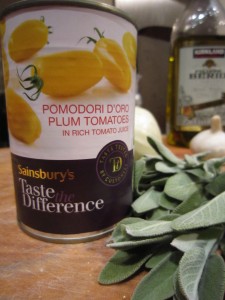
I’d seen these and thought I would have to try them… and now, it seemed, I was going to do it. They would be a change from the richness of red plum tomatoes…. I had some fresh sage as well.

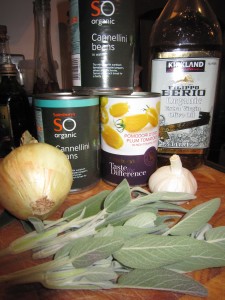
So, two tins of cannellini beans were also removed from the now collapsed wall of tins and I looked around to see what else I had. The baking could wait for a while. I was going to make something for supper.

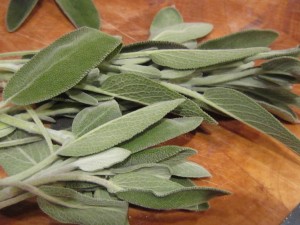
I love sage – not only the smell of it and the depth of flavour it adds to a dish (perfect with pork or tomatoes) but I also love the beautiful softness of its leaves and the delicate colour. All of which will disappear in cooking, I know, but I do like to rub it between my fingers and appreciate its soft silkiness and the smell as it bruises….

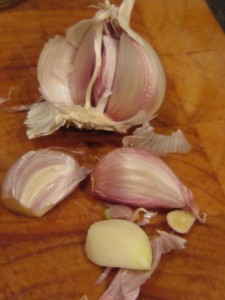
I had plenty of fresh garlic, too.

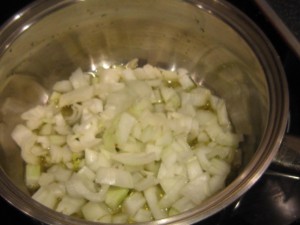
The first step, as with so many dishes, is to soften a chopped onion in a little oil. Adding salt makes the onion soften gently and release its flavour as it turns translucent. If you don’t add salt you are more likely to end up with bronzed, fried onions.

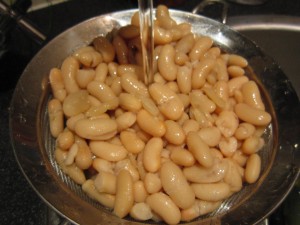
The next step is to open your tins of beans and rinse off the gloopy liquid surrounding them – this will be a mixture of the water they were packed in and any stray bits of starchiness from the beans themselves.

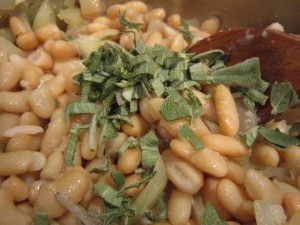
Toss the beans in the soft and glistening onions and add some chopped sage.

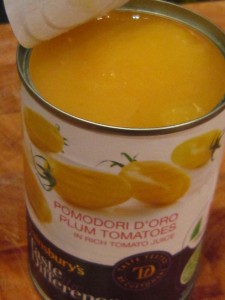
And then… those tomatoes. I’d not seen tins of yellow tomatoes before and I’d been curious to find out what they tasted like. They were certainly yellow. A beautiful, vibrant, cheerful yellow.

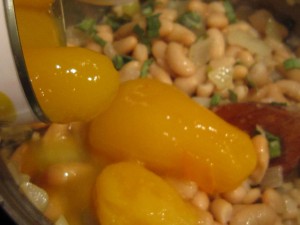
How pretty they were! They tasted nice too – sharper and yet sweeter than a tin of red tomatoes. Almost a cleaner taste in a way – you know how red tomatoes have a rich deepness to them? These seemed lighter, but just as flavourful. I added them to the beans, sage and onion.
I’d been at the  Farm shop and they had been doing Italian style sausages – what this means is that they were sausages with some red wine and fennel added so I reckoned they would be perfect with my beans and tomatoes. While the beans and tomatoes cooked together, I started frying the sausages.

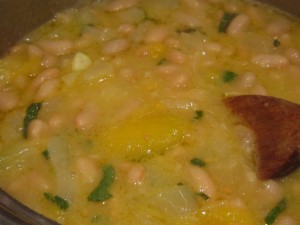
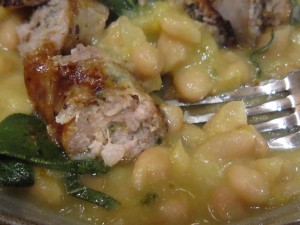
And look how gorgeous the beans and tomato was!

Those sausages fried beautifully, with the red wine helping make that deliciosuly sticky and brown, glistening skin.

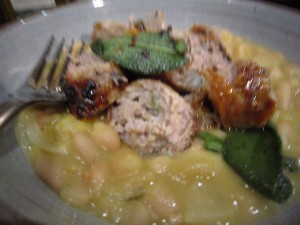
The tomato and beans were a light and delicious mix and the perfect base to serve the sauasages on.

I fried some sage leaves separately – just quickly – until they were crisp.

It was the perfect mouthful – the softness of the beans, the sweet sharpness of the tomatoes and the meaty richness of the sausage….. Delicious. Quick, simple, inexpensive. What more could I want?

Well, I could want the larder to be tidy … but at least three tins had been removed. That’s a start, right?

Purple Majesty

I think you could safely say that I am a fan of the spud.

I love baby salad potatoes boiled and with a lovely lump of salted butter melting slowly over them…or with a rich mayonnaise …or just steamed with salt and herbs.

I love floury potatoes baked slowly in the oven so they smell rich and delicious and cracking that hard outer skin reveals a steaming and fluffy middle.

I love chips either  eaten from newspaper on the sea front or par-boiled and then baked with a light tossing of oil in the oven in my attempt to lighten the fat load.

I love mash, passed through the ricer and whipped with butter and cream. I can eat it by itself as an antidote to sadness, exhaustion or disappointment.

I love roast potatoes, crisped and crackling from the oven to eat with meat, glistening and delicious.

I love fried potatoes in any of a myriad of ways… frittatas, say or as  sauté potatoes.

I love potatoes in a soup.

Or even in bread.

I think it’s safe to say that if a potato can be used in a recipe, I want to  try it. And I probably have.

And then one day….

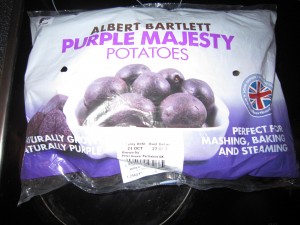
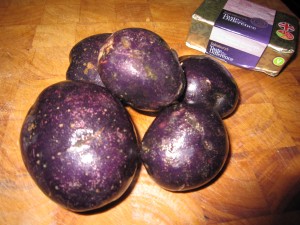
I saw these. Purple potatoes… and by golly, they were purple. Albert Bartlett’s Purple Majesty.

I had to try them because a) they were a potato and b) because they were pretty and purple. Also, I have to say, because Albert Bartlett’s Rooster potatoes are my favourite all rounders. They are marvellous for mashing, baking and frying so I was assuming that if they had another kind of potato they would be worth trying.

I didn’t use them the night I bought them and I thought I would try one of the recipes on the bag when I had a bit more time.

The next day was a day from hell, it really was. Work was piling up, I was tired and what was worse, the Bear was away so I got back to an empty apartment. I really couldn’t be bothered to do anything at all and in a sulky, bad tempered fashion I looked at what was in the kitchen…. which was a bag of potatoes.

Now, I am normally very strict on how I treat potatoes – if they are to be turned into mash then they must be gently boiled  and then passed through a potato ricer to get mounds of fluffy potato that butter or cream can be mixed through. If they are going to be baked in their jackets then they must be scrubbed, pricked, rubbed with oil and salt and baked slowly in the oven so you get a beautifully almost dry potato when you break it open.

I’d never cook a potato in its skin in the microwave – that makes it wet  and solid. It doesn’t smell right. And it certainly doesn’t taste right. So I’d never do that. Never.

Except that night I was tired and evil tempered and quite frankly, my dear, I didn’t give a damn. Besides, it was only me… and I desperately needed something quickly, so I washed a couple of the purple beauties, jabbed them with a knife and set them away in the microwave. I’d eat them and get to bed and maybe the next day would be better.

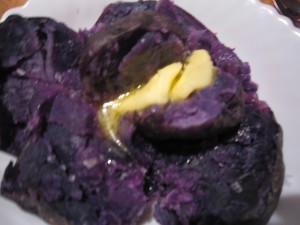
And then I got them out of the microwave and split them open. They weren’t wet.

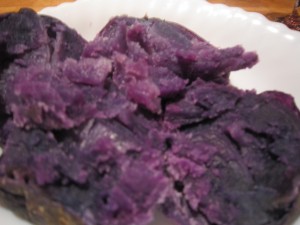
They were, in fact, almost dry (you know what I mean) like a proper baked potato. They certainly smelled nice…

They were purple… definitely purple… and they tasted delicious. They have a lovely rich flavour.

I stuck a great big lump of butter in them and started to eat. I was wrong about microwaving potatoes.  I was so wrong that I put another one in the microwave and ate that after I finished the first bowl.

I really don’t know how they do it, or how these potatoes are different  but this is the fastest way to have lovely jacket potatoes. So I did it the next night too….and the next. I finished the bag.

Next time you need a rapid baked potato fix, this could be the answer.

Then, when I had bought another bag and the Bear was home so I needed to do something more than just hand him a bowl of potato (no matter how delicious, he would want something to go with it) he asked if we could have chips.

Now I won’t have a deep fat fryer because it scares me a bit – the danger of fire and all that. It would also smell and living in an apartment means that the smell of frying gets everywhere. Thing is, there’s something quite delicious about chips…

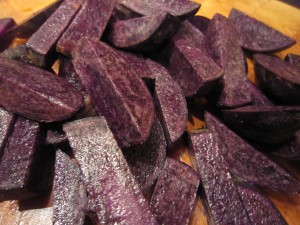
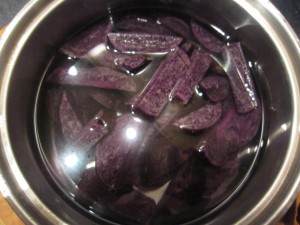
So what we do is cut them and then par-boil them for a few minutes till they are beginning to get tender.

(Look at the gorgeous colour of them.. I really do love that colour. Filled with antioxidants, apparently)

Drain them and shake them so the majority of the water is off them, although the heat will allow the moisture to evaporate.

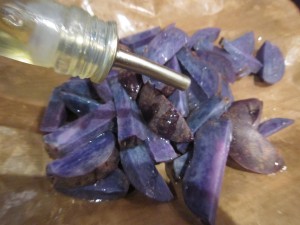
If you use a silcone sheet it makes cleaning up so much faster…. just lay the chips on a piece, which is itself spread over a baking sheet and sprinkle the chips with oil and then put them straight into a preheated oven say, 200°C or 390°F, to cook and to crisp up.

They need a stir or a shake to make sure that they are evenly cooked…

But when they are done?

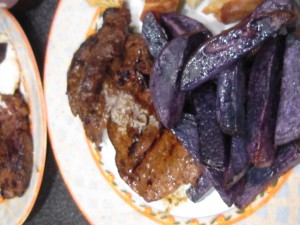
They were lovely! Again they had that fluffy and very definitely not water logged middle, the outside was crisped and they have a really potatoey taste. I know that sounds a bit silly, but, you know, some potatoes don’t taste of anything much. These had a depth of flavour that was almost rich.

The Bear, of course, looked at them oddly when I handed him his supper but he tried them… and ate them and asked if there were any more.

So, if you see a bag of purple potatoes, snap them up. Try them microwaved in their skins – you’ll be surprised. Try them as chips….you’ll love them. They are so tasty that we finished that bag by doing more chips and more microwaved potatoes…..I’m going to have to get another bag so I can go onto mash.

And then of course, another bag so I can start on the recipes….

Squash and goat’s cheese lasagne

Sometimes, when you plan things, they don’t turn out exactly as you envisaged.  Sometimes that’s a bad thing and sometimes it’s absolutely marvellous. Let me tell you about a marvellous thing.

We’d been planning to have J and R round for dinner because both of them got wonderful new jobs within a couple of days of each other and that deserved a celebration. Juggling the diaries so that everyone could make it took ages but eventually we settled on a Saturday night that would work for us all.

In the meantime, separate to all of this, the Bear had invited Anthony, founder and CEO of Kaggle, which is a platform for data prediction, to give a talk at the University and, as is the way of things, we got talking at work. You know how you know there are people you can get along with? Well, Anth was like that so, when we heard he was staying in Nottingham for the weekend to explore, we immediately invited him to come to dinner too. He’d fit in well round our table and we knew he would add to the general good humour and laughs that we were expecting.

As J is a vegetarian, I’d been thinking of things to make that would be suitable. I decided that a starter of mushroom pâté with  melba toast and caramelised red onions would start us off well but I also needed to find  something delicious for the main course. I wanted tasty yet relaxed… this was going to be a fun evening and we weren’t looking at being formal at all.

I’d spotted something that looked interesting (more than interesting, actually, positively delicious if truth be told)  on Rhi’s Foodie WorldSquash, Roasted Garlic and Goat’s Cheese Lasagne. Now lasagne is one of our favourite things and here was a recipe that would be perfect for a vegetarian main course. Rhi said it was so lovely that she would cook it again and again, which is pretty much of a guarantee of deliciousness because every food blogger is always trying to cook something different all the time.

It ticked several boxes for me – delicious, vegetarian and it was something that could be made in advance, which is always a bonus. In our apartment, the upper floor (which is our kitchen, living room and dining area)  is open plan and stretches the entire width of the building. That’s a great space for entertaining  but it also means the kitchen area is on view to any guests. There’s no hiding the pots and pans by shutting doors and I like to have everything cleared away and as much ready (or hiding, cooking in the oven) as possible.

I could have a leisurely morning, preparing everything, then clean the kitchen and set the table, then put the lasagne in before they arrive. That would be perfect. What was even more perfect was that I had everything I needed… two lovely butternut squash, garlic, a roll of goat’s cheese, a couple of tins of plum tomatoes, and a box of lasagne sheets. This was surely a sign that I had to make the lasagne.

Now when I read Rhi’s description she peeled, then cubed her squash – I was in the mood for rattling along in the kitchen so I cut mine into wedges

I laid them in a roasting tin that I’d lined with a silicone sheet (oh, how I hate scouring tins. This way means I can roast things and the vegetable sugars from the carbohydrates don’t burn onto the bottom. I can just wipe the sheet clean. I do love to make my life as easy as possible)

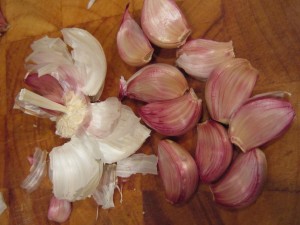
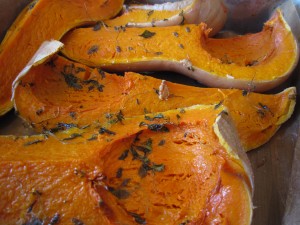
I drizzled some chilli oil over the wedges and scattered through about 6 or 7 fat cloves of garlic, still in their skins. If you do this to garlic, you can squeeze the soft white middle out later.

Rhi had used sage but all I had growing on my windowsill was some thyme, so I scattered that over the top, with some Maldon salt to season it all.

And into the oven it went at 180°C/350°F for three quarters of an hour or so while I got on with other stuff.

I needed the squash and the garlic to roast down softly and the squash sweeten and deepen in flavour as it softens.

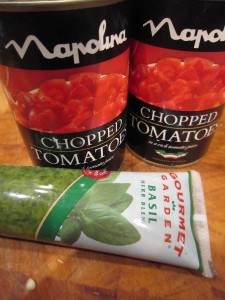
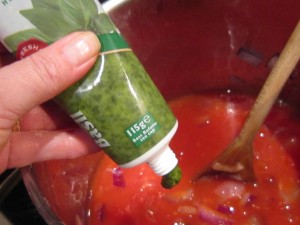
And the other stuff was making a rich and delicious tomato sauce to layer the lasagne with. I had some tubes of Gourmet Garden fresh chopped herbs (surely a life saver for us when our windowsill herb pots are dying off. A life savour, perhaps?)

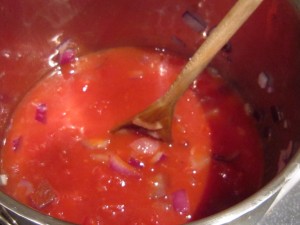
I gently cooked a red onion (well, I still had some left from when I made caramelised red onions) and then added the tomatoes to cook down.

A good squeeze of the basil would make a truly gorgeous tomato sauce.

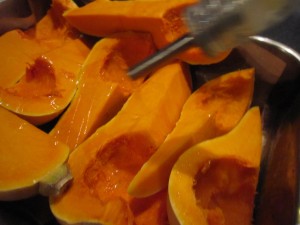
By now the squash had roasted to a delicious softness.

And just look how it had roasted. The colour of the squash had deepened and the smell was mouthwatering. The garlic was soft inside its papery skin and just ready to squeeze into the tomato sauce.

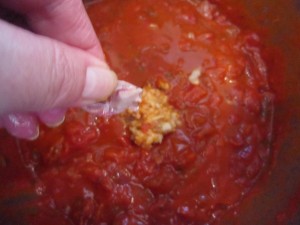
I squeezed all of the cloves into the sauce and stirred it round.

Roasting garlic takes away any harshness, leaving a sweet and aromatic garlic flavour.

(Now I know that picture makes the garlic look orangey  and incredibly bulbous but there’s a reason for that….and that is, if you ever try to squeeze an oiled and roasted clove of garlic, one handed, while trying to take a picture over a steaming pot of tomato sauce, your lens is likely to steam up, your fingers slip and the angle of the shot changes. That pile of garlic was well below the clove and had already got splashed by one of those molten lava-like bubbles. Take it from me, what emerged from the clove was soft and glisteningly white.)

Stir it all in anyway and let the roasted garlic infuse that sauce.

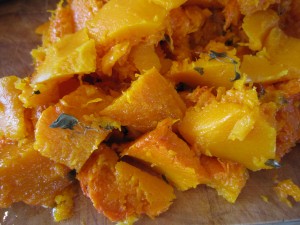
Now I had to scoop out that delicious squash….

It was so soft I could spoon it out from the skin.

I love that colour. So bright and cheerful. I’d paint the walls that colour if I could get away with it, but the Bear is more of a magnolia man.

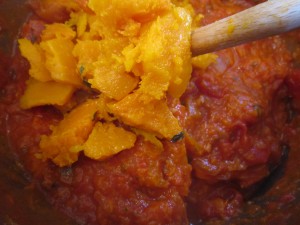
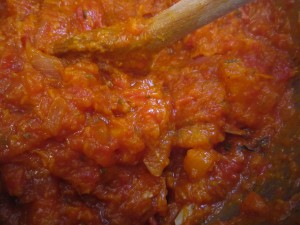
And then? Then just spoon it into the tomato sauce and stir it round.

It thickens it and gives it a lovely texture. In a strange way, the squash seems to lighten it.

The next thing to do is to make the bechamel.

The proportions for a good bechamel are, first of all, equal amounts of fat and flour must be cooked together as a roux. I do it by tablespoons, rather than weight because that’s quicker.

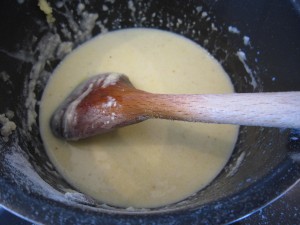
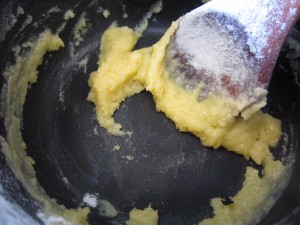
A couple of tablespoons of each, stirred together, over a gentle heat until it becomes a beautiful golden paste as the flour cooks.

Then, a pint of milk and cream – I got my jug and put in half a pint of cream and topped it up with milk, stirring it round to mix it. It might look lumpy at first but it soon smooths out to make a silky sauce.

(I didn’t say I was doing a diet version, did I? This is a celebratory meal for friends, so I’m making the sauce taste even more rich and delicious) Once it has thickened to a rich and savoury white sauce, you can start to think about putting everything together.

And now the best bit – layering the lasagne.

Start by putting down a layer of lasagne sheets to cover the bottom of a large dish. There’s no need to soak them, generally, the moisture from the sauce will soften them as everything bakes.

Then put your first layer of the rich and soft tomato, squash and garlic sauce.

Bechamel next, poured gently over the tomatoey layer.

Then more lasagne sheets (and look how I have snapped them to fit!) and more tomato sauce spread over that.

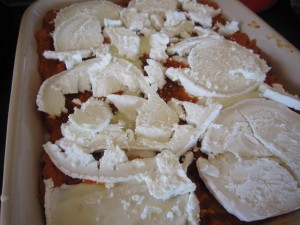
I had a beautifully fresh and crumbly goat’s cheese log… about 100g or so. It needed to be sliced into deliciously, almost sticky, rounds.

And a thick layer was spread over the tomato sauce.

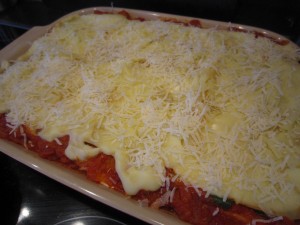
And so it went on with another layer of lasagne, more sauce and the last of the bechamel, finishing with a lovely grating of Grana Padano cheese to add a spikier, cheesier topping. I could have used parmesan, but the Grana Padano was at hand.  Doesn’t that look lovely? You just know that this is going to turn out beautifully.

And once I was at that stage, I could set the kitchen to rights and leave the lasagne, ready for cooking later.

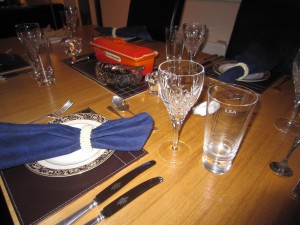
All that remained was to set the table and put the lasagne in when the guests arrived.

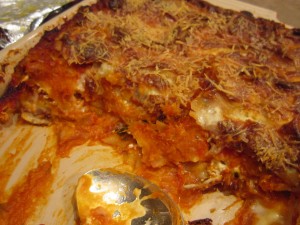
Half an hour or so, maybe forty minutes, at 190°C/ 375°F produced the most glorious lasagne… beautifully layered, fragrant and savoury. Don’t worry if you need it to be delayed – just cover it so it doesn’t burn and turn the heat down. This is a very forgiving dish.

And served with green salad and plenty of red wine, it really was lovely.

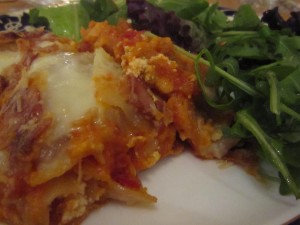
The squash really lightened the lasagne in a strange way and there was certainly no feeling of lacking anything by not using meat. It was savoury and delicious. As for the guests? We all laughed as we ate and drank. Everyone cleared their plates… it was a success.

Remember how I said that somethings don’t turn out as you planned? That happened this  night. I certainly didn’t plan that we’d be singing at the table, between mouthfuls.

A is Australian and somehow the conversation veered round to Rolf Harris (the world’s greatest living Australian) …. who, Anth said, he wasn’t really aware of.

Not aware of Rolf? He’s a hero to us all and has been part of all of our growing up and adult years, so we all chipped in with great enthusiasm to tell him about the painting, the pets and the singing. And then, as these things happen, nothing else would do until we had propped up a laptop, brought up Youtube .

Poor A. He sat there in stunned amazement as we all sang, word perfect and in tune to “Two Little Boys” I defy anyone not to have a tear in their eye when Rolf sings that. Although maybe that could have been the wine we drank……..

So, thank you, Rhi. A fantastic recipe that was exceptionally delicious and helped turn an evening into a fantastic occasion.

Singing, eh? Who would have thought a lasagne would have made you sing? But it does… Australian guests or not, this was so lovely you will want to burst into song.

A cheeky little number….. Beef Cheeks.

Whenever I go home to the North I always call in at my favourite butcher’s, George Bolam at Sedgefield. It’s from here that I have got the more unusual cuts, like plate of beef or lamb henry, where I get the best belly pork, either in strips or rolled, to make the perfect joint with crackling. I get my favourite beef skirt from there, too – the tastiest and tenderest (if cooked quickly) steak imaginable. He makes his own haggis and black pudding and has the widest variety of sausages imaginable.  He has a bakery there too, a deli, a fish counter and an amazing selection of fresh fruit and vegetables.

Everything I get from George’s is absolutely fresh, generally local and incredibly good value and that is, I suppose, why all of us should support our local butchers rather than just buy meat from supermarkets.

On my last trip home, I called in to stock up on meat to bring back to the city and saw, for the first time on his shelves, cheeks of beef.

These are, as you would imagine, the cheeks of the cows. The price was incredible – 717g of meat for £3.14? I had to buy it and try it.

So, that was frozen and put into the freezer until I had time to think of what to do with it and the time to cook it.

And then I got ill. I could barely move and any cooking that needed me to be alert and available to do things was out of the question. To be fair, I didn’t want to eat either so for days I lived on hot drinks and an occasional slice of toast.

Then one day I realised I had to have more than that – the Bear needed feeding, for one thing. And then I remembered the beef cheeks in the freezer.

Now, a cheek of a cow would get a lot of exercise, I would have thought. All that chewing of the cud must give those cheek muscles a good work out. Cows seem to chew none stop. So a well muscled piece of meat would need long and slow cooking. And the best thing about long and slow cooking is that it requires minimal preparation, even less attention and the opportunity for a nap while it cooks.

The end result is always something succulent and tasty, perfect for anybody…. even an invalid.

That settled it. I summoned up the strength to go to the kitchen and took out the cheeks to defrost. I would cook them the next day.

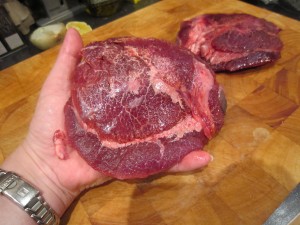
The next morning, I unwrapped them and looked at them properly. They were much larger than I thought they were going to be.

What a size they were….I have normal human sized hands, you know, it’s not as if I am a miniature person. Each cheek was bigger than my outstretched hand.

That was going to feed four, at least.

As with so many delicious things, the simplest way is often the best way and with slow cooked food that seems to be particularly true.

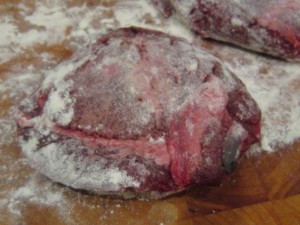
I dusted them with flour…..

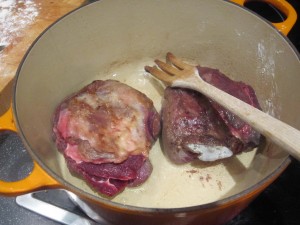
… and then browned them quickly in a splash of oil, in the bottom of a hot casserole.

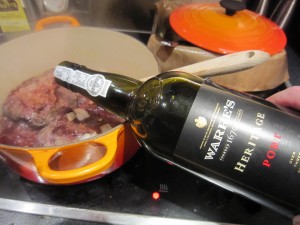
I poured in some stock, made from granules and hot water and then thought I could perhaps boost the flavour even more……As we seemed to be stockpiling port, I decided to add a good amount of it to make the gravy even more delicious. I don’t know when we were going to get around to drink it all, so it seems a good choice to use it in cooking now and again.

Don’t worry if you haven’t got port, or don’t want to use it. Use all stock instead, or maybe add in some wine, or sherry… it’s your choice. You do need to add something to make the gravy with, so add enough liquid of whatever you fancy to just cover the meat.

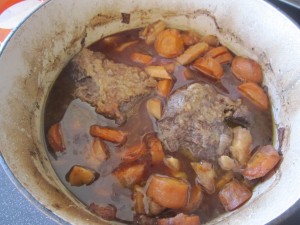
I chopped in some carrots and parsnips and put the covered casserole into the oven at 160° C/320 °F for three hours.

The smell was amazing.

As the oven was on anyway, I scrubbed some potatoes, jabbed them with a knife so they wouldn’t burst, rubbed them with oil to make the skin crispy and put them in the oven to bake alongside the cheeks, then I went back to bed.

When I next roused myself, I went upstairs to a beautifully warm kitchen, filled with wonderfully rich and aromatic smells and opened the oven.

The potatoes were perfect and the beef cheeks looked good. More than good, actually.

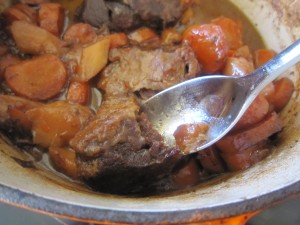
I got a spoon to stir the vegetables and gravy round and moved a cheek… the spoon went through it.

Remember how big those cheeks were? Well they were still in one piece, it’s not as if it was all in bits and easy to scoop up. People say, when they are talking about tender meat, that you can cut it with a spoon but this was the first time ever that I really could do that.

The spoon sank through the silky soft meat and there, on the bowl of the spoon, was the most delicious looking piece of meat.

And the taste? It was beyond delicious. It was rich and soft, succulent and tasty.

Probably the best beef stew I had ever eaten. In fact, calling it a beef stew seems to be a bit of an insult.

The vegetables had kept their shape in the long, low and slow cooking and were perfectly tender. The funny thing is, I’m not that fond of cooked carrots, especially cooked carrots in what is, to all intents and purposes, a simple stew but these were gorgeous. They still tasted carroty but they also had a deep rich layer of taste from the gravy.  I loved them.

But it was the meat that was the star of the show and now, thinking back as I write this, I long for beef cheeks again. So much so that I’ve just ‘phoned my mother and asked her to go and get me some more and freeze them ready for me to collect on my next trip.

Those two cheeks made enough to feed four or five healthy appetites….and for those weakened by the dreadful colds and flu, well that boosted my appetite and for the first time in days I enjoyed my food.

Simple, so very simple and it cost so little.

If you see beef cheeks, buy them immediately. If you don’t see them, start picketing the butcher to get some for you. You won’t regret it… although you may regret the fact you spend days yearning for beef cheeks when there are none available.

Lovely lamb shanks, tagine style and the Bear’s shopping expedition

I’m a lucky old thing, I know, and meeting the Bear was the best thing that has happened in my entire happy and lucky life. He’s funny and sweet, very clever and tolerant and (and this is a good bit indeed) very helpful about the house.

I had a lot to do and, while I normally do the shopping because I like to choose what I’m going to cook with, I was running out of time to get everything done. The Bear had some spare time and offered to help….

What could go wrong? I had all the meat and vegetables (so there was no problem with choosing the best examples) and all I needed were things for the house and a few food or drink items for the cupboards. It wouldn’t matter whether I picked them up or he did, they’d be the same….

So armed with a specific (very specific) shopping list the Bear set off and I got on with other stuff. We met later in the kitchen and I started to unpack the bags… cleaning stuff? Check. Dishwasher salt and rinse aid? Check. Kitchen rolls? Check. Butter, milk, cheese? Check. Tea and coffee? Check. Wine? Check, check and more check. (We were having friends round) Cordials? No check.

I had wanted a specific kind of cordial – Grape and Melon. They didn’t have any apparently (and there’s no point Googling or asking about other stockists because they have stopped making it now. Shame on you, Robinson’s!) and the Bear had remembered not to deviate from the list and get another flavour. All well and good. We did have other cordials anyway so it didn’t really matter.

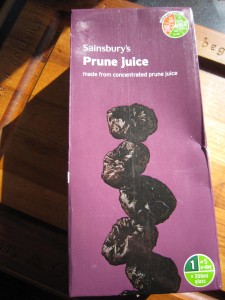
I carried on emptying the bags…. and found, in the bottom of one of them, three cartons of prune juice!

Prune juice? Whatever had possessed him to buy prune juice? I don’t like prune juice and I don’t need prune juice. I certainly didn’t need three litres of it.

He started to explain. Quite frankly the reasoning behind it was flawed. They didn’t have the clear and delicate tasting cordial I wanted so when he saw “Buy 3 for the price of 2”  next to the prune juice he thought he would use his initiative and grab us a bargain….

The prune juice went into the larder and there it stayed as a reminder that sometimes initiative is a terrible thing.

I can’t bear waste though and eventually, months later, decided I would have to do something with it. I’d gone into the larder to get a new box of salt out and spotted the prune juice still loitering on the shelf. I was going to be cooking lamb shanks that day and it struck me that if I were to do lamb shanks in, say, a Moroccan tagine style then I might have used prunes in there. What if, I thought, I was to cook the shanks IN the prune juice, instead of adding them as whole fruit, replacing just a simple stock and so making a rich and tasty gravy?

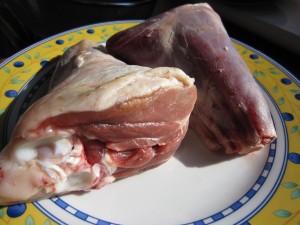
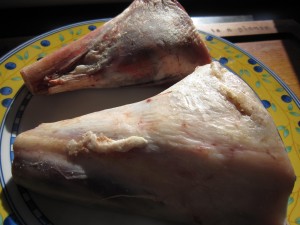
I had two lamb shanks that I was going to cook slowly while we were off doing other things.  I would have used the slow cooker but the two of them were too big for the pot and I decided that I’d just use a casserole instead. As long as you make sure you have enough liquid in there and keep the temperature low then it is safe to leave for a while.

It’s also lovely to come back to a home that smells of deliciously cooking food……

I love lamb shanks for many reasons. Firstly because they don’t cost much at all and secondly,if you leave them to cook slowly and gently they will turn into the most deliciously melting pieces of meat, far tastier and more tender than most expensive cuts and thirdly because I don’t have to do much at all to make it a perfect warming and mouthwatering meal.

Five minutes preparation and then you can walk off and leave them to glug quietly away for as long as you like. A perfect way to cook something while you are out at work or off out shopping at the weekend.

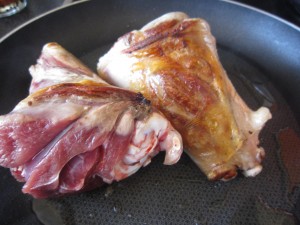
First of all, brown the outsides of the shanks. All it takes is a few minutes in a frying pan with a drop of oil to crisp and brown the skin. Yes, they are going to be cooked for hours and will cook all the way through but if you brown the outside you get a better depth of flavour and they also LOOK better. It’s all very well being delicious… it’s nice to appeal to the eye as well, though.

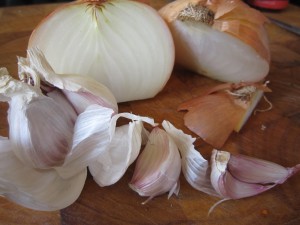
While the lamb is browning, quickly chop some onion and garlic.

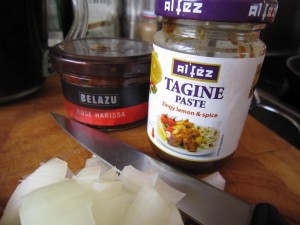
I had the remnants of some tagine paste that I could use to bring in a hint of Moroccan flavouring and some lovely Rose Harissa that would liven things up a bit. I wasn’t making an authentic tagine but I wanted a definite nod in the direction of Morocco. You can get tagine flavourings in most supermarkets now so choose whtever you fancy.

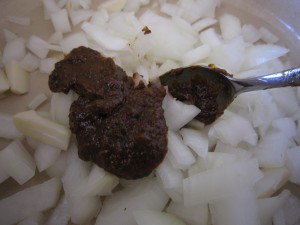
I put a spoonful of each into my casserole dish and stirred it through the chopped onion and garlic.

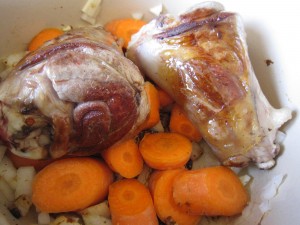
Carrots were roughly scraped clean and sliced and the browned lamb shanks were put in the pot on top of the vegetables.

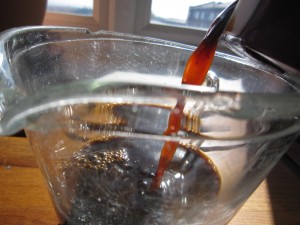
I poured a pint of prune juice into a jug – just look at the colour of it! Now while this could never replace a light and fresh tasting cordial as a drink I could see this was going to make a deliciously thick and tasty gravy. With the harissa and tagine paste to spice it it, I had high hopes of this turning out to be a success.

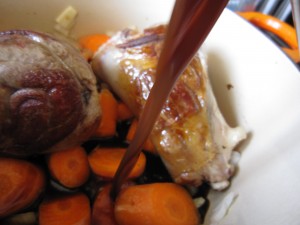
Mixed with some stock granules to add a salty, savoury taste, it was poured over the meat and vegetables.

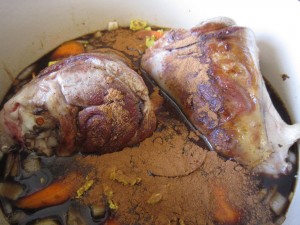
And then, because I love it and I knew it would be good, a couple of teaspoons of cinnamon powder were put in.

And that was it. The lid was put on and the casserole was put into a slow oven (165 degrees C/350 degrees F) and I went off to do what I needed to do. If I’d used the slow cooker I would have set it on Auto – which means it gets a high start then it turns down to a very low heat. The cast iron casserole would do just as well on a steady low temperature for hours.

After about three or four hours I came back and looked at the shanks…. they smelled delicious anyway.

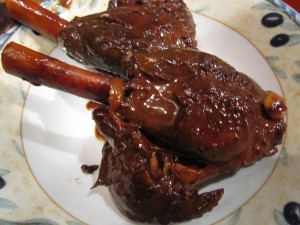
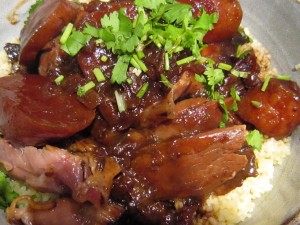
Rich and dark from the prune juice, steaming and the meat was falling from the bone.

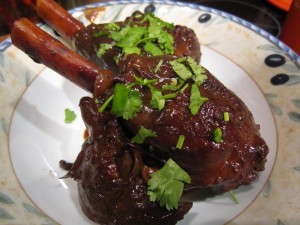
Chopped coriander would give just the right fresh herby taste

Couscous takes maybe three minutes to make – simply measure it out (the packet will tell you the proportions) and add boiling water so the grains fluff up.

You can add herbs and spices to flavour it if you are having plainer food but the gravy from the lamb would be flavourful enough, I thought.

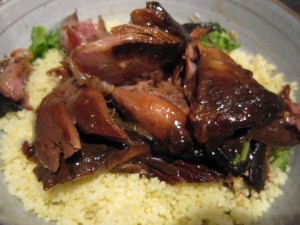
The meat just fell apart…. the prune juice gravy was rich, savoury and spicy with a mellow sweetness. It all soaked into the couscous making each mouthful delicious. Who would have thought mis-judged initiative could produce such a lovely result? Inexpensive cuts of meat, unwanted cartons of juice and a few hours in an oven produced a meal that I would have been proud to serve to guests.

We enjoyed every mouthful.

So, while I can’t advocate the drinking of prune juice…. I can suggest you cook with it. You might just be as pleased as we were with it.

Slow roast shoulder of pork with perfect crackling

The weather is getting worse and, while it is lovely to live in an apartment where three of the walls are windows, it does get gloomy when you are surrounded by rain spattered glass and grey clouds. When that happens, the only thing to do is put the lights on and make everything look cosy and then curl up, knowing that something meaty and tasty is in the oven….. just relaxing while the smell of roasting meat fills the room. It’s a smell that has always reassured me that things are happy and well in the family.

 A smell that was a constant in my childhood and it means home and happiness with loved ones. My wonderful brother and I are very similar in many ways. One of our favourite things is the crispy, fatty bits on a roast joint… all juicy and packed with flavour.

Not everyone likes this of course….The Bear has many good points and I am always glad I married him, but one of his finest points is that he doesn’t like crackling or the fat on a roast. That, of course, is good for me as it means that I don’t have to share. My brother used the same criteria when he got married – my sister in law is absolutely fabulous and we all love her dearly (he made a brilliant choice, marrying her) but again, she hates that sort of thing. Perfect. There’s nothing finer in our eyes that a gorgeous piece of crackling and the two of us have been known to stand in the kitchen at home dividing up the crisp and tasty skin….

Anyway, while I was shopping I’d spotted this marvellous piece of pork. Outdoor reared and free range meant that it was guaranteed to be tasty. The rain was bouncing off the pavements outside and I just knew that roast pork would be the perfect  antidote to the gloomy rain blues.

Pork shoulder is a great cut because it isn’t expensive but, as with most things, treated with care and respect you can produce the most delicious meals. Time is what shoulder needs, time and heat and salt. That’s all.

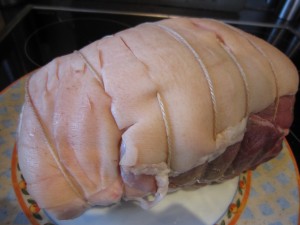
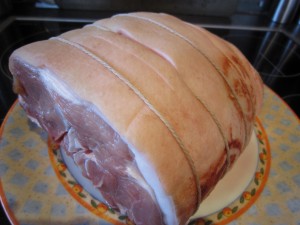
This was a lovely piece of pork shoulder with a good layer of skin around it, which is just what you need to get perfect crackling.

Pork shoulder needs slow cooking and it will turn into the softest, tenderest piece of meat ever. The rind will crisp up (if you slice at it) into delicious strips of hard, crunchy and tasty crackling.

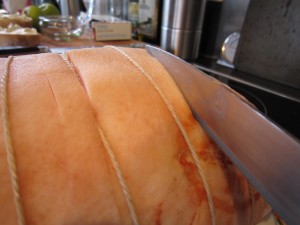
But the rind is tough and to get through it you need a very sharp knife. Butchers will slice the rind for you and, in fact, most joints come with the skin cut already but I like to get a lot of narrowly spaced slashes so I start by sharpening my favourite filleting knife.

I’ve never yet managed to use a sharpening steel so I use the Chantry knife sharpener which is one of my better kitchen equipment buys. All you have to do is run the knife through the middle a few times and the blade is perfectly sharp, which is something I have never achieved using a steel.

While you are doing all of this, get the oven preheated to 230 degrees C/450 degrees F

There were some slashes in the rind already but I sliced between them, so each strip of rind was about 1 cm wide, if that. Be careful, if you are slashing not to slice into the meat itself – just cut the rind and the fat below.

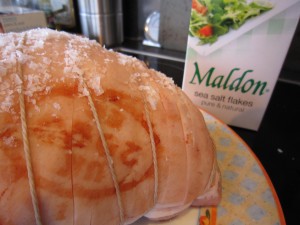
The next thing is to get some kitchen roll and dry off the rind before rubbing it over with a smear of oil and then some salt.

What you have done is wiped off the water and added some oil to help start the crisping process and salt to drive out extra moisture and add flavour.

I like to use Maldon sea salt as the crystals are large and easy to pack into the slices of rind. Maldon has a great taste as well. When the pork comes out of the oven the rind will have crisped and almost bubbled up with flecks of salt crystals embedded into it to make the crackling taste divine.

By now the oven will be bouncingly hot so get the pork into a roasting tray and put it into the oven for twenty to thirty minutes.

This is a very hot oven and what it does is sear the rind and start making the crackling. If the oven isn’t hot then the rind won’t ever get crispy.

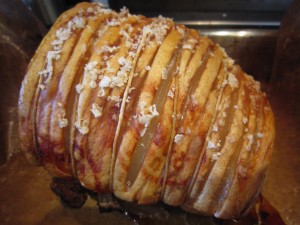
After the first burst of heat you will see, when you peek inside, that the slices are separating and the rind is starting to cook. You just know, when it looks like this after half an hour that it will have the perfect crackling when it is finished!

You can turn the oven down now to a moderate 170 degrees C/340 degrees F and just leave the joint to cook slowly for a two and a half hours……

There now.

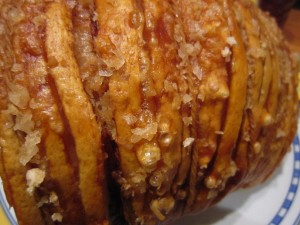
Golden, bubbled and crisp. Studded with salt crystals promising that every mouthful will be deliciosuly savoury.

When you get it out of the oven if you rap on the top of the crackling it makes a hollow sound.

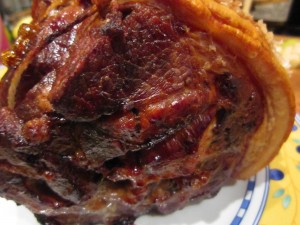
The meat is dark and caramelised from the fat dripping over it as it roasts.

The fat layer has almost disappeared in the long slow cook, making the meat juicy and the crackling crisp.

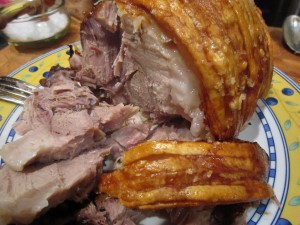
The crackling strips snap easily into bite sized bits…. perfect for nibbling at while you slice the pork……

A wet grey afternoon can be ignored because you are inside, in the warmth with a marvellous meal, just ready to share with your loved ones.

That is Heaven… that is my guilty pleasure and that is one more reason to appreciate the Bear not liking everything I adore!

Meatfree Monday – Puy Lentil and Pumpkin Soup

At this time of year, the shops start to fill with pumpkins. Halloween is not far off and millions of pumpkins will be bought to make into Jack O’Lanterns.

You can’t just buy a pumpkin and carve it… you have to DO something with it. Last year I made Pumpkin Soup, flavoured with smoked sweet paprika and drizzled with Chilli Oil

I separated the seeds from the fibrous middle and roasted them with jerk seasoning to make a tasty roasted pumpkin seed snack

This time, though, I wanted to make a soup that would be a meal in itself.

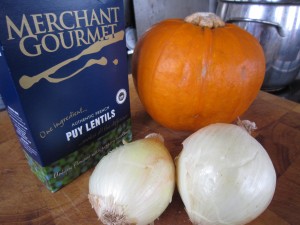
I had a small pumpkin that would be ideal for soup. I also had a craving for something with a bit of spice because I had a cold that was dragging on. I needed a burst of heat in that soup to burn through the fogginess that an autumn cold makes you feel.

I remembered a soup I had seen in the Australian Gourmet Traveller for Green Lentil Soup with Pumpkin and Harissa that would be perfect. My little sister lives in Australia and sends me (if I’m not there to buy a copy) the Gourmet Traveller Annual Cookbook as my Christmas present… the fact it costs way more in postage to send than it costs to buy is neither here nor there – it truly is the magazine I most look forward to getting.

It looked a fabulous recipe. I knew that adding my favourite Puy lentils would add heft to the soup and jazzing it up with Moroccan spices would enliven the whole bowlful.

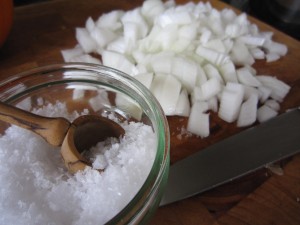
I chopped two sweet white onions, then put them in a pan to soften with a teaspoon of Maldon Sea Salt.

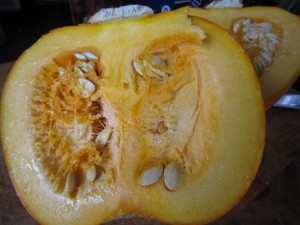
While they were cooking I halved the small pumpkin I had and scooped out the seeds.

Don’t throw the seeds away, because you can roast them later for a lovely, healthy snack.

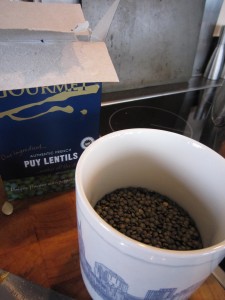
I roughly measured half a mug of Puy lentils – now, this is one of my Starbucks City Mugs that roughly hold 20 fl.oz, so the equivalent measurement will be 10 fl oz if you use a Pyrex jug… or, about a full normal coffee mug size. Me? I like coffee so I have a very big mug!

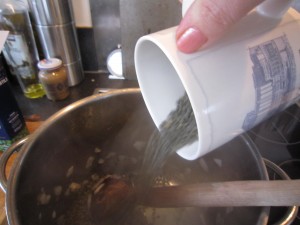
Once the onion has softened and looks translucent, add the lentils and then pour in a mug and a half of water (that’s roughly a pint and a half) and let the onion and lentil mix slowly cook.

Add in a vegetable stock cube for flavour.

While that is gently cooking, start preparing the pumpkin.

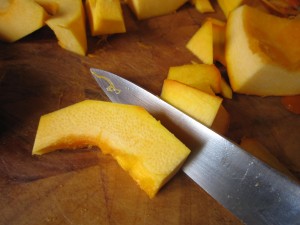
The rind of the pumpkin in very hard and I have found that the best way to peel it is to cut the pumpkin into segments and then slice off the rind.

By the time you have it all segmented, the lentils will have started to soften and the colour will have leached out into the water and stock.

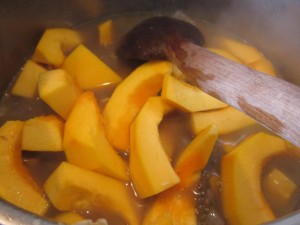
Now add in the segmented pumpkin

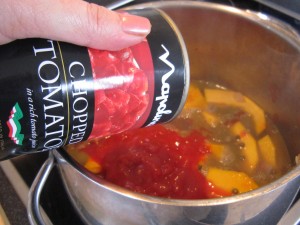
And then add a tin of chopped plum tomatoes.

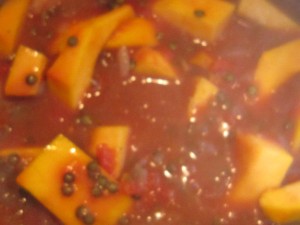
Stir it all round and let it simmer gently.

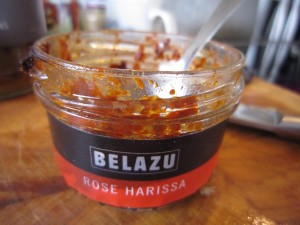
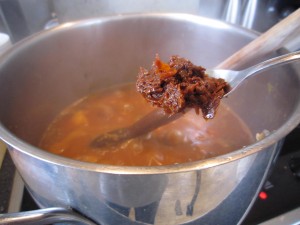
I wanted a bit of heat in the soup and a Moroccan feel so Rose Harissa paste was the obvious choice. You can buy Harissa paste in most supermarkets now – this one has rose petals in it and a deep and complex flavour. It is essentially a chilli paste so add it according to your preference. A teaspoon full will not make it too hot – if you want more heat (and I do) add another.

Stir it in so it blends with the lentils, pumpkin and tomatoes.

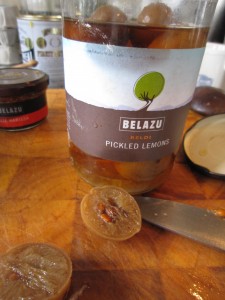
I also have some Belazu Pickled Lemons which will add a marvellously sharp-sour element to the rich and earthy soup.

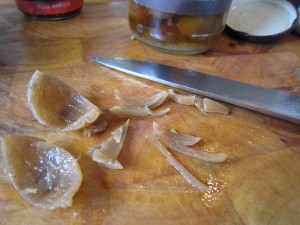
A quick scoop out of the middle of the lemon and the rind is ready for slicing then adding to the soup. I used two small lemons.

And then stir it all round… the pumpkin should have softened, the lentils will be tender and the flavours will have come together to make a deep, rich, spicy soup with sharp overtones

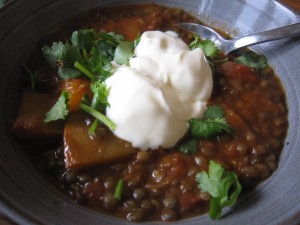
Serve it in a bowl with a spoonful of natural thick yoghurt and a sprinkling of coriander.

And there it was. Steaming perfection in a bowl.

Meatfree and delicious.