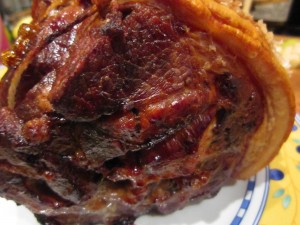
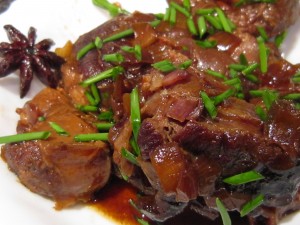
Rendang terlagi-lagi – the best beef rendang recipe

If there’s only one thing you cook from reading my Malaysian adventures then it has to be beef rendang. Unless, of course, you are a vegetarian or a vegan….because, quite frankly, beef just won’t work for you. Or unless you can’t eat coconut because that, too, would mean the beef rendang just isn’t going to be your thing. But let’s not bother with ‘unless’…let’s focus instead on the most delicious Malaysian recipe ever.

Rendang is an iconic Malaysian recipe – a mouth-filling melange of spices, coconut and slow cooked meat making an aromatic dish that has you longing to eat it again and again. The first friends I made in Malaysia, Roger and King, took me to lunch at Madam Kwan’s where we had her delicious rendang. Her version has the beef slow cooked and shredded and it is rich and delicious so little goes a long way with plain rice. King swore that this was the best rendang in Kuala Lumpur and who was I to argue?

I spent a long time looking for a recipe that would give me the right taste – every cook will have their own version. Eventually I came across (in a small, inexpensive Malaysian cookbook by Betty Saw, from Marshall Cavendish, that cost 9.90 ringgit, that’s just under £2) Rendang terlagi-lagi. ‘Lagi’ in Malay means ‘more’ and I was assured that having eaten this dish people would ask for more….and more. That had to be worth trying.

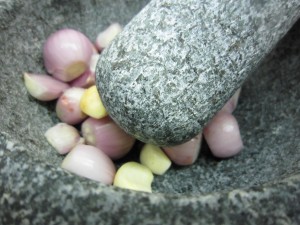
Now, before we go any further, it’s perhaps worth pointing out that authentic Malaysian cooking doesn’t rely on the kitchen gadgets that make our lives so easy. Most recipes involve spice mixes that are ground…and when they say ground they mean that they been pounded into a juicy rubble with a pestle and mortar.

What also might be worth pointing out is that while pounding produces an authentic roughness to the mix (some bits are pounded more finely than others) the pounding itself is hard physical labour. I have done this in an authentic a fashion as possible but in the interests of getting you to try this, I think it will be perfectly acceptable to use a blender to get the spice mix made. Don’t keep pulverising everything to a smooth paste, though, try and keep a certain roughness to it.

Also, if you are trying this and don’t have access to the same fresh ingredients that I can get here in Kuala Lumpur, don’t worry. Do your best. Supermarkets sell jars of ready prepared ginger, lemon grass and garlic. Use them if you can get them…it will be a lot easier than pounding.

The important thing is that you try to make this. If you like it enough you can always attempt pounding on the next go. Or maybe if you like it enough you can carry on using the prepared spices because that will mean you can make it quickly and easily. Just make it, right?

What you’ll need to make this is first of all 600g (1lb 5 oz) of beef.
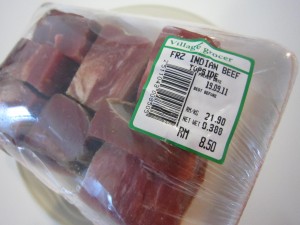
The first time I made it was with deep frozen Indian buffalo which is all I could find in the supermarket and the resulting rendang was delicious but tough. Eventually, I found some nice beef cubes that made a deliciously tender rendang. Rendang is not cooked for a long time so try and avoid those cuts that will need hours of slow cooking.

You’ll need some dried chillies (maybe 8 or 10, say) and some thick dark soy sauce (this has a roasted almost caramel taste)
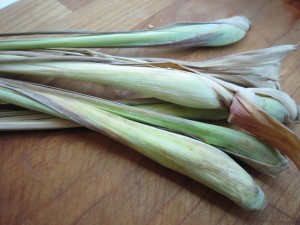
4 stalks of lemon grass (I think that 4 teaspoons of the prepared lemongrass in a jar would be the equivalent); a can of coconut cream ; some tamarind paste; and some kerisik (essentially grated coconut, roasted in a pan until golden brown and then ground finely. I think you could use desiccated coconut instead. It is important you make this, though there’s no real work involved, because it adds a gloriously rich, deep and sludgy level to the sauce surrounding the meat )

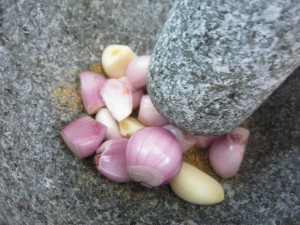
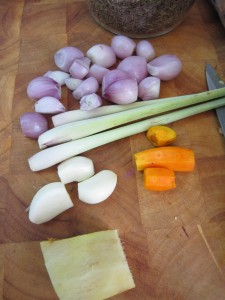
The next set of ingredients are classed as the ones that are to be ground – 300g/11 oz shallots, 4 garlic cloves and a 1 inch knob of ginger, peeled.

So, once you have everything assembled, you’re ready for the off. This is really a simple recipe and now I have done this a few times I can prepare it quickly. I make the ground spice mix first and put it in the fridge so I can split the work. If you were using  prepared spices you’ll be able to do this really quickly.

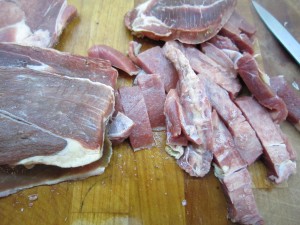
First, cut the beef into strips, maybe a quarter of an inch thick and one and a half inches long.

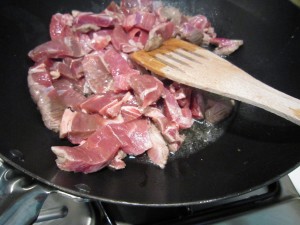
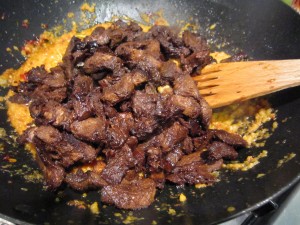
Fry the beef over a moderate heat in 125 ml/4 fl oz/ half a cup of oil, for 15 minutes.

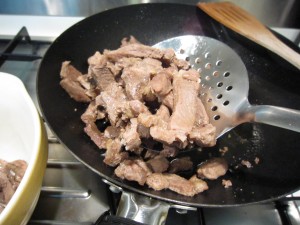
Take the beef out, leaving the oil in the pan as you’ll need this later.

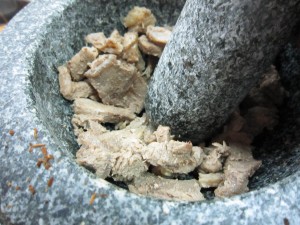
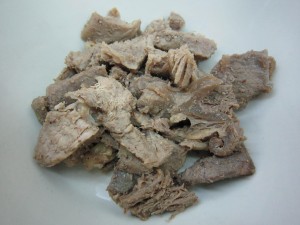
The beef needs to be pounded lightly while it is still hot – I use the pestle that I used in grinding the spices. Use a steak hammer if you have one….what you are aiming for is a flattening of the pieces of beef, breaking down the meat fibres so they can absorb the flavours better and the beef becomes more tender.

This really is just a light pummelling so don’t go mad and destroy the beef pieces.

Then pour a tablespoon of thick, dark soy over the meat, stirring it round so the pieces get covered, then pop the meat into the fridge for at least an hour. I’ve done this the night before when I have been cooking this for guests and it works out pretty well.

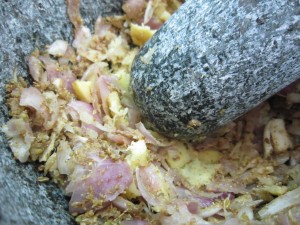
Then, start on preparing the ground ingredients. Either do it with a pestle and mortar or use a blender or use prepared spices. The garlic and shallots and ginger get crushed to a gritty paste. If you use a blender don’t go as far as a smooth mush… part of the joy of this is in the texture of the sauce.

Dried chillies need soaking separately until they are soft and then need pounding or blitzing. It’s easier if you chop them first before pounding them and make sure you keep  your hand over the top of the mortar to keep chilli splashes away from your eyes. I speak from experience.

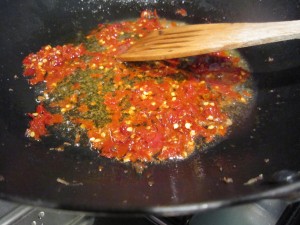
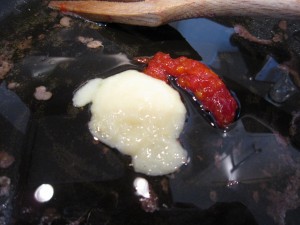
Fry the ground chillies for two to three minutes in the oil left over from the beef

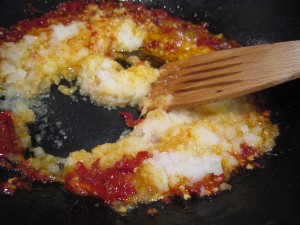
Then add the ground ingredients (shallots, garlic and ginger and the lemongrass).If you decide to pound the lemongrass first, it’s easier if you chop it into little pieces. Otherwise use the prepared lemongrass in a jar. Fry the mix until it is fragrant and the oil starts to separate out. This will take maybe 8 to 10 minutes over a gentle heat.

Once this is done, add the beef and stir it round well.

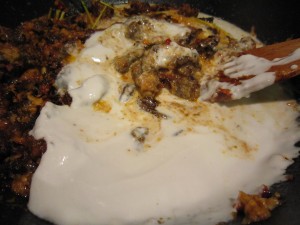
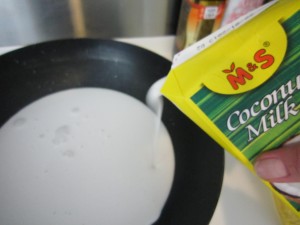
Add the coconut cream.

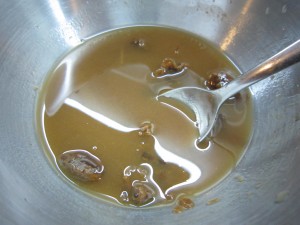
One tablespoon of tamarind paste needs adding to 5 tablespoons of water and stirring round and then strained off, leaving the pulp and stone residue behind. Add that liquid to the beef and stir in. You will probably be able to buy tamarind paste without the seeds in… here, I can’t  get that and I have to sieve out the seeds. You do need the tamarind though because it adds a sharp hint that brightens the deep and satisfying richness of the meat.

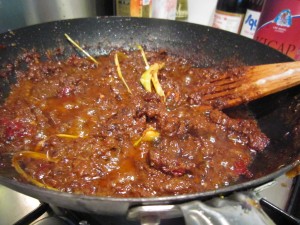
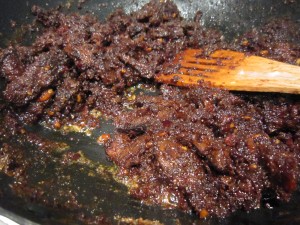
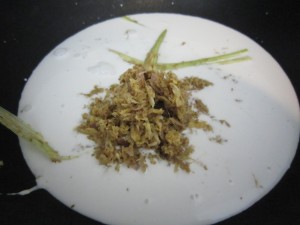
Bring everything to the boil and then reduce the heat and simmer gently until the colour has darkened and it is almost dry. In that picture I had just crushed the lenongrass and I had to pick it out later. It’s better when you either use the ready crushed into a paste version or chop it into small pices and then pound the living daylights out of it.

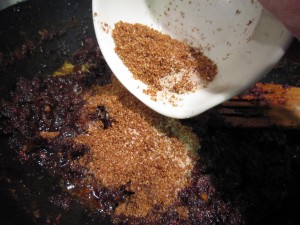
Next you need the kerisik. This is toasted and ground coconut.

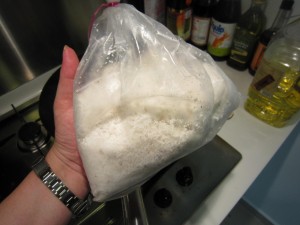
I can buy bags of freshly grated coconut  but you could manage with some dessicated coconut, I reckon. My Malay friends think it will be OK, so I’d go along with that.

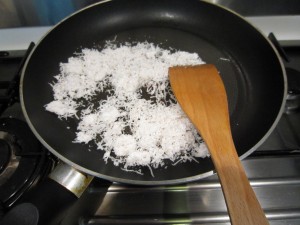
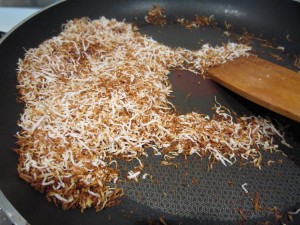
I dry fry a cup full until it browns

Be careful because it can suddenly go from white to burnt, so do stand and stir and keep checking  while you are roasting and toasting the coconut.

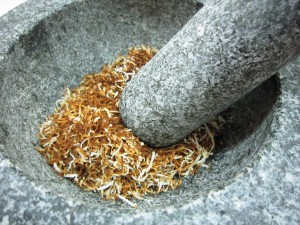
and then I grind it to a fine powder. The first time I did it I used the pestle and mortar….after that I used the Bamix and the spice grinding attachment. Far quicker.

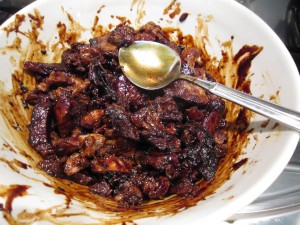
Anyway….add in the kerisik, a teaspoon or so of sugar and some salt to taste. Stir it all in and keep stirring until it begins to look like this….

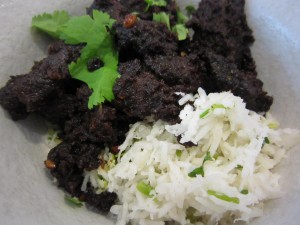
And that’s it. Taste it. Realise you have made the most delicious rendang…..

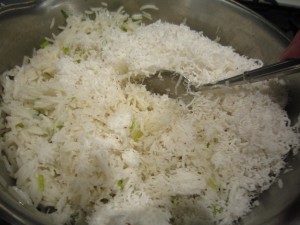
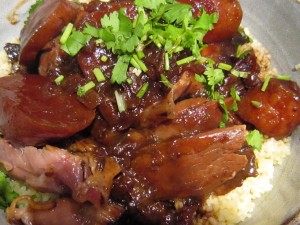
I serve it over plain boiled rice that I have added some of the fresh grated coconut to and some chopped coriander.

And then all I do is hope that there will be some left over to either eat the next day or freeze. It is a rich and deliciously tasting meat with layers of flavour becoming apparent as you eat it.

I think this has become one of our favourite Malaysian dishes and when we get back to the UK I will use (because I’ll have to) the shortcuts I’ve told you about. I’ll do anything, really to keep on eating this. It is rich and delicious, spicy but not mouth burningly so and the simple mix of spices blend together to make a complex, mouth-filling in its intensity, taste. It is deeply satisfying.

Try it… try it then tell me what you think of it. I’ve done my best to make it easy for you… now you do your best to make it!

At last, cooking and internet… chicken Malaysian style – Ayam Golek

Finally, we have a half decent internet connection. It’s still slow to load pages but we can cope now, after Unifi finally arrived to install our internet connection. For the last six weeks or so we have been trying to manage on a mobile router device, or going to sit down at the poolside, where there’s a free wifi zone.

That’s fine, you know, in fact, that is gorgeous, but as a place to try and work? Well, it was too hot in the daytime. We used to go down at night and try and catch up with things. Thing is… it took forever to upload any pictures. The other thing is that the mosquitoes caught up with me. The Bear, of course, wasn’t troubled at all but I ended up with huge, horrible bites. I suppose it says something about the tastiness of my blood….

In the end we went and bought the mobile router so we could at least sit in the apartment and use the internet.

Of course, our other problem was that the container hadn’t arrived and all of our pots and pans , cutlery and crockery, knives and tools were miles from us and weeks from delivery. I did go out and buy the bare minimum…and when I say the bare minimum, that’s what I mean. I wasn’t going to replace everything when I had boxes and boxes of kitchen stuff on its way to me, so I ended up with a chopping board; one knife for cutting and one for bread; a colander and a pan. It was fine. It worked and I kept to the simplest of dishes. I steamed fish by wrapping it in tinfoil and adding ginger and garlic, adding a few drops of water and putting it in the oven. In my pan, I cooked rice and stirred shredded coconut through it (oh, the bliss of finding fresh, shredded coconut in the local food market!) and then quickly sauteed baby kailan leaves… we ate on the balcony, sitting at the only table and chairs we had. Thank goodness for IKEA, otherwise we would have been sitting on the floor!

Eventually, after many excuses by the shipping company, we got our container and the kitchen was filled with all of my lovely things… time, I thought, for a decent meal to celebrate. I sat on the balcony at dawn and started to consider what I could cook. Isn’t that a fabulous view? I sit there every morning with my coffee and plan what I am going to do while the Bear is at work.

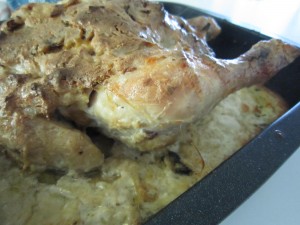
I had been out and bought a small Malaysian recipe book and I really wanted to try a recipe I had seen in there – Ayam Golek – chicken boiled in coconut milk and spices and then roasted in the oven so the skin crisps up beautifully.

Malaysians love chicken… there are stalls at the roadside cooking chicken and the hawker stalls at the back of most shopping areas always have a fried chicken stand.  Everywhere you go you will find chicken cooked in various ways and this recipe sounded perfect.

First, get your chicken. That was easy. I went to the local food market and picked up a chicken and all the ingredients I needed to make ayam golek.  I bought coconut milk ( it did say make it yourself from fresh coconut but there were no further instructions, so I ended up buying three cartons to make the 750ml I needed); some shallots; garlic; three stalks of lemon grass; a knob of galangal; a knob of ginger; some cumin seeds; white peppercorns and fennel seeds.

I came back and started to sort out the ingredients so I could prepare the meal ready for the Bear to get home from work…..


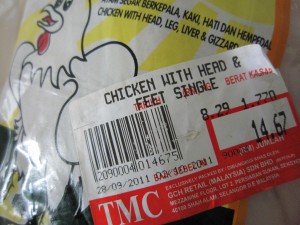
Oh dear. That will teach me to wear my specs when I go shopping….


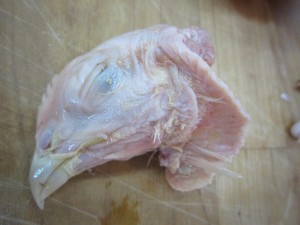
What the heck was I going to do with that? There was nothing in the recipe book about chicken heads!


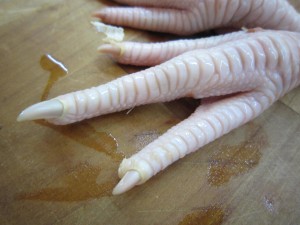
Nor feet! I know I had seen chicken feet for sale… but I’d  never wanted to eat them. The horrible claws… like long fingernails…oh it made me shudder.


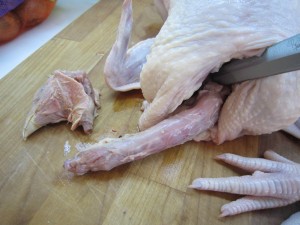
And the neck….it just stuck out horribly and I had to hack away at it.  Just shows how sanitised everything is in the West. Our chickens come prepared  and all we have to do is start cooking. Well, I got it ready but maybe next time I will look  more carefully at what I am buying. Maybe I will wear my specs.

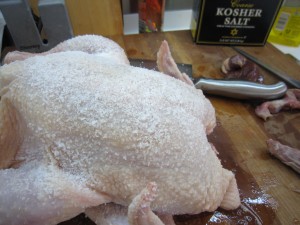
First of all, then, I rubbed the chicken with salt and put it to one side while I started on the rest of the recipe.


Malaysians set great store by grinding everything in a pestle and mortar, so I started off…


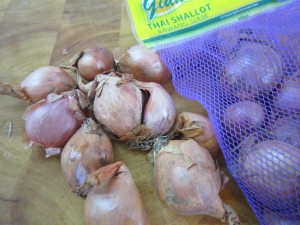
I peeled twelve small shallots


and then got the ginger out to start peeling that… and discovered I’d made my first mistake


Yellow ginger ISN’T ginger of an attractive hue…it’s tumeric. My fingers and nails were stained for days.


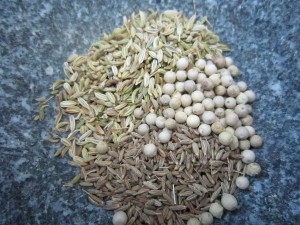
I decided that grinding the seeds and peppercorns would be easier if I did that first, so into the mortar went one teaspoon each of white peppercorns and cumin and one tablespoon of fennel seeds.


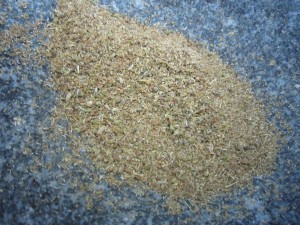
… and bashed away until I had a smooth mix. I don’t think I’m going to need a gym membership because that gives you one heck of a work out.


I’d got the other ingredients ready – the twelve shallots; three cloves of garlic; three stalks of lemon grass and the peeled ginger….and decided that I wouldn’t put that ‘yellow ginger’ in after all.


So everything else went in and I bashed away


That’s hard work, that is.. Maybe if you aren’t looking to create a truly authentic dish, you could give everything a whizz with a blender? I think I might do that next time….


Especially when this was the temperature in the kitchen. That’s our kitchen clock, which helpfully confirmed what I thought – it was hot in there.


Finally, I was ready… 750 ml of coconut milk was added to a wok…


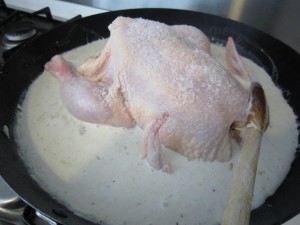
…..and the ground spices and bashed lemongrass stalks were added and everything  was heated to a slow boil before I added the chicken and a teaspoon of salt.


I was on Easy Street now… all I had to do was simmer that chicken for thirty minutes, turning it half way through so both sides got poached. The coconut milk and spices thickened at that point and it was time to put the chicken  into a roasting dish and then into a preheated oven (175°C/350°F) for another thirty minutes……the skin crisps up and the chicken browns…


Ohhh… the smell was divine!


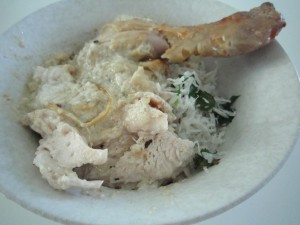
The chicken was moist and succulent and fell apart as I tried to serve it. Just the way it should be if it is cooked properly.

I made boiled rice and stirred a handful of fresh grated coconut through it, with a few bits of chopped coriander (or, as they call it here, Chinese Parsley. I spend lots of time in the food markets sticking my nose into things to work out what things are)

Was it worth it? Very definitely. I’d suggest that if you do it, you use a blender unless you want a real work out.  That would be so quick and easy and if you were to get the ready prepared chopped garlic, ginger and lemongrass (because not everyone has access to the fresh ingredients) no one would blame you. Be as authentic as you like or as lazy as you like, but do try making it because the flavours are delicious. The simmering in coconut milk make for the most incredibly moist and juicy chicken while the roasting crisps the outside and adds a final layer of taste to it all.

Oh… and maybe don’t buy a chicken with its head and feet…….


A cheeky little number….. Beef Cheeks.

Whenever I go home to the North I always call in at my favourite butcher’s, George Bolam at Sedgefield. It’s from here that I have got the more unusual cuts, like plate of beef or lamb henry, where I get the best belly pork, either in strips or rolled, to make the perfect joint with crackling. I get my favourite beef skirt from there, too – the tastiest and tenderest (if cooked quickly) steak imaginable. He makes his own haggis and black pudding and has the widest variety of sausages imaginable.  He has a bakery there too, a deli, a fish counter and an amazing selection of fresh fruit and vegetables.

Everything I get from George’s is absolutely fresh, generally local and incredibly good value and that is, I suppose, why all of us should support our local butchers rather than just buy meat from supermarkets.

On my last trip home, I called in to stock up on meat to bring back to the city and saw, for the first time on his shelves, cheeks of beef.

These are, as you would imagine, the cheeks of the cows. The price was incredible – 717g of meat for £3.14? I had to buy it and try it.

So, that was frozen and put into the freezer until I had time to think of what to do with it and the time to cook it.

And then I got ill. I could barely move and any cooking that needed me to be alert and available to do things was out of the question. To be fair, I didn’t want to eat either so for days I lived on hot drinks and an occasional slice of toast.

Then one day I realised I had to have more than that – the Bear needed feeding, for one thing. And then I remembered the beef cheeks in the freezer.

Now, a cheek of a cow would get a lot of exercise, I would have thought. All that chewing of the cud must give those cheek muscles a good work out. Cows seem to chew none stop. So a well muscled piece of meat would need long and slow cooking. And the best thing about long and slow cooking is that it requires minimal preparation, even less attention and the opportunity for a nap while it cooks.

The end result is always something succulent and tasty, perfect for anybody…. even an invalid.

That settled it. I summoned up the strength to go to the kitchen and took out the cheeks to defrost. I would cook them the next day.

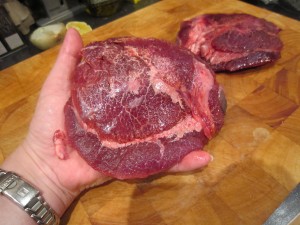
The next morning, I unwrapped them and looked at them properly. They were much larger than I thought they were going to be.

What a size they were….I have normal human sized hands, you know, it’s not as if I am a miniature person. Each cheek was bigger than my outstretched hand.

That was going to feed four, at least.

As with so many delicious things, the simplest way is often the best way and with slow cooked food that seems to be particularly true.

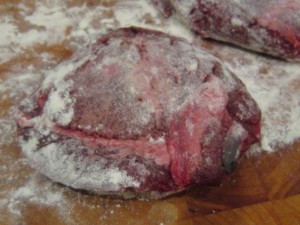
I dusted them with flour…..

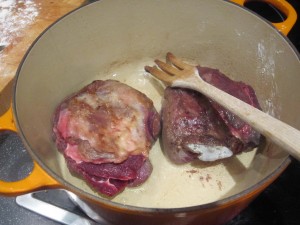
… and then browned them quickly in a splash of oil, in the bottom of a hot casserole.

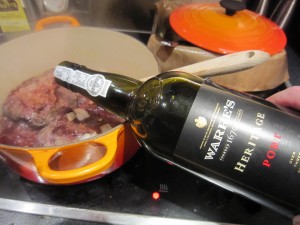
I poured in some stock, made from granules and hot water and then thought I could perhaps boost the flavour even more……As we seemed to be stockpiling port, I decided to add a good amount of it to make the gravy even more delicious. I don’t know when we were going to get around to drink it all, so it seems a good choice to use it in cooking now and again.

Don’t worry if you haven’t got port, or don’t want to use it. Use all stock instead, or maybe add in some wine, or sherry… it’s your choice. You do need to add something to make the gravy with, so add enough liquid of whatever you fancy to just cover the meat.

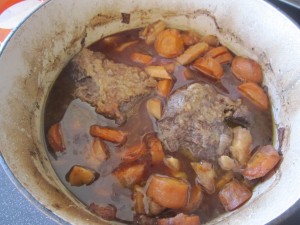
I chopped in some carrots and parsnips and put the covered casserole into the oven at 160° C/320 °F for three hours.

The smell was amazing.

As the oven was on anyway, I scrubbed some potatoes, jabbed them with a knife so they wouldn’t burst, rubbed them with oil to make the skin crispy and put them in the oven to bake alongside the cheeks, then I went back to bed.

When I next roused myself, I went upstairs to a beautifully warm kitchen, filled with wonderfully rich and aromatic smells and opened the oven.

The potatoes were perfect and the beef cheeks looked good. More than good, actually.

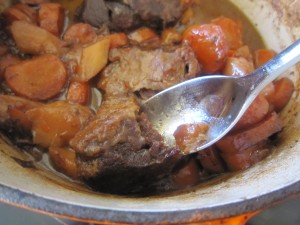
I got a spoon to stir the vegetables and gravy round and moved a cheek… the spoon went through it.

Remember how big those cheeks were? Well they were still in one piece, it’s not as if it was all in bits and easy to scoop up. People say, when they are talking about tender meat, that you can cut it with a spoon but this was the first time ever that I really could do that.

The spoon sank through the silky soft meat and there, on the bowl of the spoon, was the most delicious looking piece of meat.

And the taste? It was beyond delicious. It was rich and soft, succulent and tasty.

Probably the best beef stew I had ever eaten. In fact, calling it a beef stew seems to be a bit of an insult.

The vegetables had kept their shape in the long, low and slow cooking and were perfectly tender. The funny thing is, I’m not that fond of cooked carrots, especially cooked carrots in what is, to all intents and purposes, a simple stew but these were gorgeous. They still tasted carroty but they also had a deep rich layer of taste from the gravy.  I loved them.

But it was the meat that was the star of the show and now, thinking back as I write this, I long for beef cheeks again. So much so that I’ve just ‘phoned my mother and asked her to go and get me some more and freeze them ready for me to collect on my next trip.

Those two cheeks made enough to feed four or five healthy appetites….and for those weakened by the dreadful colds and flu, well that boosted my appetite and for the first time in days I enjoyed my food.

Simple, so very simple and it cost so little.

If you see beef cheeks, buy them immediately. If you don’t see them, start picketing the butcher to get some for you. You won’t regret it… although you may regret the fact you spend days yearning for beef cheeks when there are none available.

Lovely lamb shanks, tagine style and the Bear’s shopping expedition

I’m a lucky old thing, I know, and meeting the Bear was the best thing that has happened in my entire happy and lucky life. He’s funny and sweet, very clever and tolerant and (and this is a good bit indeed) very helpful about the house.

I had a lot to do and, while I normally do the shopping because I like to choose what I’m going to cook with, I was running out of time to get everything done. The Bear had some spare time and offered to help….

What could go wrong? I had all the meat and vegetables (so there was no problem with choosing the best examples) and all I needed were things for the house and a few food or drink items for the cupboards. It wouldn’t matter whether I picked them up or he did, they’d be the same….

So armed with a specific (very specific) shopping list the Bear set off and I got on with other stuff. We met later in the kitchen and I started to unpack the bags… cleaning stuff? Check. Dishwasher salt and rinse aid? Check. Kitchen rolls? Check. Butter, milk, cheese? Check. Tea and coffee? Check. Wine? Check, check and more check. (We were having friends round) Cordials? No check.

I had wanted a specific kind of cordial – Grape and Melon. They didn’t have any apparently (and there’s no point Googling or asking about other stockists because they have stopped making it now. Shame on you, Robinson’s!) and the Bear had remembered not to deviate from the list and get another flavour. All well and good. We did have other cordials anyway so it didn’t really matter.

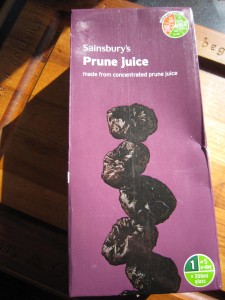
I carried on emptying the bags…. and found, in the bottom of one of them, three cartons of prune juice!

Prune juice? Whatever had possessed him to buy prune juice? I don’t like prune juice and I don’t need prune juice. I certainly didn’t need three litres of it.

He started to explain. Quite frankly the reasoning behind it was flawed. They didn’t have the clear and delicate tasting cordial I wanted so when he saw “Buy 3 for the price of 2”  next to the prune juice he thought he would use his initiative and grab us a bargain….

The prune juice went into the larder and there it stayed as a reminder that sometimes initiative is a terrible thing.

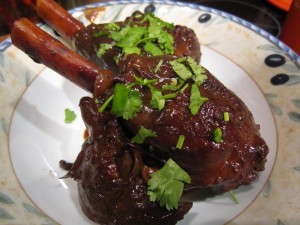
I can’t bear waste though and eventually, months later, decided I would have to do something with it. I’d gone into the larder to get a new box of salt out and spotted the prune juice still loitering on the shelf. I was going to be cooking lamb shanks that day and it struck me that if I were to do lamb shanks in, say, a Moroccan tagine style then I might have used prunes in there. What if, I thought, I was to cook the shanks IN the prune juice, instead of adding them as whole fruit, replacing just a simple stock and so making a rich and tasty gravy?

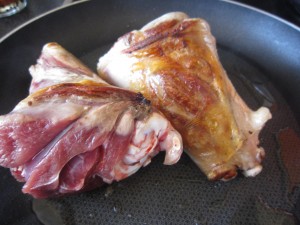
I had two lamb shanks that I was going to cook slowly while we were off doing other things.  I would have used the slow cooker but the two of them were too big for the pot and I decided that I’d just use a casserole instead. As long as you make sure you have enough liquid in there and keep the temperature low then it is safe to leave for a while.

It’s also lovely to come back to a home that smells of deliciously cooking food……

I love lamb shanks for many reasons. Firstly because they don’t cost much at all and secondly,if you leave them to cook slowly and gently they will turn into the most deliciously melting pieces of meat, far tastier and more tender than most expensive cuts and thirdly because I don’t have to do much at all to make it a perfect warming and mouthwatering meal.

Five minutes preparation and then you can walk off and leave them to glug quietly away for as long as you like. A perfect way to cook something while you are out at work or off out shopping at the weekend.

First of all, brown the outsides of the shanks. All it takes is a few minutes in a frying pan with a drop of oil to crisp and brown the skin. Yes, they are going to be cooked for hours and will cook all the way through but if you brown the outside you get a better depth of flavour and they also LOOK better. It’s all very well being delicious… it’s nice to appeal to the eye as well, though.

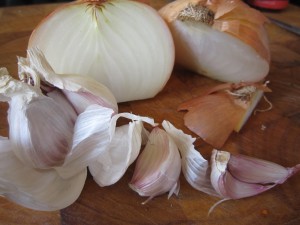
While the lamb is browning, quickly chop some onion and garlic.

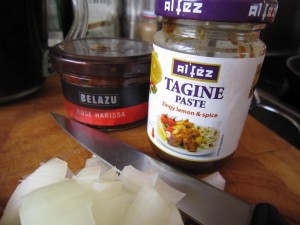
I had the remnants of some tagine paste that I could use to bring in a hint of Moroccan flavouring and some lovely Rose Harissa that would liven things up a bit. I wasn’t making an authentic tagine but I wanted a definite nod in the direction of Morocco. You can get tagine flavourings in most supermarkets now so choose whtever you fancy.

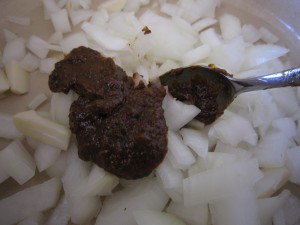
I put a spoonful of each into my casserole dish and stirred it through the chopped onion and garlic.

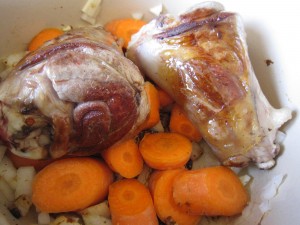
Carrots were roughly scraped clean and sliced and the browned lamb shanks were put in the pot on top of the vegetables.

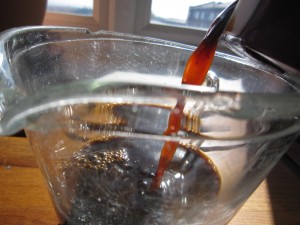
I poured a pint of prune juice into a jug – just look at the colour of it! Now while this could never replace a light and fresh tasting cordial as a drink I could see this was going to make a deliciously thick and tasty gravy. With the harissa and tagine paste to spice it it, I had high hopes of this turning out to be a success.
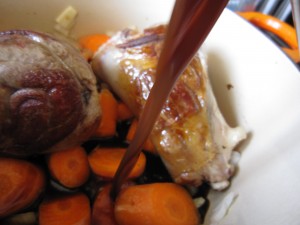
Mixed with some stock granules to add a salty, savoury taste, it was poured over the meat and vegetables.

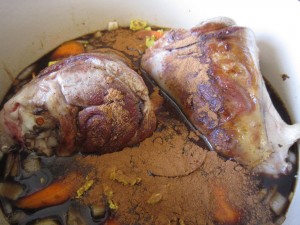
And then, because I love it and I knew it would be good, a couple of teaspoons of cinnamon powder were put in.

And that was it. The lid was put on and the casserole was put into a slow oven (165 degrees C/350 degrees F) and I went off to do what I needed to do. If I’d used the slow cooker I would have set it on Auto – which means it gets a high start then it turns down to a very low heat. The cast iron casserole would do just as well on a steady low temperature for hours.

After about three or four hours I came back and looked at the shanks…. they smelled delicious anyway.

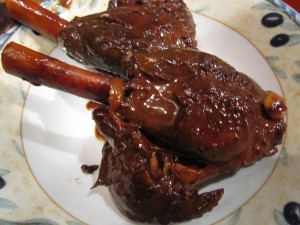
Rich and dark from the prune juice, steaming and the meat was falling from the bone.

Chopped coriander would give just the right fresh herby taste

Couscous takes maybe three minutes to make – simply measure it out (the packet will tell you the proportions) and add boiling water so the grains fluff up.

You can add herbs and spices to flavour it if you are having plainer food but the gravy from the lamb would be flavourful enough, I thought.

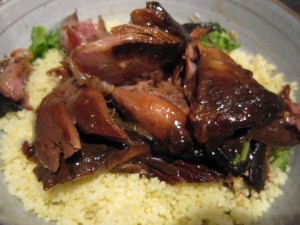
The meat just fell apart…. the prune juice gravy was rich, savoury and spicy with a mellow sweetness. It all soaked into the couscous making each mouthful delicious. Who would have thought mis-judged initiative could produce such a lovely result? Inexpensive cuts of meat, unwanted cartons of juice and a few hours in an oven produced a meal that I would have been proud to serve to guests.

We enjoyed every mouthful.

So, while I can’t advocate the drinking of prune juice…. I can suggest you cook with it. You might just be as pleased as we were with it.

Slow roast shoulder of pork with perfect crackling

The weather is getting worse and, while it is lovely to live in an apartment where three of the walls are windows, it does get gloomy when you are surrounded by rain spattered glass and grey clouds. When that happens, the only thing to do is put the lights on and make everything look cosy and then curl up, knowing that something meaty and tasty is in the oven….. just relaxing while the smell of roasting meat fills the room. It’s a smell that has always reassured me that things are happy and well in the family.

 A smell that was a constant in my childhood and it means home and happiness with loved ones. My wonderful brother and I are very similar in many ways. One of our favourite things is the crispy, fatty bits on a roast joint… all juicy and packed with flavour.

Not everyone likes this of course….The Bear has many good points and I am always glad I married him, but one of his finest points is that he doesn’t like crackling or the fat on a roast. That, of course, is good for me as it means that I don’t have to share. My brother used the same criteria when he got married – my sister in law is absolutely fabulous and we all love her dearly (he made a brilliant choice, marrying her) but again, she hates that sort of thing. Perfect. There’s nothing finer in our eyes that a gorgeous piece of crackling and the two of us have been known to stand in the kitchen at home dividing up the crisp and tasty skin….

Anyway, while I was shopping I’d spotted this marvellous piece of pork. Outdoor reared and free range meant that it was guaranteed to be tasty. The rain was bouncing off the pavements outside and I just knew that roast pork would be the perfect  antidote to the gloomy rain blues.

Pork shoulder is a great cut because it isn’t expensive but, as with most things, treated with care and respect you can produce the most delicious meals. Time is what shoulder needs, time and heat and salt. That’s all.

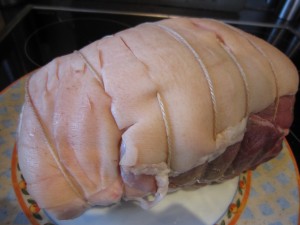
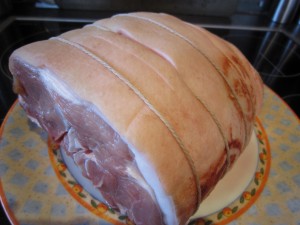
This was a lovely piece of pork shoulder with a good layer of skin around it, which is just what you need to get perfect crackling.

Pork shoulder needs slow cooking and it will turn into the softest, tenderest piece of meat ever. The rind will crisp up (if you slice at it) into delicious strips of hard, crunchy and tasty crackling.

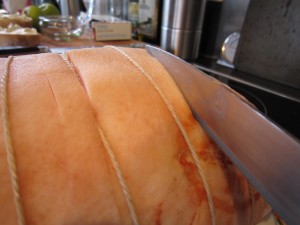
But the rind is tough and to get through it you need a very sharp knife. Butchers will slice the rind for you and, in fact, most joints come with the skin cut already but I like to get a lot of narrowly spaced slashes so I start by sharpening my favourite filleting knife.

I’ve never yet managed to use a sharpening steel so I use the Chantry knife sharpener which is one of my better kitchen equipment buys. All you have to do is run the knife through the middle a few times and the blade is perfectly sharp, which is something I have never achieved using a steel.

While you are doing all of this, get the oven preheated to 230 degrees C/450 degrees F

There were some slashes in the rind already but I sliced between them, so each strip of rind was about 1 cm wide, if that. Be careful, if you are slashing not to slice into the meat itself – just cut the rind and the fat below.

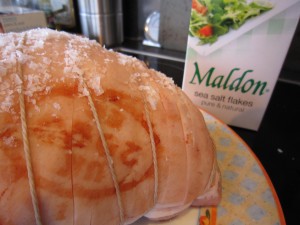
The next thing is to get some kitchen roll and dry off the rind before rubbing it over with a smear of oil and then some salt.

What you have done is wiped off the water and added some oil to help start the crisping process and salt to drive out extra moisture and add flavour.

I like to use Maldon sea salt as the crystals are large and easy to pack into the slices of rind. Maldon has a great taste as well. When the pork comes out of the oven the rind will have crisped and almost bubbled up with flecks of salt crystals embedded into it to make the crackling taste divine.

By now the oven will be bouncingly hot so get the pork into a roasting tray and put it into the oven for twenty to thirty minutes.

This is a very hot oven and what it does is sear the rind and start making the crackling. If the oven isn’t hot then the rind won’t ever get crispy.

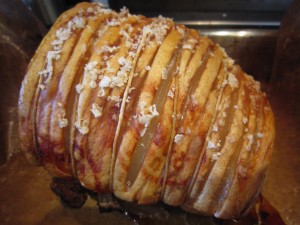
After the first burst of heat you will see, when you peek inside, that the slices are separating and the rind is starting to cook. You just know, when it looks like this after half an hour that it will have the perfect crackling when it is finished!

You can turn the oven down now to a moderate 170 degrees C/340 degrees F and just leave the joint to cook slowly for a two and a half hours……

There now.

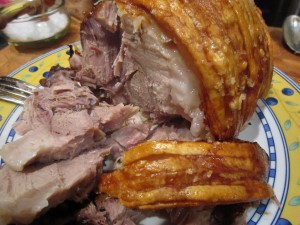
Golden, bubbled and crisp. Studded with salt crystals promising that every mouthful will be deliciosuly savoury.

When you get it out of the oven if you rap on the top of the crackling it makes a hollow sound.

The meat is dark and caramelised from the fat dripping over it as it roasts.

The fat layer has almost disappeared in the long slow cook, making the meat juicy and the crackling crisp.

The crackling strips snap easily into bite sized bits…. perfect for nibbling at while you slice the pork……

A wet grey afternoon can be ignored because you are inside, in the warmth with a marvellous meal, just ready to share with your loved ones.

That is Heaven… that is my guilty pleasure and that is one more reason to appreciate the Bear not liking everything I adore!

Red cooked shin of beef

The weather has definitely changed. The winds are getting stronger and I have started to wear a coat to travel to work.

It been raining a lot as well and when I look out of the window of my office at work I can see waves being whipped up on the lake.

Even the ducks, swans, geese and the heron are all in hiding.

You can see the trees are being bent over in the strong winds. The rain is splattering against the window and the skies are getting more grey.

What we need is something warm and sustaining. I want meat… I want tasty meat. I want something to fill me and make me smile.

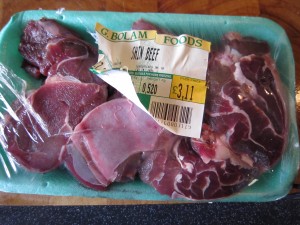
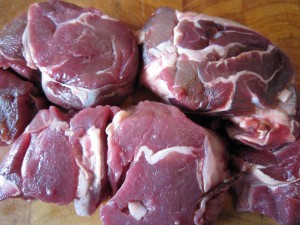
So I decided upon shin of beef which is a British, inexpensive cut of meat from the front legs of cattle. Just over 500g costs  just over £3. That’s enough to easily feed four people. Shin needs long and slow cooking which transforms it from incredibly tough to  the most melt in the mouth meat ever, with a real depth of flavour.   If this cut isn’t familiar to you, look at the link  which shows you the difference between American and British cuts of beef.

When you look at shin of beef you can see the tendons and the fat running through it. This has to be cooked slowly and the meat becomes transformed into the most tender morsels imagineable. The gravy served with it reduces and becomes intensely rich and flavoursome. It is perfect in a beef stew with dumplings  and that, I have to say, is how I normally cook it.

Except this time I wanted something different. I wanted something with a bit of a zing to it…and I had a fancy for some kind of Chinese flavouring. I have always adored the taste of star anise flavoured sauces and I remembered that when I was a poor student and wanted a treat I would order fried rice with a drizzle of Chinese barbecue rib sauce on it. That would be it. Just rice with some sauce… I think the takeaway was used to poverty stricken students asking for the bare minimum. (Mind you, there was an Italian restaurant in town that once served a group of us a side dish of peas between us because that was all we could afford and one of our friends fancied someone working there…)

Anyway. Here I was, years later, with enough money to actually buy some meat and I was going to make the most of it. I didn’t have a classic Red Cooked Beef recipe but I could make a fair attempt at it. No doubt the purists will think this isn’t the way to do it but this works for us. The flavour at the end is amazing and that’s good all we are concerned with.

Slow cooked meat is the easiest thing in the world. All it needs is time. You really do very little to it.

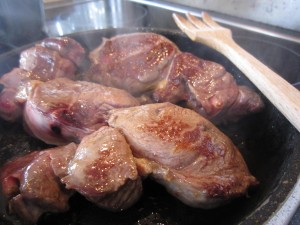
First of all, sear the outside of the beef as this gives it a good colour and a better taste.

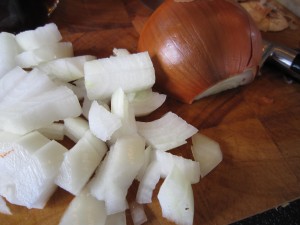
Chop an onion into pieces. There’s no need to worry about making it neat – after a few hours in the slow cooker this will jsut disappear into a lovely rich sauce.

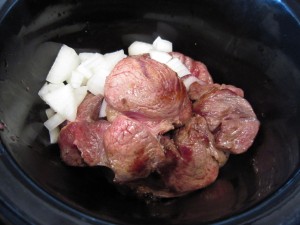
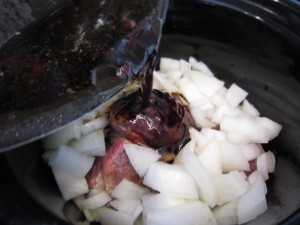
Put the onion in the bottom of the slow cooker (or casserole dish if you are using that) and lay the browned meat on top of it.

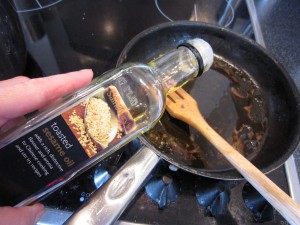
Add some oil to the pan juices (yes, I know that using sesame oil might seem extravagant, but once oil is opened you must use it as it will go off. You might as well use it in an appropriate dish rather than waste it. The delicious smell will disappear, I know, but you know the mantra, waste not, want not!) Use vegetable oil if you have it. What you are doing is getting the rich caramelised bits of meat from the pan.

Stir in a good teaspoon of minced ginger, the smae of garlic and half a teaspoon of  chilli – here I am using the tubes of freshly minced herbs and spices a) because I have them and b) my chillies have failed this year and my ginger is dried up and horrid. They are great to keep in the fridge, ready for an emergency. Add a good splash of soy sauce to add a salty, savoury element.

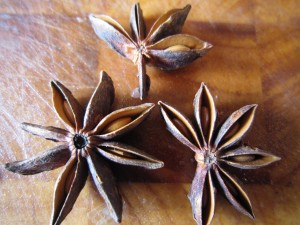
And star anise. Aren’t they beautiful?

Pour the oil and meat juice mix over the meat and onions and add the star anise.

Normally I’d add Chinese rice wine but we had none left… we did have sherry though and that is a good compromise. Half a cup of sherry adds an extra layer of aromatics to the dish.

A cup of water is added to bring the liquid content up to almost the top of the onion and meat. Don’t cover it, though as that will boil it and toughen the meat. You are aiming for a lovely gravy that will cosset the meat until it relaxes into tender submission.

And that’s it. Five minutes to prepare.

All you have to do now is to start the slow cooker, or put your casserole in the oven on a low heat and then just walk away for a few hours. Relax and enjoy the sense of anticipation.

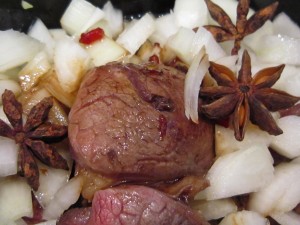
Four hours later, the apartment smells of delicious, fragrant, spicy meat.

The meat is so tender it just falls apart when I lift it out with a spoon. The long, slow cooking has turned the tough meat into soft and delicious morsels.

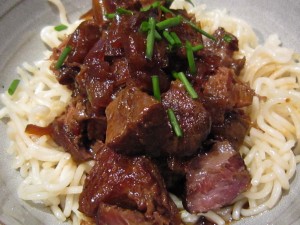
Served in a bowl on top of some noodles with a few snipped chives over the top of it and we had the perfect supper. Delicious, tasty, spicily aromatic beef piled on top of soft and filling noodles… heaven in a bowl.

It made the grey day go away and we felt warm and happy.

What more could you ask for? A meal that tasted delicious and cost £1 per serving. That’s pretty good going.

Moroccan meatballs with egg

I was on a roll with making food from my 400 and Under collection of recipes. I always look out for recipes that provide less than 400 calories per serving because that means we have some leeway with having a glass of wine, say, while still keeping our calories down and, therefore, still (theoretically at least) sticking to a diet. The thought of Moroccan spiced meatballs with egg in a delicious tomatoey sauce seemed too good to be true – a rich and delicious supper that would only add up to (according to Good Food Magazine, where I found the recipe) a mere 377 calories per serving.

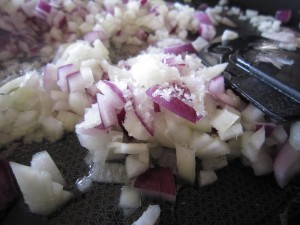
It’s diet food! And it would be delicious. Who wants to live on cottage cheese and celery when you can have a gorgeous steaming bowl of meatballs? Meatballs in a tomato and chickpea spiced sauce with a lovely egg cooked in there…….I had everything I needed so I started by chopping a small sweet white onion and a small red onion. That’s because the recipe said one onion… and these were more midget sized onions.

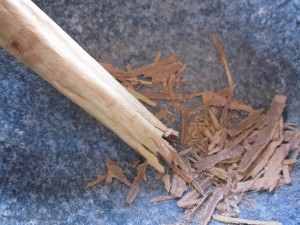
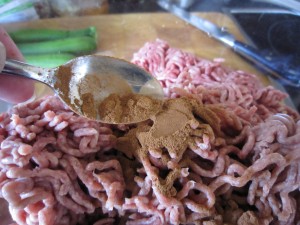
They went into the frying pan to soften while I started on the meatballs themselves. I did have one problem – I had no ground cinnamon and I needed that for a real Moroccan hit. I love the smell of cinnamon (and having made this recipe once, the next time I will add more cinnamon) I did have, however, cinnamon sticks and a large pestle and mortar…

Quite therapeutic to bash and grind the cinnamon into a soft and fragrant powder. But possibly easier to buy it ground…..? I did manage to get some ground cinnamon but there were lots of bits of the stick left. Anyway, I did, in the end, after lots of pounding, finish up with half a teaspoon or thereabouts which I added to 250g of lamb mince.

(Having made the dish I have to say that I would, when I do it again, add more than half a teaspoon of cinnamon because I so love that rich and exotic taste and smell. If you aren’t as keen on Middle eastern flavours then just stick to the recipe)

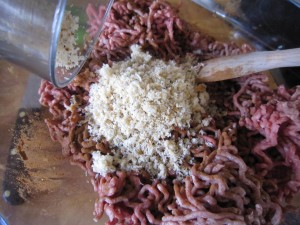
I added 50g of fresh breadcrumbs (I made them by whizzing up a breadbun I had)

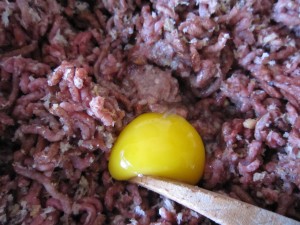
and added an egg, salt and pepper.

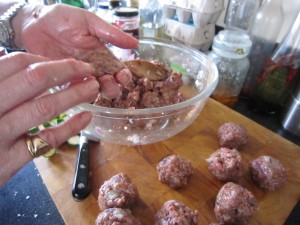
By now the onions were beautifully soft and once they cooled slightly, I stirred them in, mixed them round and started to make meatballs. The Bear was called into action… my poor Canon camera gets so much abuse with my sticky fingers but I really couldn’t subject it to meatball mix.

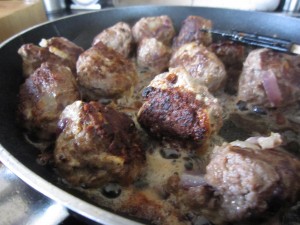
They had to be cooked in the fat left in the frying pan, turning them gently until they were browned

That only takes about 8 minutes – don’t worry, remember they do go back into the pan when you have made the tomato sauce. Take them out and put them to one side.

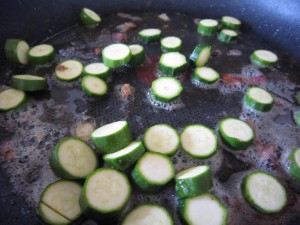
The recipe said use a courgette, thickly sliced but I only had baby courgettes, so I reckoned three of them would be the equivalent of a normal courgette… so they got sliced and gently fried for a minute or so

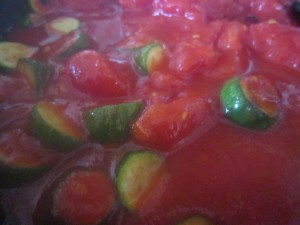
Before adding in a couple of cans of chopped plum tomatoes

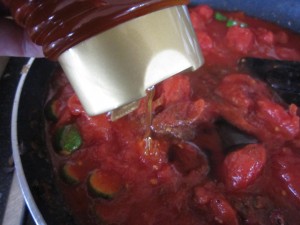
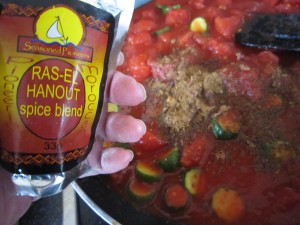
… a teaspoon of Ras-el Hanout – a Moroccan spice blend that you can buy in most large supermarkets nowadays. You can make it yourself if you can’t find it – click on that link and it takes to a description and a recipe.

… and two teaspoons of honey

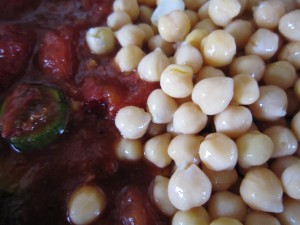
Once the tomatoey mix was soft, a tin of chickpeas was added and the stirred round

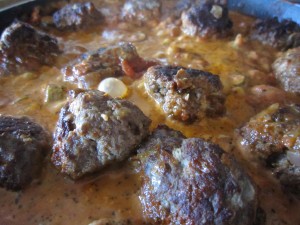
and then the meatballs put in

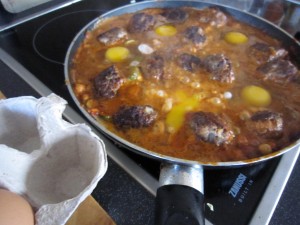
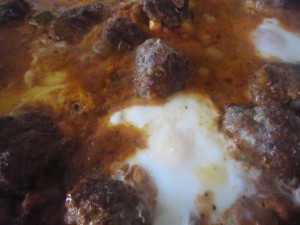
After that, the recipe said to make four hollows in the suace and crack eggs into them… I couldn’t really manage – maybe my sauce wasn’t thick enough? – anyway, I broke the eggs in and pulled the sauce away from underneath so the raw egg dropped down into the sauce.

The pan was covered for 5 minutes or so and left on a low heat to set the eggs……

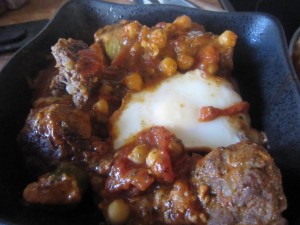
And it was delicious! The cinnamony richness of the meatballs was perfect with the spicy tomato, chickpea and Ras-El Hanout spices and the beautiful egg was the perfect addition in terms of difference in texture and taste.

This is definitely something we shall be cooking again… and it was on our diet! Less than 400 calories per serving….if you stick to one serving that is….oh, it is delicious!
As Good Food doesn’t have a link to the recipe – here it is

Ingredients:

1 onion finely chopped; 3 tbsp of olive oil; 50g fresh breadcrumbs;  250g of lean lamb mince;  1/2 tsp of ground cinnamon; 5 eggs; 2 garlic cloves, sliced; 1 courgette thickli sliced; 2x400g chopped plum tomatoes; 2 tsp. of honey; 1 tsp ras-El Hanout spice blend; 400g chickpeas, rinsed and drained.

Fry the onion in 1 tbsp oil until soft, leave to cool. Mix with the breadcrumbs, mince, cinnamon, 1 egg, 1/2 tsp salt and lots of pepper then shape into about 24 meatballs. Fry in the remaining oil in the pan for about 8 minutes until bgrowned. Lift out and set aside.

Add garlic to the oil in the pan and fry till softened. Add courgettes, fry gently for about a minutes then add tomatoes, honey, Ras-El Hanout, seasoning and a couple of tbsp of water. Stir and cook until pulpy

Stir in the chickpeas and the meatballs. Make 4 hollows in the sauce and break in the remaining eggs. Cover and cook for 5 or so minutes over a low heat till the eggs are set.

Serves 4 Preparation 40 minutes, cooking 30 minutes

Per serving – 377 calories, protein 26g, carbs 20g, fat 22g, saturated fat 7g, fibre 3g, sugar 8g, salt 0.94g

Salt and Pepper Pork Tenderloin

I had a fancy for something tasty. Actually, what I really had a fancy for was our local takeaway’s Salt and Pepper Squid, which is probably the most delicious salt and pepper squid anywhere. And I should know – just ask the Bear. Wherever we go if I see it on the menu, I ask for it.

I’ve eaten it in Perth, Brisbane, Sydney and Hobart in Australia; in Honolulu and on Kauai in Hawaii; in Florence, Barcelona, Dublin, Copenhagen, and Lisbon. I’ve eaten it in smart restaurants in the UK and in cheap ones, but somehow, nothing beats our local takeaway. They cook everything in an open kitchen and the food is spankingly fresh.

The batter round the squid is light and lacy. The squid is never chewy and the salt and chillies are perfectly balanced. The only annoying thing is that whenever I order it, people who HAVEN’T ordered it (because they don’t like squid… or chillies… or whatever else..) suddenly decide they want to try and it and then they take mine!
Anyway, despite wanting it so much that my fingers itched to phone an order in, I decided to try and stick to our vague diet. No salt and pepper squid for us that night.

But the thought of salt and peppered something just stuck in my mind.

I’d worked out a salt and pepper seasoning that didn’t involve deep frying or batter and I’ve used it on prawns and steak. Because you almost dry fry whatever protein it is you are using,  the calorie count drops significantly.

There you go, then, I thought. Perfect justification to make something tasty for supper. I WAS going to have salt and pepper after all. And I could still say we were on a diet.

I like to make lots of salt and pepper seasoning because whatever I don’t use, I keep in an airtight jar ready for my next night of craving. I had some left but I needed to top up my supply.

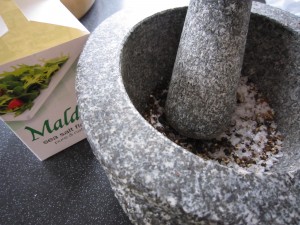
First of all, toast some salt in a large frying pan – yes, this sounds bizarre but it is essential. You will see the colour change slightly and it takes less than a minute. I used a couple of heaped tablespoons of crushed Maldon (I have to crush it in the pestle and mortar because the crystals are large and I need to end up with a smooth spice mix) Take the pan off the heat until you have the spice mix ready.

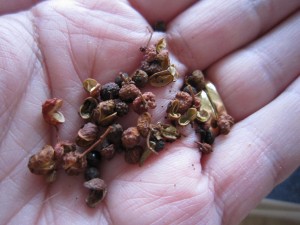
See those? They are Szechuan pink peppercorns. Not real pepper of course but they add that hint of authenticity.  They need to be pounded along with the same amount of black peppercorns.

I didn’t have any star anise but I did have some Chinese 5 Spice Powder so a good dessertspoon or so of that was added to the mix

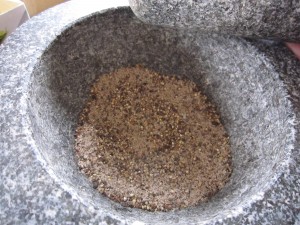
You end up with a fine mix.

Add that to the salt in the frying pan and toast again – beware of the aromatic fumes though, they can be a bit strong. Just a minute or so is all it needs, so stir it round so it toast evenly and leave it to cool. Once it is cool, put it in your jar and wipe the pan out.

And that’s it.

On to the next step – the meat.

Tonight I was going to use pork tenderloin, which is, amazingly, a very inexpensive cut of meat. Even more inexpensive if you, like I did, manage to call in at the supermarket on the way home and find it reduced for a quick sale.

Now the spice mix is cool, put some on a plate and roll it round, pressing down so it sticks to the outside of the meat.

Put your pan back on the heat with a scattering of oil in it (maybe a teaspoon or so… we ARE dieting you know!) and once it is hot pop in the tenderloin.

Roll the tenderloin  so the spice mix browns and crusts beautifully.

Once the crust looks good, turn the heat down and let the meat cook through for ten minutes or so.

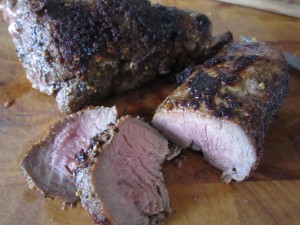
Let it rest for five minutes then slice it into medallions….. Delicious.

Healthy and tasty, oh so very tasty. Quick and easy and low in calories. pretty much of a perfect supper, eh?

You can serve it with anything you like – let it cool and serve it with salad leaves or add some vegetables. If you aren’t dieting serve it with rice… or potatoes, maybe. Well, we were dieting and potaoes were off limits. I wanted to eat it hot so I made broccoli to go with it.  And yes, the Bear was eating  with me, so I made broccoli a Bear would eat.

And when served with broccoli it becomes heaven on a plate!

Pheasant in cider

When I made the strange, but rather delicious, Tomatoey, from an old cookbook, it suggested serving it with roast meat.

I always have, in my freezer, some game. Usually despatched by my brother and given to me so I have something ready to roast quickly. On the morning of the day that I was going to make Tomatoey, I rummaged through the freezer and came up with a lovely little pheasant, which I could imagine would be truly delicious served with a rich and gorgeous tomato bread side dish.

Wild game is healthy and generally very low fat – there’s no idling around in a farm, eating processed feed pellets for a wild bird. They eat what is natural and they fly so there is no excess fat on them. That’s good for a full flavoured and low fat meat but it does mean you have to cook them carefully – and by that I mean a quick roast or braise so they don’t dry out… maybe covering their tender little breasts with bacon to protect them and serving them with something that enhances their rich meat.

Roasting a pheasant takes less than half an hour, if you sear the outsides,  so that would go well with the timings I was working on for Tomatoey. Things were coming together.

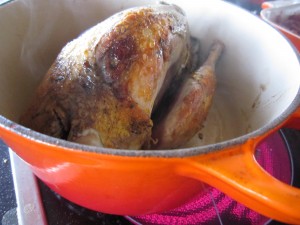
First of all, get your casserole dish hot and add a teaspoonful of oil or so then sear the outsides of the pheasant, turning it round so all of the bird browns.

If you are not using cast iron, then sear the bird in a frying pan… a ceramic casserole dish will break if you put it over a hot hob!

Take the bird out and start on the next step

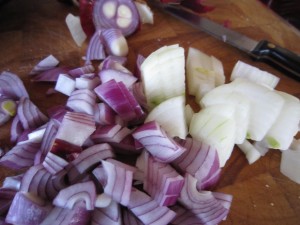
First, some some lovely onion needs to be chopped and popped into the casserole dish to start cooking

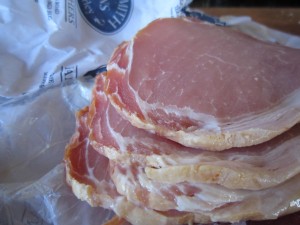
Some dry cure bacon can be chopped into that to make a rich and delicious sauce – but save a couple of bits to cover the breast of the bird when it is in the oven…

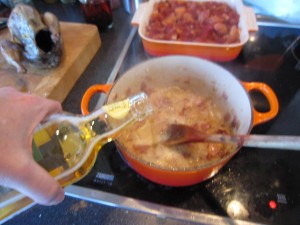
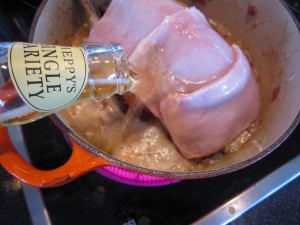
And a small bottle of cider will make a lovely gravy… so add some now to help the onion and bacon start to cook.

You will see it makes a lovely golden gravy as everything bubbles away.

Pop the bronzed little pheasant on top of the onion and bacon and cider mix and pour in the rest of the cider.

The remaining bacon can be laid over the top of the bird and all you have to do now is pop it into the oven for half an hour – which was handy because that was where I had the Tomatoey!

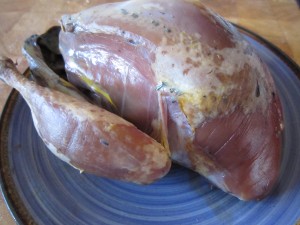
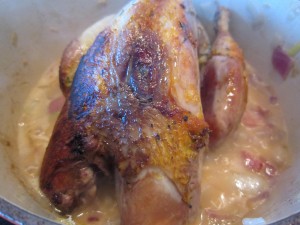
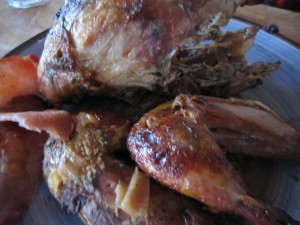
You end up with a gloriously tender and fragrant little pheasant… just falling apart..

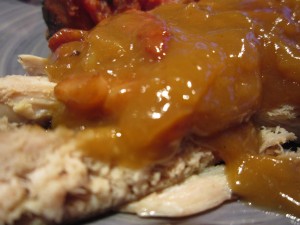
And the gravy that has been made is both sweet and savoury

Perfect to moisten the little pheasant and extremely delicious to go along with anything else you choose to serve with it.

It is a rather special dish considering it took less than an hour to start, prepare, cook and serve. And half an hour of that it was looking after itself in the oven.

Give it a go, eh?

Ham Hock Terrine

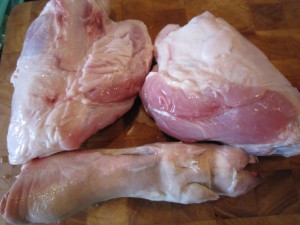
Well then. What’s a girl to do when she claps eyes on one of these?

A little porky trotter.

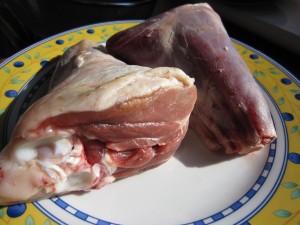
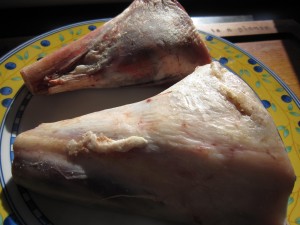
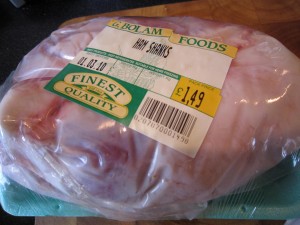
Well, if she is a cunning and cost concious cook and she also claps eyes on walloping great ham shanks

costing a mere £1.49, well then, the odds are that she starts to think of a delicious ham hock terrine, flecked with parsley and glistening with a soft and tasty jelly, just waiting to be eaten on some lovely No-Knead Bread…. perfect for a lovely light lunch or supper.

All you need are some ham shanks, a trotter (though if you can’t get one, you can use leaf gelatine – easy as anything – and I’ll tell you about that later)

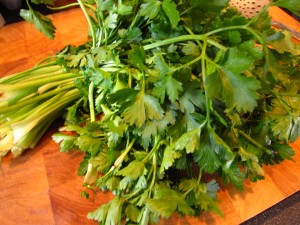
A lovely big bunch of parsley and maybe some gherkins to chop through it later

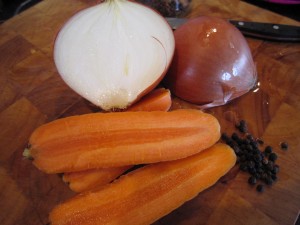
 and a couple of carrots and an onion for the stock and a scattering of peppercorns

How simple a list of ingredients is that?

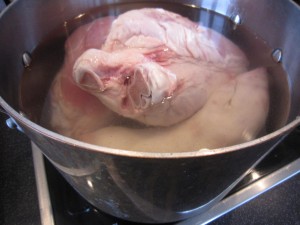
So first of all, rinse off your assorted bits of meat and pop them into the biggest pot you have (and really, don’t let that pig’s trotter worry you or put you off. It’s the traditional way to get a lovely jelly but if you can’t find one, or if you can’t face it, just relax. You can add leaf gelatine later)

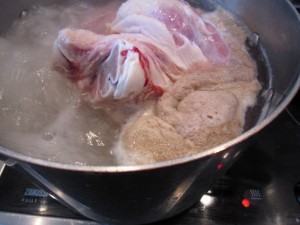
You need to bring the pot up to a boil for a few minutes – this loosens all the impurities and brings them to the surface as a dirty foam.

See? Get that scooped off and then empty the water out.

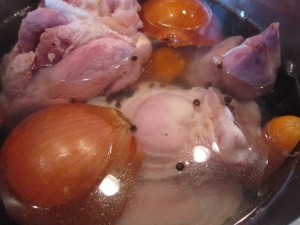
Refill the pan with fresh water and start it boiling again, but now add the halved onion (no need to peel it) and a couple of carrots and a handful of peppercorns

Bring everything to the boil and then turn  the heat right down and let everything simmer away for couple of hours.

Check, occasionally, how soft and tender the meat is.

You are going to tear the meat into shreds for the terrine so you need it all to be cooked to sheer perfect tenderness.

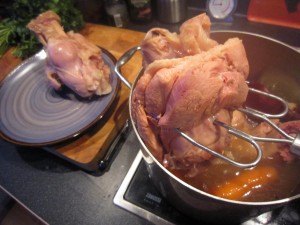
See how soft and tender the meat looks? Just hook the shanks out and put them on a plate to cool.

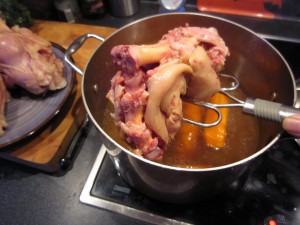
Take out the trotter too – look at how that is all falling apart… it has almost dissolved, giving up all of the lovely gelatine you will need to set the terrine later. There’s not much meat to pick through there, so don’t worry if you haven’t added a trotter. It really has done its job so you can throw that away now.

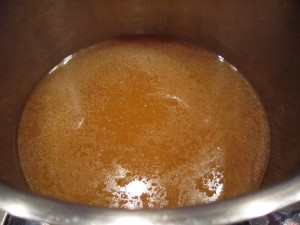
Sieve the pan of stock of its vegetables and you are left with a pan of rich and flavoursome stock. This is going to form the jelly that enrobes the ham so you want it to be as tasty as possible.

The next thing to do is to boil it down, removing more of the water and concentrating the stock.

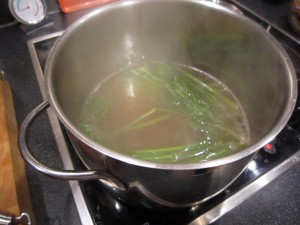
Because the jelly is also going to have parsley running through it, I thought I might as well add the parsley stalks to the final boil down, just giving it an extra depth of flavour.  Let the stock reduce some more then turn off the heat, sieve the parsley stalks out and let the stock cool.

If you haven’t used a pig’s trotter, after you have sieved the stock, get a sheet of leaf gelatine and soften it, first of all, in some cold water. When it is all soft and slippery, add it to the stock and stir it round. It will dissolve almost instantly. Now leave the stock to cool down.

While that is going on and the meat is also cooling down (well, you don’t want to burn your fingers when you are stripping the hocks, do you?) you need to prepare the terrine.

I bought that lovely Le Creuset terrine at Christmas and used it, first of all,  to bake a baguette  in and I swore then that I would get cracking on a terrine. It’s taken me all this time to get around to it.

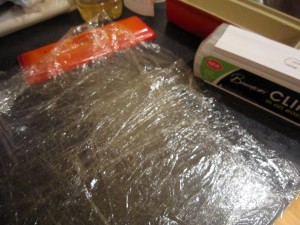
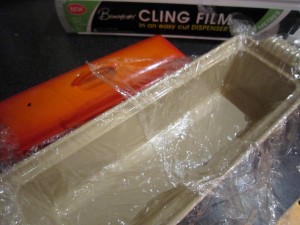
Anyway, the thing to do is to make a liner and the easiest way to do it, is with good old cling film. Lay out sheets of cling film on the bench so you have three layers and then, after rinsing out the terrine dish with water (so everything  comes out easily later and it is easy to adjust the cling film), lay the film inside the pot

Right then… back to the meat.

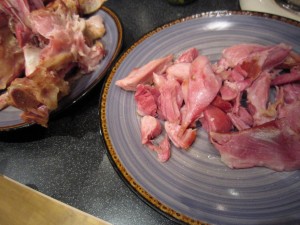
By now it will be cool enough to handle and you can start to shred the meat into pieces.

Because it has cooled, the fat will have set  so you can make sure that you can leave that behind as well as the skin and the tendony-gristley bits. (Don’t squirm!)

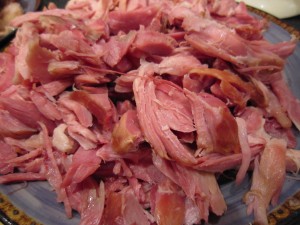
Two ham shanks will give you a really big plateful of tender, delicious, juicy meat

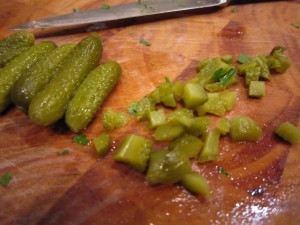
Now, meat alone is very good but you really need something to sharpen it all up and this is where some lovely little gherkins transform this into the perfect dish

Chop them into little cubes so that when they mix with the meat and the parsley and the jelly they give you little bites of sharpness.

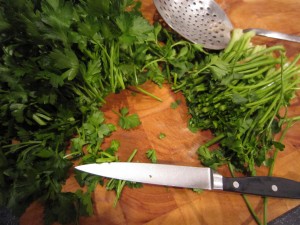
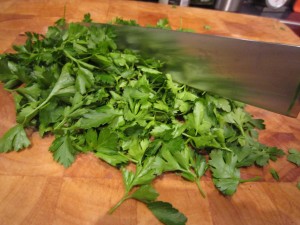
And the parsley? You used the stalks to add to the stock, now chop the leaves (and just the leaves, so strip them carefully)

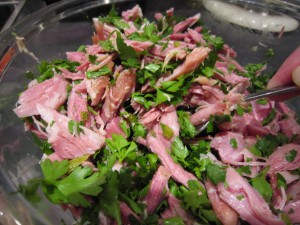
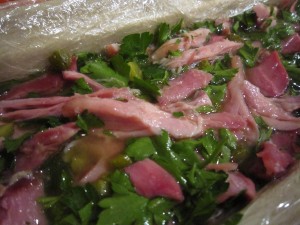
Put the meat, the gherkins and the parsley into a big bowl and mix everything so you have an even distribution of all the ingredients

Now, it’s just a matter of putting everything together.

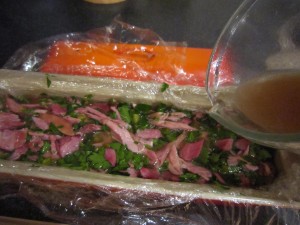
Pack in the meat and parsley/gherkin mix and then slowly pour in the cooled stock.

I say do it slowly because you need it to seep in and around the meat so everything holds together when it is set. Just pour it in till the stock just covers the meat.

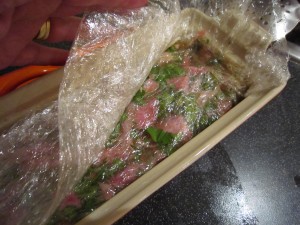
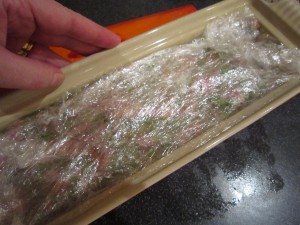
Then fold over the edges of the cling film

See? A lovely neat parcel. And that’s it. It just needs to set now.

Now, you can make a lid to fit, by cutting cardboard and covering it with clingfilm and lying it on top of the meat. This makes it easy to press down on the terrine and helps it set tight… thing is, this was so packed with meat that once I covered the top with cling film  and pressed down lightly, I realised that it was already packed tight.

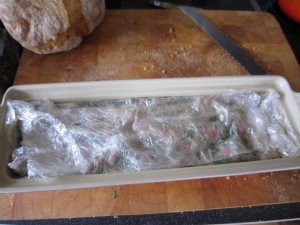
So all I did was put it in the fridge to set over night…

The next day, planning a lovely light lunch for The Bear and myself, I took out the chilled and now solid terrine.

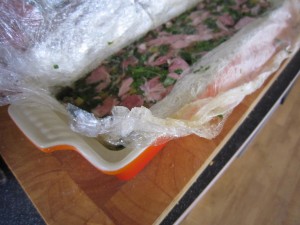
The cling film made it easy to lift out the terrine

You just get hold of the extra film and lift….. and then pop it onto a plate

How beautiful is that?

The gorgeous pink, juicy meat with leaves of lovely parsley and little nuggets of gherkin all in a lovely, savoury, light jelly….

Just the thing with some lightly toasted bread, some salad leaves and a dab of  parsley mayonnaise.

So, the next time you spot some ham shanks and maybe a pig’s trotter and only about £3.20 in your purse, do you think you might just think of making a delicious terrine?