Meatfree Monday – Chargrilled peppers in oil

There’s a movement gaining increased acceptance across the globe – Meatless Monday – if you  give up meat for one day a week, it cuts consumption by 15%. It started in the USA as non-profit initiative of The Monday Campaigns Inc. in association with the Johns Hopkins School of Public Health Center for a Livable Future.

“According to the United Nations’ Food and Agriculture Organization the meat industry generates nearly one fifth of the man-made greenhouse gas emissions that lead to climate change. Geophysicists at the Bard Center and the University of Chicago estimate that curbing meat consumption by 20% (which could be achieved through Meatless Mondays) would lower greenhouse gas emissions as dramatically as every American switching to an ultra-efficient hybrid vehicle.

The United Nations also found that current meat production methods cause nearly half of all stream and river pollution. Meat also requires a great deal of fresh water to manufacture. The production of a pound of beef takes approximately 2,500 gallons of water, compared to a pound of soy, which requires only 220 gallons.  By switching to soy on Mondays each individual could save about 890 gallons of water a week.

As of 2006, forty calories of fossil fuel energy go into every calorie of U.S. feed lot beef (manufacture, transport and storage included). By comparison, a calorie of plant-based protein only requires 2.2 calories of fossil fuel. If the population of the United States went meatless every Monday for a year, 12 billion gallons of gasoline would be saved.

Now, those figures are based on American calculations but the maths is probably as relevant, proportionally,  to those of us in the UK. As a committed carnivore, I could never give up meat all together, though I do know how delicious meat free meals are. I justify it to myself by eating as much of the animal as possible (I don’t hold back from innards, guts and glands)  and making the most of every morsel. I could (and often do) serve meatless meals. Perhaps the formality of sticking to a meatless meal on Mondays would concentrate my mind?

Even if I don’t want to save the planet (how very mean of me) or care about the the welfare of animals (how callous would that be?) then I should care about my health …

“On average Americans consume 8 ounces of meat per day, 45% more than the USDA recommends. Meat typically contains higher levels of saturated fat than plant based foods. Saturated fat intake has been linked to multiple preventable illnesses, including heart disease, stroke, diabetes and various cancers.  By removing meat once a week, the average American reduces saturated fat intake by 15%, diminishing the risk of these diseases.

A ten year longitudinal study has also linked rates of personal meat consumption to age of death. The results of this research suggest that the deaths of 1.5 million Americans over a ten year period can be attributed to excessive consumption of red and processed meats.

Chronic preventable illnesses—including those associated with excessive saturated fat intake—cause 70% of all deaths in the United States. In 2007 alone Americans spent 1.7 trillion dollars on health care related to preventable illnesses”

Following on from that, here in the UK, Paul, Stella and Mary McCartney started Meatfree Monday , saying “In the future we are all going to have to change the way we eat. We believe that it is possible to do things like changing our diets with a sense of optimism, joy and the satisfaction that you are really helping to make a difference in the world.”.

It’s not just about saving the world.  It’s also about saving our purses. Cutting back on meat provides a good cost saving as well. It is a return to the way our families ate in years gone by. Nowadays we are (in the main) lucky enough to be able to buy meat, if we want to, every day. In previous centuries meat was seen as a luxury and what meat there was had to be eked out.  (One of my favourite books, Elisabeth Luard’s “European Peasant Cookery” would be a good thing to read if you were interested in finding out more. There’s a whole world of recipes just waiting to be explored.)

Anyway, on to what I am going to do. I will make that effort. I will make Monday my meat free day.

Now…. I said it would be meat free Monday. I said nothing about the Sunday….which wasn’t meat free. Not meat free by any means.

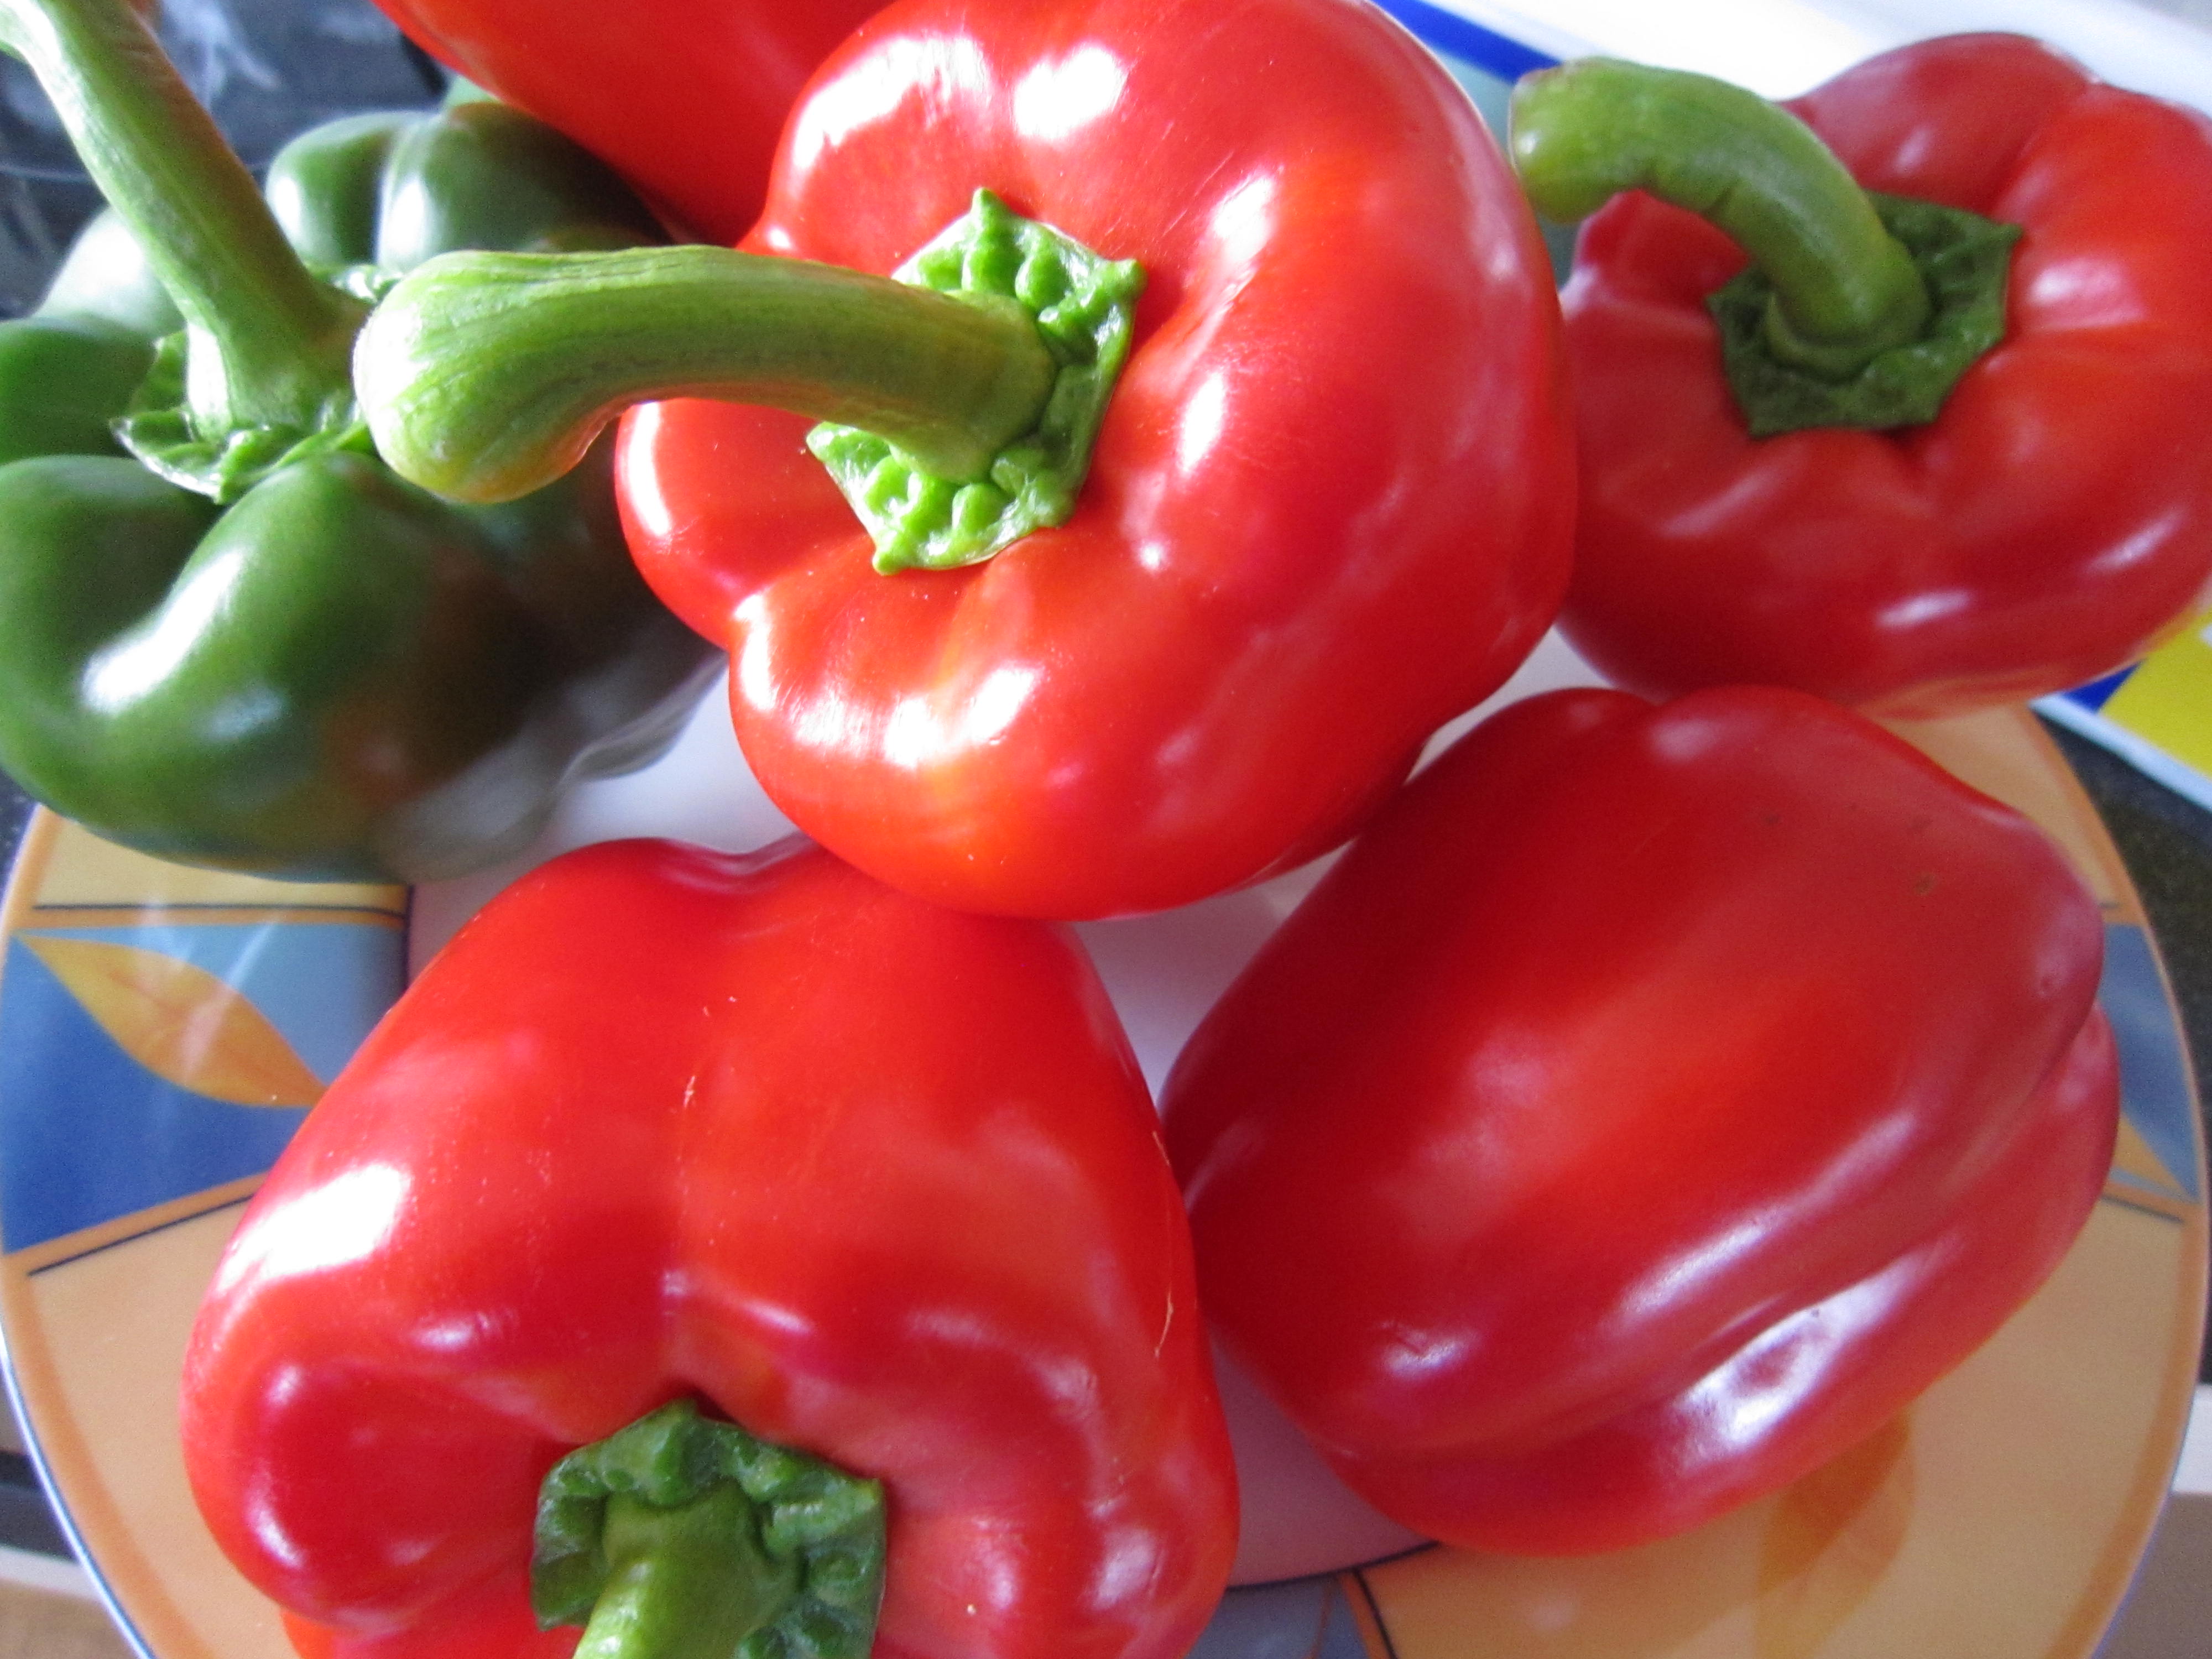
I was doing a barbecue and realised that the glowing embers of the charcoal would be perfect for chargrilling peppers.

I love chargrilled peppers – they are a wonderful addition to salads and for those of us who take packed lunches to work, they are truly gorgeous in sandwiches. I like to use red peppers best of all as they are sweeter but this time I had some green ones to add in.

Vegetarians.. look away! Yes they are sausages. Now, the success of the peppers does not rely on sausages being grilled next to them. It’s just, as you know, we only have a small balcony so I have to have a small bucket barbecue. I have to put on what I can, when I can.

Anyway, on they go and they are turned on the grill to get good and charred

Once that’s done and they are charred all round, pop the peppers (mind your fingers!) into a plastic bag so they can cool down.

As they cool, they steam and the skin loosens and is easy to peel off. Once they are cool, tip them out of the bag.

They will be juicy and dribble a lot so make sure you do this over a plate. It’s a messy job but oh-so-worth it.

Peel off the skin and scoop out the seeds – you will be left with just the glisteningly soft flesh of the peppers.

I cut them into slices so they are easier to deal with once they are in oil.

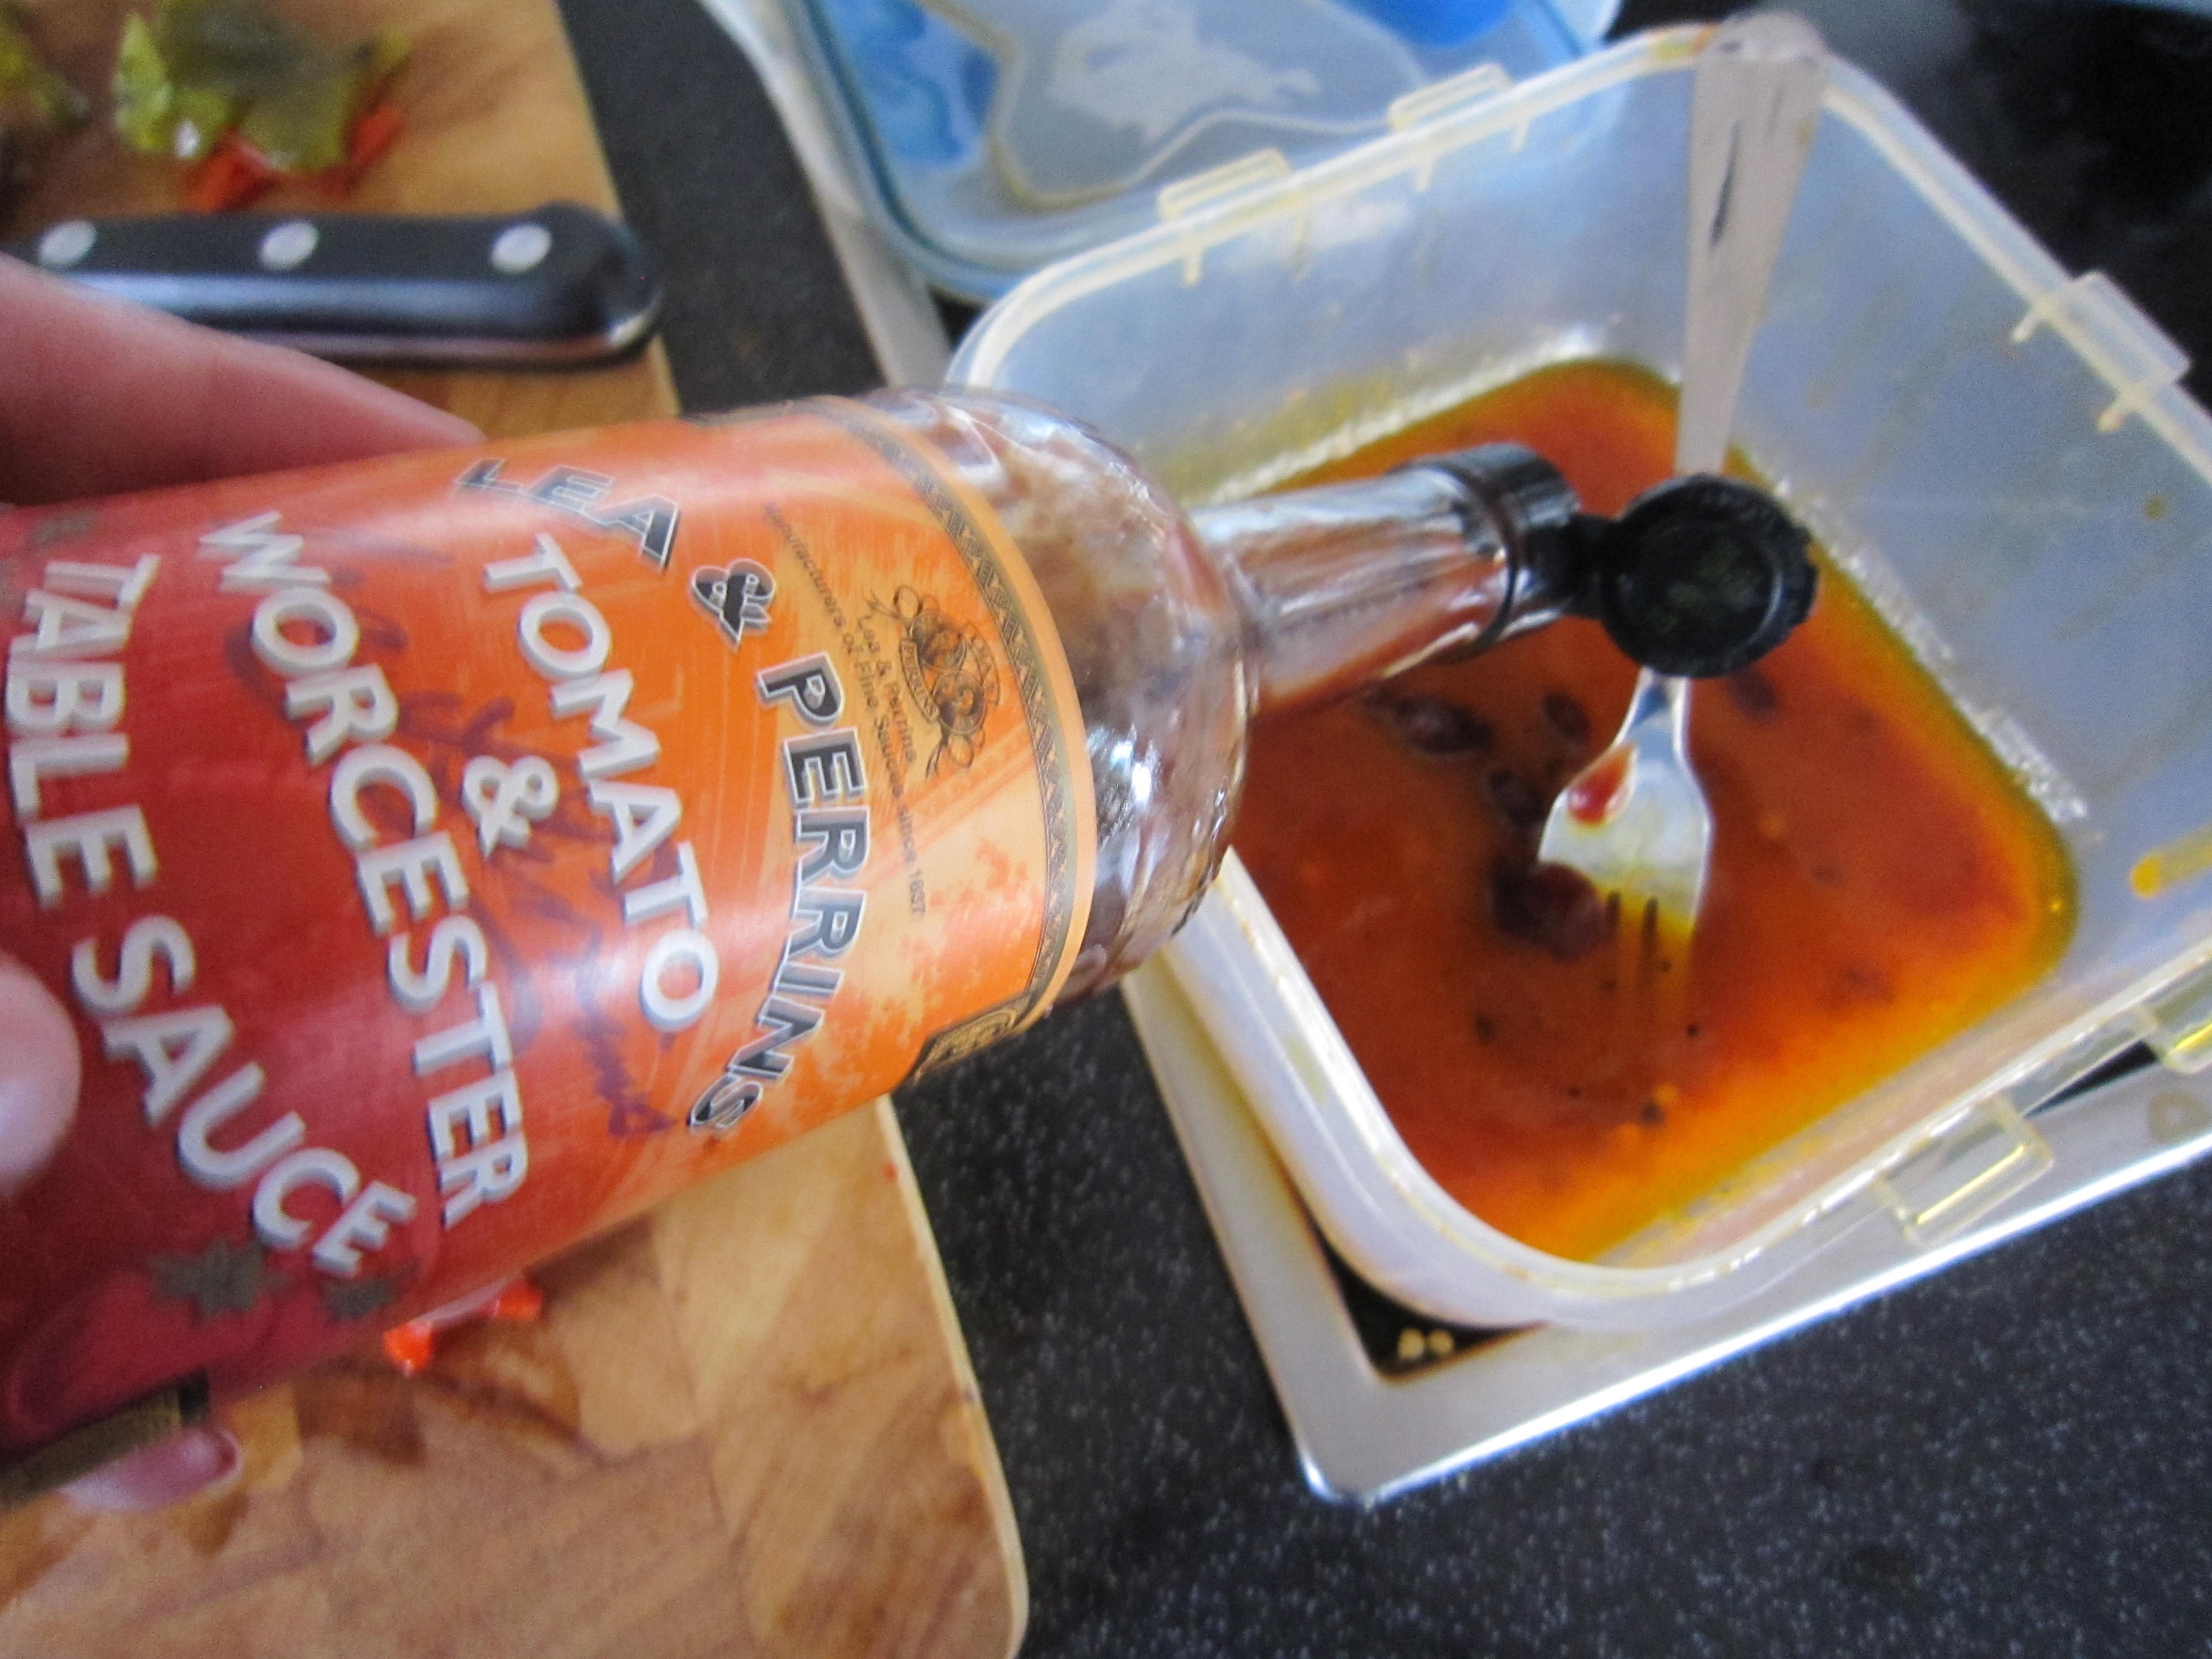
All you do then is get an air tight box and pour in some oil – I was using (because I had some left and I needed to finish the bottle) Rice Bran oil and olive oil

and I mixed it with some Lea and Perrins Tomato and Worcester Sauce.

Use whatever you like to flavour the oil slightly. The peppers have a lovely sweet and smokey flavour to them but adding just a hint of flavour to the oil really makes them special.

And then, all you do is add the sliced char grilled peppers.

And chill.

Actually, that could be an instruction to you as well as what you do with your box of peppers!  Because that’s all there is to it.

Into the fridge with the box and you have the perfect ingredient for salads or sandwiches.

Oh, and I use it in meat dishes too…… one of our favourites is Pork and Pepper Goulash 

I’m adding this bit in here because the lovely Lorraine added it to the Comment section after this was initially posted and unless you read through the comments you might not spot what she says. Lorraine lives in Canada and is married to Sonny, who is Italian…..

“As far as the grilled peppers, we grill a bushel of them every September when we get them cheap from the farmer’s market. My dear old mother-in-law (now l0l) got me into this a number of years ago as they are a staple in the Italian household. They appear on plates at every family meal. However, being only two of us, we grill the peppers and after cleaning them all, place them on paper towelling and then we place in small freezer bags and freeze for the winter. We take out a bag or two, place in a container and add olive oil, glove of garlic, dash of balsamic and if you like, some hot pepper flakes. Great on sandwiches and with grilled MEAT. Not a fan of the green ones – but the Yellow and Orange Bell Peppers are great – you must try.”

What a great idea that is. If you leave the peppers in oil for too long they soften too much. The way forward is, obviously, to do it Lorraine’s way and freeze any excess until you need them.

Today, though, is Meatfree Monday and I made sandwiches. Cream cheese and roasted pepper sandwiches…..

Delicious!

I’m on the way to saving the planet, my health and my cash…..pretty much of a result for the start of the week, eh?

Sweet Basil Biscuits

As you will have noticed from the previous post about my balcony garden in the sky, one of the things I love to do is grow my own basil – one of the most aromatic and useful herbs there are.

It saddens me when I see it in little pots in the supermarket. All you get are weedy, little, soft stems and a poor plant that is far too big for the pot. The seedlings are grown indoors in their thousands and, once bought and brought home, tend to die quickly in their thousands too. The best basil is grown from seed and allowed to get good and strong outside. I’m certain that the buffeting of the wind strengthens their stems. The sunshine concentrates their scent. Is there anything nicer than the scent of fresh basil? It’s enlivening.

OK, there’s a lot of the time when you simply CAN’T grow basil outside but when the opportunity is there – make the most of it. Failing that, of course, you must have a windowsill?

I like to grow the usual sweet basil, with its large soft leaves and the smaller leaved variety, Greek Basil. It’s not really Greek at all, but Italian, originating in Chile. An international basil with the most wonderfully strong scent. It grows tidily too, like a tight,  little ball. I keep promising myself that next year I will grow it in two, tall and elegant pots and put them on either side of the french doors to the balcony. Can you imagine the smell of that, wafting into the living room on a hot night? Scented topiary. Blissful.

I use my basil in traditional ways in tomato based sauces, scattered on top of  beautiful buffalo mozzarella with tomatoes as a delicious salad, in pesto for a simple pasta dish and in oil that I would make to drizzle over salads or cheese or bread later. Always it seemed in savoury ways. I’d never even thought of using it in something sweet.

And then, in last month’s Observer Food Magazine,  Nigel Slater wrote about going to the Royal Horticultural Society’s Chelsea Flower Show and meeting his friend, Jekka McVicar (she of the famous Jekka’s herbs). She handed him some basil biscuits…..

Basil biscuits?

Could this be a new use for some of the basil I was growing? I had to try.

And a biscuit, too…. well, it would be in the interests of research, obviously. You are allowed research on a diet, I’m sure of it. Obviously, me working in a University has caused me to develop serious academic concerns.

Besides, it was quick and easy. What more prompting did I need?

No more prompting but I did need 100g of butter, 50g of sugar, 50g of ground almonds, 100g of plain flour and a large bunch of basil leaves.

I like the symmetry of that recipe – easy to remember quantities and not many ingredients. Perfect!

The oven was switched on to 180 degrees C ( 160 degrees if you have a fan assisted oven) 350 degrees F.

It was a simple matter of creaming the butter and sugar together

Then adding the ground almonds and then the flour.

Pop that out onto a floured board and knead it into a dough.

Then, chop your basil and start rolling the dough into it… the basil will  get right in there and the smell is magnificent.

See?

All you have to do now is slice the roll into biscuits! The recipe says 15 -20 biscuits from this amount of dough so use your judgement. I can never work out, with any speed, just how big 1cm is. It’s about the width of a little finger, if that’s any help? And yes, I did just measure it with a ruler to check.

(Comes of being a child of the crossover age when we switched from Imperial measurements to metric, I suppose, although I do think all of us Brits are like that. It doesn’t matter how long we have been metric, or how many regulations there are to stop shopkeepers selling us half a pound of butter when we should be asking for grams, or a pint of milk  instead of 0.5862 of a litre; we still, generally, think in pounds and ounces, pints and gallons, feet and inches.

Look at when a baby is born – we still coo with delight (and understand exactly) what a good 8lb baby will be like. Same goes for feet and inches. I am five feet three inches tall. I can understand that. 160 odd centimetres? Sounds like a giant! And my waist… well that used to be 24 inches – though with age and greed that has certainly increased. 24 inches? You know where you are with that. But 61 centimetres? Dear me.)

So, slice your biscuit dough into the appropriate size. Use whatever measurement you like. I am most fond of commonsense as a measurement.

Put them onto a baking tray – either grease it well or use, as I do, a silicone baking sheet so the cooked biscuits can slide off easily. (Saves on the washing up, too!)

Into the oven for 15 – 20 minutes and then you get this….

Deliciously golden, green flecked biscuits… the smell is utterly gorgeous. The taste is subtle, sweet and delicious.  very definitely more-ish.

Whoever would have thought that putting basil into a biscuit could be so inspired? Jekka McVicar deserves a medal.

I took some in to work and they were devoured there too.

All I can say is, basil is not just for tomatoes but for biscuits too!

High, high above the city – you can still grow your own fruit and vegetables!

Some of you may have picked up on the fact that nowadays the Bear and I live high above the city, in an apartment. We are at the top of the block, which is itself on top of a hill and have the most marvellous views over the city below us. One of the best things about living here is that in the morning the dawns are fantastic

I’ve always been an early riser and I love to make my coffee and look down over the city sleeping below.

Each day the dawn is different… sometimes misty and calm and sometimes outrageously colourful. It probably is the best part of the day.

We have the most incredible views all round because our apartment is on two levels and the top floor has walls of windows on three sides.


… and running the full length of the apartment is our balcony

It’s not a big balcony – it’s quite narrow, really – but I have managed to make the most of what I have. I knew I would be able to grow something – there were so many things I just didn’t want to be without.


There’s a fig tree in a pot with (so far) over thirty figs, ripening nicely.

Who would have thought you could grow figs so high up? It can get very windy up here but Brown Turkey Figs are very hardy (that tree was with me in the far north, in Durham and fruited well up there too) Figs produce best when their roots are confined so keeping it in a pot is the best thing for it.

I even have an apple tree up there – if you buy the single stem fruit trees, specifically grown for containers, it is amazing what you can get away with in the smallest of spaces. Despite being told that I should keep the balcony clear………

Of course, the Bear is forever on at me as I smuggle more and more onto the balcony. I just wait until he is travelling and then I bring something more from the north… Of course he was going to notice a five and a half feet tall apple tree. And as for that fig tree – well, that is in a terracotta pot and it half killed me getting it up to the top floor. Still, he is going to be happy when he can just wander outside and pick a fresh apple or ask for a juicy fig…

I have herbs, of course, there’s thyme and rosemary standing next to a pot of lavender on either side of the french doors and a large pot of sage. When I walk out onto the balcony when I get in from work, I brush past the plants and smell their gorgeous perfumes.

We have herb pots (carefully attached to the railings) all along the top of the wall, so I can go and cut fresh sweet basil, coriander, parsley (both curly and flat leaved), mint, chives, garlic chives, a huge selection of salad leaves that I can cut at and go back for more almost daily.

It’s where I grow pots of chillies, ready for cooking with

or preserving in oil

This year, my brother has given me three chilli plants – Pinocchio, Decayenne and Heatwave, all grown from seed. I really should get some jalapeno chillies going as well, though at this time of year I’ll have to buy a seedling.


And that’s not all I have up there… there’s a bay tree and an olive tree growing there too. OK, I use the bay leaves but somehow I don’t think I will be brining my own olives.

It’s flowering now and it did have fruit on it last year but they were small and didn’t amount to much.

 The top of an apartment block in the Midlands just isn’t the same as a sun scorched hillside in Greece.

My cousin has her own allotment and always starts her seeds off in time and sends me the seedlings… this year her gorgeous french beans and a couple of sunflowers.  I like to snap off a bean and eat it as I water the pots. There’s a sweetness about them, straight from the stem.

My wild garlic grows up there in a pot

and it is the first thing I can eat from my balcony garden.

I’d love to grow more, of course, but what I do grow is pretty good for such a small space. I would love an allotment but the ones nearest to our apartment, St Ann’s Allotments, have a waiting list as long as your arm. I’ve been on the list for a couple of years now and I suppose I shall be on there for a few years yet.

When I moved here, to be with the Bear, I remember thinking there would be so much I would miss and so much I wouldn’t be able to do if we lived in apartment. Do you know what? I probably grow more up here than I did in the north.

No matter how small a space you live in, there is always room for something to grow. And there’s nothing like the wonderful sense of achievement you get when you can just walk outside and bring in something perfectly fresh that you have grown yourself.

What do you grow?  What couldn’t you live without?

Strawberry Pistachio Shortbreads

I love reading. I especially love reading food writing.  I think there’s nothing better than reading the story behind the recipe. A recipe just set down by itself doesn’t grab me the way a recipe does when I get to know more about the cook… the reasons why they made that recipe and just how they did it.

 I have quite a large collection of cookery books  (well over 150) and a mountain of food magazines. The Bear is always on at me to do something with them but I just can’t. I suppose I should go through the magazines at least and cut out the recipes I really want to try but I just haven’t got around to it yet. Part of it is, I think, that I was bought up never to despoil a book (and by extension, a magazine.) I would no more take a pair of scissors to a book than I would turn down the corner of a book or crack its spine. Books are to treasure and read again and again.

Jeffrey Steingarten – now, there’s a writer! A lawyer turned food writer for Vogue, his books “The man who ate everything” and “It must have been something I ate” kept me enthralled for hours and I still go back and read a chapter every now and again. That’s not so much recipes as mini essays and it is one of the things the Bear and I bonded over when we first met. If you are looking for entertaining (hugely entertaining) and erudite, informative stories about food, he’s your man.

Nigel Slater is another – endlessly fascinating with a huge list of cookery books to his name. “Toast: The Story of a Boy’s Hunger” is his autobiography… start to read that and I bet you won’t put it down. His “Kitchen Diaries” is one of my favourite books of all time. Nigel also writes for The Observer and the monthly Observer Food Magazine is one of my treats. There’s always something I want to cook from his articles –   everything he does is so beautiful – just look at his website and see what I mean.

The last Observer Food magazine (June 2010) featured his garden recipes and there was one in there that instantly appealled – Strawberry Pistachio Shortbreads. Strangely, for England, we have been having a marvellous summer – lovely bright days with lots of sun and the strawberries are making the most of it. There are mounds of fresh British strawberries everwyehere and this was my chance to make the most of them.

I wanted to take something nice to a friend’s house and the thought of lovely shortbreads topped with strawberries and vanilla cream seemed to be a brilliant idea. Very summery. Very British. Which would be good, because we were going to J’s house (he’s from Catalonia) and meeting N (from Argentina)  and L from the Czech Republic! Our get togethers are always brilliant international affairs.

Anyway, that was what I was going to make.

I needed  100g of butter, 3 tablespoons of caster sugar, an egg yolk, 200g of plain flour and 100g of finely ground pistachios for the shortbread….

And that is when I started to wonder. If you look at the article you can see a picture of the shortbreads and they seem to have bits of pistachios in there… not finely ground at all. So what should I do?

I sat at my desk (OK, so I was at work, but a girl can’t work constantly…) and flicked through the article again… it definitely said ground pistachios and the picture didn’t show that. Then I noticed at the end of the article was Nigel’s email address at the Observer.

Nothing ventured, nothing gained has always been my motto, so I emailed him, just asking for clarification. I mean, had he done it one way and decided the other way was better?

I didn’t really expect an answer but within 20 minutes he had replied! How marvellous was that? I never for a minute anticipated a reply.. or if I had got one, it would have been a standard response, copied and pasted into an email some weeks later. What a gentleman!

And the answer… you can use ground or roughly chopped as you choose. the resulting difference will only be the texture.

I liked the look of the ones in his photograph so I decided to do roughly chopped pistachios.

So… I was ready…

I weighed 100g of butter, beat it until it was soft and fluffy with 3 tablespoons of caster sugar (that’s superfine to those of you across the Atlantic)

Roughly blitzed (briefly) 100g of pistachios so I got a range of shapes and sizes of bits of nuts

Then dropped the pistachio bits into the buttery mix and mixed it in well

One egg yolk was added to bind it together and then the  200g of flour was added.

It was a stiff mix and Nigel advised adding a tablespoon of water to it all to make it into a firm dough.

This had to be kneaded into a ball and then rolled into a thick sausage shape. As this was to serve 8, I could see how big the roll should be.

Don’t they look pretty?

I pre-heated the oven to 180 degrees C/355 degrees F (actually, Nigel didn’t put the temperature on the recipe but I used what I thought would be appropriate and anyway, it was a bit late to be emailing him again. I couldn’t really expect him to be sitting there just looking at his emails)

In they went, lying on a silicone sheet for ten minutes or thereabouts. They weren’t to get coloured really,  just dry to the touch.

The cream was made by mixing extra thick double cream with some vanilla seeds…

 just slit the pods with a sharp knife and scrape out the seeds

and mix it through for the most gorgeous vanilla cream.

I sliced my beautiful strawberries and they were ready to be balanced on great, generous spoonfuls of delicious cream… on top of those gorgeous shortbreads.

What could be more British than strawberries and cream on a hot summer’s day? Our international gathering made short work of them.

Thanks, Nigel. Thanks a lot – they were lovely. And thanks for replying!

Meringue, dulce de leche and cream… what’s not to like?

After I’d made the dulce de leche, the important thing was , first of all to use it and secondly, use it sensibly to get as much joy as possible from eating it for as long as possible.

It would be so easy just to spoon it down…. but I resisted and set to, thinking about what to do with it all.

It just so happened that we were going to a barbecue with our friends and I had promised to make the desserts. An ideal opportunity to make something truly delicious…..I had once made a rather delicious meringue, cream and dulce de leche dessert when we had everyone round to out house. I’d bought the dulce de leche then, of course, I wouldn’t have dreamed of making my own.

I’m sure there should be a name for this but I don’t know what it is… think Pavlova base, spoonfuls of dulce de leche, piles of whipped cream, studded with little nuggets of the best fudge you can get…. mouth watering yet?

It’s not a Pavlova, of course, because Pavlova has fruit as a sharp contrast to the sweet crunchy and chewy (yes, a good meringue should be like that!) base and the smoothness of the cream.

This was going to be sweetness personified, mellowed with the whipped cream. That was good though, because the people that were going to eat it have a distinct liking for sweet things. Anyway, it was a good day – we would be meeting with our friends, the weather was marvellous and a barbecue was planned. The fact that the World Cup was on that afternoon seemed to heighten the joy of some people….

So, first things first. I needed to make the meringue base.

Start by preheating the oven – 150 degrees C (130 if it is a fan oven) or 300 degrees F.

Make sure you have a good baking tray and line it with either baking parchment or a silicone liner. You will need something like that so you can peel the meringue off when it has cooked.

The important thing about making meringues is that you must – absolutely MUST – make sure there’s not a speck of fat in the egg whites. So when you are separating the eggs be careful, very careful. Make sure the bowl you will be using is spotlessly clean.

When I make meringue, I use my copper bowl.  My all round hero food-guru, Harold McGee told me to do so because it stabilises the egg whites and makes a better foam with less risk of it all collapsing. It’s not just a wild fancy to have yet more gorgeous kitchen equipment, you know… it does work.  You don’t have to have one but I bought that back in the days when I had a well-paid job and I  could indulge myself.

If you haven’t got one, don’t worry. A pinch of cream of tartar can do the job of stabilising just as well.

The important thing is that you whisk the whites well, no matter what bowl you are using.

Three egg whites in a spotlessly clean bowl can be whisked to meringue perfection in a few minutes. 

Before you start whisking, though, weigh out your sugar – you need 175g/6oz of caster sugar (which for those of you in Canada – Lorraine- or America, means super fine sugar.) When it is time to start adding the sugar, little by little, you want to have everything ready.

Whip until the egg whites have formed soft peaks and you can tip the bowl up without it all falling out. Only then do you start to add in the sugar, bit by bit.

You can see the whites becoming glossy

When everything has been whisked together and you have a mound of glossy, white fluffed up meringue mix, spoon it out onto the parchment or the silicone liner, making a circle as the base. Some people draw circles on the paper to make sure they get a proper circle but I never do. It’s a meringue for goodness sake… it is going to be pillowy and blowsy and laden with whipped cream. We aren’t talking architecturally precise. I like the organic look of it when it comes out – so very obviously not manufactured in an industrial complex.

Once you have the circle, you make a sort of blobbed wall around the edge with more spoonfuls of meringue. You are supposed to twirl each blob round with a cocktail stick to make little pointed swirls of meringue…. but….

And this is a big but.

Normally my meringues are fine. But normally I am not attempting to make then in a boiling hot kitchen on one of the hottest days of the year (31 degrees C) with lots of humidity.

Humidity is the killer of meringues. I waited until 8 at night in the hope the weather would break and the humidity lessen.. but it didn’t happen. I had to have the not-really pavlova ready for the next day. I had to get cracking.

Reasoning that it would be OK, if not as beautiful, I got on with it. Into the oven it went and the temperature was immediately turned down to 275 degrees F/140 degrees C/120 degrees fan assisted.

It was going to take an hour to cook and once that hour was up, the oven is switched off and the meringue left there overnight. That lets it dry out perfectly.

So, the next morning, I opened the oven to take out the base.

Ah. It was as I thought. As I knew really, when I first put it onto the baking sheet. Despite whisking and using my copper bowl that dratted hot and wet air had wreaked havoc. It was OK but it wasn’t billowing into crisp peaks of perfection.

 It wasn’t the most beautiful meringue I have ever made but, what the heck. It was going to be the most delicious meringue I’d ever made and that’s what counts.

The next day was brighter and hotter than ever. I carefully peeled off the silicone paper and put the meringue onto a plate so I could take it to J’s house.

Once there, while he and N busied themselves with the barbecue, I spooned the delicious dulce lecheover the base of the meringue.

Just look at it….. thick and rich and caramelly

Next, great luscious spoonfuls of whipped cream

Then, pieces of delicious fudge scattered over the top….

And more whipped cream on that.

It was delicious. It was a triumph.

Which is more than you can say for the football.

England were out of the World Cup but the not-really pavlova was a winner. Not a scrap left. Depite it not being the most beautiful meringue base ever.

Don’t despair if your meringue isn’t perfect. Looks aren’t everything you know. Taste is.

Dulce de leche – Argentina’s iconic sweet spread.

Every country has some foods that are instantly recognised as being associated with it – for instance, in England  it is going to be roast beef and Yorkshire Puddings, or maybe fish and chips; Japan is probably  sushi. France? Maybe Foie gras or cheeses such as Camembert and Brie.

Argentina is famous for its meat, of course, and especially for the beef, but all Argentineans have a deep longing for sweetness….. because wherever you go in Argentina you will find dulce de leche (literally “sweet of milk”)  – the most delicious caramelised milk, made from sweetened condensed milk. Sweet, sticky, almost softly caramel toffeeish…

When you go to breakfast, there are little pots of it, waiting to be spread on toast… when you have a pastry or a biscuit, there’s usually dulce de leche involved somewhere, either as a filling or a flavouring. You can buy lovely large pots of artisan made Dulce de Leche or commercially produced packets. Whatever you get is guaranteed to taste delicious.

One of our dearest friends is from Argentina and he always looks wistful at the mention of dulce de leche when he is far away in cold, wet England.

The thing is, it’s not difficult to make… it is, however,  (usually) time consuming… and, in my eyes at least, just a bit scary.

The traditional way is to take a large quantity of milk and sugar and, after pouring it in a pan, slowly simmer it until it thickens as the water evaporates and it caramelises to a wonderful golden brown. Thing is, you have to stir it constantly – you can’t walk away and leave it.

Another way is to take a tin of sweetened condensed milk and boil it, unopened, in a pan for a couple of hours. You can’t walk away from that, either. If you let it boil dry the tin will explode and the kitchen (and any unwary inhabitants) will be covered in superheated caramel. If you avoid that fate then you have to take care to leave the tin to cool properly before you open it.

See what I mean about it being a bit scary? And if you went down the boiling tin route, how would you know that it had caramelised perfectly?

So, I was content to eat it but too afraid to try making it.

Until I found, whilst idling around various food blogs, (one of my favourite activities) an article by David Lebovitz telling me how to make it safely and quickly!

He says to make it in the oven in a bain marie and that it only takes one and a quarter hours…… what’s to lose, I thought? I just had to try it out.

I needed an oven proof dish and a tin of sweetened, condensed milk.

The oven needed to be preheated to 220 degrees C/200 degrees if fan assisted) 425 degrees F

I put the oven proof dish inside a large metal roasting dish and then poured in the milk.

A sprinkle of Maldon sea salt was stirred through.

I wrapped tin foil tightly over the dish and poured hot water into the roasting pan until it was half way up the sides of the dish with the condensed milk it.

And that was it.

Into the oven for an hour and a quarter, or thereabouts.

And no standing over it, terrified that it might boil dry and the tine explode… no standing for hours, stirring it slowly. Just as well because this was a Friday night after my first week back at work with jet lag and all I wanted to do was slump on the sofa.

I did check after about 40 minutes that it hadn’t boiled dry (it hadn’t) and I couldn’t resist having a peek at the colour…..

It was turning golden!

And, oh, the smell….. delicious, rich, sweet caramel aromas coming from the oven… Someone should make that smell into a scented candle or room perfume…

And then… just an hour and a quarter after putting it in the oven

It looked good.

But it was too hot to taste so I had to leave it to cool. David said to whisk it to get out lumps out but it was fine.

Oh my word.

Thick, delicious, spoonable delight. It was dulce de leche.

And I had such plans for it…..

But I needed a real assessment to be done – was it good enough? Did I have to go back to the traditional way of doing it?

As I said, we have a very dear friend from Argentina. It was his marvellous mother who organised all of our travels around the country (Thank you, P!) and he was with us for most of them. Who better, I thought, than N?

That was it – when I saw him, I marched up with a spoonful held out in front of me and demanded he tried it.

He liked it! Not only that he said it was delicious!

N’s fiancee, L, had made it the traditional way before now and both of them reckon that this way produces dulce de leche of comparable deliciousness with a minmum of effort.

So, there we have it – quick, safe and easy. Delicious and moreish. Rated by people who know what it should taste like… and by those just want to scoop it into their greedy mouths!