Making Butter.. how to have luxury in a credit crunch kitchen

As I look out of the window I see greyness everywhere…the skies are grey, the pavements are grey and even the people look grey. It’s the Age of Austerity, say the Government and the financial whizz kids who got us all into this mess.

Time to tighten our belts… cut back…spend less. We have to suffer….

The papers are full of articles on the cost of living and how food bills are soaring, utilities bills are going through the roof and how the ordinary person must make sacrifices.

Well, I agree. I agree on the cutting back, anyway. If we cook at home with care we can all produce marvellous meals for much less than you would spend on a takeaway or a pizza, or even fish and chips.  I have made a habit of cooking carefully and spending very little and, truth be told, have often turned out meals that are better and tastier than many meals I have had in restaurants. Look through the Credit Crunch section and you’ll see recipes for Beef Cheeks (the most wonderfully tender beef casserole you will ever eat); delicious soups like Roast Garlic and Marrow or Puy Lentil and Pumpkin or the gorgeous Tomato Rice Soup – simple, inexpensive ingredients made into food that you are glad you are at home for. There’s recipes using polenta, that staple of Italian peasant cooking made into Baked Polenta Pie and rice…. risottos made with Black Pudding and Apple and Bacon – just scraps of things added to a basic ingredient and transformed into something you’d be proud to serve to guests.

I don’t really believe in too many sacrifices though. I always like to use butter in my cooking – I certainly won’t use margarine or some cheap, chemically concocted spread, where dubious oils are treated with this and that to make them go solid and spreadable. Butter is better. I don’t use too much and it doesn’t feature in every dish but when I need it, it’s there.

Butter is just milk shaken until it is solid. What could be simpler?

What could be better than calling in at the supermarket and spotting, in the marked down section, a large pot of cream that you know, with very little work indeed, can be made into lovely fresh butter? That appeals to my penny pinching ways and my love of luxury.

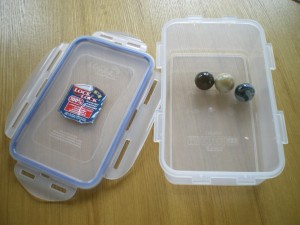
I’ve written before about making butter, way back at the start of this blog, when I did it by using marbles in a tupperware box. I still say this is a fun way to make butter and a most excellent way of entertaining children. I don’t suppose you could get them to do it all the time, but as a one-off? A Saturday afternoon’s entertainment? It’s a brilliant way to keep them occupied and then, of course, you can make them buttered toast for tea. 

This time, however, I had plenty to do and didn’t need to entertain myself unnecessarily, so I was going to do it the quick way. It’s probably the way you will end up doing it, too.

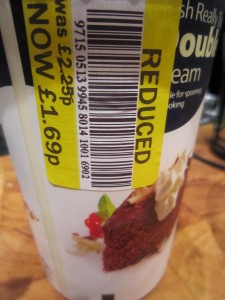
I had been shopping to get some ricotta as I was going to make ravioli and as I walked past the Dairy section, I spotted a large pot of double cream… the really thick double cream. It had been reduced  as it had reached the sell by date. This doesn’t mean that it was going off at all, just that the date they had set for it still to be in peak condition was today. Fresh cream, still perfect and at a reduced price?

Well, I had planned to be doing other cooking and I had plenty to do in the kitchen but this was a bargain, calling out to me. And it just shows how easy it is to do if I was going to do it in between making three different sorts of bread and pasta.

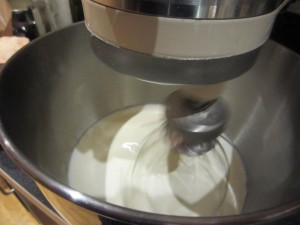
I put the cream into the mixer (you can do it with a hand mixer if you haven’t got a standing mixer… it doesn’t take long) and started to whip it.

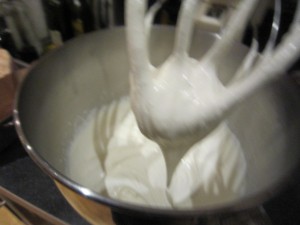
It thickens quickly.

And you keep whipping.

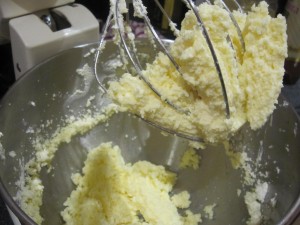
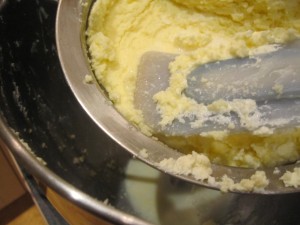
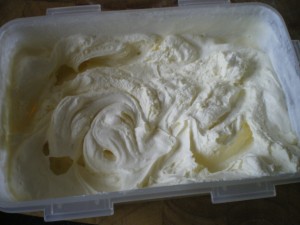
All of a sudden it transforms from a white, whipped mound to a lumpy, granular and yellowy mass. This is not great if you were looking for a topping for a dessert… but it is just what you want to see if you are making butter.

Perfect.

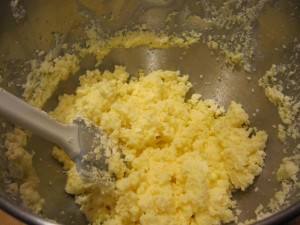
Look at it. Granular and yellow. That’s the butterfat.

Now, if you were using a thinner cream than I was, you would see quite a bit of buttermilk separating out from the creamy globules. The cream I was using was almost solid it was so thick, so there was less liquid.

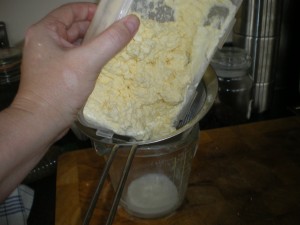
Pop the lot into a sieve and wash it inder a tap. I gave it a squish with a flexible spatula to get more of the buttermilk out.

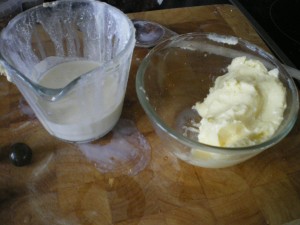
You can save the buttermilk for baking, or adding to soups – yet another credit crunch saving.

The Bear came over to help at this point… not because it is difficult but because I needed him to take the picture for you to see.

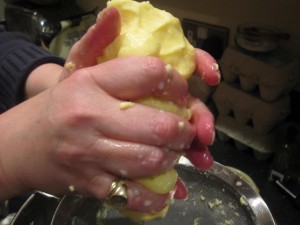
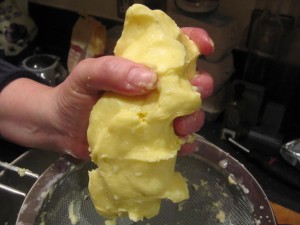
I got the butter out of the sieve and squeezed it together. More buttermilk ran out.

That’s butter, that is!

The next thing to do was to add salt.

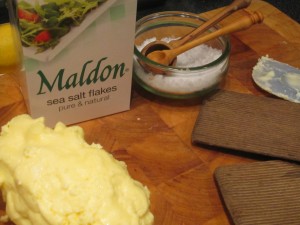
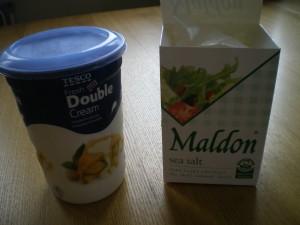
I’m a great fan of Maldon sea salt and a pinch or so of that, scattered over my hand squished butter and then squished some more meant I would have a beautifully salted butter.

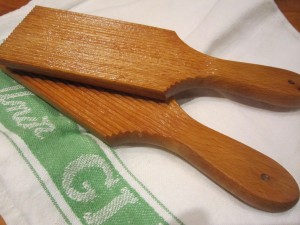
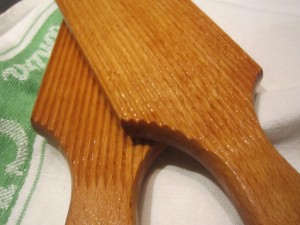
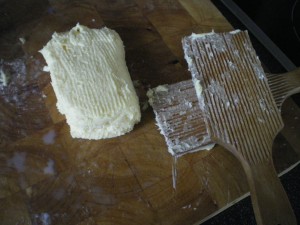
I do happen to have some old wooden butter pats  which are ideal for flattening the butter and getting the last of the buttermilk out. It also adds to the fantasy playing in my head that I am the consummate housewife and cook….

If you don’t have any, don’t worry. I just like them, that’s all.

If you look at them you can see they are finely ridged to help force the liquid out.

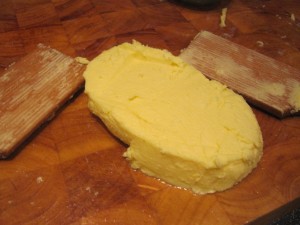
It helps make the shape of your butter. Again, it doesn’t matter if you haven’t got any, just shape your butter neatly.

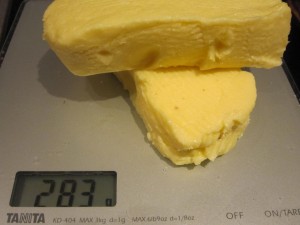
And look what I ended up with…283g of best butter.

Surely that counts as being careful with cash? A credit crunch success?

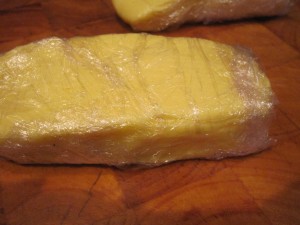
The butter can be frozen if you wrap it carefully…. you can flavour it with whatever you fancy….

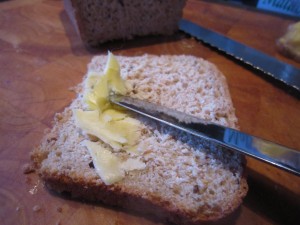
Or you can spread it on bread that you made and just enjoy it.

How simple was that?

That was made, while I did other things, in less than half an hour.

Now, as I said,  you can do it in a more relaxed fashion, getting young helpers to shake it about in a jar or a tupperware box, but you know what? This is just as satisfying and oh, so delicious.

Credit crunch money saving at its best.
Dulce de leche – Argentina’s iconic sweet spread.

Every country has some foods that are instantly recognised as being associated with it – for instance, in England  it is going to be roast beef and Yorkshire Puddings, or maybe fish and chips; Japan is probably  sushi. France? Maybe Foie gras or cheeses such as Camembert and Brie.

Argentina is famous for its meat, of course, and especially for the beef, but all Argentineans have a deep longing for sweetness….. because wherever you go in Argentina you will find dulce de leche (literally “sweet of milk”)  – the most delicious caramelised milk, made from sweetened condensed milk. Sweet, sticky, almost softly caramel toffeeish…

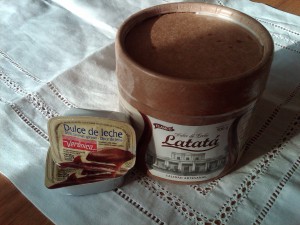
When you go to breakfast, there are little pots of it, waiting to be spread on toast… when you have a pastry or a biscuit, there’s usually dulce de leche involved somewhere, either as a filling or a flavouring. You can buy lovely large pots of artisan made Dulce de Leche or commercially produced packets. Whatever you get is guaranteed to taste delicious.

One of our dearest friends is from Argentina and he always looks wistful at the mention of dulce de leche when he is far away in cold, wet England.

The thing is, it’s not difficult to make… it is, however,  (usually) time consuming… and, in my eyes at least, just a bit scary.

The traditional way is to take a large quantity of milk and sugar and, after pouring it in a pan, slowly simmer it until it thickens as the water evaporates and it caramelises to a wonderful golden brown. Thing is, you have to stir it constantly – you can’t walk away and leave it.
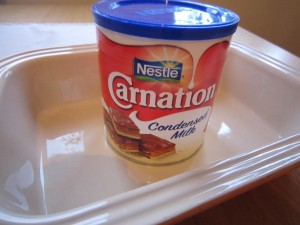
Another way is to take a tin of sweetened condensed milk and boil it, unopened, in a pan for a couple of hours. You can’t walk away from that, either. If you let it boil dry the tin will explode and the kitchen (and any unwary inhabitants) will be covered in superheated caramel. If you avoid that fate then you have to take care to leave the tin to cool properly before you open it.
See what I mean about it being a bit scary? And if you went down the boiling tin route, how would you know that it had caramelised perfectly?

So, I was content to eat it but too afraid to try making it.

Until I found, whilst idling around various food blogs, (one of my favourite activities) an article by David Lebovitz telling me how to make it safely and quickly!

He says to make it in the oven in a bain marie and that it only takes one and a quarter hours…… what’s to lose, I thought? I just had to try it out.

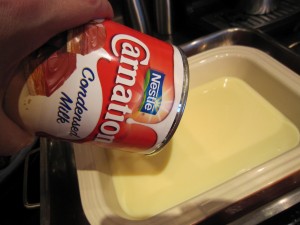
I needed an oven proof dish and a tin of sweetened, condensed milk.

The oven needed to be preheated to 220 degrees C/200 degrees if fan assisted) 425 degrees F

I put the oven proof dish inside a large metal roasting dish and then poured in the milk.

A sprinkle of Maldon sea salt was stirred through.

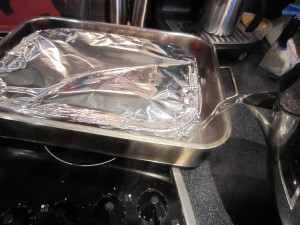
I wrapped tin foil tightly over the dish and poured hot water into the roasting pan until it was half way up the sides of the dish with the condensed milk it.

And that was it.

Into the oven for an hour and a quarter, or thereabouts.

And no standing over it, terrified that it might boil dry and the tine explode… no standing for hours, stirring it slowly. Just as well because this was a Friday night after my first week back at work with jet lag and all I wanted to do was slump on the sofa.

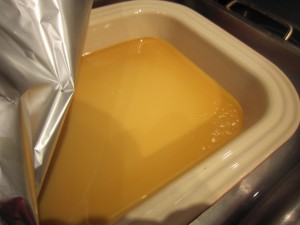
I did check after about 40 minutes that it hadn’t boiled dry (it hadn’t) and I couldn’t resist having a peek at the colour…..

It was turning golden!

And, oh, the smell….. delicious, rich, sweet caramel aromas coming from the oven… Someone should make that smell into a scented candle or room perfume…

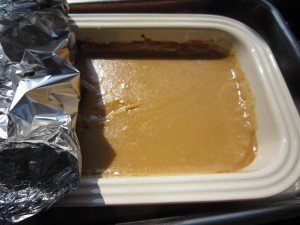
And then… just an hour and a quarter after putting it in the oven

It looked good.

But it was too hot to taste so I had to leave it to cool. David said to whisk it to get out lumps out but it was fine.

Oh my word.

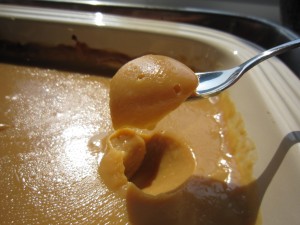
Thick, delicious, spoonable delight. It was dulce de leche.

And I had such plans for it…..

But I needed a real assessment to be done – was it good enough? Did I have to go back to the traditional way of doing it?

As I said, we have a very dear friend from Argentina. It was his marvellous mother who organised all of our travels around the country (Thank you, P!) and he was with us for most of them. Who better, I thought, than N?

That was it – when I saw him, I marched up with a spoonful held out in front of me and demanded he tried it.

He liked it! Not only that he said it was delicious!

N’s fiancee, L, had made it the traditional way before now and both of them reckon that this way produces dulce de leche of comparable deliciousness with a minmum of effort.

So, there we have it – quick, safe and easy. Delicious and moreish. Rated by people who know what it should taste like… and by those just want to scoop it into their greedy mouths!

Christmas Pudding Ice Cream

With the best will in the world, no family can eat an entire Christmas Pudding.

Not even when it is one made by my aunt… the world’s best Christmas Pudding maker, ever.

All that love, skill and years of practice to make a lovely pudding …. you need to use it up to the last crumb. And what better way than by making it into the Boxing Day favourite pudding… ice cream.

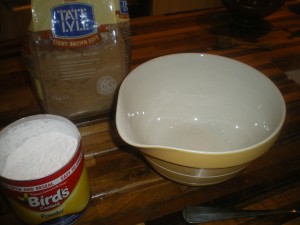
First, make some custard. You can do it with eggs, as I normally do, or you can do it with custard powder. I have to consider who will be eating the ice cream so it’s custard powder for me this time.

Mr Bird, a Birmingham chemist,  had a wife who was allergic to eggs but adored custard so he invented the world famous Bird’s Custard Powder. It uses cornflour to thicken and is a staple ingredient in most British kitchens. I use it when I can’t make real egg custard – for example for those who are allergic or intolerant and those who may be unwell and it isn’t advised that they eat egg yolks.

It makes a perfectly lovely custard though and generations of people have grown up on it. I still think a real custard is best but needs must and all that.

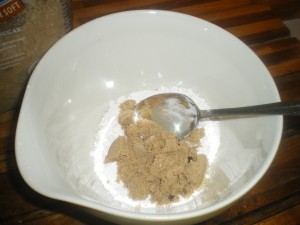
You combine the powder in a bowl with some sugar – two tablespoons of each.

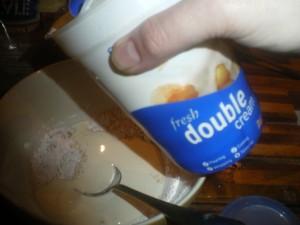
Then stir in some cold liquid… I am looking for a lovely, rich effect so I am adding cream

… maybe a couple more tablespoons of the cream, stirred in to make a smooth paste.

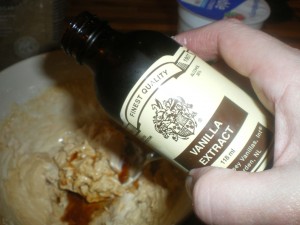
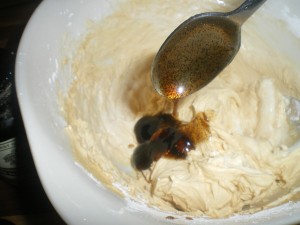
I like to add vanilla, as I would if I was doing the custard with eggs. You can use a teaspoonful of extract

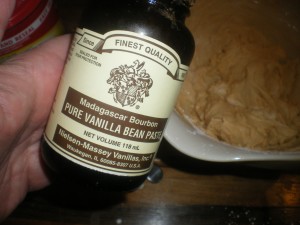
 Or, if you like the look of vanilla seeds, you can use the paste

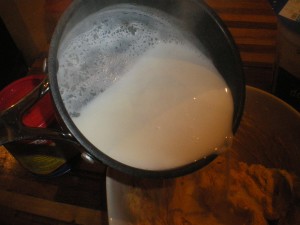
In the meantime, I have a pint or so of milk heating on the hob. Once it reaches boiling… well, once it gets those tiny bubbles round the side of the pan that are the warning it is just about to explode into a bubbling, overflowing pan of scalding milk…then you add that to the bowl and stir it smooth

You need to add it slowly and stir it round gently.. a smooth paste at first and then getting thinner and and more custard like.

Once it is smooth, pour it back into the pan and heat through to boiling again. It thickens and becomes…. custard!

You can see how it leaves a trail when you dribble a spoonful over the surface….

All you need to do now is put it into a clean bowl and leave to cool. I do this the night before and leave it in the fridge over night.

That’s handy… because if you you are using an ice cream maker, you need to have the bowl chilling in the freezer. Of course, there are some incredibly fancy machines that have their own freezing unit built in… but why spend hundreds of pounds when an ordinary machine can be had for around £30?

You can do this without a machine as well, you know. You just put the custard mix into a plastic box, clip the lid on and freeze it. You just have to keep opening the box and stirring it round with a fork to stop the ice crystals from turning the custard into a solid block.

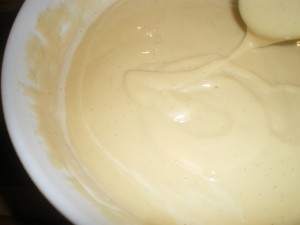
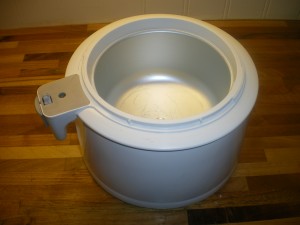
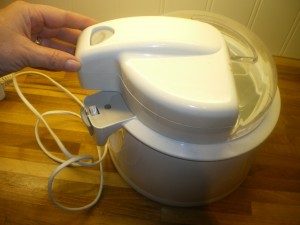
My machine is a simple one… you put the bowl in the freezer

and the next day, connect the lid,

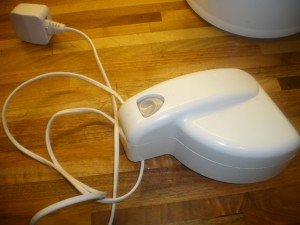
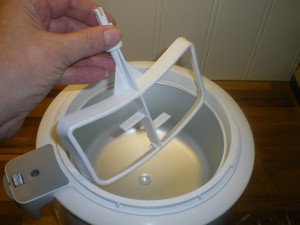
with the paddle and the motorised bit,

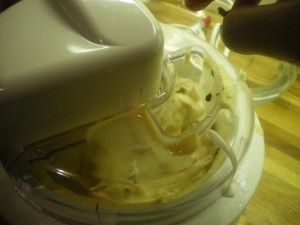
set it away to whirr and pour the chilled mixture down the hole in the lid…

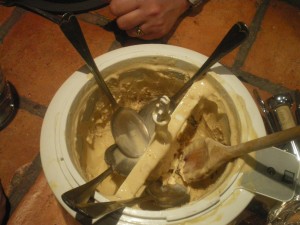
It whirrs away for maybe ten minutes or so, thickening and freezing.

You can see the change happening. Once it starts to get really thick and look like it is freezing, get your added extras ready.

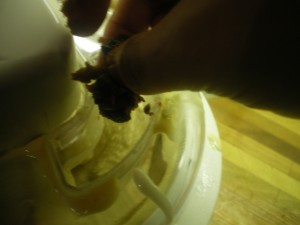
You break up your cold, left over Christmas pudding and drop bits of it down the hole so it sets into the freezing mix. Don’t do it too soon because you don’t want it to dissolve – you need bits of it running through the mix.

I also like to add little nuggets of brandy butter. They stay whole, too and make a surprising litle burst of soft booziness. I don’t think you are in any danger of getting drunk on it, but leave it out if you think it wouldn’t be suitable.

See how economical you are being? Using up any leftovers like this?

I suppose the fact that I was hiding the brandy butter to make sure there was some for the ice cream is neither here nor there.

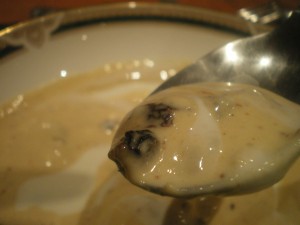
Within a minute or so you are ready to serve it up….. I might have poured some brandy cream over it as well….

It was left over, OK? I was trying to use it all up!

But it doesn’t end there…..

What should have been a respectable portion for each of us somehow seemed to be not enough after all.

I admit we were all feeling rather jolly. It was J’s birthday dinner and we did deserve to spoil ourselves.

The freezer bowl was called for and spoons were dug in

In fact, we all dug in.

Sign of a succesful pudding then, don’t you think?

Fresh Cheese

When I was young my mother would sometimes make cheese if milk had started to sour. Not a matured cheddar cheese or anything like that but a simple, home-made, fresh cheese, just as people have done all over the world whenever they have had spare or spoiling or leftover dairy products.

It’s easy enough – all you need is some milk or yoghurt, a sieve, a jug, some salt and some muslin. If you want to flavour it, you can mix in some chopped herbs say, or lemon zest, or garlic.. maybe crushed black peppercorns….. anything at all.

As part of the Great Greek Yoghurt Experiment I thought I would use some of the yoghurt to make cheese as I need some for another recipe.

You do need to allow some time for this but don’t worry, it’s not as if you have to be busy with it, hour after hour. Like much else we do, it is a case of starting it off and then leaving it to do its business until we wander back to it.

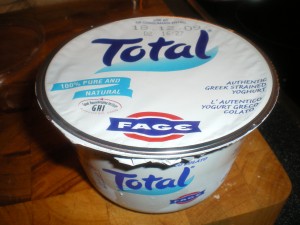
So, first of all, get your yoghurt

Yoghurt, cheese and chilli oil 012

………and think about what you want your cheese for.

I want to use it in a recipe that will involve roasted game, thyme and lemon so I will add lemon zest and thyme to it. If you want plain cheese then you make plain cheese – if you want something else then you add it. It really is as simple as that.

Yoghurt, cheese and chilli oil 038

My balcony herb box is looking a bit battered now but there’s still plenty of thyme.

Yoghurt, cheese and chilli oil 029

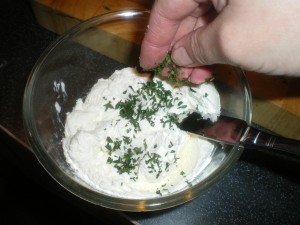
Strip the leaves from it and chop it finely.

Yoghurt, cheese and chilli oil 022

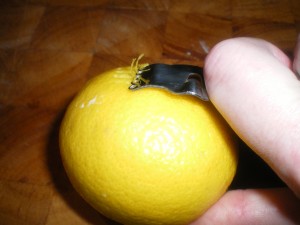
Get a lemon (make sure that you wash it properly – especially if it is a waxed one. You certainly don’t want wax in your lovely fresh cheese! If it is unwaxed then scrub it just as carefully because you certainly don’t want people’s dirty fingers in your cheese either)

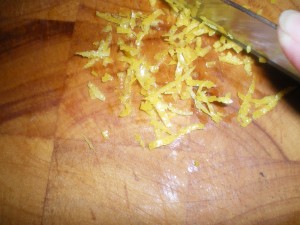
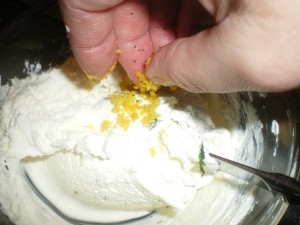
Get a lemon zester and get some lemon zest (that was a difficult photo to take… clutching the lemon and the zester in one hand as I leant over to take a shot with the other) and then chop the zest finely

Yoghurt, cheese and chilli oil 027

And now for the important bit – using the yoghurt. This will make lovely, thick, smooth cheese. (If you are using sour milk it will be an awful lot thinner and more lumpy, more like cottage cheese.)

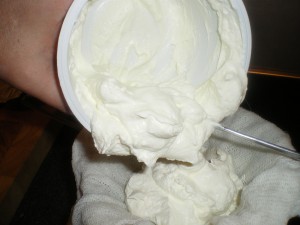
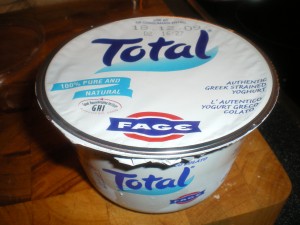
Total Greek Yoghurt is already strained so it is, to start with, thick and smooth.. look at it….

Yoghurt, cheese and chilli oil 017

it’s so thick you almost need to cut it.

Get it into a bowl and then add a pinch or two of salt and the finely chopped thyme and lemon zest

Yoghurt, cheese and chilli oil 031

Yoghurt, cheese and chilli oil 033

Mix it all together and then….

…….Get your high tech cheese making equipment together

Yoghurt, cheese and chilli oil 009

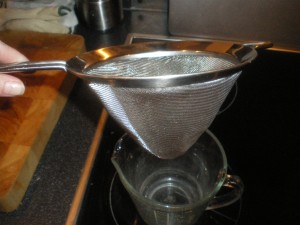
You need a sieve and a jug and some muslin, if you have any

Yoghurt, cheese and chilli oil 008

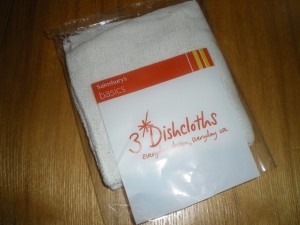
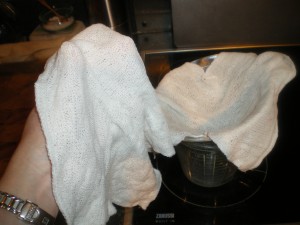
I can’t find mine so I bought some new dishcloths – they are tightly woven and at 3 for 25p, a bit of a bargain. Give them a good wash in plenty of hot water, rinsing well to make sure they are clean

Yoghurt, cheese and chilli oil 010

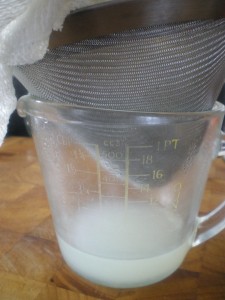
and line the sieve, which is now placed over the jug

Yoghurt, cheese and chilli oil 018

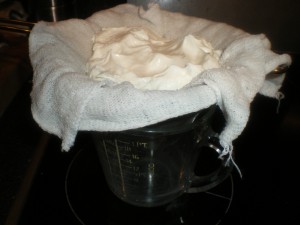
and then scoop your yoghurty, herby, lemony mix in there.

Technical, huh?


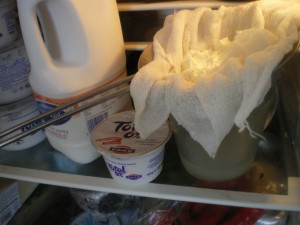
Then you put it in the fridge and leave it. You’ll need at least a day, preferably two. I put it in on Friday night and now, Sunday lunchtime, it is perfectly drained. The Total site has a recipe for making much the same cheese – except they add mint and  call it Labna. Just goes to show that wherever you go people make the same food using the same ingredients.

 cheese 016

Even though it is strained, some whey can still come out… there’ll not be much, though and you will see the yoghurt is becoming more dense. More cream cheese like…

cheese 017

cheese 018

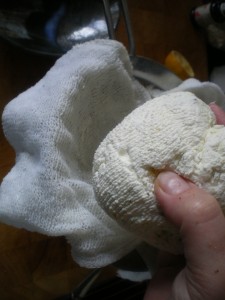
See? It is so dense you can just lift it out of the draining cloth.

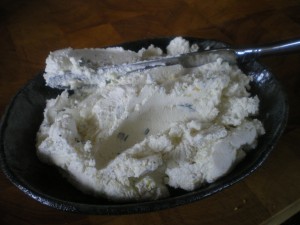
And that’s it… you’ve done it. Perfect cream cheese, flavoured exactly as you want it, made with the simplest ingredients.

cheese 020

It’s ready for you to eat now, just as it is. What could be simpler?

I am going to use this in a couple of things I am making……. and I bet you will want to make them too, so start on your fresh cheese now and catch up with me later!

The Great Greek Yoghurt Experiment

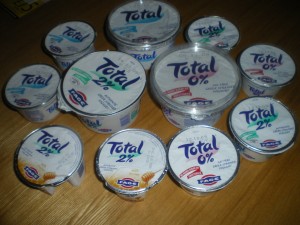
Those lovely people at Total Greek Yoghurt sent me a big delivery of yoghurt so that I could try out recipes…..

 Yoghurt, cheese and chilli oil 006Yoghurt, cheese and chilli oil 012

Yoghurt has been made for over 4,500 years and is eaten all over the world  – for many adults, milk is hard to digest and yoghurt is perhaps the only way that milk can be consumed. It is only really the North European who generally escape the problems of lactose intolerance and can drink milk with impunity.

When yoghurt is made, the bacteria in live yoghurt, by breaking down the sugar into lactic acid, makes it easier to digest and even those with lactose intolerance can sometimes eat yoghurt. It’s worth a try if you do suffer….

And there are so many things you can do with yoghurt  – apart from eating it with honey or fruit and nuts, it makes beautiful moist cakes; it can be used in savoury dishes instead of cream… and it is my mission to work my way through  a variety of recipes and really extend my repertoire.

Phase one of my first recipe has already been started and tomorrow, all will be revealed. Then of course there are the other things….

Something for the weekend? Bacon wrapped, cheese stuffed chillies!

I do so love a Saturday – there’s the knowledge that you still have Sunday to come and that tonight you can treat yourself knowing that the weekend is still stretching ahead….

I have a really horrible cough (caught while in hospital) with no Bear about to look after me so I need something that will make me feel better and burn away all those germs… what better than bacon wrapped, cheese stuffed chillies? Actually, I don’t need a cough as an excuse to make these. They are the kind of delicious snacketty bits that you might want to make every weekend. I read about them in one of my favourite blogs “The Pioneer Woman” and tried them out. Ree, The Pioneer Woman, describes herself as a desperate housewife, living in the country- with a description like that, how can you NOT read her blog?  It really is one of the best on the web.

She’s right, however many you make, you will wish you made more.

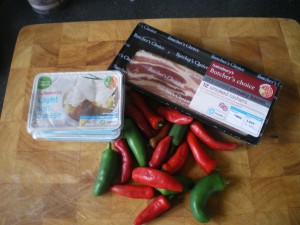
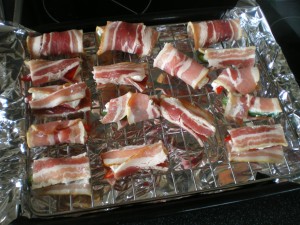
You need chillies (obviously) bacon  and cream cheese…..

Bacon wrapped, cheese stuffed chillies 004

Slice the chillies and scoop out the seeds. The first time I did this I scrupulously removed all the white membrane as well… but then when they were cooked there was no real chilli hit. Best leave a bit in, I think. I love it when my eyebrows start to sweat after I have been gobbling chillies… classy, eh?

Bacon wrapped, cheese stuffed chillies 005

Bacon wrapped, cheese stuffed chillies 006

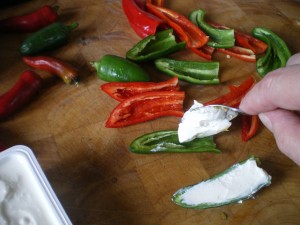
Then… shove in some cream cheese with a spoon… it isn’t neat and it won’t look tidy but that hardly matters, does it?

Bacon wrapped, cheese stuffed chillies 007

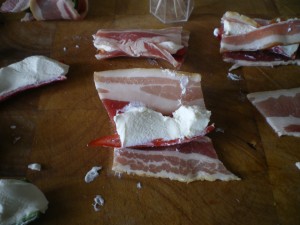
Then, wrap those little tinkers in bacon! The Pioneer Woman stabs hers through with cocktail sticks, but mine seem to be OK like this. They have to be. I just can’t manage to do it.

Bacon wrapped, cheese stuffed chillies 008

Put them on the grill pan (put some tin foil underneath to catch the drippings unless you positively enjoy scouring grill pans) and put them in a preheated oven at 200 degrees.

Bacon wrapped, cheese stuffed chillies 009

Keep sneaking a peek and sniffing at that lovely bacony aroma… when they look good and crisped (maybe 15 to 20 minutes) get them out!

Bacon wrapped, cheese stuffed chillies 010

Not as neat as Ree’s but pretty good for a person using one arm….

I’d like to think I have the kind of life where I would make these as appetisers, perhaps to be served with an aperitif or two, whilst looking ineffably elegant and making conversation with a variety of sophisticated guests at my regular cocktail party. The truth of the matter is I am just going to gobble these down whilst watching something on TV, or reading more of Ree’s blogs. Just as I imagine you will.

They are so gorgeous I don’t think I want to share them with anybody.

Actually, I am sure they are a health measure and will drive away any evil cough and cold germs. You’d better make them. You wouldn’t want to let your family down by succumbing to illness would you?

Churn baby, churn… Or, how to make butter

This morning I realised, as I struggled to get dressed with only one working arm, I would have to make things easier on myself. If I did do a loaf as normal, even calling in help to get it out of the oven, I probably wouldn’t be able to slice it. I could gnaw at it, I supposed, but descending into savagery was a slippery slope.

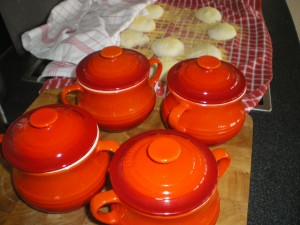
I wouldn’t be able to lift the Le Creuset casserole, or any casserole, come to that. I did have a bowl of dough ready to be baked……the answer, my friends, was to cut the dough into little bits and then put the little bits into mini covered pots and make buns! It has to work, right? Reduce the time, I suppose, but it should be plain sailing.

Lamb Henry, bread and butter 010

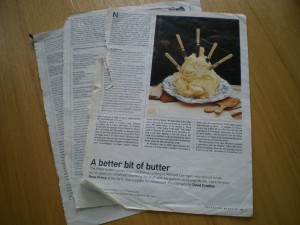
And what would I want on these delicious morsels of bread? Why, butter! Ages ago (and no, I don’t know when because despite Googling for quite some time for the article, I can’t find it) anyway, ages ago, The Telegraph Magazine had an article about Richard Corrigan, making butter.

Lamb Henry, bread and butter 011

Luckily I do have my tattered bits that I ripped out of the magazine and I promise to copy out exactly the bit about making butter. How easy it would have been to have given you the link but, hey ho, one does what one can.

I first made this when I was wandering through a supermarket and saw a large pot of cream reduced for quick sale as it had to be sold that day. Never being one to miss a bargain, I thought this would be a cheap way to try out what Richard Corrigan assured me, was a quick and easy way to make butter.

How could it not be good for you? All it was was, was cream and a pinch of salt….Lamb Henry, bread and butter 016

Richard explained that one way of doing it was to put the cream into a plastic box with some marbles and shake… or you could go the easy route and whip it. Guess which way I did it? Think of the fun for the family… everyone having a go shaking the box.

First, find some marbles. These are beauties – my sister in law in Australia gave them to me, and she was sent them from her cousin in law in America. How international is that?

Lamb Henry, bread and butter 014

Then put them in a plastic box that seals tight. You really don’t want cream going everywhere, do you?

Lamb Henry, bread and butter 015

The put in your cream and start shaking!

This is what Richard Corrigan says

” To make butter

The simplest way to make butter is in a standing mixer, but it is also possible with any vessel that can be agitated back and forth. A Tupperware box with a couple of glass marbles is a perfect makeshift churn for a child to use.

Pour fresh double cream into a very clean mixing bowl and whisk at medium speed until thick. When it becomes stiff, slow down the mixer. The whipped cream will collapse and form into butterfat globules and the buttermilk will flood out. Strain through a sieve, reserving the buttermilk to make milkshakes or soda bread. Return the  the butter fat to the mixer and mix slowly for another 30 seconds. Fill the bowl with cold water. Wash your hands well and knead the butter, allowing the water around it to wash it. Drain off the water and repeat twice. Weigh the butter, then, if you wish to salt it, add a quarter of a teaspoon to every 115g/4oz. Pat it into a shape with wooden spatulas or butter pats, wrap in greaseproof paper and store in the fridge.”

So, you can do it in a mixer, but I have always done it in a box with the marbles. Cream in, marbles in and shake it up baby…

You can hear the change as it goes from liquid cream to whipped cream and then to a strange thickness, almost as if it is one solid mass slapping against the sides of the box. Take a look at it…

Lamb Henry, bread and butter 020

Keep going and then all of a sudden the colour seems to change and it looks different, almost granular. It becomes a yellowy golden substance, almost cottage cheese like in texture and you can see the buttermilk is separating out and you have almost-butter!

Lamb Henry, bread and butter 022

You need to drain the excess liquid off, so put a sieve over a jug and pour in the almost-butter.

Squish it about with a wooden spoon getting more and more of the buttermilk out of there. Then you need to rinse it with cold water. You need to get the buttermilk out, leaving only the butterfat. If you don’t then it will go off sooner, though I have to say, there’s never been any left lying around to go rancid in this house.

Lamb Henry, bread and butter 024

At this point I add some salt and mix it in, giving it a good slapping. The first few times I just used a wooden spatula and that worked brilliantly but The Bear found some wooden butter pats at an antique place at some ridiculously low price (maybe £3?) and bought them for me. You can slap the butter from both sides then. They aren’t essential at all unless you are looking at it from a style point of view. Just whack it with whatever you have. More of the buttermilk will come out and what is left looks just like…… butter!

Lamb Henry, bread and butter 026

There you go, rough and ready, but that is undeniably butter. I usually make it look a lot better but as I keep telling you, I only have one working arm, so what do you expect? But if I can do that in under half an hour? What could you do?

Think of the fun if you have children to entertain – you can make bread and they can be put to forced labour shaking a plastic box filled with cream and a couple of marbles.

I have chopped herbs into it before and even mixed in truffle oil to make gorgeous flavoured butters….You can freeze it too, all you do is  make sausages of the  butter and wrap it in cling film and then freeze it, ready for when you need it.

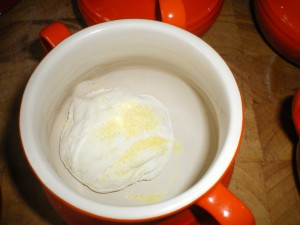
So now I have butter, ready for my buns. I told you I  had made the dough as normal and then I put it into heated mini Le Creuset pots….

Lamb Henry, bread and butter 017

Lamb Henry, bread and butter 019The oven was hot and in they went. There they stayed for 30 minutes, with their lids on and then another 15 minutes to brown… what little beauties they are? Don’t they deserve the beautiful butter?
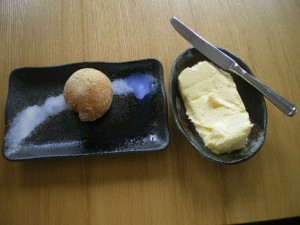
Lamb Henry, bread and butter 028

There you go. Wonderful home made bread and butter.

Easy, isn’t it? I reckon it would be easier still if you did what Richard said and used a food mixer……