Potato Focaccia

One of the big loves of my life is reading. I can do without television quite easily but I could not manage if I couldn’t occupy myself with something to read. I have shelves groaning with books and magazines are stacked in piles… I have an  eReader so I can read when I can’t carry piles of books with me and when I can’t read, (because I’m driving, say) I listen to audio books. So maybe it’s not reading? Maybe it is that I don’t need the visual stimulus of pictures… I just need the words and my mind fills in the gaps.  So, maybe I should say one of the big loves of my life is writing.. that is, writing done by others.

It has to be good writing though, so that I stay interested. I will, honestly, read almost anything, from any genre, but as you’d imagine a big part of my reading involves food – cooking it, eating it, growing it, preparing it… telling stories about it.

I have shelf after shelf of cookery books. When I’m in the north, I love to sit in that chair, with a cup of green tea, steaming quietly beside me as I read recipes or books on food writing –  from Brillat-Savarin’s “The Physiology of Taste,  or transcendental gastronomy”  – he, who famously wrote, “tell me what you eat and I will tell you who you are” and described the first version of what became, in essence, the low-carb diet. Brillat-Savarin (1755-1826) believed that white flour and sugar made you fat and prescribed protein rich meals. If you haven’t read him yet and you’re curious you can read it for free online, thanks to the University of Adelaide or on Project Gutenberg, or, you can do as I did, and buy a copy.

I love reading modern cookery writing too and I have shelves of that in the apartment… that’s a picture of the shelves when I had only half unpacked and there’s 132 books there. The shelves are full now. Those shelves are half way up the stairs and I sit there, leaning against the wall, reading whatever takes my fancy.  Probably my favourite book of all time, MFK Fisher’s The Art of Eating, an anthology of all her works is on that bottom shelf  and I regularly take it out and start reading it again. There are  fascinating books that the Bear finds on his travels and brings back for me because he knows I will love them. He found Laurie Colwin’s Home Cooking when he was travelling through the USA and I know I wouldn’t have stumbled on that easily but it is now one of my dearly loved books. He also brought home the wonderful Ruth Reichl’s  Comfort me with Apples and that started me on a search through Amazon for more books like that.  The whole point of it is, I love to read something that makes me think, that captures my imagination and makes me explore just what it was they felt, what they tasted and what it meant to them.

When I’m not reading books, I’m looking on line and reading blogs and searching out great writers there, too. I was reading the fabulous Gin and Crumpets and something she wrote made me stop and think….it made my mouth water. Potato Focaccia, or as she says, a fancy chip butty. Who doesn’t like a chip butty? Well, apart from Brillat-Savarin and his purely protein meals, but he’s long gone, so it doesn’t matter…

A soft and savoury focaccia with potato…. perfect. Imagine how that tastes…

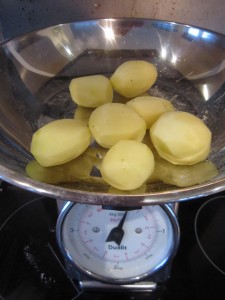
Gin and Crumpets had used, so I surmised from the photographs, smaller potatoes than I had and she’d left the skins on. I had a bag of my favourite Rooster potatoes  (excellent all rounders, good as either chips or mash or roast) so I washed and peeled 250g of them and cooked them in gently simmering water. You need them still to have some body about them as they are going to be cooked again on top of the focaccia, so don’t boil them to death.

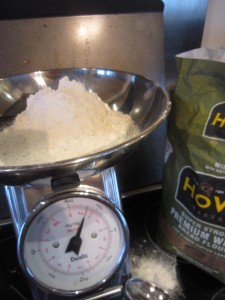
The next thing was to start on the focaccia so 350g of strong bread flour was mixed with one 7g sachet of fast action dried yeast, a teaspoon of caster sugar and two teaspoons of Maldon sea salt.

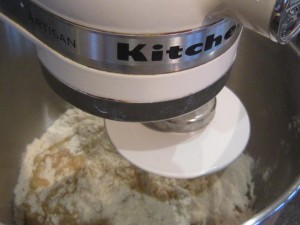
Four tablespoons of olive oil and roughly 150ml-200ml of lukewarm water need to be added to bring it together into a loose dough.

If you haven’t got a mixer with a dough hook, just use your hands.  Drop it onto a floured board and upend the bowl over it to stop it drying out. Let it rest for a few minutes.

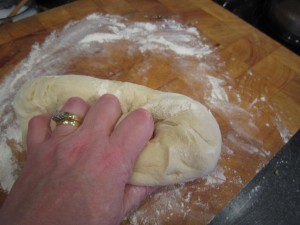
Then knead it… you’ll feel it change into a beautifully bouncy, smooth and silky dough.

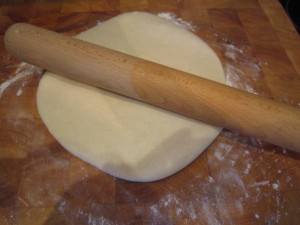
You need to roll it into a smooth oval

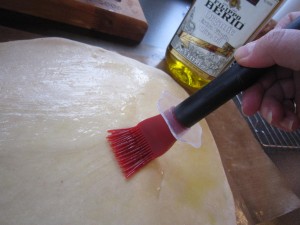
And then lie it on a silicone sheet, ontop of a baking sheet and brush yet more lovely olive oil over it.

Lay a loose piece of clingfilm over it and leave it to rise gently. That depends, of course, on how warm your room is but it shouldn’t take too long.

Start the oven pre-heating to 210°C or 410°F and check the potatoes.

They should be tender so drain them and leave them to cool and then have a quick wipe round while you are waiting…

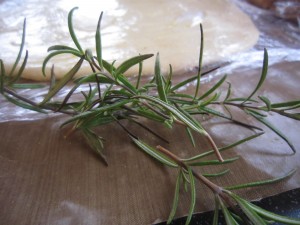
A sprig of rosemary would be good to add, so strip the leaves off the harder stems and chop them lightly.

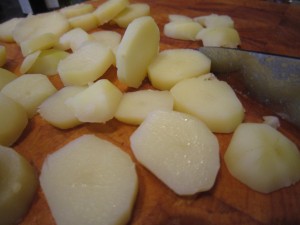
By now the potatoes are cool enough to slice without burning your fingers…

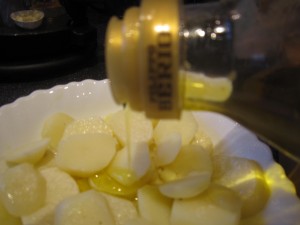
I drizzled the oil over the potato, in a bowl, so I got an even covering and each piece was glistening, then laid them on top of the puffy dough, sprinkling it all with the chopped rosemary and a sprinkle of salt…and into the oven it went.

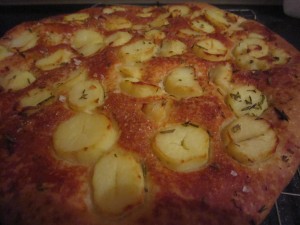
Just under half an hour later and this emerged… golden and glistening, smelling deliciously sweet and savoury – you know just what I mean…

The focaccia bread was light and aerated and the potato on top? It was heavenly… it really was like the best chip butty ever. The taste? The taste was sublime. The potatoes were soft with that sweetness that comes from being cooked properly and then baked, the salt and the rosemary made it savoury, the focaccia was warm and delicious. People looked at it, sniffed it and then tore at it…all of them saying how wonderful it was.

This is what you need to make for parties – it’s warm and delicious and it will to help soak up the alcohol and keep people happy and cheerful….

…this is what you need to make it when there’s just the two of you and a bottle of wine to share as you curl up on the sofa….

… and you need to make it when there’s just you, needing something to sustain you through upset or cheer you through gloom or give you a much deserved treat on a cold Saturday night.

This is heaven.  Really, it is.

Beans, yellow tomatoes, sage and sausages

Right then, I said, as I was surrounded by a tumbling wall of tinned tomatoes and beans, we really need to get through some of that store cupboard.

When I go shopping I will often pick up tins of tomatoes or beans because you can always make a meal, very quickly, from them. You never know when people may suddenly arrive and need feeding, or when you really just can’t face going to the supermarket at the end of a long day at work. I like to plan ahead – after all, what if there is a crisis and we are trapped, at the top of our apartment building,  with only the contents of the kitchen?  I need to be sure we can eat , at least. What if the shops are suddenly and mysteriously emptied of everything? I’d better have stuff in that won’t go off. Be prepared is my motto. The thing is, I’d kept on doing it and we were now reaching a shelf overload situation in the larder.

I’d gone into the larder to get some stuff out for baking and realised that the wild and fanciful imagined crises had not happened, unexpected guests had not turned up without warning but with an empty belly and I had managed, after all, to shop on a pretty regular basis and provide meals for the two of us without using the stores of beans and tomatoes. I noticed all that because there seemed to be a wall of tomatoes and beans blocking my way to my baking tins.
The fact that it was a pretty substantial wall, many tins deep made me think that I really ought to do something with them. The thing about beans and tomatoes is that you can do so much… the butter beans, softly mashed, make a quick and lovely alternative to mashed potato, the tomatoes can be used in the rich and soothing Tomato Rice soup or to make a ragu base for the indulgent, quick and easy lasagne, or in the vegetarian squash and goat’s cheese lasagne. The cannellini beans can be transformed into the Bear’s very favourite, Italian derived Beans on toast. I have borlotti beans and haricot beans, I have plum tomatoes and yellow tomatoes…..they were all just waiting for me. They were all just waiting to fall on me, apparently.

I decided to delay the baking session and make something to eat instead from the cans that were now falling off the shelves because I had balanced them precariously, one on top of another, after every shopping trip and then tried to shove them to one side so I could get at my shortbread mold. Falling with a clatter and bouncing off my bare feet. So… beans and tomatoes…..

Yellow tomatoes….

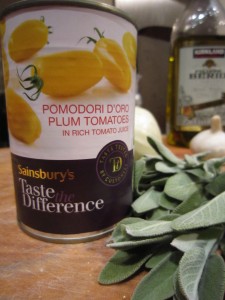
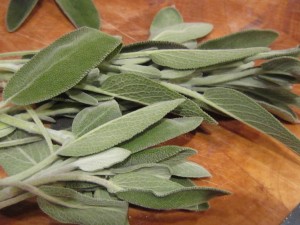
I’d seen these and thought I would have to try them… and now, it seemed, I was going to do it. They would be a change from the richness of red plum tomatoes…. I had some fresh sage as well.

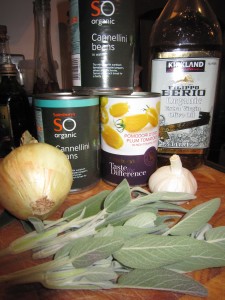
So, two tins of cannellini beans were also removed from the now collapsed wall of tins and I looked around to see what else I had. The baking could wait for a while. I was going to make something for supper.

I love sage – not only the smell of it and the depth of flavour it adds to a dish (perfect with pork or tomatoes) but I also love the beautiful softness of its leaves and the delicate colour. All of which will disappear in cooking, I know, but I do like to rub it between my fingers and appreciate its soft silkiness and the smell as it bruises….

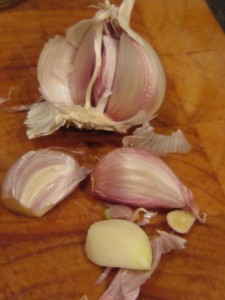
I had plenty of fresh garlic, too.

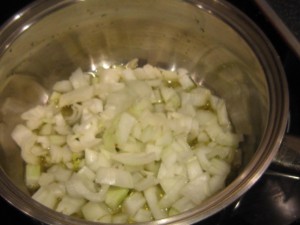
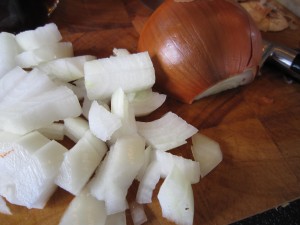
The first step, as with so many dishes, is to soften a chopped onion in a little oil. Adding salt makes the onion soften gently and release its flavour as it turns translucent. If you don’t add salt you are more likely to end up with bronzed, fried onions.
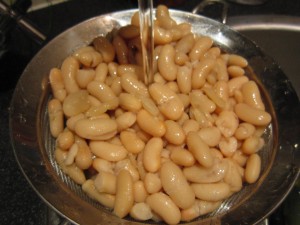
The next step is to open your tins of beans and rinse off the gloopy liquid surrounding them – this will be a mixture of the water they were packed in and any stray bits of starchiness from the beans themselves.
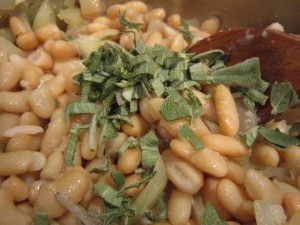
Toss the beans in the soft and glistening onions and add some chopped sage.

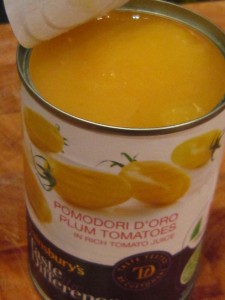
And then… those tomatoes. I’d not seen tins of yellow tomatoes before and I’d been curious to find out what they tasted like. They were certainly yellow. A beautiful, vibrant, cheerful yellow.

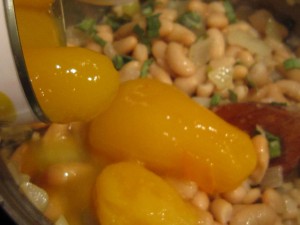
How pretty they were! They tasted nice too – sharper and yet sweeter than a tin of red tomatoes. Almost a cleaner taste in a way – you know how red tomatoes have a rich deepness to them? These seemed lighter, but just as flavourful. I added them to the beans, sage and onion.

I’d been at the  Farm shop and they had been doing Italian style sausages – what this means is that they were sausages with some red wine and fennel added so I reckoned they would be perfect with my beans and tomatoes. While the beans and tomatoes cooked together, I started frying the sausages.

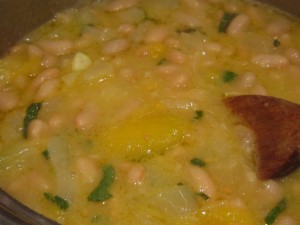
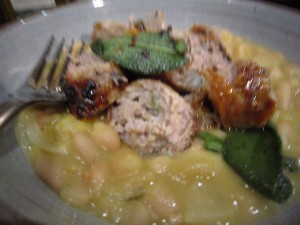
And look how gorgeous the beans and tomato was!

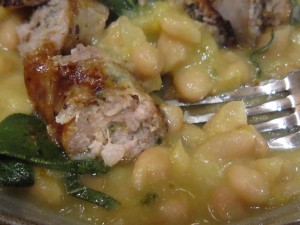
Those sausages fried beautifully, with the red wine helping make that deliciosuly sticky and brown, glistening skin.

The tomato and beans were a light and delicious mix and the perfect base to serve the sauasages on.

I fried some sage leaves separately – just quickly – until they were crisp.

It was the perfect mouthful – the softness of the beans, the sweet sharpness of the tomatoes and the meaty richness of the sausage….. Delicious. Quick, simple, inexpensive. What more could I want?

Well, I could want the larder to be tidy … but at least three tins had been removed. That’s a start, right?

Making Butter.. how to have luxury in a credit crunch kitchen

As I look out of the window I see greyness everywhere…the skies are grey, the pavements are grey and even the people look grey. It’s the Age of Austerity, say the Government and the financial whizz kids who got us all into this mess.

Time to tighten our belts… cut back…spend less. We have to suffer….

The papers are full of articles on the cost of living and how food bills are soaring, utilities bills are going through the roof and how the ordinary person must make sacrifices.

Well, I agree. I agree on the cutting back, anyway. If we cook at home with care we can all produce marvellous meals for much less than you would spend on a takeaway or a pizza, or even fish and chips.  I have made a habit of cooking carefully and spending very little and, truth be told, have often turned out meals that are better and tastier than many meals I have had in restaurants. Look through the Credit Crunch section and you’ll see recipes for Beef Cheeks (the most wonderfully tender beef casserole you will ever eat); delicious soups like Roast Garlic and Marrow or Puy Lentil and Pumpkin or the gorgeous Tomato Rice Soup – simple, inexpensive ingredients made into food that you are glad you are at home for. There’s recipes using polenta, that staple of Italian peasant cooking made into Baked Polenta Pie and rice…. risottos made with Black Pudding and Apple and Bacon – just scraps of things added to a basic ingredient and transformed into something you’d be proud to serve to guests.

I don’t really believe in too many sacrifices though. I always like to use butter in my cooking – I certainly won’t use margarine or some cheap, chemically concocted spread, where dubious oils are treated with this and that to make them go solid and spreadable. Butter is better. I don’t use too much and it doesn’t feature in every dish but when I need it, it’s there.

Butter is just milk shaken until it is solid. What could be simpler?

What could be better than calling in at the supermarket and spotting, in the marked down section, a large pot of cream that you know, with very little work indeed, can be made into lovely fresh butter? That appeals to my penny pinching ways and my love of luxury.

I’ve written before about making butter, way back at the start of this blog, when I did it by using marbles in a tupperware box. I still say this is a fun way to make butter and a most excellent way of entertaining children. I don’t suppose you could get them to do it all the time, but as a one-off? A Saturday afternoon’s entertainment? It’s a brilliant way to keep them occupied and then, of course, you can make them buttered toast for tea. 

This time, however, I had plenty to do and didn’t need to entertain myself unnecessarily, so I was going to do it the quick way. It’s probably the way you will end up doing it, too.

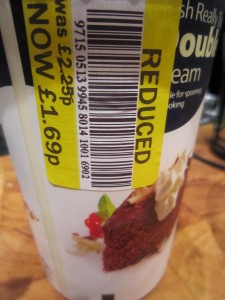
I had been shopping to get some ricotta as I was going to make ravioli and as I walked past the Dairy section, I spotted a large pot of double cream… the really thick double cream. It had been reduced  as it had reached the sell by date. This doesn’t mean that it was going off at all, just that the date they had set for it still to be in peak condition was today. Fresh cream, still perfect and at a reduced price?

Well, I had planned to be doing other cooking and I had plenty to do in the kitchen but this was a bargain, calling out to me. And it just shows how easy it is to do if I was going to do it in between making three different sorts of bread and pasta.

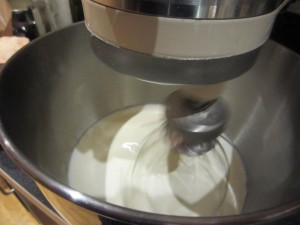
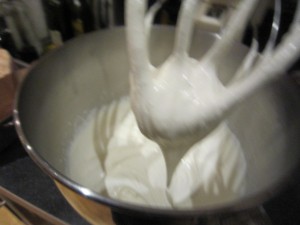
I put the cream into the mixer (you can do it with a hand mixer if you haven’t got a standing mixer… it doesn’t take long) and started to whip it.

It thickens quickly.

And you keep whipping.

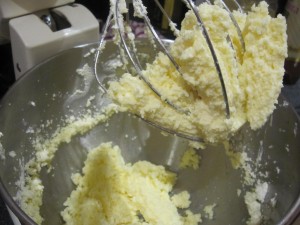
All of a sudden it transforms from a white, whipped mound to a lumpy, granular and yellowy mass. This is not great if you were looking for a topping for a dessert… but it is just what you want to see if you are making butter.

Perfect.

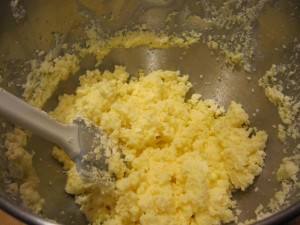
Look at it. Granular and yellow. That’s the butterfat.

Now, if you were using a thinner cream than I was, you would see quite a bit of buttermilk separating out from the creamy globules. The cream I was using was almost solid it was so thick, so there was less liquid.

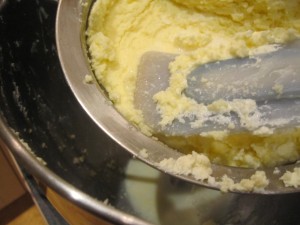
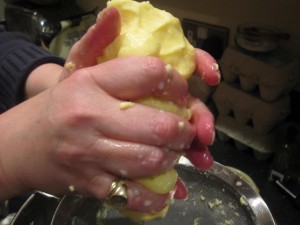
Pop the lot into a sieve and wash it inder a tap. I gave it a squish with a flexible spatula to get more of the buttermilk out.

You can save the buttermilk for baking, or adding to soups – yet another credit crunch saving.

The Bear came over to help at this point… not because it is difficult but because I needed him to take the picture for you to see.

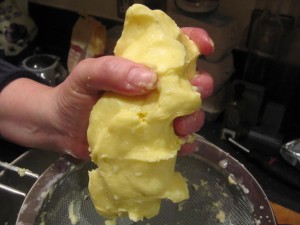
I got the butter out of the sieve and squeezed it together. More buttermilk ran out.

That’s butter, that is!

The next thing to do was to add salt.

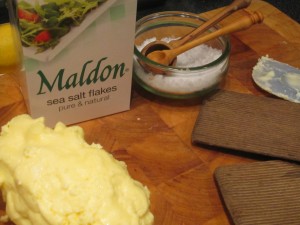
I’m a great fan of Maldon sea salt and a pinch or so of that, scattered over my hand squished butter and then squished some more meant I would have a beautifully salted butter.

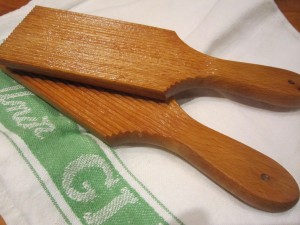
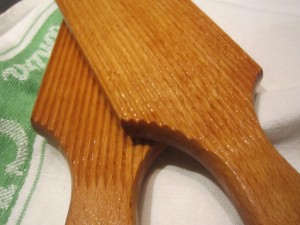
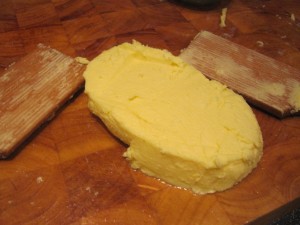
I do happen to have some old wooden butter pats  which are ideal for flattening the butter and getting the last of the buttermilk out. It also adds to the fantasy playing in my head that I am the consummate housewife and cook….

If you don’t have any, don’t worry. I just like them, that’s all.

If you look at them you can see they are finely ridged to help force the liquid out.

It helps make the shape of your butter. Again, it doesn’t matter if you haven’t got any, just shape your butter neatly.

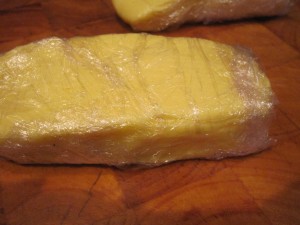
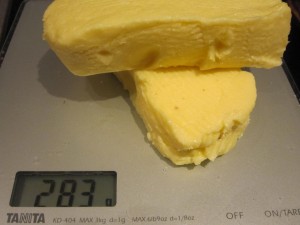
And look what I ended up with…283g of best butter.

Surely that counts as being careful with cash? A credit crunch success?

The butter can be frozen if you wrap it carefully…. you can flavour it with whatever you fancy….

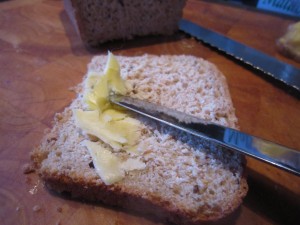
Or you can spread it on bread that you made and just enjoy it.

How simple was that?

That was made, while I did other things, in less than half an hour.

Now, as I said,  you can do it in a more relaxed fashion, getting young helpers to shake it about in a jar or a tupperware box, but you know what? This is just as satisfying and oh, so delicious.

Credit crunch money saving at its best.

A cheeky little number….. Beef Cheeks.

Whenever I go home to the North I always call in at my favourite butcher’s, George Bolam at Sedgefield. It’s from here that I have got the more unusual cuts, like plate of beef or lamb henry, where I get the best belly pork, either in strips or rolled, to make the perfect joint with crackling. I get my favourite beef skirt from there, too – the tastiest and tenderest (if cooked quickly) steak imaginable. He makes his own haggis and black pudding and has the widest variety of sausages imaginable.  He has a bakery there too, a deli, a fish counter and an amazing selection of fresh fruit and vegetables.

Everything I get from George’s is absolutely fresh, generally local and incredibly good value and that is, I suppose, why all of us should support our local butchers rather than just buy meat from supermarkets.

On my last trip home, I called in to stock up on meat to bring back to the city and saw, for the first time on his shelves, cheeks of beef.

These are, as you would imagine, the cheeks of the cows. The price was incredible – 717g of meat for £3.14? I had to buy it and try it.

So, that was frozen and put into the freezer until I had time to think of what to do with it and the time to cook it.

And then I got ill. I could barely move and any cooking that needed me to be alert and available to do things was out of the question. To be fair, I didn’t want to eat either so for days I lived on hot drinks and an occasional slice of toast.

Then one day I realised I had to have more than that – the Bear needed feeding, for one thing. And then I remembered the beef cheeks in the freezer.

Now, a cheek of a cow would get a lot of exercise, I would have thought. All that chewing of the cud must give those cheek muscles a good work out. Cows seem to chew none stop. So a well muscled piece of meat would need long and slow cooking. And the best thing about long and slow cooking is that it requires minimal preparation, even less attention and the opportunity for a nap while it cooks.

The end result is always something succulent and tasty, perfect for anybody…. even an invalid.

That settled it. I summoned up the strength to go to the kitchen and took out the cheeks to defrost. I would cook them the next day.

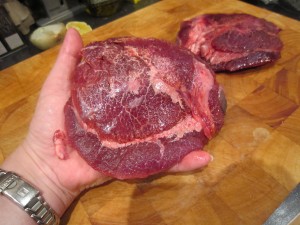
The next morning, I unwrapped them and looked at them properly. They were much larger than I thought they were going to be.

What a size they were….I have normal human sized hands, you know, it’s not as if I am a miniature person. Each cheek was bigger than my outstretched hand.

That was going to feed four, at least.

As with so many delicious things, the simplest way is often the best way and with slow cooked food that seems to be particularly true.

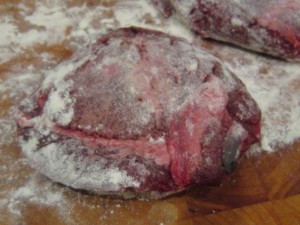
I dusted them with flour…..

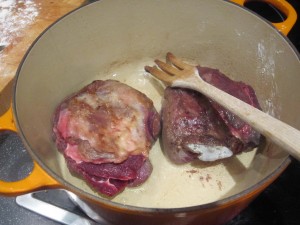
… and then browned them quickly in a splash of oil, in the bottom of a hot casserole.

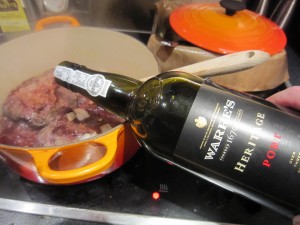
I poured in some stock, made from granules and hot water and then thought I could perhaps boost the flavour even more……As we seemed to be stockpiling port, I decided to add a good amount of it to make the gravy even more delicious. I don’t know when we were going to get around to drink it all, so it seems a good choice to use it in cooking now and again.

Don’t worry if you haven’t got port, or don’t want to use it. Use all stock instead, or maybe add in some wine, or sherry… it’s your choice. You do need to add something to make the gravy with, so add enough liquid of whatever you fancy to just cover the meat.

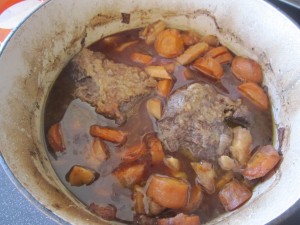
I chopped in some carrots and parsnips and put the covered casserole into the oven at 160° C/320 °F for three hours.

The smell was amazing.

As the oven was on anyway, I scrubbed some potatoes, jabbed them with a knife so they wouldn’t burst, rubbed them with oil to make the skin crispy and put them in the oven to bake alongside the cheeks, then I went back to bed.

When I next roused myself, I went upstairs to a beautifully warm kitchen, filled with wonderfully rich and aromatic smells and opened the oven.

The potatoes were perfect and the beef cheeks looked good. More than good, actually.

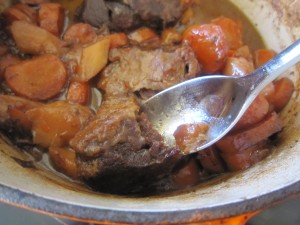
I got a spoon to stir the vegetables and gravy round and moved a cheek… the spoon went through it.

Remember how big those cheeks were? Well they were still in one piece, it’s not as if it was all in bits and easy to scoop up. People say, when they are talking about tender meat, that you can cut it with a spoon but this was the first time ever that I really could do that.

The spoon sank through the silky soft meat and there, on the bowl of the spoon, was the most delicious looking piece of meat.

And the taste? It was beyond delicious. It was rich and soft, succulent and tasty.

Probably the best beef stew I had ever eaten. In fact, calling it a beef stew seems to be a bit of an insult.

The vegetables had kept their shape in the long, low and slow cooking and were perfectly tender. The funny thing is, I’m not that fond of cooked carrots, especially cooked carrots in what is, to all intents and purposes, a simple stew but these were gorgeous. They still tasted carroty but they also had a deep rich layer of taste from the gravy.  I loved them.

But it was the meat that was the star of the show and now, thinking back as I write this, I long for beef cheeks again. So much so that I’ve just ‘phoned my mother and asked her to go and get me some more and freeze them ready for me to collect on my next trip.

Those two cheeks made enough to feed four or five healthy appetites….and for those weakened by the dreadful colds and flu, well that boosted my appetite and for the first time in days I enjoyed my food.

Simple, so very simple and it cost so little.

If you see beef cheeks, buy them immediately. If you don’t see them, start picketing the butcher to get some for you. You won’t regret it… although you may regret the fact you spend days yearning for beef cheeks when there are none available.

Lovely lamb shanks, tagine style and the Bear’s shopping expedition

I’m a lucky old thing, I know, and meeting the Bear was the best thing that has happened in my entire happy and lucky life. He’s funny and sweet, very clever and tolerant and (and this is a good bit indeed) very helpful about the house.

I had a lot to do and, while I normally do the shopping because I like to choose what I’m going to cook with, I was running out of time to get everything done. The Bear had some spare time and offered to help….

What could go wrong? I had all the meat and vegetables (so there was no problem with choosing the best examples) and all I needed were things for the house and a few food or drink items for the cupboards. It wouldn’t matter whether I picked them up or he did, they’d be the same….

So armed with a specific (very specific) shopping list the Bear set off and I got on with other stuff. We met later in the kitchen and I started to unpack the bags… cleaning stuff? Check. Dishwasher salt and rinse aid? Check. Kitchen rolls? Check. Butter, milk, cheese? Check. Tea and coffee? Check. Wine? Check, check and more check. (We were having friends round) Cordials? No check.

I had wanted a specific kind of cordial – Grape and Melon. They didn’t have any apparently (and there’s no point Googling or asking about other stockists because they have stopped making it now. Shame on you, Robinson’s!) and the Bear had remembered not to deviate from the list and get another flavour. All well and good. We did have other cordials anyway so it didn’t really matter.

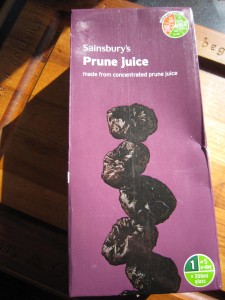
I carried on emptying the bags…. and found, in the bottom of one of them, three cartons of prune juice!

Prune juice? Whatever had possessed him to buy prune juice? I don’t like prune juice and I don’t need prune juice. I certainly didn’t need three litres of it.

He started to explain. Quite frankly the reasoning behind it was flawed. They didn’t have the clear and delicate tasting cordial I wanted so when he saw “Buy 3 for the price of 2”  next to the prune juice he thought he would use his initiative and grab us a bargain….

The prune juice went into the larder and there it stayed as a reminder that sometimes initiative is a terrible thing.

I can’t bear waste though and eventually, months later, decided I would have to do something with it. I’d gone into the larder to get a new box of salt out and spotted the prune juice still loitering on the shelf. I was going to be cooking lamb shanks that day and it struck me that if I were to do lamb shanks in, say, a Moroccan tagine style then I might have used prunes in there. What if, I thought, I was to cook the shanks IN the prune juice, instead of adding them as whole fruit, replacing just a simple stock and so making a rich and tasty gravy?

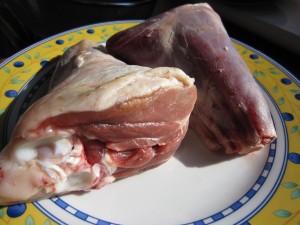
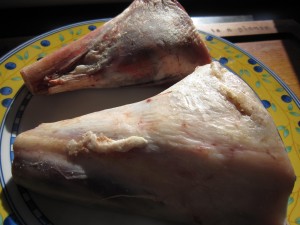
I had two lamb shanks that I was going to cook slowly while we were off doing other things.  I would have used the slow cooker but the two of them were too big for the pot and I decided that I’d just use a casserole instead. As long as you make sure you have enough liquid in there and keep the temperature low then it is safe to leave for a while.

It’s also lovely to come back to a home that smells of deliciously cooking food……

I love lamb shanks for many reasons. Firstly because they don’t cost much at all and secondly,if you leave them to cook slowly and gently they will turn into the most deliciously melting pieces of meat, far tastier and more tender than most expensive cuts and thirdly because I don’t have to do much at all to make it a perfect warming and mouthwatering meal.

Five minutes preparation and then you can walk off and leave them to glug quietly away for as long as you like. A perfect way to cook something while you are out at work or off out shopping at the weekend.

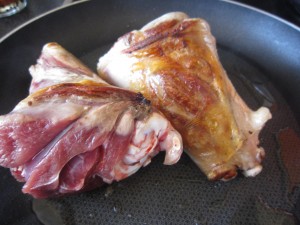
First of all, brown the outsides of the shanks. All it takes is a few minutes in a frying pan with a drop of oil to crisp and brown the skin. Yes, they are going to be cooked for hours and will cook all the way through but if you brown the outside you get a better depth of flavour and they also LOOK better. It’s all very well being delicious… it’s nice to appeal to the eye as well, though.

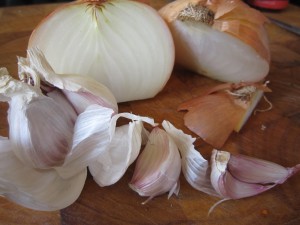
While the lamb is browning, quickly chop some onion and garlic.

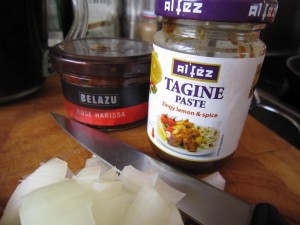
I had the remnants of some tagine paste that I could use to bring in a hint of Moroccan flavouring and some lovely Rose Harissa that would liven things up a bit. I wasn’t making an authentic tagine but I wanted a definite nod in the direction of Morocco. You can get tagine flavourings in most supermarkets now so choose whtever you fancy.

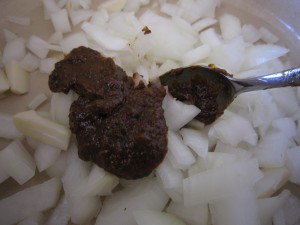
I put a spoonful of each into my casserole dish and stirred it through the chopped onion and garlic.

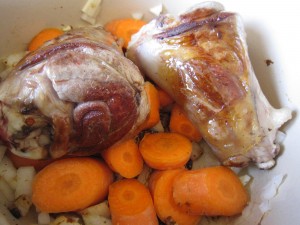
Carrots were roughly scraped clean and sliced and the browned lamb shanks were put in the pot on top of the vegetables.

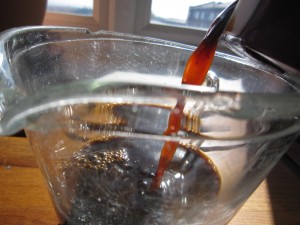
I poured a pint of prune juice into a jug – just look at the colour of it! Now while this could never replace a light and fresh tasting cordial as a drink I could see this was going to make a deliciously thick and tasty gravy. With the harissa and tagine paste to spice it it, I had high hopes of this turning out to be a success.

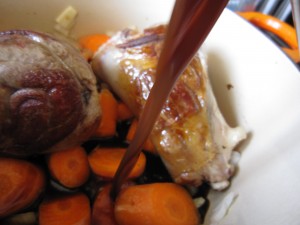
Mixed with some stock granules to add a salty, savoury taste, it was poured over the meat and vegetables.

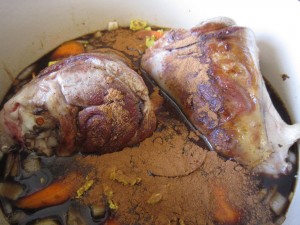
And then, because I love it and I knew it would be good, a couple of teaspoons of cinnamon powder were put in.

And that was it. The lid was put on and the casserole was put into a slow oven (165 degrees C/350 degrees F) and I went off to do what I needed to do. If I’d used the slow cooker I would have set it on Auto – which means it gets a high start then it turns down to a very low heat. The cast iron casserole would do just as well on a steady low temperature for hours.

After about three or four hours I came back and looked at the shanks…. they smelled delicious anyway.

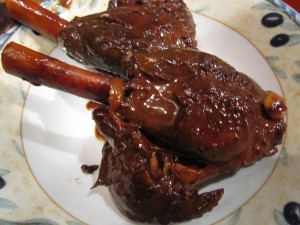
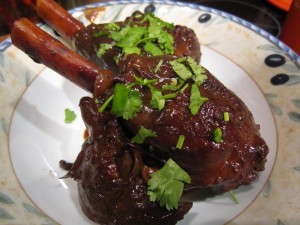
Rich and dark from the prune juice, steaming and the meat was falling from the bone.

Chopped coriander would give just the right fresh herby taste

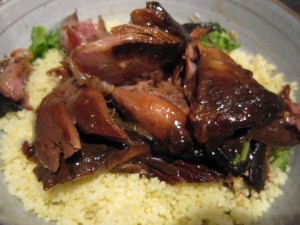
Couscous takes maybe three minutes to make – simply measure it out (the packet will tell you the proportions) and add boiling water so the grains fluff up.

You can add herbs and spices to flavour it if you are having plainer food but the gravy from the lamb would be flavourful enough, I thought.

The meat just fell apart…. the prune juice gravy was rich, savoury and spicy with a mellow sweetness. It all soaked into the couscous making each mouthful delicious. Who would have thought mis-judged initiative could produce such a lovely result? Inexpensive cuts of meat, unwanted cartons of juice and a few hours in an oven produced a meal that I would have been proud to serve to guests.

We enjoyed every mouthful.

So, while I can’t advocate the drinking of prune juice…. I can suggest you cook with it. You might just be as pleased as we were with it.

Slow roast shoulder of pork with perfect crackling

The weather is getting worse and, while it is lovely to live in an apartment where three of the walls are windows, it does get gloomy when you are surrounded by rain spattered glass and grey clouds. When that happens, the only thing to do is put the lights on and make everything look cosy and then curl up, knowing that something meaty and tasty is in the oven….. just relaxing while the smell of roasting meat fills the room. It’s a smell that has always reassured me that things are happy and well in the family.

 A smell that was a constant in my childhood and it means home and happiness with loved ones. My wonderful brother and I are very similar in many ways. One of our favourite things is the crispy, fatty bits on a roast joint… all juicy and packed with flavour.

Not everyone likes this of course….The Bear has many good points and I am always glad I married him, but one of his finest points is that he doesn’t like crackling or the fat on a roast. That, of course, is good for me as it means that I don’t have to share. My brother used the same criteria when he got married – my sister in law is absolutely fabulous and we all love her dearly (he made a brilliant choice, marrying her) but again, she hates that sort of thing. Perfect. There’s nothing finer in our eyes that a gorgeous piece of crackling and the two of us have been known to stand in the kitchen at home dividing up the crisp and tasty skin….

Anyway, while I was shopping I’d spotted this marvellous piece of pork. Outdoor reared and free range meant that it was guaranteed to be tasty. The rain was bouncing off the pavements outside and I just knew that roast pork would be the perfect  antidote to the gloomy rain blues.

Pork shoulder is a great cut because it isn’t expensive but, as with most things, treated with care and respect you can produce the most delicious meals. Time is what shoulder needs, time and heat and salt. That’s all.

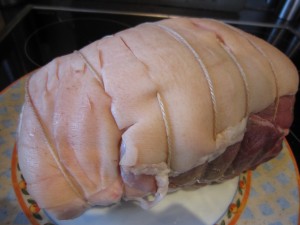
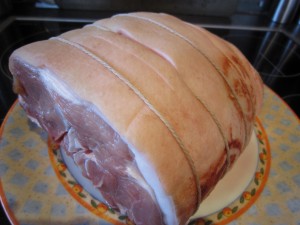
This was a lovely piece of pork shoulder with a good layer of skin around it, which is just what you need to get perfect crackling.

Pork shoulder needs slow cooking and it will turn into the softest, tenderest piece of meat ever. The rind will crisp up (if you slice at it) into delicious strips of hard, crunchy and tasty crackling.

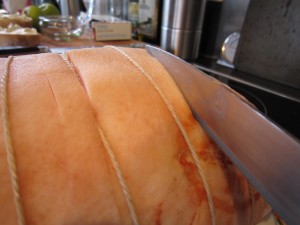
But the rind is tough and to get through it you need a very sharp knife. Butchers will slice the rind for you and, in fact, most joints come with the skin cut already but I like to get a lot of narrowly spaced slashes so I start by sharpening my favourite filleting knife.

I’ve never yet managed to use a sharpening steel so I use the Chantry knife sharpener which is one of my better kitchen equipment buys. All you have to do is run the knife through the middle a few times and the blade is perfectly sharp, which is something I have never achieved using a steel.

While you are doing all of this, get the oven preheated to 230 degrees C/450 degrees F

There were some slashes in the rind already but I sliced between them, so each strip of rind was about 1 cm wide, if that. Be careful, if you are slashing not to slice into the meat itself – just cut the rind and the fat below.

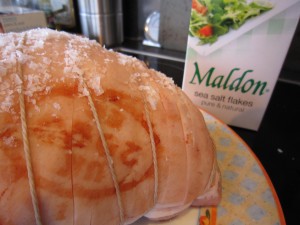
The next thing is to get some kitchen roll and dry off the rind before rubbing it over with a smear of oil and then some salt.

What you have done is wiped off the water and added some oil to help start the crisping process and salt to drive out extra moisture and add flavour.

I like to use Maldon sea salt as the crystals are large and easy to pack into the slices of rind. Maldon has a great taste as well. When the pork comes out of the oven the rind will have crisped and almost bubbled up with flecks of salt crystals embedded into it to make the crackling taste divine.

By now the oven will be bouncingly hot so get the pork into a roasting tray and put it into the oven for twenty to thirty minutes.

This is a very hot oven and what it does is sear the rind and start making the crackling. If the oven isn’t hot then the rind won’t ever get crispy.

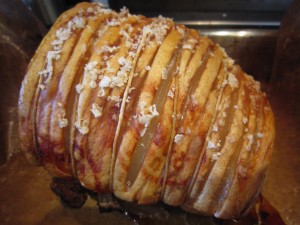
After the first burst of heat you will see, when you peek inside, that the slices are separating and the rind is starting to cook. You just know, when it looks like this after half an hour that it will have the perfect crackling when it is finished!

You can turn the oven down now to a moderate 170 degrees C/340 degrees F and just leave the joint to cook slowly for a two and a half hours……

There now.

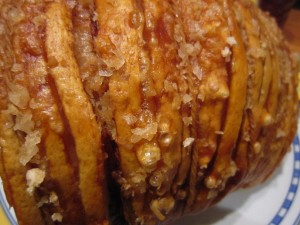
Golden, bubbled and crisp. Studded with salt crystals promising that every mouthful will be deliciosuly savoury.

When you get it out of the oven if you rap on the top of the crackling it makes a hollow sound.

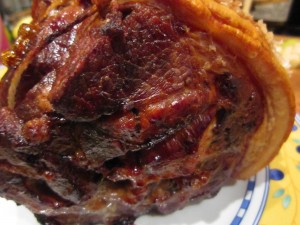
The meat is dark and caramelised from the fat dripping over it as it roasts.

The fat layer has almost disappeared in the long slow cook, making the meat juicy and the crackling crisp.

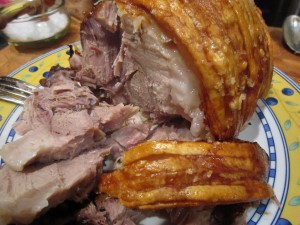
The crackling strips snap easily into bite sized bits…. perfect for nibbling at while you slice the pork……

A wet grey afternoon can be ignored because you are inside, in the warmth with a marvellous meal, just ready to share with your loved ones.

That is Heaven… that is my guilty pleasure and that is one more reason to appreciate the Bear not liking everything I adore!

Roasted pumpkin seeds

Sometimes we all need a little treat.

I don’t tend to buy crisps, crackers or olives  to nibble at with a glass of wine unless we have guests. I don’t know why… maybe I think we don’t deserve it or maybe it is that we are fat enough and having extras isn’t a necessity. Perhaps I think it is a needless extravagance?

But you know what? We do deserve to have something every now and again. After all, the person I like best in the world would be sharing them with me and I’m happy enough to put stuff out for people I don’t love half as much.

So, what follows is the ideal compromise. It’s healthy, it’s tasty and it doesn’t cost very much at all.

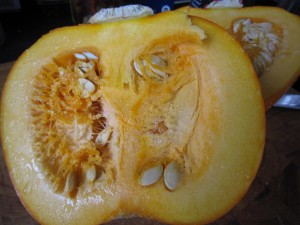
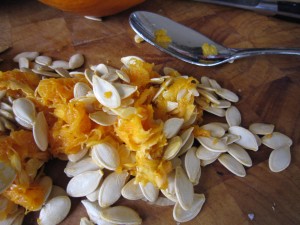
I’d bought a small pumpkin to make some Puy Lentil and Pumpkin Soup and I’d had to scoop out all of those plump seeds. What better than to use something that others might just throw out?

They are all embedded in the fibrous middle but they are easy enough to remove if you gouge at it all with a spoon.

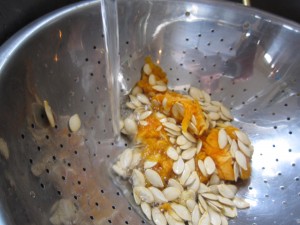
If you put them in a colander and run water over them it’s quite easy to pull the orange fibres off, leaving just the seeds behind. They will feel very slippery so give them a good rub in fresh water.

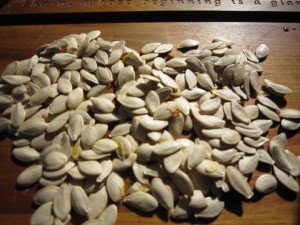
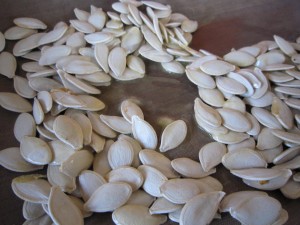
Once they are clean, spread them, out on a board and leave them to dry off.

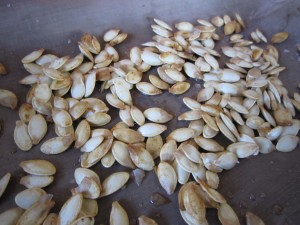
This time I wanted plain and simple butter and salt roasted pumpkin seeds (I often make them and flavour them with things like chilli powder or spices ) but there’s something rather delicious about the plainness of the roasted seeds… plain, certainly but tasting deliciously of butter and salt!

Get a flat baking tray and put a knob of butter and some salt on it (I always use a silicone sheet because it is so easy to clean and doesn’t tear if you scrape at it. If you haven’t got any, it doesn’t matter – use tin foil or be prepared to clean the baking tray)

Put the tray in a pre heated oven at 200 degrees C/390 degrees F and get the butter melted and hot.

Toss the pumpkin seeds in the melted and salted butter and put them back in the oven for ten minutes or so.

After ten minutes, give them a shake… they should be browning nicely.

Put them back in if they need a few minutes more – this will depend on how much moisture was left in the seeds.

Once they have cooled… put them in a bowl and share with your best friend.

A glass or two of wine makes this the perfect pre-dinner snack – healthy, tasty and all it took was a knob of butter, ten minutes and some otherwise thrown away seeds!

Meatfree Monday – Puy Lentil and Pumpkin Soup

At this time of year, the shops start to fill with pumpkins. Halloween is not far off and millions of pumpkins will be bought to make into Jack O’Lanterns.

You can’t just buy a pumpkin and carve it… you have to DO something with it. Last year I made Pumpkin Soup, flavoured with smoked sweet paprika and drizzled with Chilli Oil

I separated the seeds from the fibrous middle and roasted them with jerk seasoning to make a tasty roasted pumpkin seed snack

This time, though, I wanted to make a soup that would be a meal in itself.

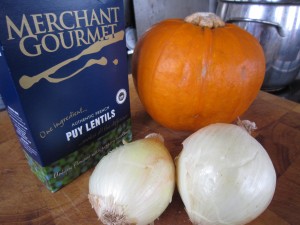
I had a small pumpkin that would be ideal for soup. I also had a craving for something with a bit of spice because I had a cold that was dragging on. I needed a burst of heat in that soup to burn through the fogginess that an autumn cold makes you feel.

I remembered a soup I had seen in the Australian Gourmet Traveller for Green Lentil Soup with Pumpkin and Harissa that would be perfect. My little sister lives in Australia and sends me (if I’m not there to buy a copy) the Gourmet Traveller Annual Cookbook as my Christmas present… the fact it costs way more in postage to send than it costs to buy is neither here nor there – it truly is the magazine I most look forward to getting.

It looked a fabulous recipe. I knew that adding my favourite Puy lentils would add heft to the soup and jazzing it up with Moroccan spices would enliven the whole bowlful.

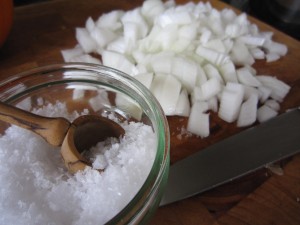
I chopped two sweet white onions, then put them in a pan to soften with a teaspoon of Maldon Sea Salt.

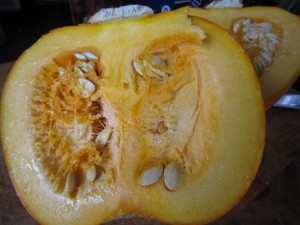
While they were cooking I halved the small pumpkin I had and scooped out the seeds.

Don’t throw the seeds away, because you can roast them later for a lovely, healthy snack.

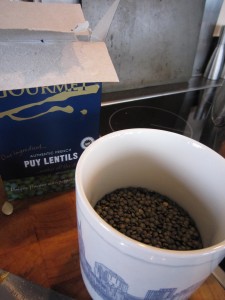
I roughly measured half a mug of Puy lentils – now, this is one of my Starbucks City Mugs that roughly hold 20 fl.oz, so the equivalent measurement will be 10 fl oz if you use a Pyrex jug… or, about a full normal coffee mug size. Me? I like coffee so I have a very big mug!

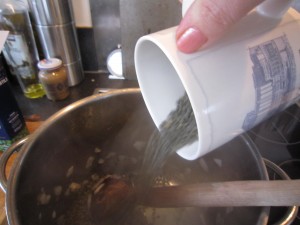
Once the onion has softened and looks translucent, add the lentils and then pour in a mug and a half of water (that’s roughly a pint and a half) and let the onion and lentil mix slowly cook.

Add in a vegetable stock cube for flavour.

While that is gently cooking, start preparing the pumpkin.

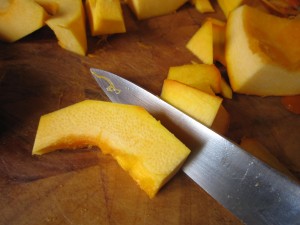
The rind of the pumpkin in very hard and I have found that the best way to peel it is to cut the pumpkin into segments and then slice off the rind.

By the time you have it all segmented, the lentils will have started to soften and the colour will have leached out into the water and stock.

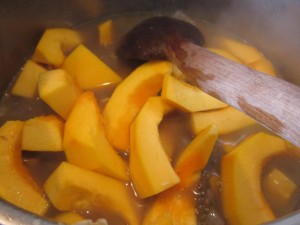
Now add in the segmented pumpkin

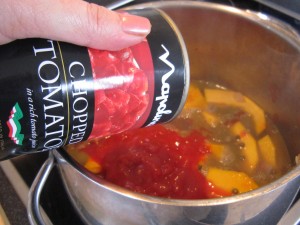
And then add a tin of chopped plum tomatoes.

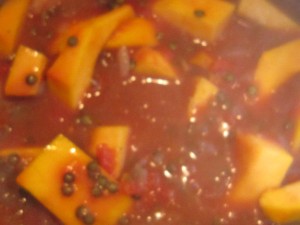
Stir it all round and let it simmer gently.

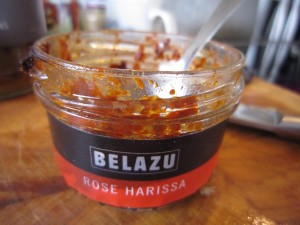
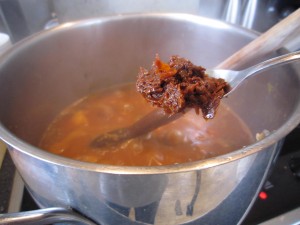
I wanted a bit of heat in the soup and a Moroccan feel so Rose Harissa paste was the obvious choice. You can buy Harissa paste in most supermarkets now – this one has rose petals in it and a deep and complex flavour. It is essentially a chilli paste so add it according to your preference. A teaspoon full will not make it too hot – if you want more heat (and I do) add another.

Stir it in so it blends with the lentils, pumpkin and tomatoes.

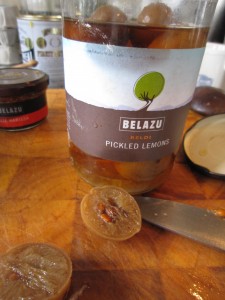
I also have some Belazu Pickled Lemons which will add a marvellously sharp-sour element to the rich and earthy soup.

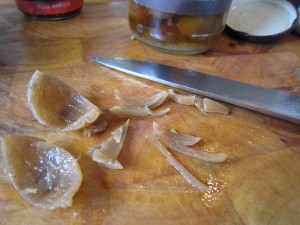
A quick scoop out of the middle of the lemon and the rind is ready for slicing then adding to the soup. I used two small lemons.

And then stir it all round… the pumpkin should have softened, the lentils will be tender and the flavours will have come together to make a deep, rich, spicy soup with sharp overtones

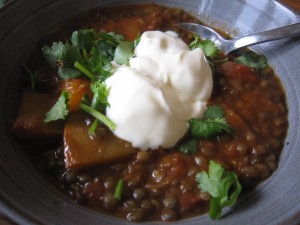
Serve it in a bowl with a spoonful of natural thick yoghurt and a sprinkling of coriander.

And there it was. Steaming perfection in a bowl.

Meatfree and delicious.

Red cooked shin of beef

The weather has definitely changed. The winds are getting stronger and I have started to wear a coat to travel to work.

It been raining a lot as well and when I look out of the window of my office at work I can see waves being whipped up on the lake.

Even the ducks, swans, geese and the heron are all in hiding.

You can see the trees are being bent over in the strong winds. The rain is splattering against the window and the skies are getting more grey.

What we need is something warm and sustaining. I want meat… I want tasty meat. I want something to fill me and make me smile.

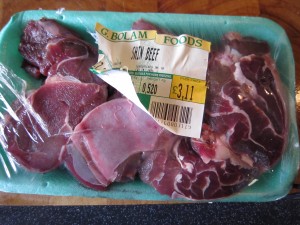
So I decided upon shin of beef which is a British, inexpensive cut of meat from the front legs of cattle. Just over 500g costs  just over £3. That’s enough to easily feed four people. Shin needs long and slow cooking which transforms it from incredibly tough to  the most melt in the mouth meat ever, with a real depth of flavour.   If this cut isn’t familiar to you, look at the link  which shows you the difference between American and British cuts of beef.

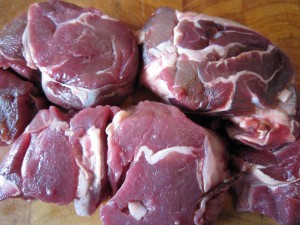
When you look at shin of beef you can see the tendons and the fat running through it. This has to be cooked slowly and the meat becomes transformed into the most tender morsels imagineable. The gravy served with it reduces and becomes intensely rich and flavoursome. It is perfect in a beef stew with dumplings  and that, I have to say, is how I normally cook it.

Except this time I wanted something different. I wanted something with a bit of a zing to it…and I had a fancy for some kind of Chinese flavouring. I have always adored the taste of star anise flavoured sauces and I remembered that when I was a poor student and wanted a treat I would order fried rice with a drizzle of Chinese barbecue rib sauce on it. That would be it. Just rice with some sauce… I think the takeaway was used to poverty stricken students asking for the bare minimum. (Mind you, there was an Italian restaurant in town that once served a group of us a side dish of peas between us because that was all we could afford and one of our friends fancied someone working there…)

Anyway. Here I was, years later, with enough money to actually buy some meat and I was going to make the most of it. I didn’t have a classic Red Cooked Beef recipe but I could make a fair attempt at it. No doubt the purists will think this isn’t the way to do it but this works for us. The flavour at the end is amazing and that’s good all we are concerned with.

Slow cooked meat is the easiest thing in the world. All it needs is time. You really do very little to it.

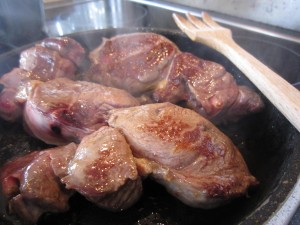
First of all, sear the outside of the beef as this gives it a good colour and a better taste.

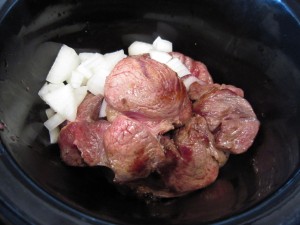
Chop an onion into pieces. There’s no need to worry about making it neat – after a few hours in the slow cooker this will jsut disappear into a lovely rich sauce.

Put the onion in the bottom of the slow cooker (or casserole dish if you are using that) and lay the browned meat on top of it.

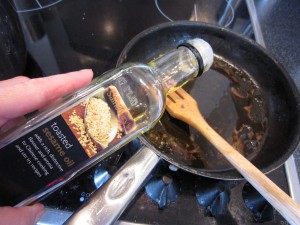
Add some oil to the pan juices (yes, I know that using sesame oil might seem extravagant, but once oil is opened you must use it as it will go off. You might as well use it in an appropriate dish rather than waste it. The delicious smell will disappear, I know, but you know the mantra, waste not, want not!) Use vegetable oil if you have it. What you are doing is getting the rich caramelised bits of meat from the pan.

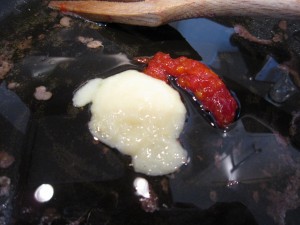
Stir in a good teaspoon of minced ginger, the smae of garlic and half a teaspoon of  chilli – here I am using the tubes of freshly minced herbs and spices a) because I have them and b) my chillies have failed this year and my ginger is dried up and horrid. They are great to keep in the fridge, ready for an emergency. Add a good splash of soy sauce to add a salty, savoury element.

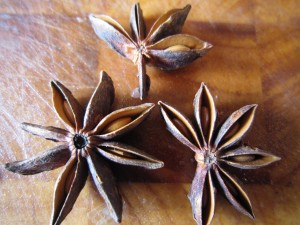
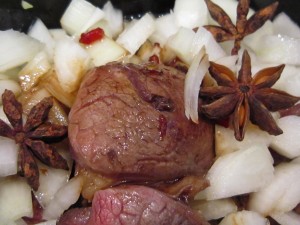
And star anise. Aren’t they beautiful?

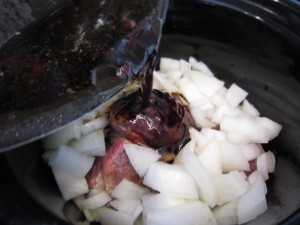
Pour the oil and meat juice mix over the meat and onions and add the star anise.

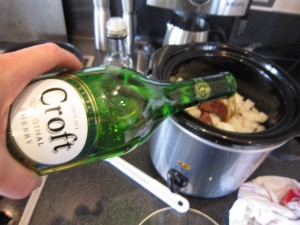
Normally I’d add Chinese rice wine but we had none left… we did have sherry though and that is a good compromise. Half a cup of sherry adds an extra layer of aromatics to the dish.

A cup of water is added to bring the liquid content up to almost the top of the onion and meat. Don’t cover it, though as that will boil it and toughen the meat. You are aiming for a lovely gravy that will cosset the meat until it relaxes into tender submission.

And that’s it. Five minutes to prepare.

All you have to do now is to start the slow cooker, or put your casserole in the oven on a low heat and then just walk away for a few hours. Relax and enjoy the sense of anticipation.

Four hours later, the apartment smells of delicious, fragrant, spicy meat.

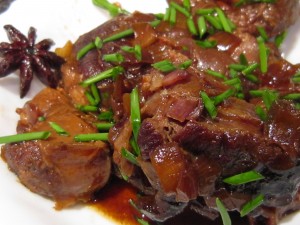
The meat is so tender it just falls apart when I lift it out with a spoon. The long, slow cooking has turned the tough meat into soft and delicious morsels.

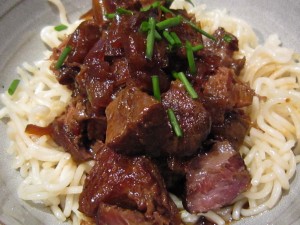
Served in a bowl on top of some noodles with a few snipped chives over the top of it and we had the perfect supper. Delicious, tasty, spicily aromatic beef piled on top of soft and filling noodles… heaven in a bowl.

It made the grey day go away and we felt warm and happy.

What more could you ask for? A meal that tasted delicious and cost £1 per serving. That’s pretty good going.

Meatfree Monday – Roast Garlic and Marrow Soup

It’s the time of year when everyone who gardens starts to look around for people to take their extra produce off their hands. There are messages at work telling people if they want apples or pears they can help themselves, people come to work carrying bags of fruit and vegetables and we all start to look for recipes to use up the glut. This week’s harvest is vegetable marrow.

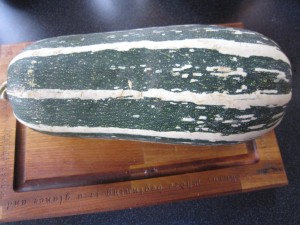
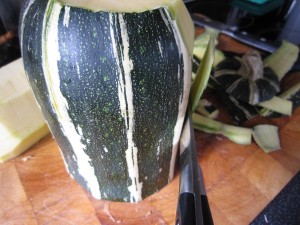
Vegetable marrow, for those of you who aren’t British, are a kind of squash with a very pale, slightly sweet flesh. They are quite large, as you can see – that’s one lying across my large chopping board – and when they are ready for harvesting, there are bound to be lots of them. That’s quite a lot of marrow to deal with.

I need to think of something tasty and warming. I also need to keep an eye on the calorie count. It’s so easy to go wild when the weather turns cold and treat yourself with calorific goodies. I want the best of both worlds – rich and delicious as well as low calorie and healthy.

The weather is changing and this weekend has been very grey and miserable. The temperature is dropping and the winds are picking up. Looking out of our windows I can see rain coming down on the horizon and it is moving our way. I want to stay inside and be cocooned in warmth and comfort.

Soup, I thought. A big bowl of silky, tasty soup. That was what I needed.

Now, vegetable marrow has a very delicate flavour that can, if handled badly,  seem insipid. What I wanted to do was enhance its lovely sweetness and one way of doing it is to add roast garlic to the soup. Garlic, when roasted, develops a lovely sweetness of its own and it works well with the pure taste of the marrow.

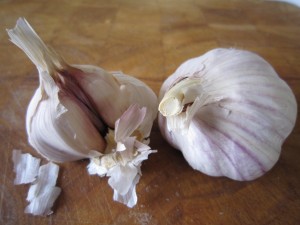
So, first roast your garlic. I have one and a half bulbs, which might seem a lot but once garlic is roasted gently it loses its pungency and becomes almost sweet.

Heat the oven to 200 degrees C/390 degrees F.

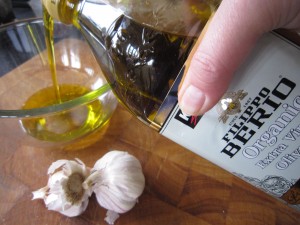
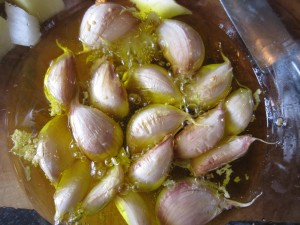
While the oven is getting to the right temperature, pour some olive oil into a heatproof bowl. You need enough to cover the cloves of garlic, but don’t worry – once the garlic has cooked gently you can save the oil to use again. Not only have you made a necessary ingredient for your soup but the by-product is a gorgeously flavoured garlic oil that you can use in all sorts of things later.

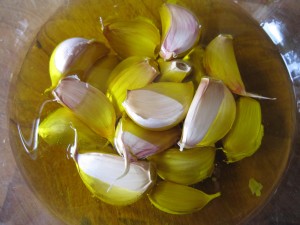
Separate the cloves, removing the outer layer but leave the skins on. Put them all in the bowl with the olive oil, making sure there’s enough oil to cover the cloves and put the bowl in the oven for 10 to 15 minutes.

While that is cooking, get started on the marrow.

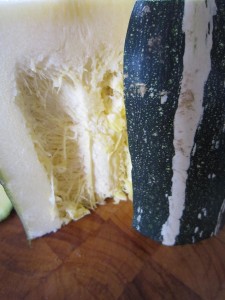
The skin of a vegetable marrow is extremely hard so the only way to peel it, I found, is to cut the marrow into manageable pieces and then cut the skin off.

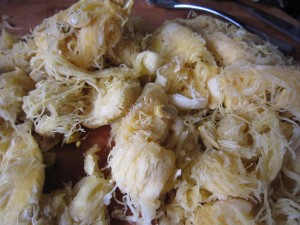
Scoop out the seedy, fibrous middle and cut the flesh into cubes.

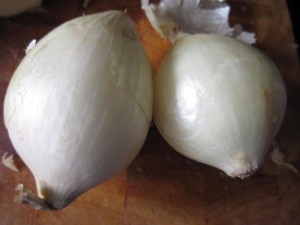
I wanted to emphasise the sweet and aromatic flavours in the soup, so I chose sweet white onions for the base.

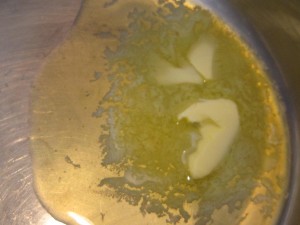
A good tablespoon of butter was heated in a large pan. And when I say large pan, that’s what I mean.

Until the marrow cooks down you will end up with what seems like an enormous quantity so use your biggest pan.

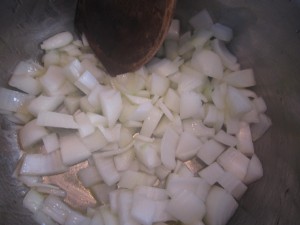
Peel and dice the onion and start to soften it gently. Add a pinch of salt to keep the onion soft and white. You don’t want burned or browned onion as the final soup is a lovely pale cream colour.

By now, the garlic will be cooked so take the bowl out carefully and remove the cloves of garlic with a slotted spoon so they can cool enough to be handled. Remember to keep the oil and bottle it when it is cooled so you can use it later.

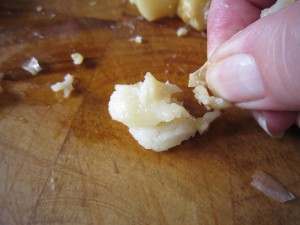
Once you can touch the garlic cloves easily, snip the end off the papery outside covering and squeeze out the soft white inside.

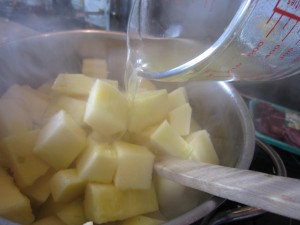
Add the garlic, the marrow and a pint and a half of vegetable stock.

Add a small amount of chilli. I get those tubes of chilli, ready prepared, and keep them in the fridge. Very labour saving and, seeing as this year’s chilli harvest has been a dismal failure to date, an absolute god-send.

Stir everything round, bring to the boil, then cover and simmer gently until the marrow is soft.

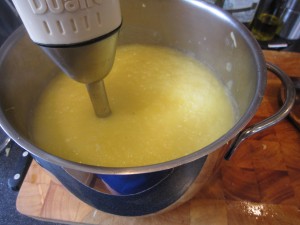
Whizz the softened marrow mix to a smooth consistency.

You’ll see that it looks rather watery and it needs something to pull it together into a rich and delicious soup.

And this is it.

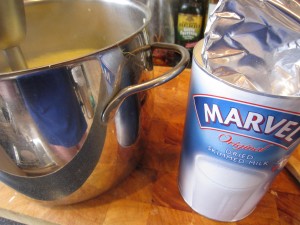
Dried skimmed milk powder. Almost totally fat free.

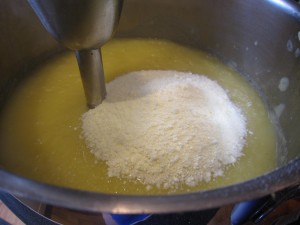
Adding a ladle full of Marvel will make the soup taste rich and creamy with negligible addition of fat. Trust me, this is a brilliant way to make soup taste like it is made with cream. You have plenty of liquid already in the soup base, the milk powder dissolves into that  and enriches the whole pan without adding extra liquid.

Whizz it round and you can see the texture change from  an almost granular in appearance puree, to a smooth and silky soup base.

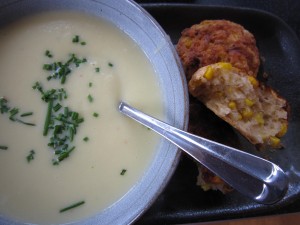
Snip some chives to go on the top of the soup and serve it up.

That was, when served with some savoury scones, absolutely gorgeous.

Each big bowl of soup contained minimal calories yet it felt as rich and luxurious as if it was made with double cream. Of course, if I had been really serious about cutting calories I wouldn’t have made the scones as well…. but hey ho. It’s a start, isn’t it?