Ravioli with a soft egg

I love weekends….I love the fact that although I may still wake up at 6 am, I don’t have to start rushing about, getting ready for work.

I love the fact that the Bear goes to make my coffee because I always do it during the week… I love being able to relax in bed, with the pillows plumped up behind me, reading the news online and checking up with any gossip on Facebook. Even though I can happily spend a couple of hours doing all that and it feels like I have had a complete morning off, when I get up there’s still most of the day stretching ahead of me.

I’d been thinking of what other treats I could have that day….what I could cook that would make me happy.

Before the Bear and I got married, I’d bought a pasta machine and, in the first optimistic rush of enthusiasm, we decided to make ravioli. Perhaps we should have started with something easier than that if we’d never used a machine before, because what we turned out was an utter disaster. We hadn’t got the seasoning right, we hadn’t sealed the ravioli, we weren’t quite confident with the machine…oh it was a sad and soggy meal that we sat down to.

It quite put me off until I decided to start again and make something simple. Like tagliatelli or papardelle, simple strips of pasta. And you know what? It really was simple. It turned out really well and the two of us have had great times – one feeding the pasta and the other winding the handle. It is, actually, simple enough to do by yourself but we do like to work together.

It’s simple enough that when I was playing Cookery Lotto (where those of you who are reading the blog at the time choose a random cookery book and then a random page and I have to cook the recipe) and pappardelle was chosen as the random recipe, I decided to make it with the help of a nearly two year old and a ten year old and, you know what? It was fantastic… they loved making it and felt such a sense of achievement when they produced beautiful tagliatelli to take home to their brothers. Now, if I can get two little girls, (one of whom was very little indeed) to set to and produce pasta I think that shows how easy it can be.

I decided that this would be a day where I made pasta and when I asked the Bear what he fancied, he reminded me of something we had seen on a cooking programme on TV (and no, we can’t remember which one it was) where the ravioli filling was a mix of ricotta and herbs and an egg yolk. When you cut into the ravioli the egg yolk was still soft and delicious….

There were several plus points to having a go at this: firstly the ravioli were going to be large as they had to contain an egg yolk, which meant they would be easier to deal with; secondly, we had lots of wonderfully fresh eggs from the Farm Shop and thirdly, it pandered to my intense yearning to be messing about in the kitchen trying something new.

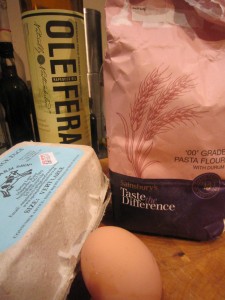
Making pasta is a cinch – all you need is decent ’00’ flour (and most supermarkets sell it nowadays), good oil (I had chosen Oleifera, a delicious cold-pressed rapeseed oil) and fresh eggs.

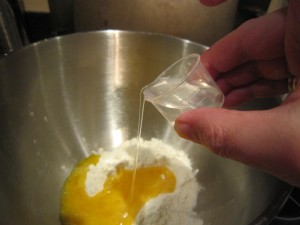
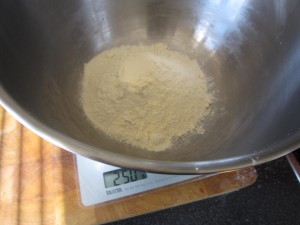
Weigh out 140g of flour and put it in a mixing bowl with a  lightly whisked egg, add three teaspoons of good oil (I was using my new organic rapeseed oil) and 15 ml of water.

You know how I was ill all over Christmas? I survived on bottles of cough and cold cure and they all came with a handy little measuring cup…. which, as it turns out, are perfect for keeping for baking adventures and measuring out, accurately, small amounts of liquids. Waste not, want not.

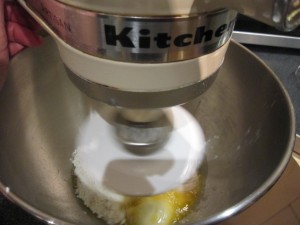
All you do then is mix it together. Obviously, if I was trying to recreate a true home made pasta in the style of an Italian housewife, I would have rolled up my sleeves and set to, mixing and kneading the dough. As I wanted all of the fun and less of the hard work, I let the mixer deal with it while I had a cup of coffee.

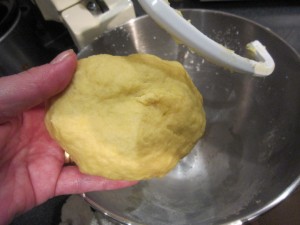
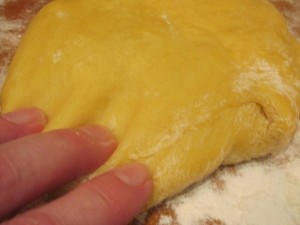
See how it comes together, looking golden from the egg yolk? When you feel it, it is almost hard and tough.

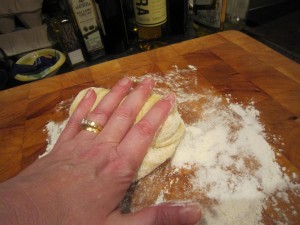
Dust a board with flour and start to knead it. You then need to let it rest and relax, so cover  it lightly in cling film and leave it to relax. It doesn’t take long, maybe ten minutes or so, but if you want to leave it for longer, you can.

While the pasta is relaxing, you may as well get on with the filling. If we are going to use an egg yolk then I needed something to nestle the yolk into and usually soft cheese, flavoured with herbs or even truffles is used. Strangely, my cupboards seem bare of truffles so I had to make do with a mixture of Parmesan cheese, ricotta and whatever else I could find in the fridge.

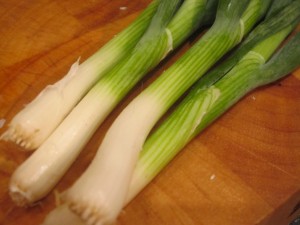
And what was in the fridge were some spring onions.

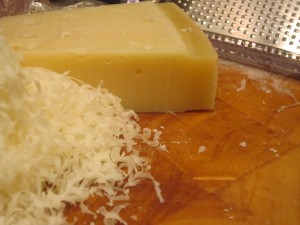
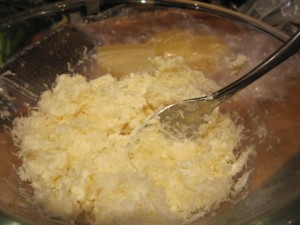
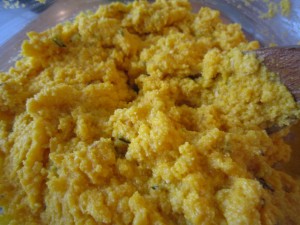
I put a tub of ricotta into a bowl and grated a good chunk of parmesan into it. (As I didn’t have a recipe to work from I thought I’d make a bowl of filling and whatever wasn’t used I would make into a cheese savoury sandwich)

The amount of parmesan added was enough to make the ricotta and parmesan mix taste good to me…. you do what you fancy.

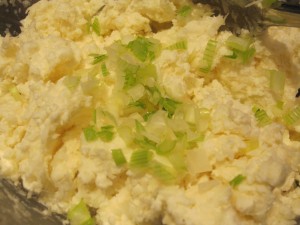
Then I added some of the finely chopped spring onion. Now it really did taste good.

Once I’d done the cheese mix and wiped down the benches, I looked at the pasta dough. Whereas before it had seemed tough and unyeilding, now it was soft and giving. Perfect.

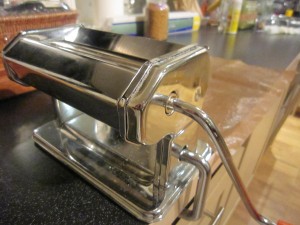
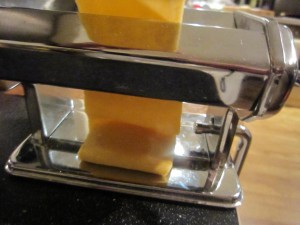
The pasta machine needs to be clamped onto the bench before you can start whizzing the dough through.

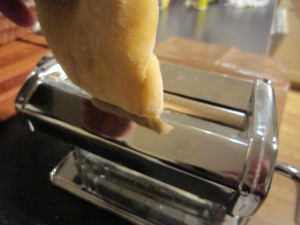
I rolled out the dough lightly and set the machine to the widest setting and then started feeding through the dough.

With each go through, I reduced the setting, making each rolled piece thinner and thinner.

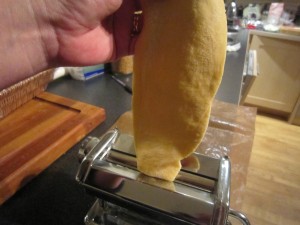
After the first couple of goes you’ll need to cut the dough in half because it becomes too long to handle.

Remember to dust it with flour to stop it sticking and by the time you reach the lowest setting, you will have beautifully thin and smooth pasta.

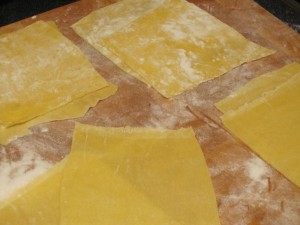
And that’s it… well that’s it for how you make the pasta. For the ravioli you will need squares of pasta because you are going to put the filling and the egg on them, so dust your board and cut… it doesn’t matter if it isn’t perfectly neat as you will be serving two to a plate and they look wonderfully handmade. If you were serving more, you’d need them to be smaller and neater, I think.

I cut eight squares of pasta for the two of us.

Remember you will need an equal number of pasta squares – one for the top and one for the bottom. One set of four was slightly larger than the other set because that was going to be the top layer and it would have to stretch over the cheeses and egg.

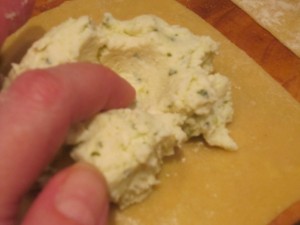
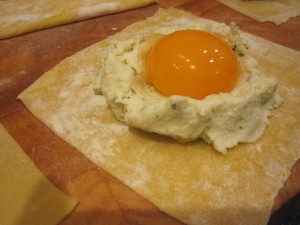
On the bottom, smaller piece put a spoonful of the ricotta, parmesan and spring onion mix and, using your finger, make a hollow in the cheese.

This is going to be the nest the egg yolk sits in.

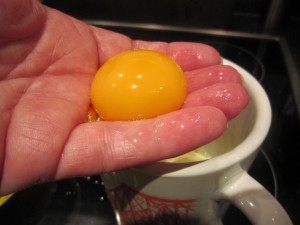
It’s a lot easier to separate the egg yolk by cracking it onto your fingers and letting the white of the egg drain away. When you do it by tipping the egg from half shell to half shell there’s a greater danger of breaking the yolk. 

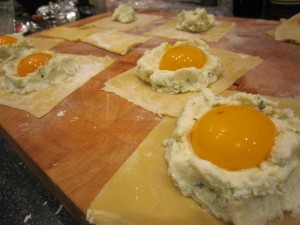
See how it sits snugly in its little cheesey nest?

And as quickly as anything the other squares were filled.

I realised that not only had I got some cheese left over but I also had plenty of pasta, so thought I would make us a simple cheese ravioli with the left overs. So much for a sandwich filling, eh?

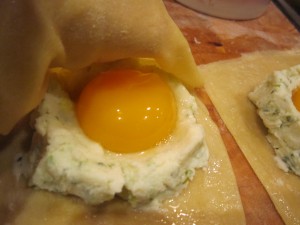
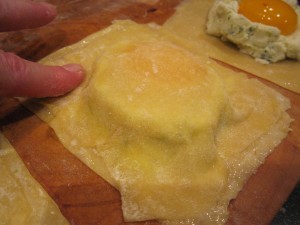
The ravioli had to be covered now, so having whisked up some of the egg white, I pasted it round the edges of the bottom layer and covered the filling with the top square which, if you remember was cut slightly larger all round. The egg white will act as a glue and stick the two pieces of pasta together.

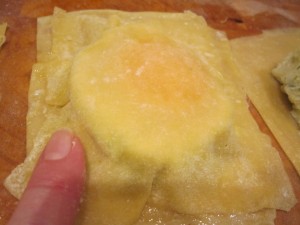
Carefully press down the edges of the pasta so they stick firmly. Make sure there are no air bubbles as that will burst the ravioli when they are in the pan.

You can see what gorgeously generously sized ravioli they are going to be.

I trimmed them neatly and they were ready for the pasta pot.

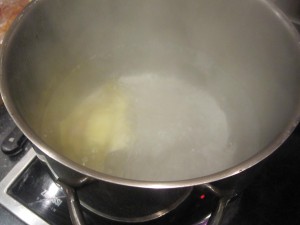
The water needs to be boiling and you’ll need a slotted spoon to get them in and out of the water.

And… and it worked!

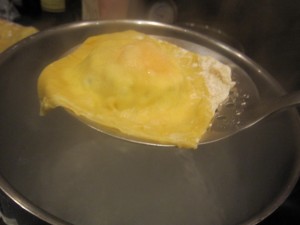
Two, maybe three minutes in the pan and the ravioli floated on the top of the water. The first one didn’t burst and neither did any of the remaining ones.

I drained them on the slotted spoon and got ready to serve them….

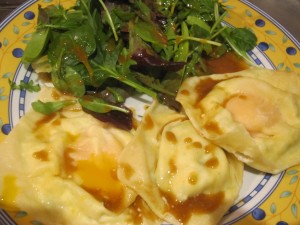
I’d got some leaves to make a salad and made a tangy balsamic vinegar dressing which I sprinkled over the leaves and the ravioli.

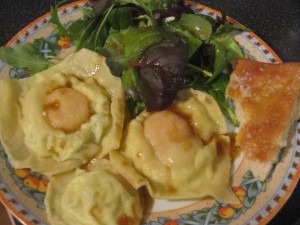
Two soft egg ravioli and a little cheese filled ravioli…..

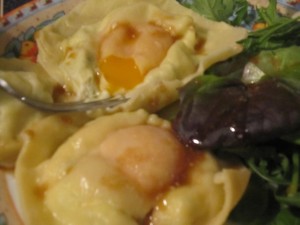
The soft egg ravioli looked like yellowy fried eggs.

But were the yolks soft?

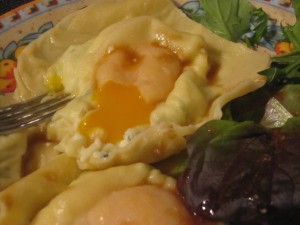
They were.

It was delicious.

The pasta was soft and tender, the cheese filling was tasty and fresh and the yolk…. oh, that yolk was delicious, running out and covering everything like a golden tasty sauce….

That was, the Bear and I concluded, a ravioli triumph.

I’m going to do it again – it would make a marvellous starter for a meal with friends because you could get everything ready and then leave them in the fridge for a while and then cook them at the last minute. Imagine the surprise when you serve that to people because it does look as if it would have been more bother to make than it really was.

Simple, delicious and spectacular – can you really ask for anything more?
Cauliflower and apple soup

Now that autumn is here we are starting to see the arrival of our glorious winter vegetables. As the seasons change, our food does too – we no longer want cooling salads or light and fresh meals, we need something to fill us and warm us against the chill winds and the leaves fall and the skies turn a constant grey.

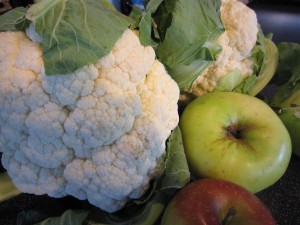
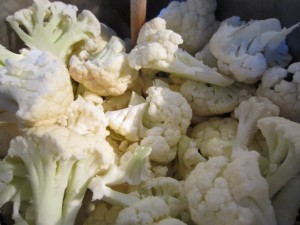
When I walked up to the local shops I saw beautiful white cauliflowers, grown in local fields, stacked in the greengrocer’s barrow outside his shop. How could I resist them?

There was a time, you know, when I did resist them. When they appeared in school dinners… overboiled, smelling slightly and looking rather grey. If your teacher forced you to eat them you’d get a mouthful of hot water and the grey and tasteless, soft but weirdly sort of granular vegetable mush would dissolve in your mouth and slide down your throat. I was a picky child and I could be very stubborn. There was many a school lunchtime when I would sit there, with my jaws clamped shut, refusing to eat, while my teachers tried to make me.

Now, obviously, this isn’t a picture of me at a school dinner table (even the Grim North isn’t cold enough to make me wear an anorak indoors) but this is pretty typical of my sideways, scowling look when faced with something I didn’t want to do. I could be very determined. Cauliflower? No. And I mean no. Make me? I don’t think so. I mean no. I meant no for years.
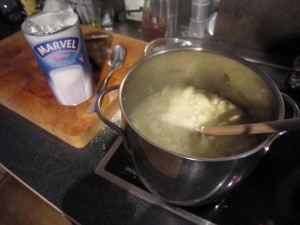
Years and years went by until I finally discovered, as with so many things, that it is not the food itself that is the problem, it’s just the way you cook it.  Cauli can be good….. I discovered the joys of Cauliflower Puree and realised that if you cooked it carefully and didn’t overload the poor vegetable with water, you would end up with a beautifully rich and almost earthy tasting, interestingly textured dish that really was gorgeous to eat.

Anyway, I’m over it now. I like cauliflower. I like it raw and I like it cooked and after I saw all of those crisp cauli’s I decided I’d like it, this week, in a soup.

I bought a couple of cauliflowers and then, because apples are in season as well, I got a couple of  Bramley apples and a Braeburn.

I had an idea.

I would make a rich cauliflower soup but I’d add a Bramley apple to cook with it and add a sharp sweetness to the soup and as an extra apple boost, I’d caramelise an eating apple with chillies to go on the top. Bramleys are cooking apples and are generally too sharp to eat raw but when cooked they almost dissolve into a delicious mushy smoothness. That’s perfect when you are adding them to something like this soup or you’re making a sauce.

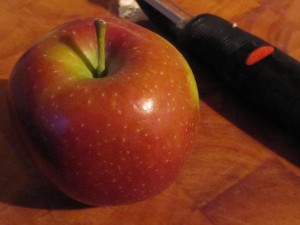
The Braeburn I got to go with it is an eating apple – sharp, crunchy, juicy and sweet. If you cook that it keeps it’s shape. If you can’t get a Braeburn, find something else that is like that.

So, to make soup, start like you always do with soup – peeling and chopping onions and then softening them in a knob of butter with a pinch of salt. The salt will keep the onions white and stop them from burning. You want them to be soft and almost translucent, so start them on a medium heat.

While they are gently cooking, cut up the cauliflowers, separating the florets. The hard stem, chopped into small pieces,  can go in first with the onions as this will cook faster than the lacy florets.

When a cauli is fresh, the florets are crisp and hard and a beautiful creamy white.

Add them to the pan with a couple of pints of water and some good stock cubes.

The next thing is to peel, core and segment the Bramleys. They will take less time to cook so you can do this while the florets soften.

Add the pieces of apple to the cauliflower and let everything cook, still on a medium heat.

It won’t take long, so while that’s glugging away, start on the Braeburn. This is going to be turned into a deliciously sweet, sharp and spicy apple dressing to be served with the soup…

Peel your sweet, juicy, sharp and crunchy eating apple. Core it and cut into pieces.

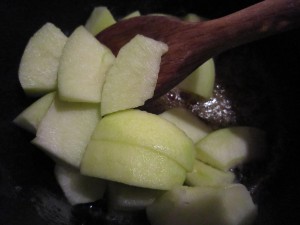
I cut into segments and then cut those bits in half.

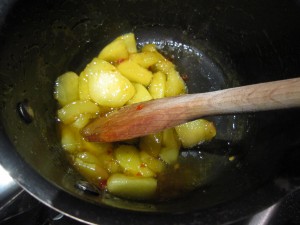
Then, in a non-stick pan, heat a couple of tablespoons of butter and a couple of tablespoons of golden granulated sugar over a medium heat. As this melts and dissolves into an almost caramelised buttery deliciousness, add some chopped chilli.

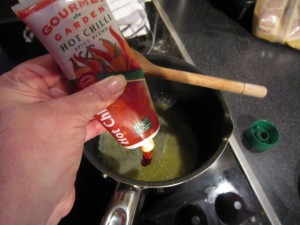
My chilli harvest this year has been an utter disaster, so tubes of prepared chopped chillies, which can be kept in the fridge, have been a marvellous help.  An inch squeezed out – which would, I suppose, be about a teaspoonful – needs to be stirred into the sweetened butter.

Next, add the segmented bits of the Braeburn and stir it all round so the pieces are covered and let it cook gently. The apple will keep it’s shape even though it is cooked.

By now, the cauliflower will have cooked and when you poke at it with a knife, it is tender. If you were to just have this as the soup it would taste rather thin. The thing to do next is to add richness…

But richness can mean adding extra calories when you might be wanting to cut back. Why not save some calories but still get a rich and creamy taste?
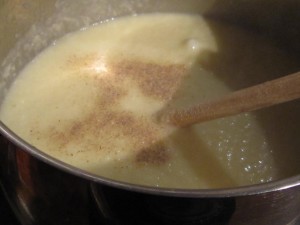
This is where I add skimmed milk powder. If you were to start the cooking off with milk (skimmed or not) you would have to be very careful because there is every chance that the milk would catch and burn on the bottom of the pan. Starting the cooking off with water and stock means that the vegetables can cook with scorching but if you later then add milk to enrich it, you end up with too much liquid to the vegetables.

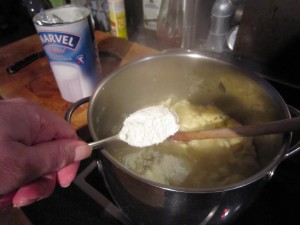
So, I use Marvel skimmed milk powder. No added fat (and no added liquid) but if you add a good scoop of it you get a lovely, creamy taste. 4 heaped tablespoons are the equivalent to a pint of milk.

Stir it round… yes, it will be lumpy but that doesn’t matter because you are going to blend it all into a smooth and creamy soup.

I use a stick blender because it is quick and easy.

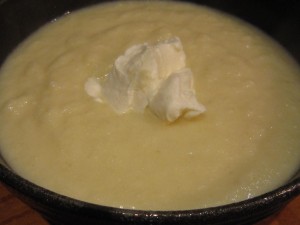
Once it is smooth, add a good shaking of ground white pepper. I say white, because it does have a different taste to black pepper and it also looks better. You  are making a beautifully pale and creamy soup….check the seasoning and and add a pinch more salt if you need to. The big thing is checking that the soup tastes good to you.

By now the Braeburn has softened. It still has its shape but it has turned a lovely golden colour. If you happen to taste it, the sauce is not too hot from the chillies and not too sweet from the sugar. There’s just emough salt from the butter to make it almost savoury. It just tastes divine.

A scoop of natural, thick Greek yoghurt can go in the middle…. the sharpness of the yoghurt is perfect against the smoothness of the cauliflower…..

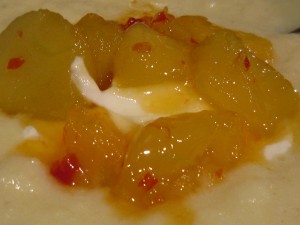
And on top of that… a spoonful of the chillied and caramelised apples.

That was, as the Bear will tell you, absolutely delicious.

Minimal calories for a most delicious fresh and tasty soup. You can cut back further on the calorie count by not doing the chillied and caramelised apples but there’s a limit you know. Why not enjoy yourself?

Now if they’d served this at school there would have been a race to the tables to sit down and scoff….

Meatfree Monday – the simplest supper ever – spaghetti with tomato, anchovy, chilli and cream.

I needed to make supper but there was only me to cook for as the Bear had gone out to eat at an incredibly smart restaurant (work, you know… ) and I just couldn’t be bothered to shop. Sometimes, you know, the thought of going food shopping at the end of a working day just defeats me. It’s not that I’m not organised, it’s that while our apartment is beautiful, it doesn’t have a large fridge so it’s not as if I can do a big shop and get everything I need for the week. I have to do little and often.  

I thought first of all that  would just have cheese and crackers but when I got in, I discovered I didn’t even have any cheese, never mind crackers. I would have to see what there was…..

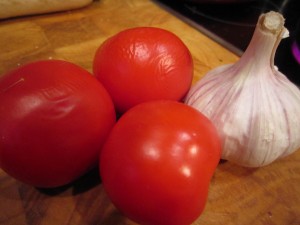
I did find some tomatoes that the Bear had brought back from his Dad’s greenhouse and a head of garlic. The tomatoes were going a bit wrinkly but at least that meant they had ripened.

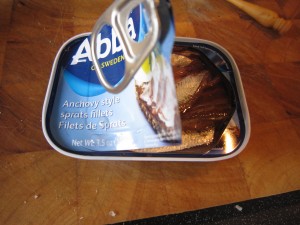
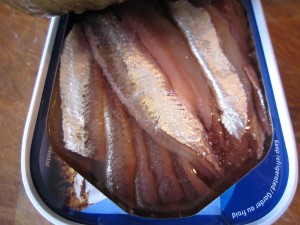
I’d previously opened a tin of anchovy style sprats (the famous Ikea sweet sprats (essential for Jannson’s temptation, possibly the world’s most succulently decadent comfort food) and had some left over

They had to be used up

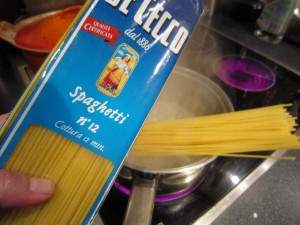
And I had some spaghetti.

I had enough for a feast! I set the water to boil and then added the spaghetti.

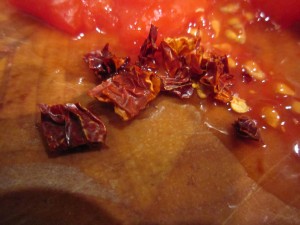
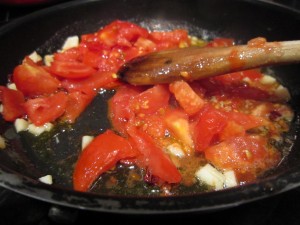
While the water was heating I chopped the tomatoes and chopped in a dried chilli

Quickly fried them together

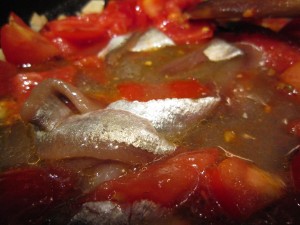
Stirred in the remaining anchovies

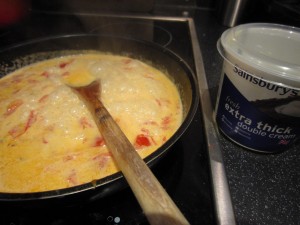
And then realised that there was the remnants of a pot of cream waiting to be used… would it work?

I often eat chilli, tomato and anchovy over spaghetti, but tonight I felt I needed something a little richer, a little bit more comforting. Cream would help, surely?

I stirred it in……it tasted delicious. Probably beyond delicious. It was a gorgeous mix of sweetness, heat and salt, all softened by the addition of cream which made it into a lovely smoothly rich sauce.

Tossed over the spaghetti it was just what I needed. It was rich and satisfying and, unbelievably, made from scraps.

And all it took was maybe 15 minutes.

Do you know, that was better than anything I could have ordered from that fancy restaurant.

Another Meatfree Monday success!

Meatfree Monday – Baguette baked with cheese, tomatoes and peppers

For me, there’s something so soothing about baking bread. I love getting out a big bag of flour, some yeast and some good salt and knowing you can turn it into something delicious. Those ingredients, by themselves, could never be a meal (unlike quite a lot of things we cook with) but together, in some almost alchemical way, become something nearly essential to our day to day life. We talk of “breaking bread together” to refer to eating together. Bread in the Bible is called “The Staff of Life”  and means it is a staple, or a necessary food. We talk of  “Our daily bread”  both in prayer and conversation. It doesn’t matter if you aren’t religious in any way, it’s just the Bible tends to be the oldest, most widely accessible book in the world and phrases and proverbs from there crop up in our everyday language without the majority of us even noticing, or realising where they come from.

The fact that these terms have entered our language and are used daily point to the importance of bread for the majority of people. “Bread” and “dough”  are even used as slang terms for money.

Anyway, I love the action of making bread. I love the smell of it baking and I especially love cutting into a still warm loaf. I think I could get away with murder in our house as long as the Bear can have his fresh loaf. His favourite is the No-Knead Bread but sometimes I make soft white bread because, really, there’s nothing like it for a fried egg sandwich which is one of our favourite weekend breakfasts.

This  wasn’t planned as a breakfast , however. I wanted to make us something nice for lunch. Something light and tasty but also something that would brighten what was a rather vile day. There were thick clouds everywhere and violent rain storms. The Met Office were issuing storm and flood warnings. A typical British Summer, eh?

I had a fancy for a sandwich but a kind of baked and stuffed sandwich. Sort of like a calzone pizza but with lovely white bread. I wanted a light and fresh toasted sandwich – certainly not a heavy meaty one…and it had to be suitable for Meatfree Monday.

But first of all I had to make the bread.

That’s as easy as anything, really.

250g of strong white bread flour with a teaspoon each of dried yeast and salt are stirred together so you have all the dry ingredients evenly dispersed

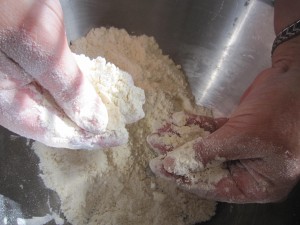
50g of butter can then be rubbed through, rubbing the butter lumps with your fingers so they make a fine, almost granular in appearance, mix.  (Yes, the Bear took that photograph as my hands were messy)

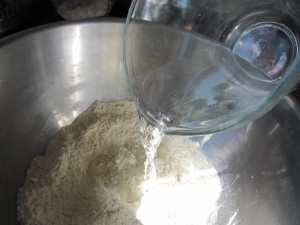
5 fluid ounces of warm water need to be poured in and mixed through. The warm water helps the yeast become active, so don’t have it too hot as this will kill the yeast and too cold means it won’t start to work its yeasty magic and make the bread rise.

The dough will come together quickly and then you need to knead it. Either do it by hand (and it’s not a tough job as this is only a small quantity of dough, just enough for two people) or if you have a mixing machine with a dough hook, stick it in there for 5 minutes. If you are doing it by hand, take ten minutes and think of it as a meditative exercise… I stretch the dough away from me and pull it back again and again. The texture of the dough changes from an uneven, lumpy mass into a smooth and almost silky ball of dough that bounces back when you poke it. It’s a marvellous way of calming down or settling your mind.

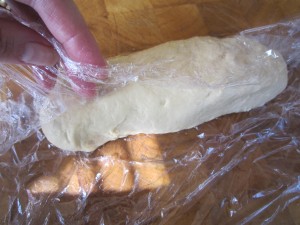
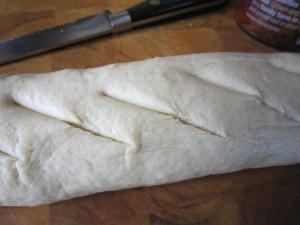
Once the dough looks right – and you will be able to tell the difference from when you started out – make it into the shape you want and leave it to rest, lying in either a greased loaf tin, covered with a damp tea towel to stop it drying out or, as I have done, lying on some lightly  oiled cling film and loosely wrapped. I wanted a baguette shape so I rolled it between my hands for a free form shape.

That needed to rise quietly by itself until it had doubled in size, which, in normal temperatures, takes about an hour or maybe an hour and a half. In the depths of winter it can take longer and you might have to find a warm place so the dough can rise.

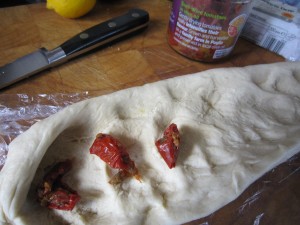
Once it had grown into the size it should be – i.e. a baguette big enough for two – I pulled it apart and started putting the filling in.

Sun dried tomatoes went first.

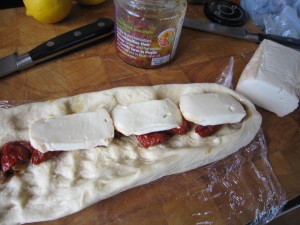
Slices of lovely, tangy Tallegio cheese on top of that. I chose Tallegio because it melts well and tastes divine. You choose whatever you think is the nicest.

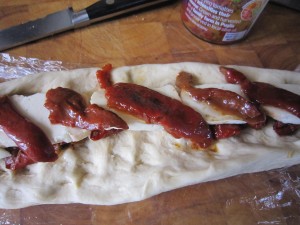
And remember those roasted red peppers I made?  I thought they would add an extra layer of flavour, so the last of them were laid on top.

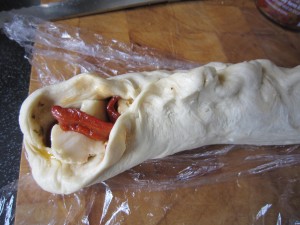
Then it was simply a matter of making sure the oven was heated to 230 degrees C/45o degrees F and the edges of the dough pinched back together

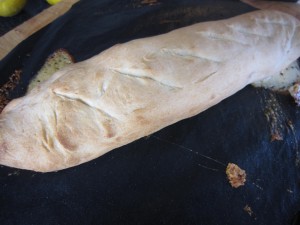
A few slashes across the top to let it expand and then it went iinto the oven for half an hour or so.

You’ll be able to smell it when it’s ready – that gorgeous baking bread smell fills the apartment and the Bear starts to look around, sniffing, realising his lunch is nearly ready.

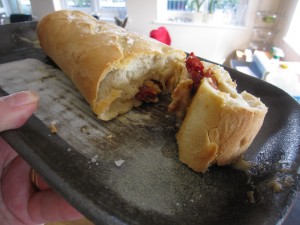
The bread has risen nicely and browned gently… some of the cheese has started to ooze out….

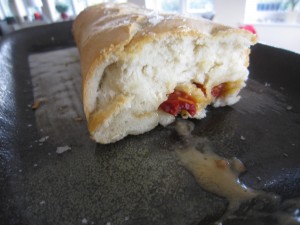
And cut into? It’s not doughy at all but a lovely, well risen soft white baguette with a hot and savoury tomatoey, cheesey and smokey peppered middle!

A success, if I say so myself.

The Bear thought so too and, really, that’s what counts for me.

Try it… put whatever filling you like in – the heat of the oven will heat the filling as it bakes the bread. It really is worth it… delicious baguette stuffed with your favourite things. Just what you need to brighten a wet and windy August day!

Meatfree Monday – citrus, thyme and garlic potatoes, or dinner from scraps.

We didn’t have much in the apartment – I’d been getting to work early and getting back late and the thought of stopping to buy food was just too much. Crawl through rush-hour traffic and pull off the main road, then fight through shoppers and then try and get back to the main road? No thanks.

I knew there were a few potatoes left and I could do something with them….

I had some polenta pie left so that would go with them.

I needed to liven them up a bit so as I drove back I worked through what else we had in the apartment… or what else we had growing outside the apartment.

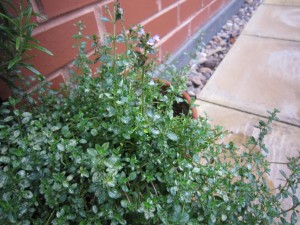
There was a lovely, healthy bush of thyme, just outside the french doors. I could use that…..

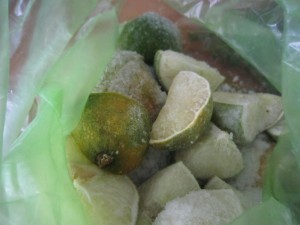
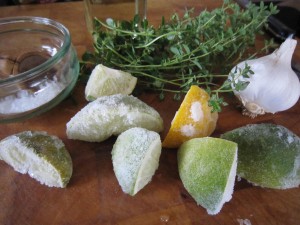
And in the freezer there was a bag of quartered lemons and limes. Whenever I have lemons and limes left over, rather than letting them dry out and go to waste, I quarter them and freeze them. That way I have a marvellous ice cube for a G&T or other drink. But if I used them for the potatoes… well… they would go perfectly with thyme.

So I had a plan.

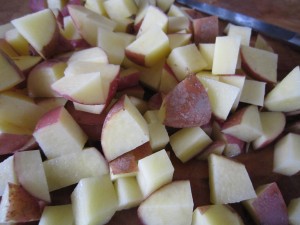
The potatoes were washed and  cubed and the oven put on at 180 degrees C/160 degrees C, fan assisted/350 degrees F.

I put the cubed potato in a bowl with some water and salt – minimal water – and microwaved them for 5 minutes. You could parboil them but this was faster and I was tired, hungry and didn’t want to wash any pans.

In a lined baking tray, I mixed crushed garlic with oil and salt

and grabbed a handful of thyme and lemon and lime pieces.

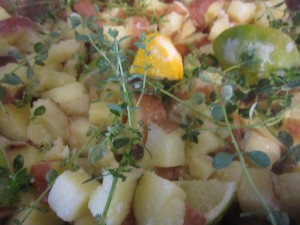
The potato cubes were thrown into the baking tin with the thyme and the frozen lemon and lime and everything was tossed in the garlicky oil.

Into the oven for twenty to thirty minutes while I went to get changed out of my work clothes and into something more comfortable.

The thyme leaves fall off the stem so all you have to do is pick out the stems and Bob’s your uncle.

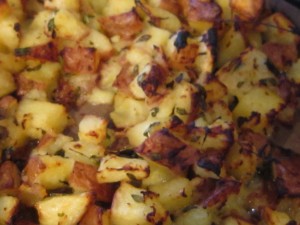
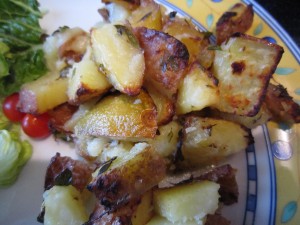
The potatoes had that lovely, almost sweet, savoury taste, crunchy on the edges and deliciously soft in the middle. The lemon and lime had cooked slowly from frozen solid to soft, almost caramenlised roastedness, which gave everything a lovely sharpness and the garlic and thyme worked wonderfully. With a few salad leaves from the box on the balcony and a couple of tiny tomatoes and the remnants of the polenta pie, I had a marvellous meal in less than 40 minutes.

Now, look at that photograph more carefully…. guess who didn’t spot that lime quarter nestling amongst her potatoes?

What have I learned from this?

That a delicious meal can be made from scraps, that freezing lemons and limes are not just for gin…. and that wearing your glasses when dishing up is a good idea.

Meatfree Monday – Baked Butternut Squash Gnocchi

The weather had changed. It was blustery and rainy (and can you believe that this morning the weather forecast included the possibility of hail? Hail?? In August?) I wanted something that would make us feel happy. We needed comfort food… but not too comforting. It was still warm so I needed something that didn’t generate too much heat. Something that I could have with salad. I wanted to have it on Meat free Monday so it needed to be vegetarian. And then, I thought of something I had first made a couple of years ago.
Baked butternut squash gnocchi… it was a comfort food, so that was good… it is great served with salad, so that, too, is good and best of all, it is only 280 calories per serving. And no meat… so perfect for Meat free Monday.
I could have delicious comfort food and still stay on a diet!

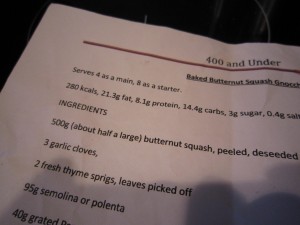
When I see recipes that provide, per serving, less than 400 calories, I save them in a folder called 400 and Under so that I can make a delicious supper that leaves room for manoeuvre with side dishes or even a glass of wine.
This recipe first featured in “delicious.” in September 2008, by the equally delicious Jean-Christophe Novelli. Just as well that I copied it out and saved it because I can’t find it online now. Anyway, doing it like that means I can print it out and take it with me when I shop for the ingredients and then work with it at the kitchen bench.
Also, it means I can then insert it, in its entirety, at the end of this post, something that some of you have been asking for.
Anyway, I did this on my return home from work… supper was delayed slightly as I had to roast the squash first, but not by much. This can be done easily as a weekday meal but if you were feeling efficient, the best way would be to roast the squash the day before while you were cooking something else.
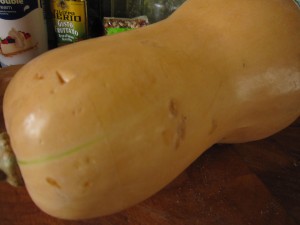
No worries though… it was no problem to peel and dice a butternut squash
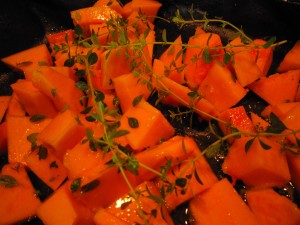
I put it onto a silicone sheet and drizzled it with oil, garlic puree and sprigs of thyme. Jean-Christophe says to take the leaves off the sprigs of thyme but that is so fiddly because the stems are soft… if you pull off as many as possible, that’s good and any that are left on the sprigs… well, don’t worry about it. Once everything roasts in the oven, the leaves fall off and the stems are hard and bare – you just remove them from the dish at the end! (See, Jean-Christophe is a chef and he does it properly. Me? I am someone who cooks when she gets in, tired from work. I find shortcuts. I have to.)
The covered roasting pan went into the oven at 180 degrees C/160 degrees if it is a fan assisted oven… and for those of you who use Fahrenheit, that is 356 degrees. 45 minutes was enough to soften the gorgeous squash.
I picked off the stems of thyme and then whizzed the squash to a smooth puree.
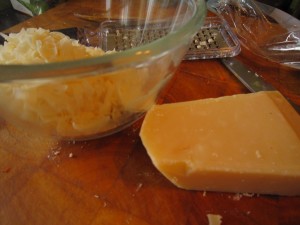
While the squash was roasting, I grated 40 g or thereabouts of Parmesan cheese
And added it to 9og of polenta (that’s grits to those of you in America!) , stirring it round to make an even mix before I added the (still hot) butternut squash puree and 65g of  butter.
The heat started to melt the butter…you could tell this was going to be delicious.
In another bowl I mixed three lovely eggs with 125ml of double cream and then added that to the polenta/squash mix.
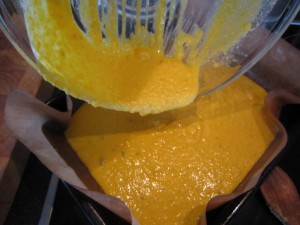
I lined a baking tin with a silicone sheet and poured in the mix….
Back into the oven, covered with tin foil to stop it burning,  for thirty minutes
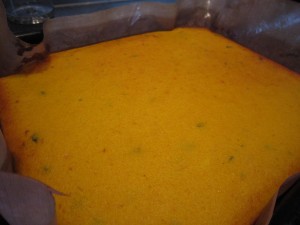
When it emerged, all golden and flecked with thyme leaves. It feels firmish, if you press it… firmish but not solid. This is the joy of this gnocchi…it uses no flour so it is suitable for those on who are coeliac or who are on gluten free diets (I shall make this for my dear friend Angela if she ever returns from America)  and it has no potato in in it so it is light and fresh.
Let it cool enough so you can handle it – while you are waiting, cut slices of Tallegio cheese (and if you can’t find this, get some other cheese that would melt well)
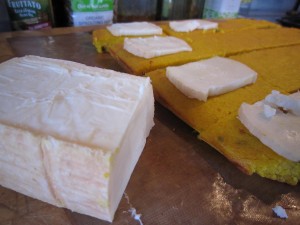
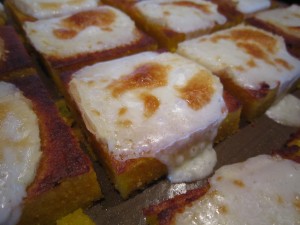
I didn’t bother with a cookie cutter, as suggested, I just cut the gnocchi into squares and laid slices of Tallegio on top.
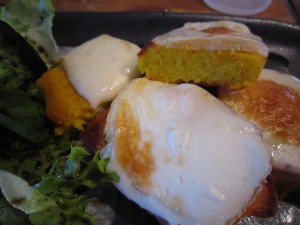
And then put it under the grill to melt the cheese…
Then serve with a light green salad…
Perfect.
The texture of the gnocchi is light and delicious – you can tell it is polenta rather than potato or flour. The taste of the cheeses blended together is rich and satisfying and even better, you can eat it cold. Perfect to put in a packed lunch and take it to work. Immensely satisfying and just right for a blustery day…
And now – here’s the recipe, exactly as it was in delicious.
Baked Butternut Squash Gnocchi
Serves 4 as a main course, 8 as a starter
280 calories, 21.3g fat, 8.1g protein, 14.4 carbs, 3g sugar, 0.4g salt
INGREDIENTS
500g – about half of a large butternut squash – peeled, deseeded and cubed
3 garlic cloves
2 sprigs of fresh thyme, leaves picked off
95g  semolina or polenta
40g grated Parmesan or Gran padano
65g butter, softened
3 medium free range eggs
125ml double cream
Tallegio or other melting cheese to serve.
Preheat oven to 180C/fan 160C. Place squash, garlic and thyme in a roasting tin, cover with foil and roast for 45 minutes. Leave the oven on.
Transfer to a food processor and whizz until smooth. Spoon into a bowl and add semolina/polenta, Parmesan and butter. Whisk eggs and cream together and add to the mix. Season.
Spread in an 18cmx24cm roasting tin, lined with baking parchment or silicone sheet and cover with foil. Bake for 30 minutes.
Cool slightly in the tin then cut into rounds using a cookie cutter – or squares if you don’t have a cutter. Preheat the grill to high, while you put the gnocchi on the grill, covered with slices of Taleggio. When melted, serve with a green salad.

Jean-Christophe Novelli, French Horn. Published in “delicious. magazine” September 2008

Try it… it’s another Meat free Monday success!
(Oh, and in case you are wondering why I haven’t got spaces between paragraphs and decent formatting – well, so am I!
WordPress seems to be refusing to do what I want and no matter how many times I change everything – it just goes back to cramming everything together. If anyone has any idea on how to fix it, let me know!)

Meatfree Monday – Monkfish in a cream, vermouth and pea sauce.

The weather has been really good this year. Proper weather, if you know what I mean. In the winter it was cold and snowy (OK so I was moaning about the interminable snow when it stretched on, week after week, but looking back? Well… it was fun at times, wasn’t it?) and now we are into the summer and we have had sun!

This is England, you know. We do damp and cool very well indeed. Having sun when we are supposed to get it it is break from tradition.

Of course, I can moan about the sun being too hot (because it’s no real fun when I am at work behind glass, steaming gently like an heirloom tomato in a greenhouse… all red,shiny and strangely misshapen) but generally I am happy. Everything I am growing on the balcony is benefitting from the gorgeous weather and it is lovely to come out from work into sunshine.

It makes you want to have light and fresh foods. Not just salad, of course, though that’s good and refreshing, but tasty and light suppers that still feel rather special.

I had a fancy for fish and called in at the fishmongers on the way home from work. There, on ice, were monkfish cheeks at £4.99 a kilo. Monkfish!   For those of you who don’t recognise the name “monkfish”, it is apparently known as goosefish on the eastern coast of North America.

I adore monkfish! The tails are very expensive, but the cheeks are the cheapest part of the fish. Monkfish are possibly the ugliest fish in the oceans, with an enormous head – but it is their tails that are the prized part. In days gone by, unscrupulous people would use monkfish tails instead of lobster as they taste very similar – sweet and meaty- and were very cheap. Now, with the amount of overfishing that goes on monkfish are becoming as expensive, often costing as much, if not more, than lobster, at times.

But the head… that great big, goggly eyed, enormous mouthed and whiskered head, well, that would often be just chopped off and thrown out. Nowadays though, more care is taken and the cheeks are cut off. They taste the same – sweet and delicious – but they are, of course, by necessity, just small pieces of fish. Which is why they are sold for so much less… and why they are an ideal quick and easy and very cost concious option for supper!

I bought six cheeks for £2

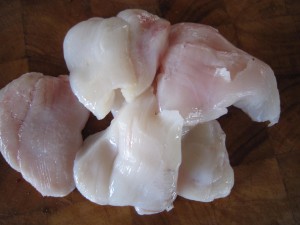
It’s such pretty, pinky white  flesh when you have stripped off the tough grey outer skin, but be aware there’s an almost translucent grey membranous layer that needs to be removed as well. You will spot it and it is easy to get off but be warned, it is still very tough.

I decided that if I were to do the cheeks in an aromatic sauce and serve them with rice it would make a really lovely supper…. but I needed to see what I had in the apartment that I could use.

I found some sweet onions and the remains of a pot of cream in the fridge. There were some frozen garden peas in the freezer that I thought would add a nice sweet touch and a lovely almost popping surprise in terms of the overall texture. I knew I had some vermouth that would lighten it and give a fresh taste so that could go in too.

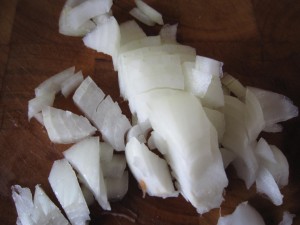
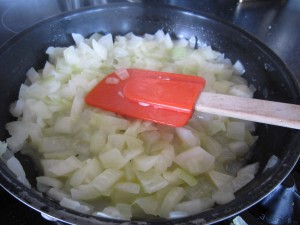
I started by chopping the sweet white onion and started it off in a saute pan.

Adding salt to the onion makes it sweat more, keeping it white, rather than browning. I wanted this to look appetisingly pale.

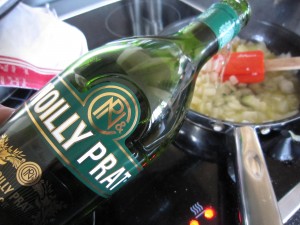
A good splash of vermouth once the onions were softened helps make the start of a flavourful sauce. I always use Noilly Prat because that is the vermouth I have always used, but any good dry vermouth will do.  Just remember that it is the dry vermouth and don’t go throwing in the sweet red!

While that was gently bubbling away, I started some basmati rice – using one mug of rice with one and a half mugs of water (if it is real basmati it needs less water than other long grain rice) and let that boil softly until the water was mostly absorbed. Once the rice was nearly perfect and the water, in the main, absorbed, I take it off the heat and put a clean tea towel over the top of the pan and put a lid on top of that.

That is the most marvellous way to make sure that the rice is perfectly cooked and fluffy – the tea towel absorbs all the excess steam and moisture.

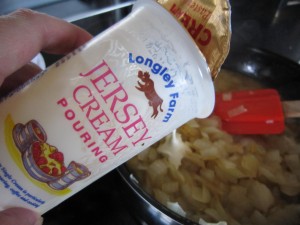
Once the alcohol had lost its almost raw smell and the aromatics of the vermouth remained, I added what was left of the cream to softem the sauce

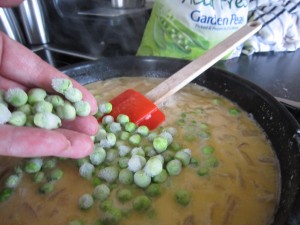
A few handfuls of frozen garden peas were added so they could defrost in the sauce (frozen peas really are the only way anyone can have sweet peas if they haven’t got them growing outside their kitchen door!)

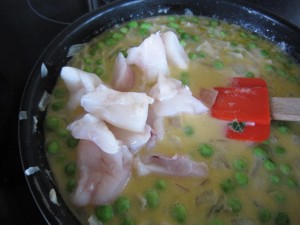
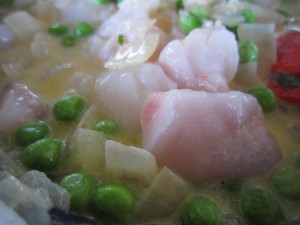
And then the cheeks, sliced into bite size bits…

A few minutes is all they need.

Just watch as the soft pink turns to a pure white coloured flesh.

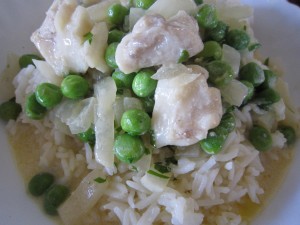
And that, served on top of basmati rice is a truly delicious supper.

It was quick – under 25 minutes. It was cheap – maybe £3 or so in total and it made the two of us feel as if we had had a luxurious meal. Pretty good, eh?

The Bear loved it and that is what counts, isn’t it?