Red cooked shin of beef

The weather has definitely changed. The winds are getting stronger and I have started to wear a coat to travel to work.

It been raining a lot as well and when I look out of the window of my office at work I can see waves being whipped up on the lake.

Even the ducks, swans, geese and the heron are all in hiding.

You can see the trees are being bent over in the strong winds. The rain is splattering against the window and the skies are getting more grey.

What we need is something warm and sustaining. I want meat… I want tasty meat. I want something to fill me and make me smile.

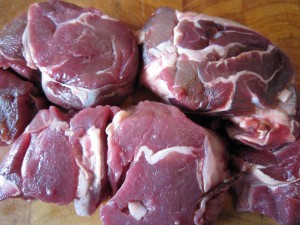
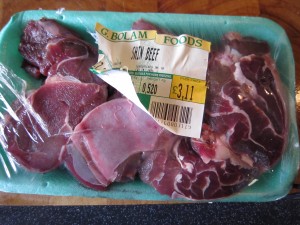
So I decided upon shin of beef which is a British, inexpensive cut of meat from the front legs of cattle. Just over 500g costs  just over £3. That’s enough to easily feed four people. Shin needs long and slow cooking which transforms it from incredibly tough to  the most melt in the mouth meat ever, with a real depth of flavour.   If this cut isn’t familiar to you, look at the link  which shows you the difference between American and British cuts of beef.

When you look at shin of beef you can see the tendons and the fat running through it. This has to be cooked slowly and the meat becomes transformed into the most tender morsels imagineable. The gravy served with it reduces and becomes intensely rich and flavoursome. It is perfect in a beef stew with dumplings  and that, I have to say, is how I normally cook it.

Except this time I wanted something different. I wanted something with a bit of a zing to it…and I had a fancy for some kind of Chinese flavouring. I have always adored the taste of star anise flavoured sauces and I remembered that when I was a poor student and wanted a treat I would order fried rice with a drizzle of Chinese barbecue rib sauce on it. That would be it. Just rice with some sauce… I think the takeaway was used to poverty stricken students asking for the bare minimum. (Mind you, there was an Italian restaurant in town that once served a group of us a side dish of peas between us because that was all we could afford and one of our friends fancied someone working there…)

Anyway. Here I was, years later, with enough money to actually buy some meat and I was going to make the most of it. I didn’t have a classic Red Cooked Beef recipe but I could make a fair attempt at it. No doubt the purists will think this isn’t the way to do it but this works for us. The flavour at the end is amazing and that’s good all we are concerned with.

Slow cooked meat is the easiest thing in the world. All it needs is time. You really do very little to it.

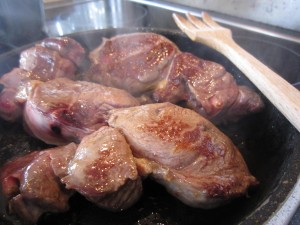
First of all, sear the outside of the beef as this gives it a good colour and a better taste.

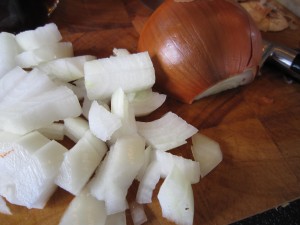
Chop an onion into pieces. There’s no need to worry about making it neat – after a few hours in the slow cooker this will jsut disappear into a lovely rich sauce.

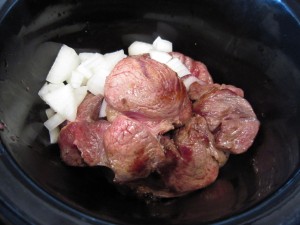
Put the onion in the bottom of the slow cooker (or casserole dish if you are using that) and lay the browned meat on top of it.

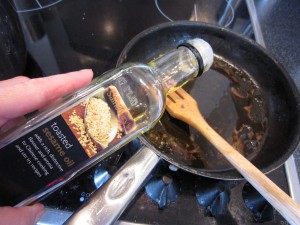
Add some oil to the pan juices (yes, I know that using sesame oil might seem extravagant, but once oil is opened you must use it as it will go off. You might as well use it in an appropriate dish rather than waste it. The delicious smell will disappear, I know, but you know the mantra, waste not, want not!) Use vegetable oil if you have it. What you are doing is getting the rich caramelised bits of meat from the pan.
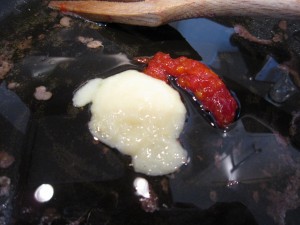
Stir in a good teaspoon of minced ginger, the smae of garlic and half a teaspoon of  chilli – here I am using the tubes of freshly minced herbs and spices a) because I have them and b) my chillies have failed this year and my ginger is dried up and horrid. They are great to keep in the fridge, ready for an emergency. Add a good splash of soy sauce to add a salty, savoury element.

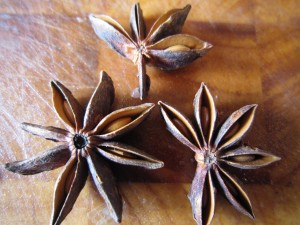
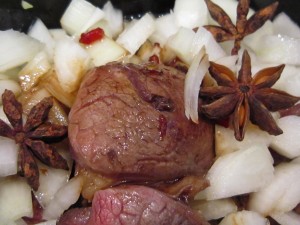
And star anise. Aren’t they beautiful?

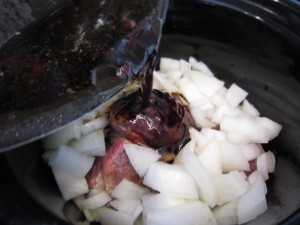
Pour the oil and meat juice mix over the meat and onions and add the star anise.

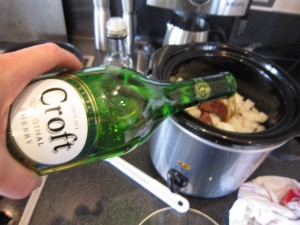
Normally I’d add Chinese rice wine but we had none left… we did have sherry though and that is a good compromise. Half a cup of sherry adds an extra layer of aromatics to the dish.

A cup of water is added to bring the liquid content up to almost the top of the onion and meat. Don’t cover it, though as that will boil it and toughen the meat. You are aiming for a lovely gravy that will cosset the meat until it relaxes into tender submission.

And that’s it. Five minutes to prepare.

All you have to do now is to start the slow cooker, or put your casserole in the oven on a low heat and then just walk away for a few hours. Relax and enjoy the sense of anticipation.

Four hours later, the apartment smells of delicious, fragrant, spicy meat.

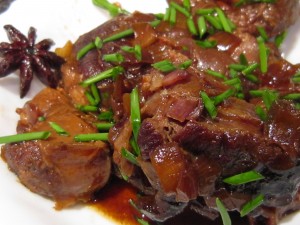
The meat is so tender it just falls apart when I lift it out with a spoon. The long, slow cooking has turned the tough meat into soft and delicious morsels.

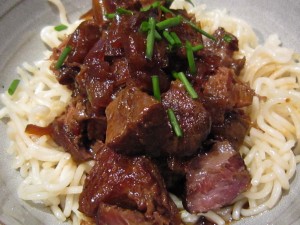
Served in a bowl on top of some noodles with a few snipped chives over the top of it and we had the perfect supper. Delicious, tasty, spicily aromatic beef piled on top of soft and filling noodles… heaven in a bowl.

It made the grey day go away and we felt warm and happy.

What more could you ask for? A meal that tasted delicious and cost £1 per serving. That’s pretty good going.

Meatfree Monday – Roast Garlic and Marrow Soup

It’s the time of year when everyone who gardens starts to look around for people to take their extra produce off their hands. There are messages at work telling people if they want apples or pears they can help themselves, people come to work carrying bags of fruit and vegetables and we all start to look for recipes to use up the glut. This week’s harvest is vegetable marrow.

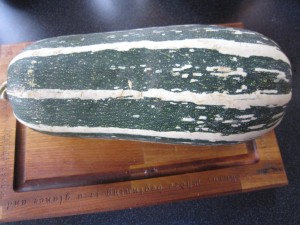
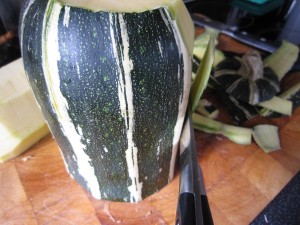
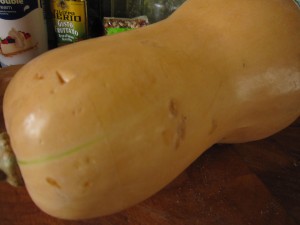
Vegetable marrow, for those of you who aren’t British, are a kind of squash with a very pale, slightly sweet flesh. They are quite large, as you can see – that’s one lying across my large chopping board – and when they are ready for harvesting, there are bound to be lots of them. That’s quite a lot of marrow to deal with.

I need to think of something tasty and warming. I also need to keep an eye on the calorie count. It’s so easy to go wild when the weather turns cold and treat yourself with calorific goodies. I want the best of both worlds – rich and delicious as well as low calorie and healthy.
The weather is changing and this weekend has been very grey and miserable. The temperature is dropping and the winds are picking up. Looking out of our windows I can see rain coming down on the horizon and it is moving our way. I want to stay inside and be cocooned in warmth and comfort.

Soup, I thought. A big bowl of silky, tasty soup. That was what I needed.

Now, vegetable marrow has a very delicate flavour that can, if handled badly,  seem insipid. What I wanted to do was enhance its lovely sweetness and one way of doing it is to add roast garlic to the soup. Garlic, when roasted, develops a lovely sweetness of its own and it works well with the pure taste of the marrow.

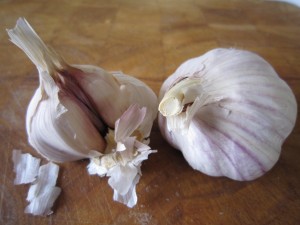
So, first roast your garlic. I have one and a half bulbs, which might seem a lot but once garlic is roasted gently it loses its pungency and becomes almost sweet.

Heat the oven to 200 degrees C/390 degrees F.

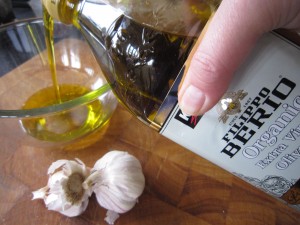
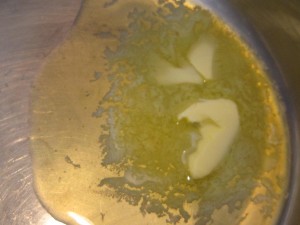
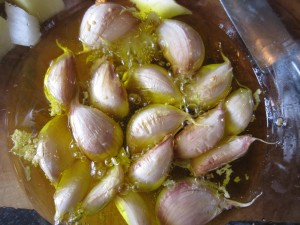
While the oven is getting to the right temperature, pour some olive oil into a heatproof bowl. You need enough to cover the cloves of garlic, but don’t worry – once the garlic has cooked gently you can save the oil to use again. Not only have you made a necessary ingredient for your soup but the by-product is a gorgeously flavoured garlic oil that you can use in all sorts of things later.

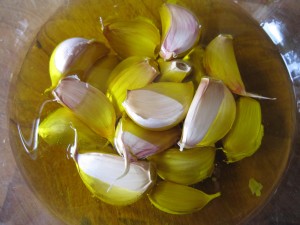
Separate the cloves, removing the outer layer but leave the skins on. Put them all in the bowl with the olive oil, making sure there’s enough oil to cover the cloves and put the bowl in the oven for 10 to 15 minutes.

While that is cooking, get started on the marrow.

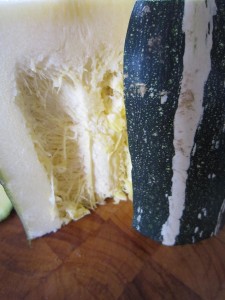
The skin of a vegetable marrow is extremely hard so the only way to peel it, I found, is to cut the marrow into manageable pieces and then cut the skin off.

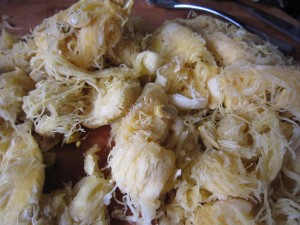
Scoop out the seedy, fibrous middle and cut the flesh into cubes.

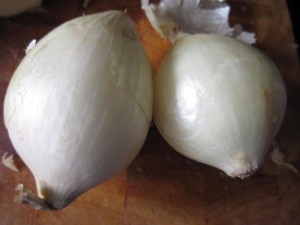
I wanted to emphasise the sweet and aromatic flavours in the soup, so I chose sweet white onions for the base.

A good tablespoon of butter was heated in a large pan. And when I say large pan, that’s what I mean.

Until the marrow cooks down you will end up with what seems like an enormous quantity so use your biggest pan.

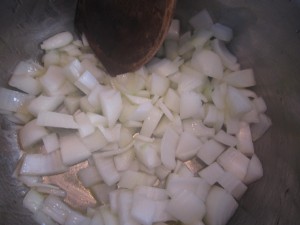
Peel and dice the onion and start to soften it gently. Add a pinch of salt to keep the onion soft and white. You don’t want burned or browned onion as the final soup is a lovely pale cream colour.

By now, the garlic will be cooked so take the bowl out carefully and remove the cloves of garlic with a slotted spoon so they can cool enough to be handled. Remember to keep the oil and bottle it when it is cooled so you can use it later.

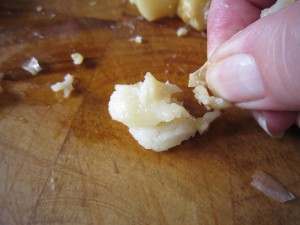
Once you can touch the garlic cloves easily, snip the end off the papery outside covering and squeeze out the soft white inside.

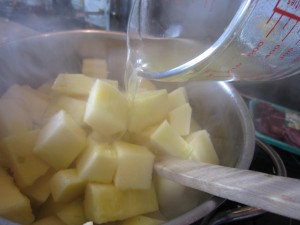
Add the garlic, the marrow and a pint and a half of vegetable stock.

Add a small amount of chilli. I get those tubes of chilli, ready prepared, and keep them in the fridge. Very labour saving and, seeing as this year’s chilli harvest has been a dismal failure to date, an absolute god-send.

Stir everything round, bring to the boil, then cover and simmer gently until the marrow is soft.

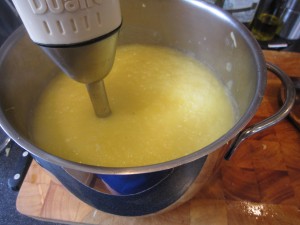
Whizz the softened marrow mix to a smooth consistency.

You’ll see that it looks rather watery and it needs something to pull it together into a rich and delicious soup.

And this is it.

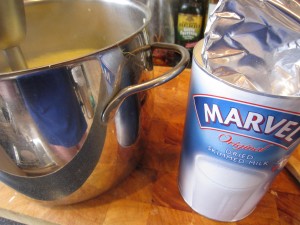
Dried skimmed milk powder. Almost totally fat free.

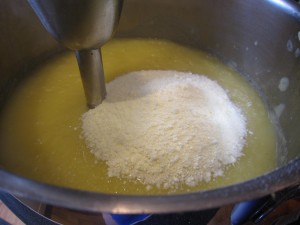
Adding a ladle full of Marvel will make the soup taste rich and creamy with negligible addition of fat. Trust me, this is a brilliant way to make soup taste like it is made with cream. You have plenty of liquid already in the soup base, the milk powder dissolves into that  and enriches the whole pan without adding extra liquid.

Whizz it round and you can see the texture change from  an almost granular in appearance puree, to a smooth and silky soup base.

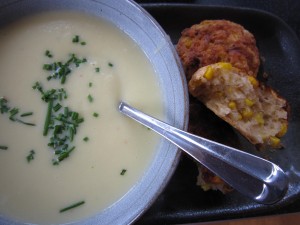
Snip some chives to go on the top of the soup and serve it up.

That was, when served with some savoury scones, absolutely gorgeous.

Each big bowl of soup contained minimal calories yet it felt as rich and luxurious as if it was made with double cream. Of course, if I had been really serious about cutting calories I wouldn’t have made the scones as well…. but hey ho. It’s a start, isn’t it?

Strawberry Surprise Marshmallows

Some time back, I was at work and I had a fancy for something sweet. That’s odd, for me as I generally tend to prefer savoury things.

All I could find was some Turkish Delight that a Turkish colleague had brought back from a visit home. Normally I don’t like Turkish Delight because it is too sweet and over scented for me but this was delicious – it was stuffed with pistachios and the contrast between the soft delight and the crunchy pistachio was unbelievable.  It really did make me a convert. Our friend, Ender, explained there is a world of difference between the mass produced cheap stuff we get over here and the high quality Turkish Delight produced in Turkey. People make it at home, he said, and that’s even better. All sorts of flavours are made, all sorts of additions to the delight.

It made me think about what I could do…..

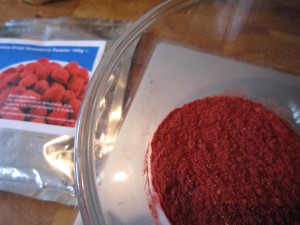
I remember the excitement I felt when I first read about freeze dried food. It was what the astronauts ate, apparently, and it seemed so exciting. I was a child at this point, mind you, so it’s understandable. Fancy being able to eat something like that….. and then I found you could actually buy freeze dried fruit. I spotted freeze dried strawberries. I had to buy some. And when I saw the freeze dried strawberry powder as well, my mind really started ticking over.
Maybe I could make Turkish delight and use the strawberries instead of pistachios? Perhaps use the strawberry powder in cakes as a swirl? Or in meringues to make them all pretty and pink? Macaroons…whipped cream…oh the  ideas were just pouring out. But I didn’t do anything because I was too busy dealing with the huge apple harvest. I made cakes and apple butter and apple mash and apple crumble until, at last, even I was fed up of apples.

A month or so later, as I sat down at home one night, I started to read Good Food magazine and spotted a recipe for bramble stuffed marshmallows. Well, I thought, why not make marshmallows instead of Turkish delight and put the freeze dried strawberries in there?

It seemed meant to be. I was on trend!

I would have to do something with the strawberries because I had opened the packet….

It seemed pretty easy.

First of all, some cornflour and icing sugar needed to be mixed together as this would be the dusting that the mallow is poured upon. If you don’t do that it will stick.  Now, although I wanted something sweet, I didn’t want too sweet. If I used the strawberry powder that would have the same sort of effect and add a touch of sharpness, stopping everything becoming too sickly.

I made a 100g/ 4 oz mix of  cornflour and freeze dried strawberry powder, using slightly more strawberry powder. This was going to be the dusting that stops the mallow sticking together.

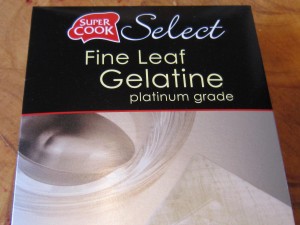
In order to get the bouncy texture of the mallow you need gelatine.

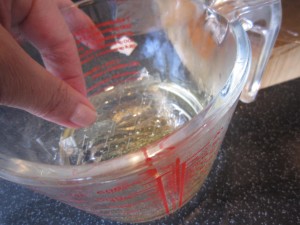
9 sheets were put in a pyrex jug with 150 ml of hot water. It softens and starts to dissolve quickly but it will probably need a mix with a fork to get a good, even distribution

I lined a baking tray with baking parchment and scattered a good layer of the strawberry and cornflour mix over it

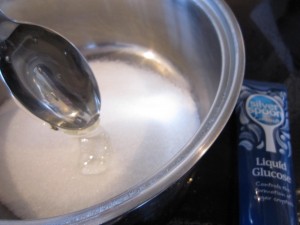
One tablespoon of liquid glucose was added to 1 lb/450g of granulated sugar

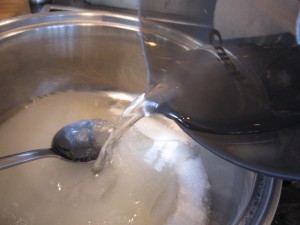
200 ml of cold water was added and the pan was put over a medium heat to start the sugar dissolving.
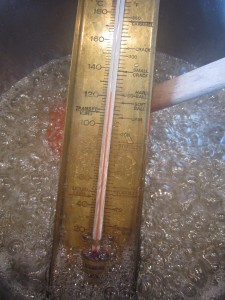
Now, I have a sugar thermometerand I placed that in the pan too. Once the sugar was dissolved I turned the heat up to start to get the sugar solution boiling. I had to get it to 125 degrees.
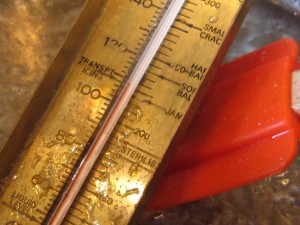
if you haven’t got a thermometer, don’t worry, just time it, for a start. To get to the right temperature takes about 10 to 15 minutes of boiling. You can check how well it is doing after 10 or more minutes by dropping a little bit into cold water. If it sets into a soft ball you know you are at the right temperature.
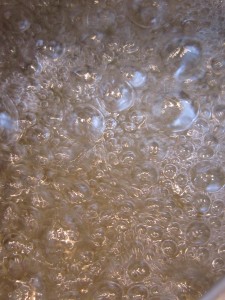
The bubbles start to look different – thicker and perhaps more glossy.

While it is getting to that stage, start whisking the egg whites untill they become stiff and white. Once you have them at that stage there’s no harm in leaving them in the bowl, ready for the next bit.

And there you have it – I timed it – it was just over 13 minutes to get to this stage.

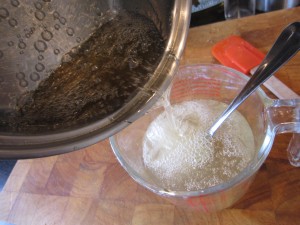
Now, carefully, in two stages, pour half the sugar syrup into the dissolved gelatine. Give it a little stir and then add the rest of the sugar solution.

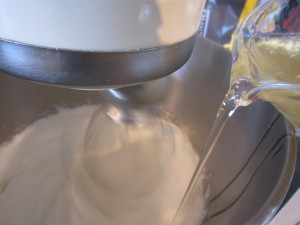
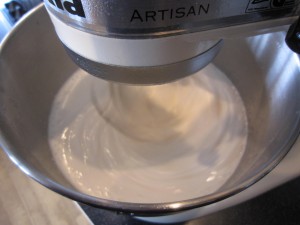
While the whisk is going, start pouring in the gelatine sugar mix into the already whisked egg whites.

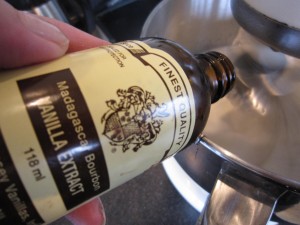
Add  a teaspoon of vanilla extract as the whisk goes on

And carry on whisking for ten minutes or so – you will see the mix become shiny and somewhat stiff.

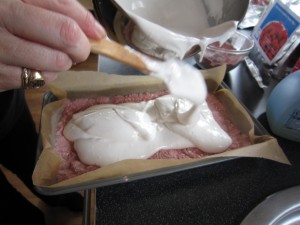
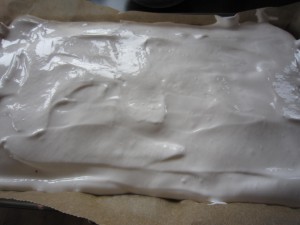
Pour half of the mix onto the strawberry dusted baking parchment

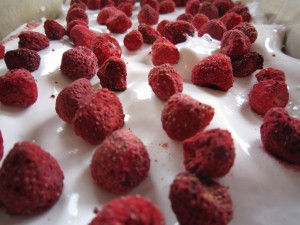
Then put freeze dried strawberries all over the mallow

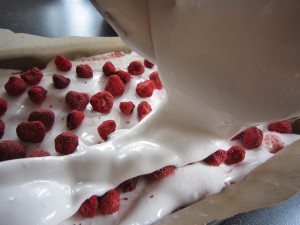
And start pouring the rest of the mallow over the strawberries

And then leave to set.

This will take a couple of hours at least. (I put mine in the fridge later on as I had been doing the washing and there was a lot of moisture in the air. A fridge is a very dry environment so that helped everything set. Bear that in mind if the weather is funny and humid)

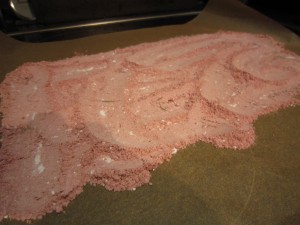
The rest of the strawberry powder mix was poured onto another sheet of baking parchment

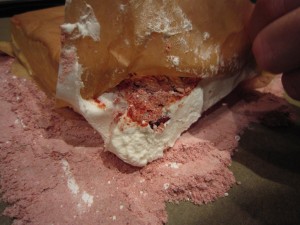
…and the cooled and set mallow was upended onto the powder

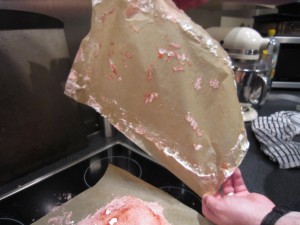
The bottom layer of paper was now on the top and was easy to pull away (the Bear did that bit as I needed to take pictures and it is a bit sticky….)

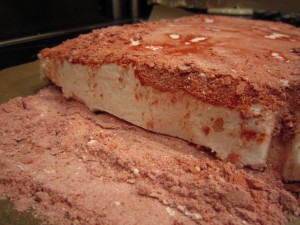
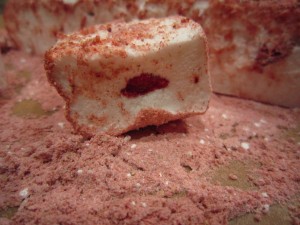
There it was.. white and bouncy mallow with a pink dusting and an occasional strawberry poking through

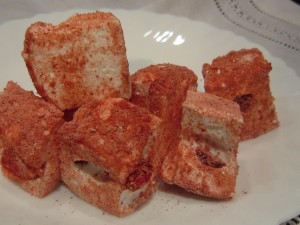
We cut it all into squares – there were over 60 pieces!

They were fabulous. The sharpness of the strawberry powder stopped them being too sweet and the surprising soft crunch of the freeze dried strawberry in the middle really enhanced the softness of the mallow.

The Bear and I ate a piece. Then another piece or two ….and we realised that, delicious though they were, we would have to stop.

I put the marshmallows in an airtight box, lined with baking parchment and decided to take the rest to work. After all, it had been thanks to Ender’s generosity with his Turkish Delight that started this whole experiment off.

They were eaten! And people who normally find marshmallows too sweet had some… and then had some more!

The only downside? Ender, who inspired the whole thing, wasn’t in the office that day!

Should you make this? Yes, I think you should. I know it involves boiling sugar but that’s fine. Just time things if you don’t have a thermometer and it really is rather easy.

And to make it easier for you – here’s the recipe.

Strawberry Surprise Marshmallows

30g cornflour; 70g freeze dried strawberry powder; 9 sheets of gelatine; 450 g /1lb granulated sugar; 1 tablespoon of liquid glucose; 2 large egg whites; 1 teaspoon vanilla extract; freeze dried strawberries.

* Mix the strawberry powder with the cornflour

* Dissolve the gelatine sheets in a pyrex jug with 150ml of hot water. You will need to stir it round

* Line a tin (I used my normal baking tray for flapjacks) with baking parchment and put down a layer with the pretty pink strawberry and cornflour mix. The gooey mallow mix will go on this so make sure the paper is covered

*Put the granulated sugar and the liquid glucose in a heavy bottomed pan  and add 200 ml of water. Stir over a medium heat untiol the sugar has dissolved completely  and boil until a sugar thermometer reads 125 degrees. This takes between ten and fifteen minutes. With no thermomemter, drop a little of the sugar mix into a glass of cold water after twelve minutes –  if it sets as a soft ball then it is ready.

*While the sugar is boiling, start whisking the egg whites until they are stiff

*When the sugar is at the right stage pour it carefully into the pyrex jug that has the dissolved gelatine.

*Keep on whisking the egg and add the gelatine and sugar syrup in a steady stream.

* Add the vanilla essence.

* Keep whisking until the mix is shiny and stiff.

*Pour half into the lined tray

* Add the freeze dried strawberries then pour the rest of the mallow mix over and leave it to cool for at least a couple of hours

* Put more baking parchment on the bench and scatter the rest of the cornflour/strawberry powder mix over and then turn the set marshmallow onto that. Take off the top layer of paper.

* Using a sharp knife, cut into squares.

Pork with saffron cream and mushrooms

I do like a bit of a challenge. Nothing too strenuous, you understand and nothing too difficult.

I like to call in at a supermarket on the way home from work and see what is in the reduced-for-a-quick-sale-as-it-has-to-be-used-today section. It means I am approaching cooking the evening meal with no preconceptions. I start with what’s there and then decide what I am going to cook and what else I need. See what I mean? It’s a bit of a challenge at the end of the working day, but it’s a fun one. And I end up with a surprise while I save money.

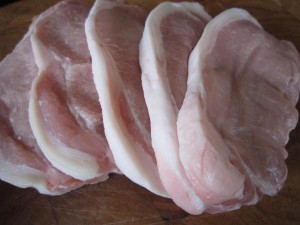
When I called in one night, I found lovely pork steaks from outdoor farmed, happy, well-looked after pigs (though I do wonder how on earth you could keep a pig indoors?) Still, this was premium pork and it was half price.

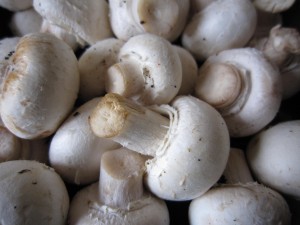
There were also some baby button mushrooms.

That would do I thought. I could make something from that. As I drove back home I was thinking about what else I had in the kitchen….. and remembered that friends of ours had brought home some lovely saffron from their holidays. Pork and saffron…. pork in a cream and saffron sauce… with mushrooms. Bet that would be good, I thought.

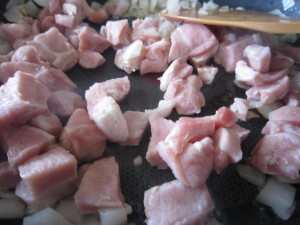
Within five minutes of getting into the apartment I had chopped some onion and started to soften it, while I cubed the pork.

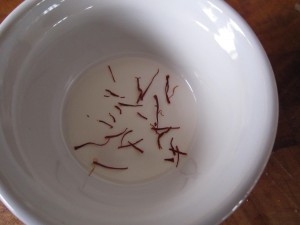
A few stamens of saffron were put into a ramekin

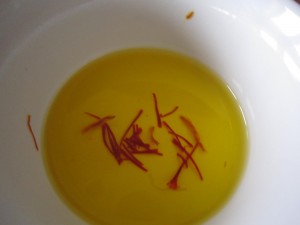
And some hot water added to release the flavour and glorious colour.

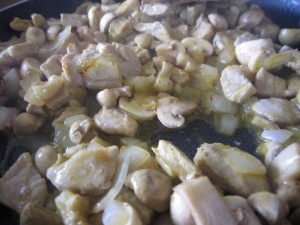
Little mushrooms were sliced while the pork cooked through and then were added to the pan.

The saffron was added… actually it looked far more golden that this, but hey… I’m not a photographer so I have no idea why it DOESN’T look more golden. Just use your imagination.

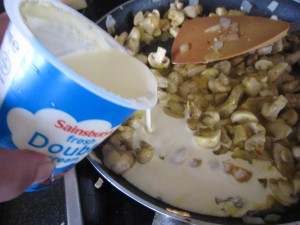
Then just over a quarter of a pot of cream was poured in to make the sauce….. I always seem to have cream in the house. Cream and butter – if you have them then you can always make even the meanest of ingredients taste delicious.

While I’d been doing that I put some basmati rice on to cook. That only takes a few minutes to cook and if you measuer the rice to water ratio correctly (just a bit over one and a half times the water to the rice) you can cook it through without having to drain it. A tea towel on the top once the pan is off the oven absorbs any extra moisture and leaves you with tender, fragrant, perfectly separated rice grains.

And there you have it. In less than twenty minutes I had supper ready.

The pork was tender and the mushrooms cooked through… the saffron cream added a lovely savoury hit and the rice mopped up the sauce.

Can’t do better than that, I think. It was quick, easy, tasty, inexpensive and best of all… it was a surprise.

I might just pop into a store on the way home tonight to see what other surprises I can get!

Foraging to make Fruit Leather – Part 2

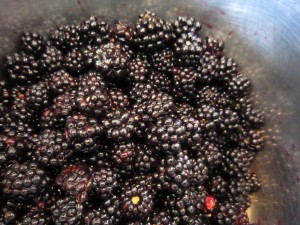
So, we returned from our foraging expedition with two bags of berries. There were still huge amounts left on the bushes but we had to stop. I needed to see if the fruit leather experiment would work, or, at least, work for me. If it does then I am going back to get more.

Once back in the kitchen I picked through the berries and removed any leaves and stray bits that had fallen into our bags and put them straight into a large, heavy bottomed pan on a gentle heat to start cooking down.

The theory behind making fruit leather is that you have to cook the fruit and puree it, adding just honey or sugar to sweeten it (if necessary) and lemon juice. What you end up with is the very essence of the fruit so it is important to keep everything simple. There’s no need to add too much sugar…I suppose, though, it is a matter of taste. Berries, especially wild berries, can be very sharp and do need something to sweeten them. Just don’t go masking the fruit with an overload of sugar.

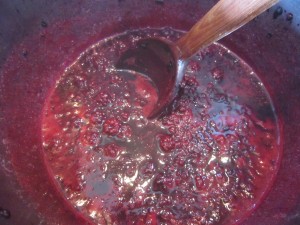
A sprinkling of sugar helps the berries start to cook down – there’s  no need to add water as the juices soon come out. Just look at that glorious colour!

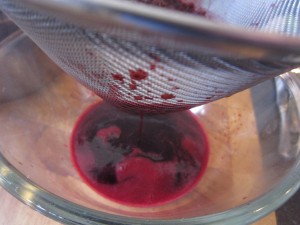
Once the fruit was cooked, I strained the fruit pulp to get the majority of the juice out

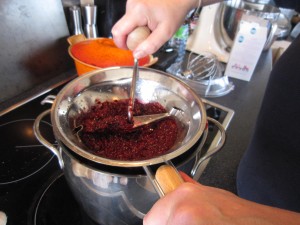
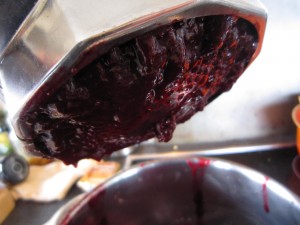
There was still a lot of juice in the pulp so I got my mouli food mill out and started milling the pulp. This will keep the seeds out and push through the pulp. Wild berries are very seedy so you must try and get the majority of them out. If you haven’t got a food mill then try pushing the pulp through a sieve.

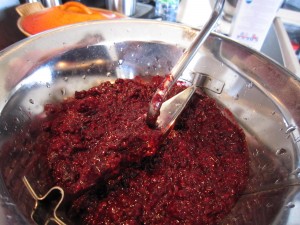
You can see how many seeds there are as the pulp gets pushed through

And underneath the mill you can see the pure fruit pulp being squeezed out

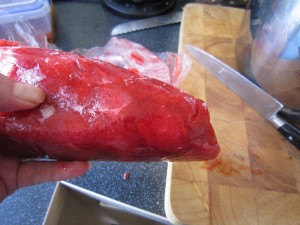
Last year we had gone to a Pick Your Own Fruit farm and came home with punnets of strawberries. I had cooked some of them down and frozen, in bags, those we didn’t eat. This was an ideal time to use up the last of the bags of strawberries and add some extra fruit to our fruit leather. There would be seeds from the strawberries, I know, but at least I had removed the majority of the blackberry seeds.

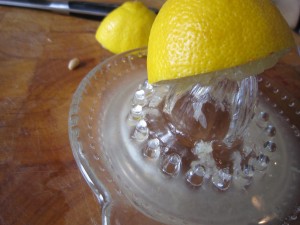
I added the juice of a lemon

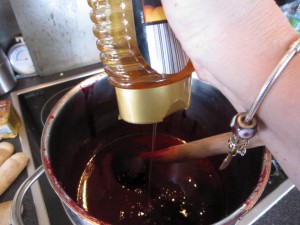
And some honey to taste

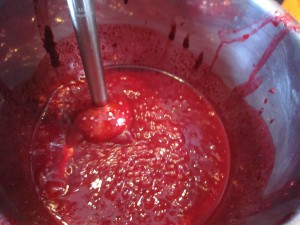
And pureed it all to a lovely smooth mix before letting it simmer, bubbling gently for 5 minutes.

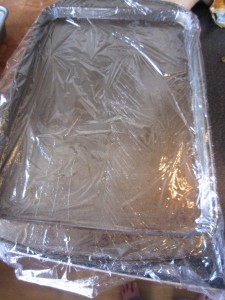
I lined a couple of baking trays with clingfilm

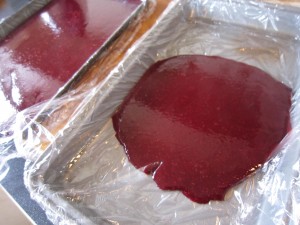
And poured in a thin layer of the fruit puree. It spreads out over the cling film. You don’t need a really thick layer – maybe 3mm or thereabouts? Put in a bit at a time and tip the tin back and forth to get an even layer.

My great plan to free up freezer space by making preserved fruit that didn’t need freezing wasn’t quite working out because I had puree left over.  Into pots it went and into the freezer. Some was poured over yoghurt that evening to have a a dessert after supper.

And then this is when I started to wonder how I was going to do the next bit….

Everything I had read suggested that the trays were then put into the oven on 50 degrees c (120 degrees F) and left for 6 hours. And yes, it was OK to use clingfilm and put it in the oven. That temperature is so low it won’t melt the clingfilm. What you are really doing, of course, is just drying it out, rather than cooking it. When this is manufactured on a large scale, dehydrators are used but an oven on the lowest temperature possible for a long time does the job just as well.

Thing is, it was 9pm and I was tired… did I start it off now and then set my alarm for 3am? Or did I try and stay awake till midnight and then turn the oven off when I got up for work?  What would happen if I left it in for longer?

I decided, in the end, to start it off before I went to bed and get up at three…. but then, of course, I ended up waking up every hour or so and going to check.  I thought I might as well so at least we would all have some kind of idea about cooking it.

For the first few hours it was definitely liquid and I thought I must have gone wrong somewhere but eventually

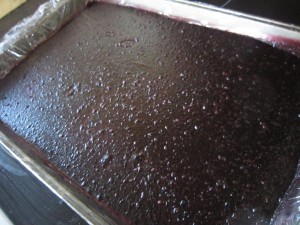
as the sun came up,  it became thicker and sticky… and at last it looked set.

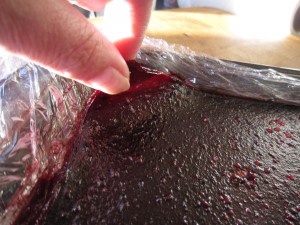
It was darker and when I touched it it felt tacky but not sticky

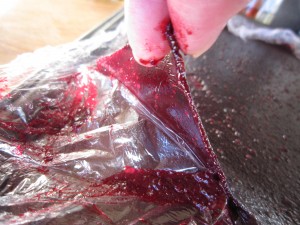
I could peel it away from the cling film! It had worked!

Maybe it could have stayed in a bit longer as there was some puree still liquid underneath…

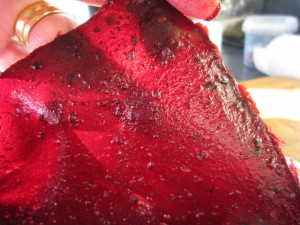
But really? I think it worked! It pulled up as a sheet just as I’d read it would do

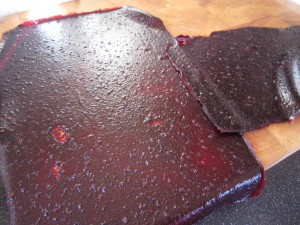
I had two sheets of fruit leather

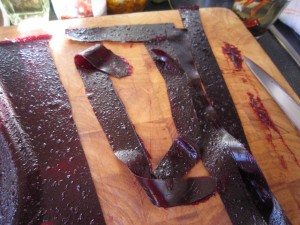
It was easy to cut into strips

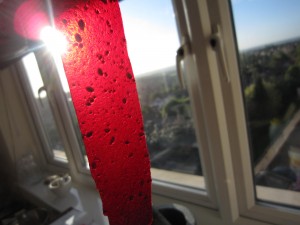
And held up to the light it was the most beautiful colour

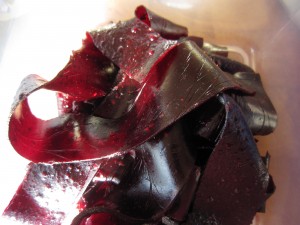
All I had to do now was put the strips into an airtight box and we had our supplies of fruit leather.

The big question, of course, is was it worth it?

Was it worth diving through the bushes, getting scratched and prickled to collect the fruit? Was it worth the constant getting up to check the progress of the leather? Would I do it again?

Yes, yes and yes.

I know that next time I will be more relaxed about the timing  – 50 degrees C is so low that leaving it in there for longer won’t harm it and next time when there’s puree left over I will simply make another tray of it.

The taste was fantastic – it really was the fruitiest fruity taste I’d ever had. The texture was smooth and chewy, but not horribly so… it soon dissolves. We have eaten it as a sweet treat  and also cut it into slices and stirred it through yoghurt.

Guess what? We’re going out blackberrying again.

Meatfree Monday – citrus, thyme and garlic potatoes, or dinner from scraps.

We didn’t have much in the apartment – I’d been getting to work early and getting back late and the thought of stopping to buy food was just too much. Crawl through rush-hour traffic and pull off the main road, then fight through shoppers and then try and get back to the main road? No thanks.

I knew there were a few potatoes left and I could do something with them….

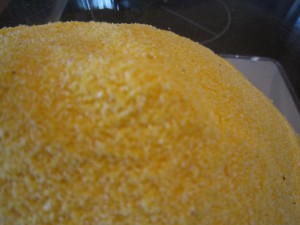
I had some polenta pie left so that would go with them.

I needed to liven them up a bit so as I drove back I worked through what else we had in the apartment… or what else we had growing outside the apartment.

There was a lovely, healthy bush of thyme, just outside the french doors. I could use that…..

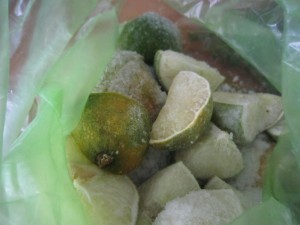
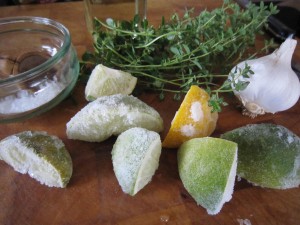
And in the freezer there was a bag of quartered lemons and limes. Whenever I have lemons and limes left over, rather than letting them dry out and go to waste, I quarter them and freeze them. That way I have a marvellous ice cube for a G&T or other drink. But if I used them for the potatoes… well… they would go perfectly with thyme.

So I had a plan.

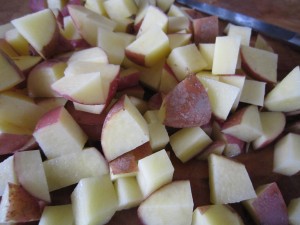
The potatoes were washed and  cubed and the oven put on at 180 degrees C/160 degrees C, fan assisted/350 degrees F.

I put the cubed potato in a bowl with some water and salt – minimal water – and microwaved them for 5 minutes. You could parboil them but this was faster and I was tired, hungry and didn’t want to wash any pans.

In a lined baking tray, I mixed crushed garlic with oil and salt

and grabbed a handful of thyme and lemon and lime pieces.

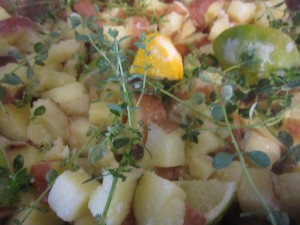
The potato cubes were thrown into the baking tin with the thyme and the frozen lemon and lime and everything was tossed in the garlicky oil.

Into the oven for twenty to thirty minutes while I went to get changed out of my work clothes and into something more comfortable.

The thyme leaves fall off the stem so all you have to do is pick out the stems and Bob’s your uncle.

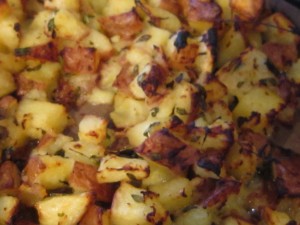
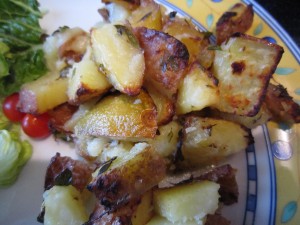
The potatoes had that lovely, almost sweet, savoury taste, crunchy on the edges and deliciously soft in the middle. The lemon and lime had cooked slowly from frozen solid to soft, almost caramenlised roastedness, which gave everything a lovely sharpness and the garlic and thyme worked wonderfully. With a few salad leaves from the box on the balcony and a couple of tiny tomatoes and the remnants of the polenta pie, I had a marvellous meal in less than 40 minutes.

Now, look at that photograph more carefully…. guess who didn’t spot that lime quarter nestling amongst her potatoes?

What have I learned from this?

That a delicious meal can be made from scraps, that freezing lemons and limes are not just for gin…. and that wearing your glasses when dishing up is a good idea.

Meatfree Monday – Baked Butternut Squash Gnocchi

The weather had changed. It was blustery and rainy (and can you believe that this morning the weather forecast included the possibility of hail? Hail?? In August?) I wanted something that would make us feel happy. We needed comfort food… but not too comforting. It was still warm so I needed something that didn’t generate too much heat. Something that I could have with salad. I wanted to have it on Meat free Monday so it needed to be vegetarian. And then, I thought of something I had first made a couple of years ago.
Baked butternut squash gnocchi… it was a comfort food, so that was good… it is great served with salad, so that, too, is good and best of all, it is only 280 calories per serving. And no meat… so perfect for Meat free Monday.
I could have delicious comfort food and still stay on a diet!

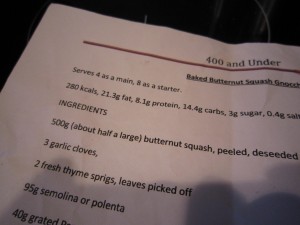
When I see recipes that provide, per serving, less than 400 calories, I save them in a folder called 400 and Under so that I can make a delicious supper that leaves room for manoeuvre with side dishes or even a glass of wine.
This recipe first featured in “delicious.” in September 2008, by the equally delicious Jean-Christophe Novelli. Just as well that I copied it out and saved it because I can’t find it online now. Anyway, doing it like that means I can print it out and take it with me when I shop for the ingredients and then work with it at the kitchen bench.
Also, it means I can then insert it, in its entirety, at the end of this post, something that some of you have been asking for.
Anyway, I did this on my return home from work… supper was delayed slightly as I had to roast the squash first, but not by much. This can be done easily as a weekday meal but if you were feeling efficient, the best way would be to roast the squash the day before while you were cooking something else.
No worries though… it was no problem to peel and dice a butternut squash
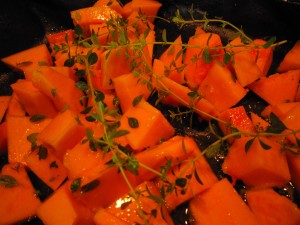
I put it onto a silicone sheet and drizzled it with oil, garlic puree and sprigs of thyme. Jean-Christophe says to take the leaves off the sprigs of thyme but that is so fiddly because the stems are soft… if you pull off as many as possible, that’s good and any that are left on the sprigs… well, don’t worry about it. Once everything roasts in the oven, the leaves fall off and the stems are hard and bare – you just remove them from the dish at the end! (See, Jean-Christophe is a chef and he does it properly. Me? I am someone who cooks when she gets in, tired from work. I find shortcuts. I have to.)
The covered roasting pan went into the oven at 180 degrees C/160 degrees if it is a fan assisted oven… and for those of you who use Fahrenheit, that is 356 degrees. 45 minutes was enough to soften the gorgeous squash.
I picked off the stems of thyme and then whizzed the squash to a smooth puree.
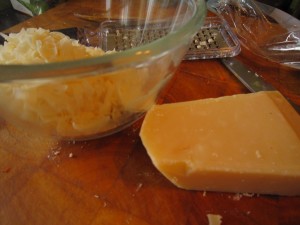
While the squash was roasting, I grated 40 g or thereabouts of Parmesan cheese
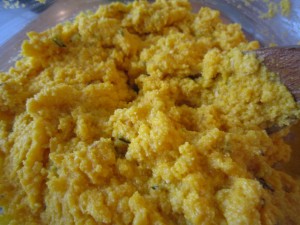
And added it to 9og of polenta (that’s grits to those of you in America!) , stirring it round to make an even mix before I added the (still hot) butternut squash puree and 65g of  butter.
The heat started to melt the butter…you could tell this was going to be delicious.
In another bowl I mixed three lovely eggs with 125ml of double cream and then added that to the polenta/squash mix.
I lined a baking tin with a silicone sheet and poured in the mix….
Back into the oven, covered with tin foil to stop it burning,  for thirty minutes
When it emerged, all golden and flecked with thyme leaves. It feels firmish, if you press it… firmish but not solid. This is the joy of this gnocchi…it uses no flour so it is suitable for those on who are coeliac or who are on gluten free diets (I shall make this for my dear friend Angela if she ever returns from America)  and it has no potato in in it so it is light and fresh.
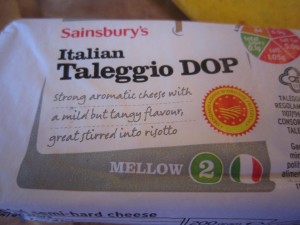
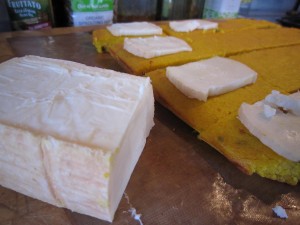
Let it cool enough so you can handle it – while you are waiting, cut slices of Tallegio cheese (and if you can’t find this, get some other cheese that would melt well)
I didn’t bother with a cookie cutter, as suggested, I just cut the gnocchi into squares and laid slices of Tallegio on top.
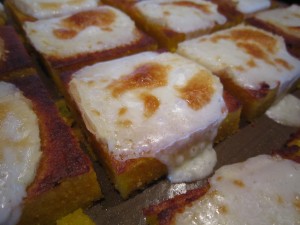
And then put it under the grill to melt the cheese…
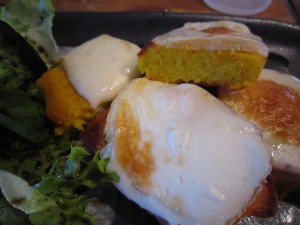
Then serve with a light green salad…
Perfect.
The texture of the gnocchi is light and delicious – you can tell it is polenta rather than potato or flour. The taste of the cheeses blended together is rich and satisfying and even better, you can eat it cold. Perfect to put in a packed lunch and take it to work. Immensely satisfying and just right for a blustery day…
And now – here’s the recipe, exactly as it was in delicious.
Baked Butternut Squash Gnocchi
Serves 4 as a main course, 8 as a starter
280 calories, 21.3g fat, 8.1g protein, 14.4 carbs, 3g sugar, 0.4g salt
INGREDIENTS
500g – about half of a large butternut squash – peeled, deseeded and cubed
3 garlic cloves
2 sprigs of fresh thyme, leaves picked off
95g  semolina or polenta
40g grated Parmesan or Gran padano
65g butter, softened
3 medium free range eggs
125ml double cream
Tallegio or other melting cheese to serve.
Preheat oven to 180C/fan 160C. Place squash, garlic and thyme in a roasting tin, cover with foil and roast for 45 minutes. Leave the oven on.
Transfer to a food processor and whizz until smooth. Spoon into a bowl and add semolina/polenta, Parmesan and butter. Whisk eggs and cream together and add to the mix. Season.
Spread in an 18cmx24cm roasting tin, lined with baking parchment or silicone sheet and cover with foil. Bake for 30 minutes.
Cool slightly in the tin then cut into rounds using a cookie cutter – or squares if you don’t have a cutter. Preheat the grill to high, while you put the gnocchi on the grill, covered with slices of Taleggio. When melted, serve with a green salad.

Jean-Christophe Novelli, French Horn. Published in “delicious. magazine” September 2008

Try it… it’s another Meat free Monday success!
(Oh, and in case you are wondering why I haven’t got spaces between paragraphs and decent formatting – well, so am I!
WordPress seems to be refusing to do what I want and no matter how many times I change everything – it just goes back to cramming everything together. If anyone has any idea on how to fix it, let me know!)

Dulce de leche – Argentina’s iconic sweet spread.

Every country has some foods that are instantly recognised as being associated with it – for instance, in England  it is going to be roast beef and Yorkshire Puddings, or maybe fish and chips; Japan is probably  sushi. France? Maybe Foie gras or cheeses such as Camembert and Brie.

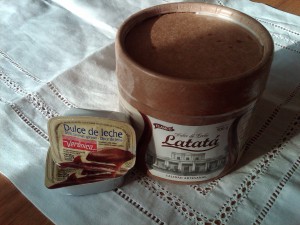
Argentina is famous for its meat, of course, and especially for the beef, but all Argentineans have a deep longing for sweetness….. because wherever you go in Argentina you will find dulce de leche (literally “sweet of milk”)  – the most delicious caramelised milk, made from sweetened condensed milk. Sweet, sticky, almost softly caramel toffeeish…

When you go to breakfast, there are little pots of it, waiting to be spread on toast… when you have a pastry or a biscuit, there’s usually dulce de leche involved somewhere, either as a filling or a flavouring. You can buy lovely large pots of artisan made Dulce de Leche or commercially produced packets. Whatever you get is guaranteed to taste delicious.

One of our dearest friends is from Argentina and he always looks wistful at the mention of dulce de leche when he is far away in cold, wet England.

The thing is, it’s not difficult to make… it is, however,  (usually) time consuming… and, in my eyes at least, just a bit scary.

The traditional way is to take a large quantity of milk and sugar and, after pouring it in a pan, slowly simmer it until it thickens as the water evaporates and it caramelises to a wonderful golden brown. Thing is, you have to stir it constantly – you can’t walk away and leave it.

Another way is to take a tin of sweetened condensed milk and boil it, unopened, in a pan for a couple of hours. You can’t walk away from that, either. If you let it boil dry the tin will explode and the kitchen (and any unwary inhabitants) will be covered in superheated caramel. If you avoid that fate then you have to take care to leave the tin to cool properly before you open it.

See what I mean about it being a bit scary? And if you went down the boiling tin route, how would you know that it had caramelised perfectly?

So, I was content to eat it but too afraid to try making it.

Until I found, whilst idling around various food blogs, (one of my favourite activities) an article by David Lebovitz telling me how to make it safely and quickly!

He says to make it in the oven in a bain marie and that it only takes one and a quarter hours…… what’s to lose, I thought? I just had to try it out.

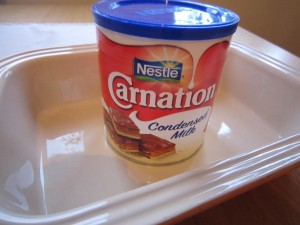
I needed an oven proof dish and a tin of sweetened, condensed milk.

The oven needed to be preheated to 220 degrees C/200 degrees if fan assisted) 425 degrees F

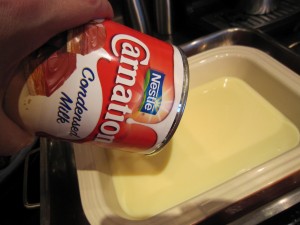
I put the oven proof dish inside a large metal roasting dish and then poured in the milk.

A sprinkle of Maldon sea salt was stirred through.

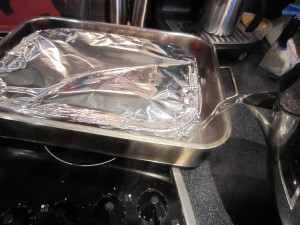
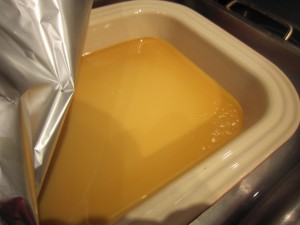
I wrapped tin foil tightly over the dish and poured hot water into the roasting pan until it was half way up the sides of the dish with the condensed milk it.

And that was it.

Into the oven for an hour and a quarter, or thereabouts.

And no standing over it, terrified that it might boil dry and the tine explode… no standing for hours, stirring it slowly. Just as well because this was a Friday night after my first week back at work with jet lag and all I wanted to do was slump on the sofa.

I did check after about 40 minutes that it hadn’t boiled dry (it hadn’t) and I couldn’t resist having a peek at the colour…..

It was turning golden!

And, oh, the smell….. delicious, rich, sweet caramel aromas coming from the oven… Someone should make that smell into a scented candle or room perfume…

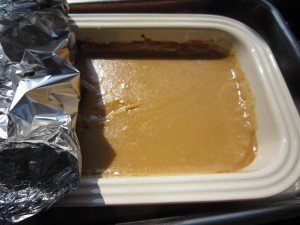
And then… just an hour and a quarter after putting it in the oven

It looked good.

But it was too hot to taste so I had to leave it to cool. David said to whisk it to get out lumps out but it was fine.

Oh my word.

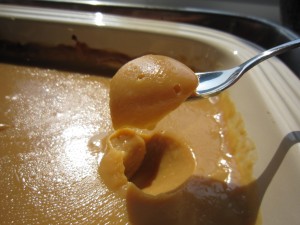
Thick, delicious, spoonable delight. It was dulce de leche.

And I had such plans for it…..

But I needed a real assessment to be done – was it good enough? Did I have to go back to the traditional way of doing it?

As I said, we have a very dear friend from Argentina. It was his marvellous mother who organised all of our travels around the country (Thank you, P!) and he was with us for most of them. Who better, I thought, than N?

That was it – when I saw him, I marched up with a spoonful held out in front of me and demanded he tried it.

He liked it! Not only that he said it was delicious!

N’s fiancee, L, had made it the traditional way before now and both of them reckon that this way produces dulce de leche of comparable deliciousness with a minmum of effort.

So, there we have it – quick, safe and easy. Delicious and moreish. Rated by people who know what it should taste like… and by those just want to scoop it into their greedy mouths!

Cheese and chorizo omelette…. Or, supper from scraps

It was half way through the working week and it felt like it should be the end of the week. I got in from work, too tired to go to the supermarket on the way back  and was desperately craving something tasty and filling to eat. Looking around the kitchen I found various bits… some ends of cheese, a couple of limp looking spring onions,  the last bit of a chorizo, the end of a pot of cream, two wafer thin slices of  Parma ham and, of course, eggs.

I love eggs. I really do. I could happily eat eggs every day.

Some times I do. I mean… they are packed full of protein and they have been shown to have no real effect on cholesterol. If you eat eggs for breakfast, the high protein levels make you feel full for longer, which is just the thing you need to stop you snacking mid morning. Eggs for supper stop you having cravings late at night.

So, it seemed just right to have an omelette. I had that lovely chorizo which neede using up

And  I had that cheese… so Cheese and Chorizo Omelette it was going to be.

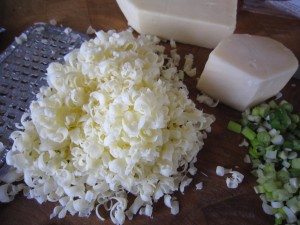
There was  the last of the Emmental and Gruyere cheese that I had used in Omelette Arnold Bennett and some farmhouse Cheddar.  The sorry looking spring onions weren’t bad once I had trimmed them down and refreshed them in ice cold water.

I microplaned the cheese and sliced the spring onion.

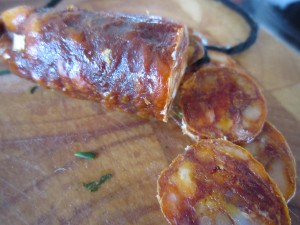
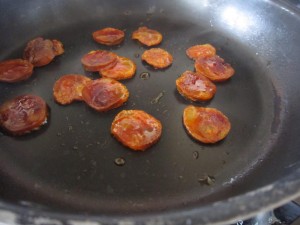
Dry frying sliced chorizo releases the oil and cooks the outside to a sort of caramelised bronze. Once the slices were browned on both sides, I took them out and left them to cool.

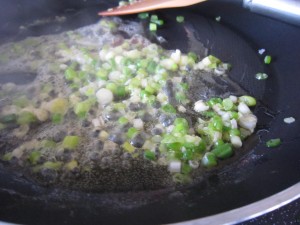
A knob of butter softened the spring onions (I really can’t stand raw onion … it gives me a headache)

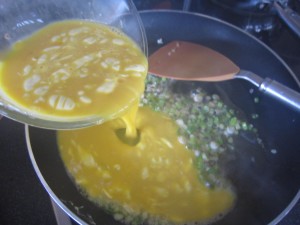
I briefly whisked the eggs with a fork and added the last of the cream. That’s what you can see in the egg mix. I didn’t bother to whisk it all in smoothly (it was very thick cream) but I knew that with cooking it would all melt in with the cheese.  That was all poured in over the softened spring onions.

My mother always calls them scallions and I don’t know why. I really should ask her.

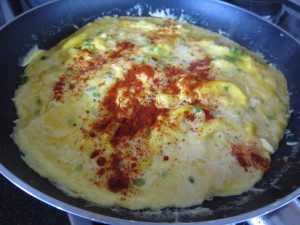
Look how gorgeous it looks… I scattered over some sweet smoked paprika because I love the taste and that would be echoed by the chorizo. Don’t add it before the omelette has started to set because otherwise you get a diffuse pinky orange looking omelette. I still like to see the creamy golden yellow of the eggs.

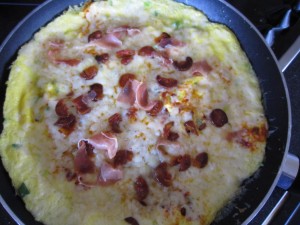
Slices of chorizo would be too much but it is easier to cook them in slices. Once they were cool I cut them in half and scattered them over the still soft egg.

Then a layer of cheese and those two remaining slices of Parma ham, torn into pieces..

I stuck the pan under a hot grill for a minute and the cheese softened and melted over everything… the eggs puffed up a bit more and then…..

Then, it was supper made from scraps.

A truly delicious  omelette. The cheese and chorizo worked perfectly well together and I had not only used up stray items in the fridge but I had made supper in less than twenty minutes.

It really did taste gorgeous. I really must make sure I have more scraps in my fridge.

Salt and Pepper Pork Tenderloin

I had a fancy for something tasty. Actually, what I really had a fancy for was our local takeaway’s Salt and Pepper Squid, which is probably the most delicious salt and pepper squid anywhere. And I should know – just ask the Bear. Wherever we go if I see it on the menu, I ask for it.

I’ve eaten it in Perth, Brisbane, Sydney and Hobart in Australia; in Honolulu and on Kauai in Hawaii; in Florence, Barcelona, Dublin, Copenhagen, and Lisbon. I’ve eaten it in smart restaurants in the UK and in cheap ones, but somehow, nothing beats our local takeaway. They cook everything in an open kitchen and the food is spankingly fresh.

The batter round the squid is light and lacy. The squid is never chewy and the salt and chillies are perfectly balanced. The only annoying thing is that whenever I order it, people who HAVEN’T ordered it (because they don’t like squid… or chillies… or whatever else..) suddenly decide they want to try and it and then they take mine!

Anyway, despite wanting it so much that my fingers itched to phone an order in, I decided to try and stick to our vague diet. No salt and pepper squid for us that night.

But the thought of salt and peppered something just stuck in my mind.

I’d worked out a salt and pepper seasoning that didn’t involve deep frying or batter and I’ve used it on prawns and steak. Because you almost dry fry whatever protein it is you are using,  the calorie count drops significantly.

There you go, then, I thought. Perfect justification to make something tasty for supper. I WAS going to have salt and pepper after all. And I could still say we were on a diet.

I like to make lots of salt and pepper seasoning because whatever I don’t use, I keep in an airtight jar ready for my next night of craving. I had some left but I needed to top up my supply.

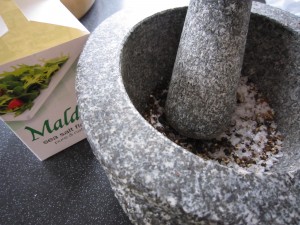
First of all, toast some salt in a large frying pan – yes, this sounds bizarre but it is essential. You will see the colour change slightly and it takes less than a minute. I used a couple of heaped tablespoons of crushed Maldon (I have to crush it in the pestle and mortar because the crystals are large and I need to end up with a smooth spice mix) Take the pan off the heat until you have the spice mix ready.

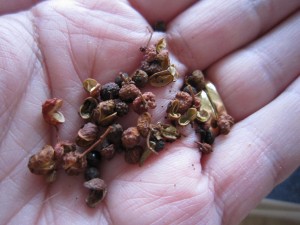
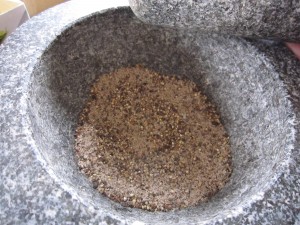
See those? They are Szechuan pink peppercorns. Not real pepper of course but they add that hint of authenticity.  They need to be pounded along with the same amount of black peppercorns.

I didn’t have any star anise but I did have some Chinese 5 Spice Powder so a good dessertspoon or so of that was added to the mix

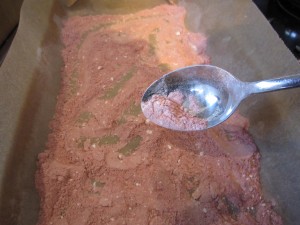
You end up with a fine mix.

Add that to the salt in the frying pan and toast again – beware of the aromatic fumes though, they can be a bit strong. Just a minute or so is all it needs, so stir it round so it toast evenly and leave it to cool. Once it is cool, put it in your jar and wipe the pan out.

And that’s it.

On to the next step – the meat.

Tonight I was going to use pork tenderloin, which is, amazingly, a very inexpensive cut of meat. Even more inexpensive if you, like I did, manage to call in at the supermarket on the way home and find it reduced for a quick sale.

Now the spice mix is cool, put some on a plate and roll it round, pressing down so it sticks to the outside of the meat.

Put your pan back on the heat with a scattering of oil in it (maybe a teaspoon or so… we ARE dieting you know!) and once it is hot pop in the tenderloin.

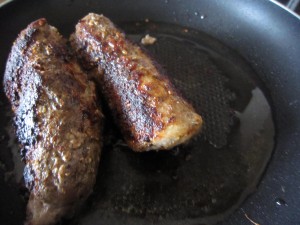
Roll the tenderloin  so the spice mix browns and crusts beautifully.

Once the crust looks good, turn the heat down and let the meat cook through for ten minutes or so.

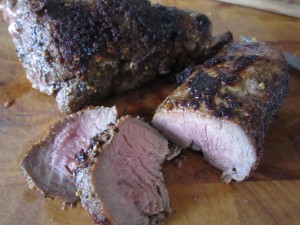
Let it rest for five minutes then slice it into medallions….. Delicious.

Healthy and tasty, oh so very tasty. Quick and easy and low in calories. pretty much of a perfect supper, eh?

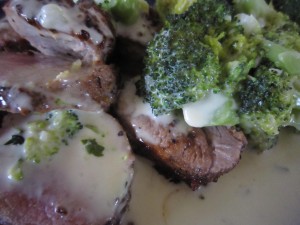
You can serve it with anything you like – let it cool and serve it with salad leaves or add some vegetables. If you aren’t dieting serve it with rice… or potatoes, maybe. Well, we were dieting and potaoes were off limits. I wanted to eat it hot so I made broccoli to go with it.  And yes, the Bear was eating  with me, so I made broccoli a Bear would eat.

And when served with broccoli it becomes heaven on a plate!