Maggie’s Lemon Drizzle Cake … an homage to my aunt

As some of you know, my aunt passed away a few weeks ago. What you might not know is just how much of an influence she was on my life.

When I started this blog, I told you how I had spent a lot of my life not cooking. I ate, obviously, but I got other people to cook for me. I didn’t need to cook as I lived on my own and anyway, I was always travelling. I ate in great restaurants and had a marvellous time.

I come from a family that always celebrate things with a family meal. Every occasion was marked with a get together. My mother and my aunt used to swap occasions… Christmas Day, one of them would cook, Boxing Day, the other would do it. Whoever did New Year wouldn’t do Easter. Everybody’s birthdays were a reason to come together as a family and eat.

My aunt was a great cook and always made the most superb cakes. Her Christmas pudding really couldn’t be beaten and, since I started cooking,  I always used to ask for some to take home with me so I could use it in Christmas Pudding Icecream. She always believed that a person should be able to cook and, more to the point, be able to cook well.

She was so pleased when I started cooking and asking her how things were done. I used to ring her from my car as I drove the thousands of miles I used to do on motorways in my other job. She would tell me how I was supposed to make things and patiently go through the shopping I would need to get in order to make whatever it was she was helping me with. I would stop in some far away town, get my ingredients and carry on driving home. Then, when I got there, I’d ring her again and check I had everything right in my head.

She was the one who taught me how to cook ham properly….. she taught all of us.  My brother adapted her recipe and came up with Gingery. Which is, in our eyes at least, possibly the world’s most delicious roast ham. Her daughter, my cousin, has been baking for years and is the maker of the world’s most delicious chocolate cakes which pleases her sons and her nephew no end. My aunt was never happier than helping people learn – she was a teacher all of her life. She even taught my postman when he was a little boy and whenever I saw him he would always send his best wishes and tell me that my aunt and uncle were the best teachers in that school.

Anyway, while my cousin and I were sorting things out at my aunt’s house, she dragged me to a bookcase and said she had found this….

………An ancient copy of Mrs Beeton’s Book of Household Management.

My cousin said she wanted me to have it, tattered though it was, because it was something my aunt had had for years. It’s falling apart, as you can see and the covers are hanging off. I wish I’d asked my aunt about the book … who it belonged to before her and what she had learnt from it….anyway, I have it now and it is on my cookery bookshelves. You never know, it might get picked on the next round of Cookery Lotto!  How proud she would have been to think that I was even contemplating cooking something from it.

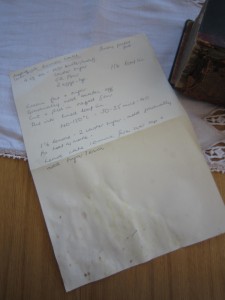
The very first cake she taught me to make was her simple and delicious Lemon Drizzle cake. I found the recipe in my cook book, scrawled on a piece of paper. She will have dictated that to me as I, no doubt, sat in the car at some motorway services, parked up in the rain.

I think she chose that as it is the simplest cake in the world to make and if she was going to entice me into the world of baking, she would need to make sure that I could manage. I think she was reckoning on a small cake, emerging triumphantly from the oven, would be the first in a line of cakes.

And, I suppose, in a way, it was. I decided, this weekend, to bake the Lemon Drizzle cake because it reminded me of her.

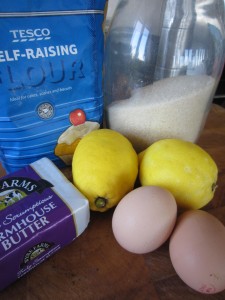
The ingredient list was simple and concise – 4 oz each of soft butter, caster sugar, self raising flour and a couple of large eggs. How hard could that be? And some lemons for the lovely drizzle to be poured over the top.

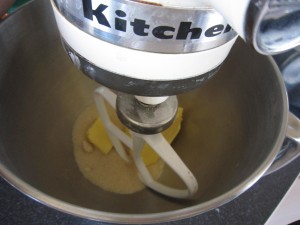
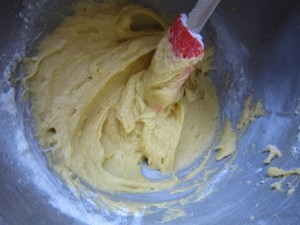
My note did say to cream the butter and sugar together and I’m certain she meant doing it with a wooden spoon… but you see the Kitchen Aid mixer? She bought me that as my wedding present. I have to use it, then, don’t I? I think she realised by the time I eventually got married that I was turning into a cook and a Kitchen Aid was going to be far more use to me in my married life than some standard wedding present of crystal or maybe bed linen. It was an incredibly generous gift, from an incredibly generous aunt.

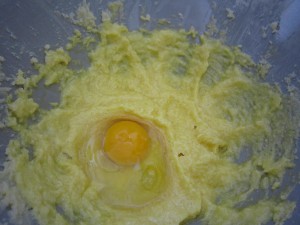
A couple of the brilliantly golden-yolked free range eggs turn the mix into a vibrant yellow. Finely grate some lemon zest in there – you will be using the lemons later. Just remember to make sure you used unwaxed lemons and if you don’t, give the lemons a good scrubbing first.

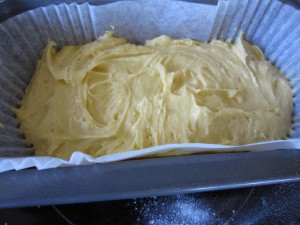
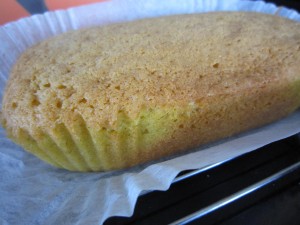
That 4 oz of flour (she told me to sieve it) was folded in and then everything put into a lined loaf tin.

Those silcone paper tin liners are an absolute godsend. No more snipping about with pieces of greaseproof paper or baking parchment… the hours they must save across the world!

And into the oven for about 30-40 minutes at 140-150 degrees.

Now to make the lemon drizzle…
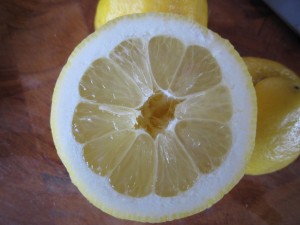
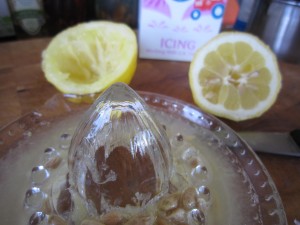
That too, is simple…. Just the juice of one and a half lemons and some icing sugar – a good 2 ounces.

(I know that whenever you see chefs on the TV they squeeze lemons in their hands but I always use that glass lemon juicer. I don’t think you need to get your fingers covered in juice and besides, the pips will always drop in whatever it is you are making. Anyway, you get far more juice out of the lemon or the lime with one of them than you do by just squeezing. Maybe my hands aren’t strong enough? )

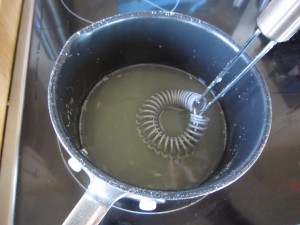
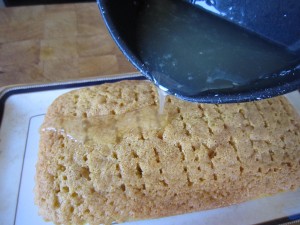
Heat it gently in a pan until the icing sugar dissolves.

Then let it cool.

At the end of the cooking time, take the cake out and peel back the paper to let it cool for ten minutes or so.

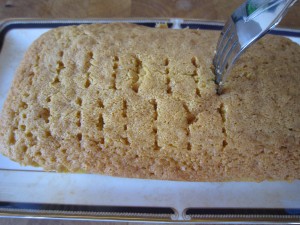
Once that’s done, take a fork and prick over the surface of the cake

This will let the lemon sugar syrup sink in when you gently drizzle it over the surface.

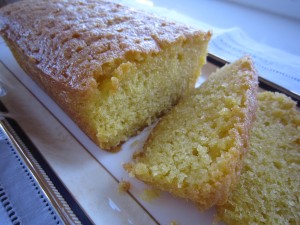
And there you have it.

The simplest cake in the world… but also one of the most delicious.

Golden cake with a lovely, sweetly sharp lemon drizzle. The first cake I made and one that will always remind me of my darling aunt.

Thanks for everything, Maggie.
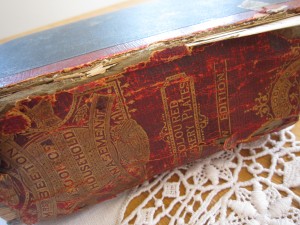
Broccoli a Bear will eat

As you know, I wage a constant battle to get the Bear to eat what I want him to eat. All in the interest of health, you know, it’s not just me wanting to assert dominance over my poor, beleagured husband. It makes things easier as well, if you both eat the same things. I am having some success – he is now eating prawns and has started to eat broccoli.

Yes, I know, not everybody loves broccoli and for some the slightly bitter tang puts them off, but my reasoning is that if the Bear can eat raw broccoli with a dip as a crudite, or broccoli and stilton soup, or even the deliciously tasty Broccoli and Stilton Pastryless Pie then he can eat it as a vegetable.

And not complain.

Finally, it seems, I may have cracked it.

I’d made the salt and pepper pork tenderloin for supper and knew we needed something with it. He’d started with a crisp salad of leaves, red and yellow peppers and tomatoes so I reckoned that if he didn’t eat what was served with the pork, that wasn’t going to harm him.

Anyway, I love broccoli.

I had gone to our local farm shop and come back with two gloriously green and hard heads of broccoli. We have been on a high protein and low carb diet and butter (thank God) is allowed. I had a feeling that I could make something delicious – well, delicious for me – and if he was hungry enough then he would eat it.

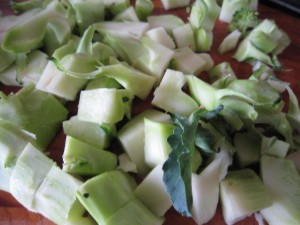
So, I chopped the florets off and sliced the stalks into smaller chunks.

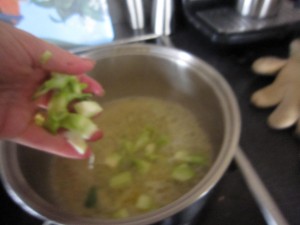
Broccoli stems take longer to cook than the florets so they need to go in a pan first with some butter and a sprinkle of salt. Put it on a medium heat so you don’t burn things.

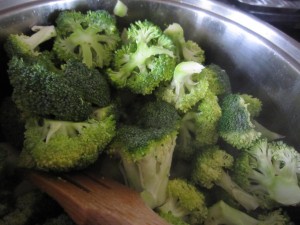
Give them a couple of minutes to soften slightly before you add the florets.

Toss them round in the butter – you want them to soften and cook but not turn to mush.

It still looks green and delicious and it is holding its shape but now there’s a softness about it.

Sooooo… all well and good but I have to get the Bear to eat it.

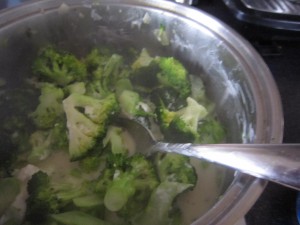
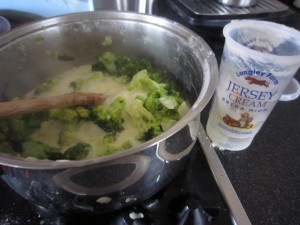
I need to up the protein level as well so a great big spoonful of Philadelphia cream cheese goes in and melts over the broccoli.

It is now on a low heat, stir it round and let it cover everywhere.

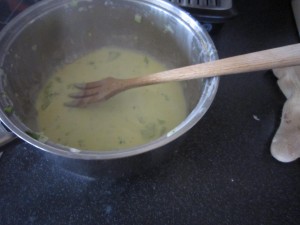
A spoonful of double cream helps loosen things and makes a delicious sauce.

With salt and pepper added to bring everything together, the creamy, faintly coolly-cheese (you know how cream cheese has that sort of taste) sauce the broccoli feels slightly tamed.

Take the broccoli out and reduce the creamy sauce so it thickens, adding a knob of butter – this makes it taste even more rich and delicious. Just the thing to add to that steaming green goodness.

The bitterness has disappeared and you have a savoury, tasty pile of broccoli, just ready to serve to an unsuspecting Bear.

So I did. There was his pork just asking for something to sit along side it… there was that sauce just begging to be poured over everything. I served it up.

After all, he’d already had a lovely big crisp salad… if he didn’t like the broccoli it wouldn’t be so bad.

It was delicious. Utterly, absolutely, totally gorgeous. I had justified giving myself the larger portion because, after all, he doesn’t like broccoli.

“Did you like it?” I asked.

“Yes…. I just wish there was more broccoli…. ”

Drat. There was more and I had my greedy little eyes on that but in the interests of converting the Bear to a love of broccoli, I just had to do it. This was unprecedented in our lives together – my Bear actually asking for broccoli. He got the lot.

Now, once I have got him to eat it like this I can start to cut back on the cream and Philly – not too much, you understand – and it becomes even healthier.

Maybe I won’t though. Maybe it is just delicious as it is.

Oh, and you know what? He’s asked for, and eaten, broccoli cooked like this several times since. So maybe if you have children who find broccoli just too bitter, try it like this. You never know… one day you might hear the magical words “I just wish there was more broccoli”

Salt and Pepper Pork Tenderloin

I had a fancy for something tasty. Actually, what I really had a fancy for was our local takeaway’s Salt and Pepper Squid, which is probably the most delicious salt and pepper squid anywhere. And I should know – just ask the Bear. Wherever we go if I see it on the menu, I ask for it.

I’ve eaten it in Perth, Brisbane, Sydney and Hobart in Australia; in Honolulu and on Kauai in Hawaii; in Florence, Barcelona, Dublin, Copenhagen, and Lisbon. I’ve eaten it in smart restaurants in the UK and in cheap ones, but somehow, nothing beats our local takeaway. They cook everything in an open kitchen and the food is spankingly fresh.

The batter round the squid is light and lacy. The squid is never chewy and the salt and chillies are perfectly balanced. The only annoying thing is that whenever I order it, people who HAVEN’T ordered it (because they don’t like squid… or chillies… or whatever else..) suddenly decide they want to try and it and then they take mine!

Anyway, despite wanting it so much that my fingers itched to phone an order in, I decided to try and stick to our vague diet. No salt and pepper squid for us that night.

But the thought of salt and peppered something just stuck in my mind.

I’d worked out a salt and pepper seasoning that didn’t involve deep frying or batter and I’ve used it on prawns and steak. Because you almost dry fry whatever protein it is you are using,  the calorie count drops significantly.

There you go, then, I thought. Perfect justification to make something tasty for supper. I WAS going to have salt and pepper after all. And I could still say we were on a diet.

I like to make lots of salt and pepper seasoning because whatever I don’t use, I keep in an airtight jar ready for my next night of craving. I had some left but I needed to top up my supply.

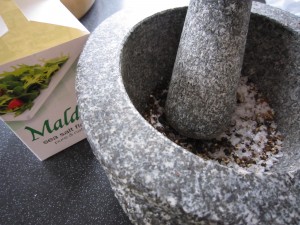
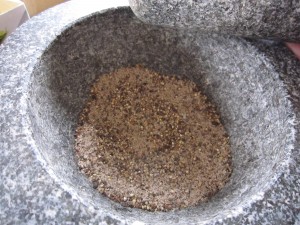
First of all, toast some salt in a large frying pan – yes, this sounds bizarre but it is essential. You will see the colour change slightly and it takes less than a minute. I used a couple of heaped tablespoons of crushed Maldon (I have to crush it in the pestle and mortar because the crystals are large and I need to end up with a smooth spice mix) Take the pan off the heat until you have the spice mix ready.

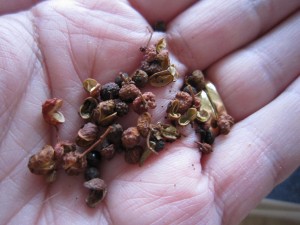
See those? They are Szechuan pink peppercorns. Not real pepper of course but they add that hint of authenticity.  They need to be pounded along with the same amount of black peppercorns.

I didn’t have any star anise but I did have some Chinese 5 Spice Powder so a good dessertspoon or so of that was added to the mix

You end up with a fine mix.

Add that to the salt in the frying pan and toast again – beware of the aromatic fumes though, they can be a bit strong. Just a minute or so is all it needs, so stir it round so it toast evenly and leave it to cool. Once it is cool, put it in your jar and wipe the pan out.

And that’s it.

On to the next step – the meat.

Tonight I was going to use pork tenderloin, which is, amazingly, a very inexpensive cut of meat. Even more inexpensive if you, like I did, manage to call in at the supermarket on the way home and find it reduced for a quick sale.

Now the spice mix is cool, put some on a plate and roll it round, pressing down so it sticks to the outside of the meat.

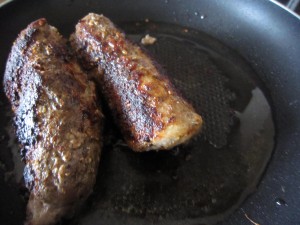
Put your pan back on the heat with a scattering of oil in it (maybe a teaspoon or so… we ARE dieting you know!) and once it is hot pop in the tenderloin.

Roll the tenderloin  so the spice mix browns and crusts beautifully.

Once the crust looks good, turn the heat down and let the meat cook through for ten minutes or so.

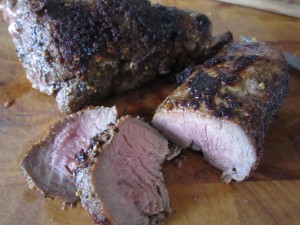
Let it rest for five minutes then slice it into medallions….. Delicious.

Healthy and tasty, oh so very tasty. Quick and easy and low in calories. pretty much of a perfect supper, eh?

You can serve it with anything you like – let it cool and serve it with salad leaves or add some vegetables. If you aren’t dieting serve it with rice… or potatoes, maybe. Well, we were dieting and potaoes were off limits. I wanted to eat it hot so I made broccoli to go with it.  And yes, the Bear was eating  with me, so I made broccoli a Bear would eat.

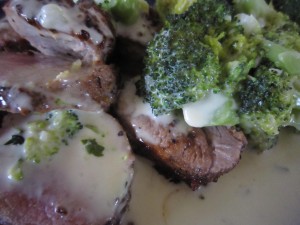
And when served with broccoli it becomes heaven on a plate!

Omelette Arnold Bennett

Although we live in a large city, it is a city surrounded by farmland. There are amazing local food producers and farm shops everywhere.

Our closest farm shop, Spring Lane,  is less than a mile from our apartment and I go there every weekend to buy eggs, cheeses, vegetables and meat. There’s a bakery there, too, and sometimes… just sometimes, I buy fresh cream cakes.

But the best things of all, in my eyes, are their fantastic eggs.

Free range, with fantastic golden, almost orange yolks… and oh,  the size of them….

I’d gone there as usual and picked up a dozen extra large eggs and got my fresh vegetables and came back. I had a fancy for an omelette.

Specifically, Omelette Arnold Bennett, the beautiful, open omelette with smoked haddock and a creamy cheese sauce.

(Whenever Arnold Bennett stayed at the Savoy Hotel, he ordered this and loved it so much that wherever else he travelled  he asked for it. Eventually, the Savoy Hotel named it after him and it has stayed on the menu ever since)

I always buy the extra large eggs at Spring Lane and this time, being in a hurry, I grabbed my dozen eggs,  some fresh vegetables and cream, then  set off home again.

I hadn’t checked the eggs because I have never before found a broken one in one of their boxes (they are so careful with all of their produce) so I hadn’t looked inside the box. Anyway, there I was, standing at the bench, about to prepare for the omelette when I noticed that the lid wasn’t down properly on the box.

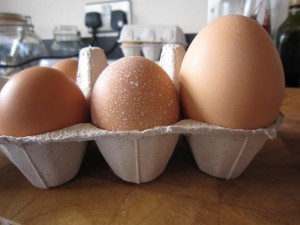
I opened the box to see this rather surprising sight

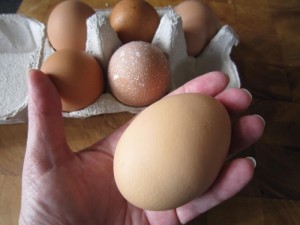
Look at the size of that!

That wasn’t just an extra large egg… that was an extra, extra large egg.

In the UK there are regulations about egg sizes. Each egg size, from pullet to small, to medium, to large and then to extra large has a weight range.

 An extra large egg  must be 75g and above.

That beauty weighed 114g.

All I could think was that the hen who was involved in that production was probably just as surprised as I was.

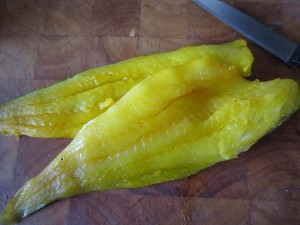
Onto the omelette then – I also had some smoked haddock

(actually, I prefer undyed smoked haddock, but needs must and all that. I wanted that omelette and I wanted it that day so I was prepared to accept the dyed fish)

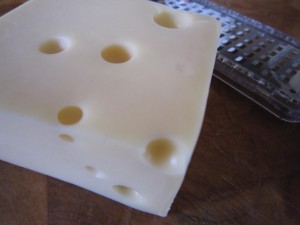
And some cheese – both Emmental and Gruyere.

And I always have pots of cream in the fridge.

Now there are plenty of recipes available to tell you how to make Omelette Arnold Bennett and some of them are very involved indeed – telling you to make flour based cheese sauces, making you use lots of pans and it is all very labour intensive. What I do would get me thrown out of the Savoy kitchens but, you know, it works for me.

So… here goes… the quick and easy way to make an Almost Arnold Bennett Omelette …

Poach the haddock gently in some milk. You don’t want to boil it fiercely, just sort of bubble along softly for a few short minutes.

While that’s doing, break 4 eggs into a bowl and whisk them gently with a fork and add a good spoonful of cream.

Grate huge handfuls of lovely cheese and add it to another bowl where you have put some more of the thick cream. You want more cheese than cream and the cream needs to be thick.

What you need is a thick and delicious mixture of cheese and cream.

By now, the haddock will be ready, so, carefully, take it out of the pan and flake it.

(Remember to take the skin off before you flake the fish – imagine how difficult it would be to peel the skin off after tearing it to pieces!)

Put the grill on high and get your best omelette pan out and start heating it on the hob with a knob of butter

Pour the eggy, creamy mix into the pan and swirl it round, pulling the softly cooking bits to the middle and letting the runny bits spread out so it cooks gently.

I like to pop it under the grill at this stage so it puffs up slightly in a sort of souffle-ish fashion.

Just a bit though, you don’t want it too cooked because it goes back under the grill later.

Scatter the flaked fish over the omelette and then pour over the cheese and cream mix and then pop it straight back under the grill.

You need a minute or so so the cheese browns on the top

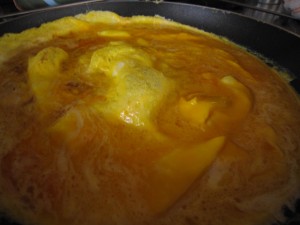
And there it is…..

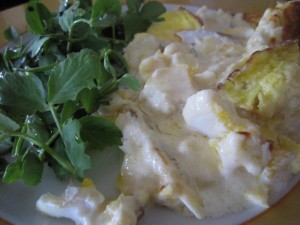
Fluffy omelette with smokey fish, covered in a creamy cheese sauce…. all you need, perhaps to go with it is a salad

That’s it. Sit down and fork up that gloriously tasty omelette.

Oh, and say a quiet thank you to the hen who valiantly produced such wonderful eggs!

Wild garlic buds

You know how some days you just long for something different to eat? Perhaps the weather is getting you down or the work you are doing seems rather tedious and your mind starts to wander….. you feel hungry (oh, how often I feel hungry. Goes with the territory of being a greedy old thing, I suppose) anyway, you feel hungry and you start to think of nice things to cook. A treat seems to be called for. Something to brighten up your evening…..

And then I thought of my wild garlic.

I’d cut away at the leaves the other week but I still had plenty of buds and as my mind was still unoccupied by pressing problems I started to think of how I could use the buds.

I’ve had them in a light tempura-style batter (but I didn’t want the fuss)

And in risotto (but I didn’t want to eat rice)

And I started to think about the shape of the buds….

Perhaps if I cosseted them in some butter, like tiny tender stems of asparagus…..

I could serve them with some lovely roast lamb. I had a lamb henry in the freezer…that would be quick. Forty-five minutes in a hot oven would get me a deliciously cooked piece of lamb and a few seconds in a pan and I could have the wild garlic ready.

Sometimes it’s worth letting your mind wander.

Besides the weather was awful

The rain was lashing down and if ever a day called for something tasty to cheer me, this was it.

Out in the rain I went and snipped away to get a good handful of slender stemmed garlic buds. I  got a few leaves as well as they would be lovely sauteed with a drop of cream as a base to balance the buds on. It doesn’t have to be like that of course… it’s just I had an abundance of sweetly mild leaves and some cream.

And I’m greedy. Have I mentioned that before?

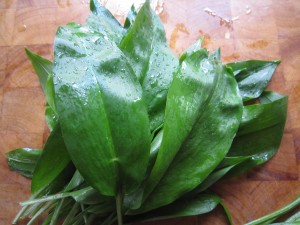
So, a good handful of leaves

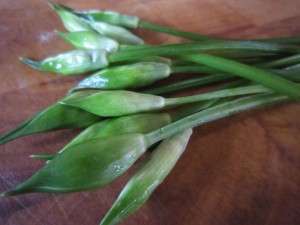
And some juicy buds … all I needed now was a knife, some butter and a pan or two.

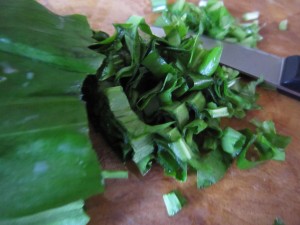
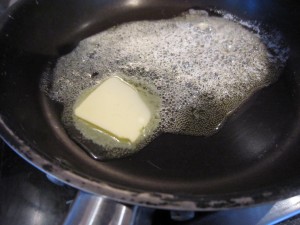
Roughly chop the leaves while a knob of butter starts to sizzle in a pan

Then pop in the shredded leaves with a pinch of salt and let them saute gently.

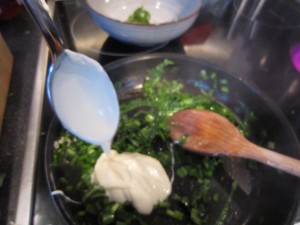
A lovely dollop of thick Jersey cream makes a deliciously smooth and savoury sauce for the sofetened leaves.

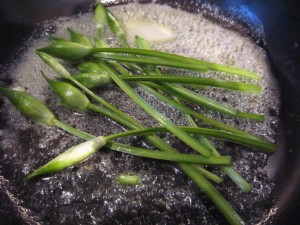
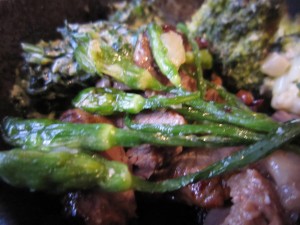
Pop those tender buds and stems into more hot butter and quickly (very quickly) let them cook through.

And that was it.

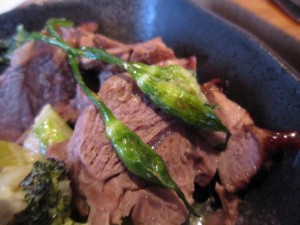
My lamb was ready and all I did was serve those soft and buttery wilted garlic buds and stems over the lamb alongside a smooth and rich spoonful of creamy, shredded wild garlic leaves.

Remarkably delicious, though I say it myself.

T.O.B. Cooks Update

When I started this blog one of the aims was to show my friends both real and virtual what it was that I was cooking. I don’t suppose I had any idea of how it was going to develop, but develop it did.

One of the most lovely things about this blog is that you, my friends, also got involved in cooking and trying recipes. Then, those  who were friends on Facebook showed the others photographs of the food they had made and I decided to post them on here so everyone could see. Everything was evolving and changing.

We call this the T.O.B Cooks section and there’s even a page telling everyone all about it.

For those of you who don’t know what this is all about, what we do is if you make something, you send me your pictures  and I make a post for you… we add to it with every cooking escapade.

You can, like Lesley, Lolly, Nikki, Laura, and Debs send me a description of your cooking experiences to date and that goes at the start of your post… and fascinating reading they all are, too! Follow those links and see what fun we all had….

It doesn’t matter if I  haven’t  met you – once you cook and send me pictures, you are in the blog!

This week Lesley tried the Pastryless Pie that I had cooked earlier.. and look at what a fabulous job she made of it

So come on. Join in with us.

Take pictures of the cooking you’ve done from recipes on here then tell us about it – we’ll sort out how you get the pictures to me and anything you want to say on the blog post itself.

If you don’t want to do that, well at least say hello to us all in the comments section.. come and make friends – we’re all having a lovely time here!

Puys, peas please me

As the Spring advances, I seem to be getting more lively, almost as if I am speeding up.

I walk faster and I feel brighter and more alert. Must be the increased sunshine, I reckon.

The same goes for my cooking. I am moving away from slow cooked food and wanting faster results. I want to get in from work and make something quickly. Something brighter tasting and lively.

And who would have thought that lentils would fit the bill?

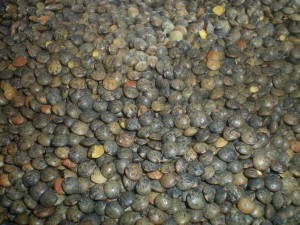
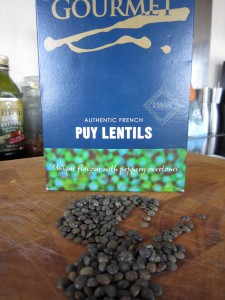
Not red lentils – these are lovely nutty, green and brown speckled  Puy lentils.

They cook really quickly, too.

Before you dismiss lentils as dark and stodgy, try them. They are packed full of protein and deliciously tasty and  make a perfect accompaniment for fish or meat. Sometimes potatoes just seem so… potatoey. Sometimes you want a change and lovely Puy lentils give you that.

They take the same time to cook as does roasting a piece of salmon in the oven… how about that as an easy supper option?

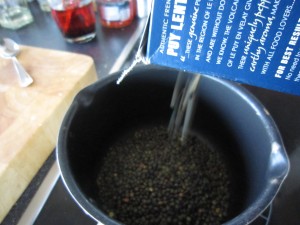
All you have to do is pour some Puy lentils into a pan, add some water and a stock cube (for added flavour) and start to boil gently.

The stock absorbs within a few minutes  – just try them and see if they are at the state of tenderness that you would prefer. They aren’t going to go mushy like red lentils, they keep their shape so don’t guage by looking, taste them. Maybe ten minutes or so should do it.

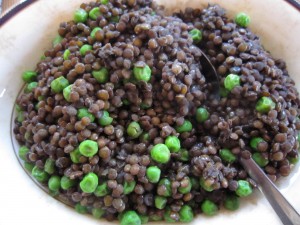
Then, just as you are ready to serve, add a handful or so of frozen peas.

Stir them round so they defrost.

And the surprise secret ingredient that changes this to a really lovely side dish that you will want to make again and again?

A spoonful of mint jelly. Stirred in, once everything is cooked, it  adds a lovely sweet brightness to the finished dish and really lifts it.

Don’t be put off by this – it doesn’t give it an over powering taste of mint, more of an elusive sweet sharpness that works wonderfully with fish and meat.

In actual fact, I am happy to eat this all by itself it’s so tasty.

Go on… you really should make them.

Wild Garlic

It’s been a long and hard winter and so much of the food we have wanted to eat has been, of necessity, warming and comforting. Delicious though that is, there comes a time when you want fresh food. Eventually, though, things start to sprout and poke through the earth and fresh vegetables of all kinds start to make their appearance.

You know Spring has arrived when the wild garlic is out. You can smell it, for a start, if you are walking in the woods. You might know it as ransoms and its botanical name is Allium ursinum.

Back home, in the North, there are swathes of it running round the edges of my mother’s garden, underneath the trees. Gardeners who care about formality would probably be horrified and, like the Royal Horticultural Society, class it as a weed.

But I come from a family that believes in food rather than manicured flowerbeds, so Ma lets it romp away and we reap the benefits.

Best of all, I have a brother who thinks about what his sister might like, now she is living in an apartment, high above the city.

One Sunday last year he had the inspired idea of digging up a clump of wild garlic and putting it in an old bucket so that I could drive back to the city and pot it up to keep on the balcony. It was marvellous. I could wander outside, cut off a handful of wonderfully fresh leaves and cook away.

Wild garlic is a perennial and after eating our fill of it last year, it died down and just last week I realised that what had been a bare pot was now bursting the bright and shiny leaves. The wild garlic was ready for the first harvest. 

It was Sunday and we were having a friend round for supper. I was cooking lamb and the thought of eating sweet roast lamb with a lovely side dish of wild garlic suddenly seemed to be the best idea I had had in a while.

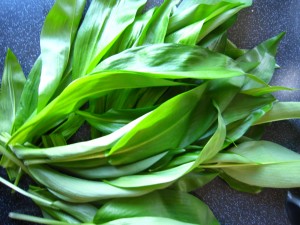
All I had to do was snip off a pan full of leaves

I cut relatively carefully, taking the leaves because I wanted to leave some  buds so they can flower later

I will use them in something else.. maybe a risotto? I shall see what takes my fancy when they are ready.

Anyway, back in the kitchen, I heated a knob of butter in a large pan and looked over my leaves.

They were young and tender so they would only need the slightest bit of cooking… a quick rinse and into the pan they went.

Oh the smell……and a sprinkle of Maldon salt  was all that was needed after that.

They were served quickly with roast lamb… beautifully tender and with a gentle garlic flavour and an underlying almost-sweetness to them.

How about that,  wild food foraged from my balcony?

I have plans though…I am going to go out in the dead of night and plant some in the hedgerows. I shall turn this part of the city into a wild garlic foraging zone!

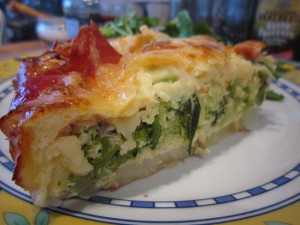
Broccoli and Stilton Pastryless Pie

At long last the days are becoming brighter and the weather seems to be improving. Today at work I had the windows open as it was getting rather hot, sitting behind glass with the sun shining in. It’s time, I think, to start freshening up food…. making it lighter and more summery.

Time, in fact, to make something like a pastryless pie.
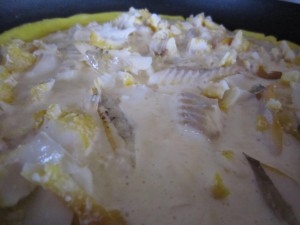
I often make this because it is perfect with a light, dressed green salad for supper and also because it is absolutely ideal to take to work for an easy packed lunch.

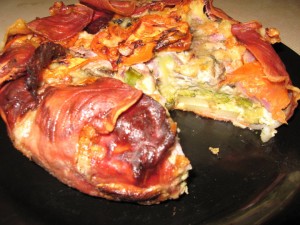
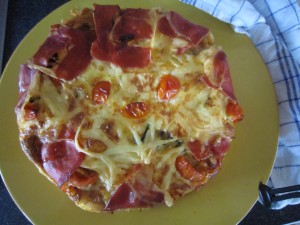
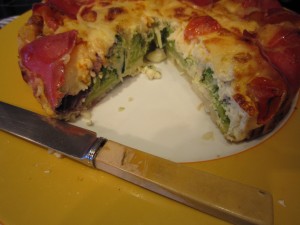
A pastryless pie is, in effect, a quiche without pastry. The quiche filling is baked inside strips of ham. What that means is that if you are baking it to share with friends then anyone with a wheat intolerance or coeliac disease doesn’t have to miss out.

If you are trying to cut carbs from your diet, well, it isn’t exactly Atkins because there’s plenty of vegetables in there but it does, at least, avoid pastry.

So then… what do you need?

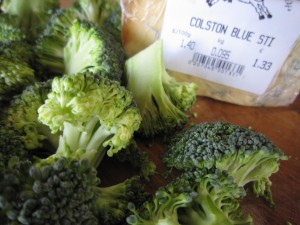
I had some broccoli in the fridge and that, along with a lovely piece of Stilton cheese would make a lovely pie.
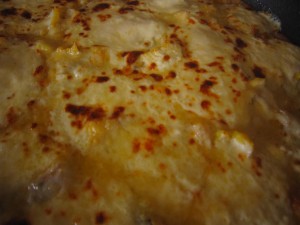
I had half a dozen free range eggs, a small pot of cream, a packet of sliced Serrano ham, 200g of Emmental cheese (which I love for its sweet nuttiness) a courgette, a handful of cherry tomatoes and few baby salad potatoes.
For those of you who don’t have access to Stilton or Serrano ham or, in fact, anything else I have listed, just remember I am putting those ingredients in because that’s what’s in my fridge.

As long as you have eggs, cream, some ham (some kind of air dried ham, sliced thinly) some cheese and some vegetables you can make this.

Now, because you are making what is really a quiche filling, it is going to be runny. And you don’t have a pastry shell to pour it into. I told you we were wrapping some air dried ham around it but that isn’t going to stop the filling from running out, so this is what to do

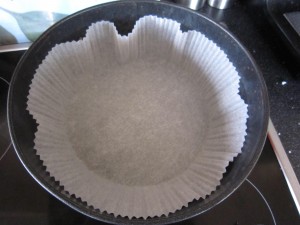
You can buy silicone paper cake liners from most places now – one of these popped inside a springform cake tin makes the ideal liner to keep all your lovely ingredients from seeping out when you bake it.

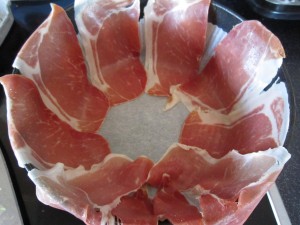
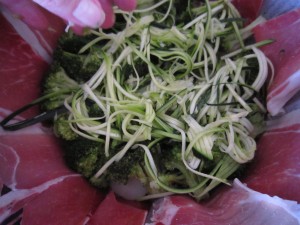
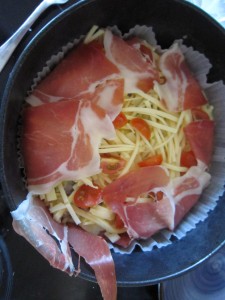
Open your packet of ham and drape the slices round the edge.

You don’t need to completely cover the sides and you don’t need to cover the base. What you are doing is making what will turn out to be a lovely, savoury, lightly crisped ham edging. It helps keep it in one piece when you cut it.

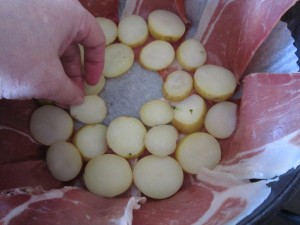
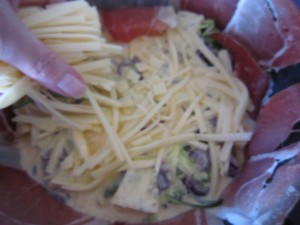
The bottom of the pie will be lined with a layer of steamed and sliced potatoes – it makes for a firmer base. Either slice them and steam them now, or use left  over cold salad potatoes. Because I am using broccoli, I steam that at the same time.

See? Just a thin layer of little slices of potato.

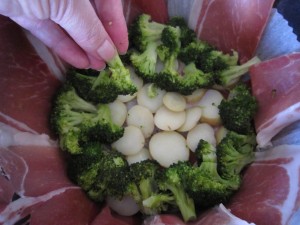
Followed by a lovely layer of broccoli florets

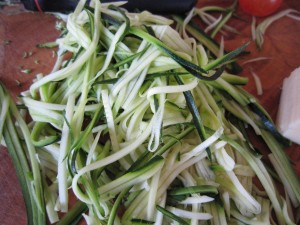
I found a courgette in the fridge and if you use a julienne cutter, you get a glorious tangle of shredded courgette. When this cooks it disappears into the gorgeousness of the creamy, cheesey, eggy filling so even for avowed courgette haters… this would slip right on past them. Another vegetable chalked up!

Scatter those shreds over the broccoli layer

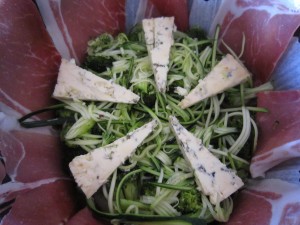
And as it is a broccoli and Stilton pie, now is the time to slice that piece of Stilton you saw earlier.  You could crumble it if you want to, and scatter it across but I thought how pretty and symmetrical it looked to arrange it in thin slivers.

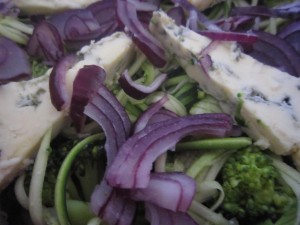
I had half of a red onion left over from something else I’d made so I thought that, sliced finely so that it would cook through while the pie was baking, it would add an extra hint of savouriness.

 That was scattered on top of the cheese.

That’s the vegetables taken care of, the next thing is the delicious cheesey, eggy mix.

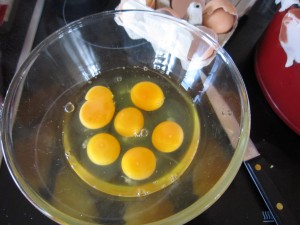
6 beautifully golden fresh free range eggs need breaking into a bowl and whisking round with a fork.

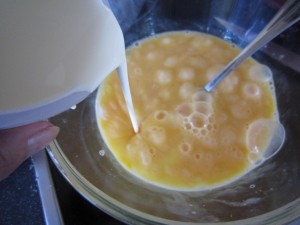
A small (150 ml) pot of cream gets poured in and whisked around again.

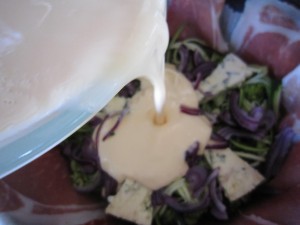
And pour it in……

Give the springform tin a gentle shake from side to side to make sure the eggy mix falls down around those lovely vegetable layers.

I had some sliced Emmental to use up as well, so that was shredded and scattered over the top.

Little cherry tomatoes (there were only 4 or 5 left) were quartered and added to the top layer before the ends of the ham were folded over.

You can see when you do this that the egg and cream mixture seeps between the slices of ham and then you realise just what an excellent idea it was to use the paper liners…

Into the oven with it at 160 or so degrees C for approximately 30 -40 minutes.

You can tell when it is done when the top looks golden and if you give it a gentle side to side shake the pie quivers just a little bit… and if you press it with your finger it feels soft but firm…

The only thing to do now is to free it from the springform tin, peel back the paper liner and slide it onto a serving plate

The hardest part is waiting for it to cool slightly so you can slice into it….

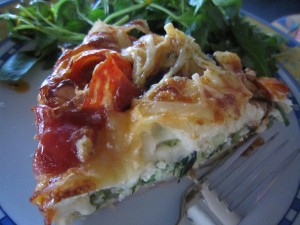
With a green salad it truly is the perfect lunch or supper.

Tasty, easy to make, easy to take for lunch… cunningly packed full of vegetables in the midst of that delicious filling… just the thing for the summer months!

Pheasant in cider

When I made the strange, but rather delicious, Tomatoey, from an old cookbook, it suggested serving it with roast meat.

I always have, in my freezer, some game. Usually despatched by my brother and given to me so I have something ready to roast quickly. On the morning of the day that I was going to make Tomatoey, I rummaged through the freezer and came up with a lovely little pheasant, which I could imagine would be truly delicious served with a rich and gorgeous tomato bread side dish.

Wild game is healthy and generally very low fat – there’s no idling around in a farm, eating processed feed pellets for a wild bird. They eat what is natural and they fly so there is no excess fat on them. That’s good for a full flavoured and low fat meat but it does mean you have to cook them carefully – and by that I mean a quick roast or braise so they don’t dry out… maybe covering their tender little breasts with bacon to protect them and serving them with something that enhances their rich meat.

Roasting a pheasant takes less than half an hour, if you sear the outsides,  so that would go well with the timings I was working on for Tomatoey. Things were coming together.

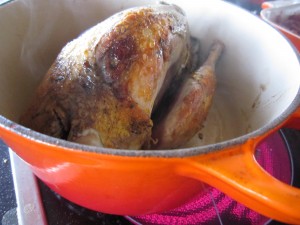
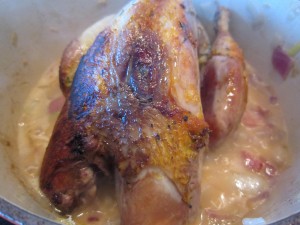
First of all, get your casserole dish hot and add a teaspoonful of oil or so then sear the outsides of the pheasant, turning it round so all of the bird browns.

If you are not using cast iron, then sear the bird in a frying pan… a ceramic casserole dish will break if you put it over a hot hob!

Take the bird out and start on the next step

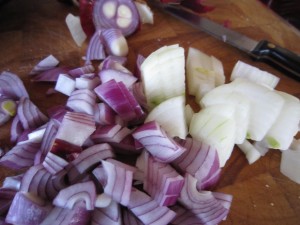
First, some some lovely onion needs to be chopped and popped into the casserole dish to start cooking

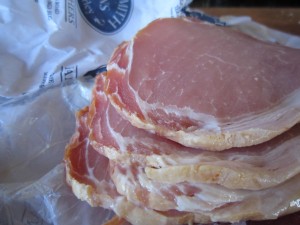
Some dry cure bacon can be chopped into that to make a rich and delicious sauce – but save a couple of bits to cover the breast of the bird when it is in the oven…

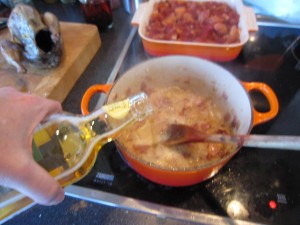
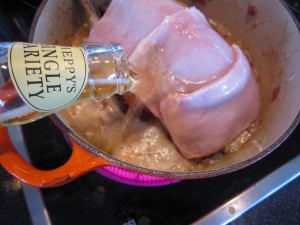
And a small bottle of cider will make a lovely gravy… so add some now to help the onion and bacon start to cook.

You will see it makes a lovely golden gravy as everything bubbles away.

Pop the bronzed little pheasant on top of the onion and bacon and cider mix and pour in the rest of the cider.

The remaining bacon can be laid over the top of the bird and all you have to do now is pop it into the oven for half an hour – which was handy because that was where I had the Tomatoey!

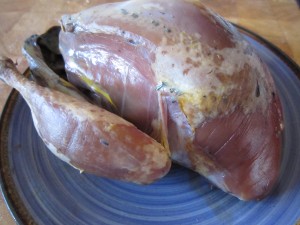
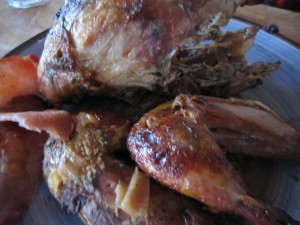
You end up with a gloriously tender and fragrant little pheasant… just falling apart..

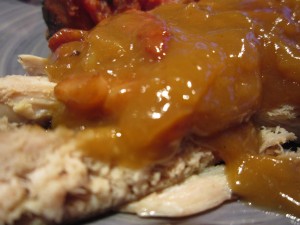
And the gravy that has been made is both sweet and savoury

Perfect to moisten the little pheasant and extremely delicious to go along with anything else you choose to serve with it.

It is a rather special dish considering it took less than an hour to start, prepare, cook and serve. And half an hour of that it was looking after itself in the oven.

Give it a go, eh?