Making Butter.. how to have luxury in a credit crunch kitchen

As I look out of the window I see greyness everywhere…the skies are grey, the pavements are grey and even the people look grey. It’s the Age of Austerity, say the Government and the financial whizz kids who got us all into this mess.

Time to tighten our belts… cut back…spend less. We have to suffer….

The papers are full of articles on the cost of living and how food bills are soaring, utilities bills are going through the roof and how the ordinary person must make sacrifices.

Well, I agree. I agree on the cutting back, anyway. If we cook at home with care we can all produce marvellous meals for much less than you would spend on a takeaway or a pizza, or even fish and chips.  I have made a habit of cooking carefully and spending very little and, truth be told, have often turned out meals that are better and tastier than many meals I have had in restaurants. Look through the Credit Crunch section and you’ll see recipes for Beef Cheeks (the most wonderfully tender beef casserole you will ever eat); delicious soups like Roast Garlic and Marrow or Puy Lentil and Pumpkin or the gorgeous Tomato Rice Soup – simple, inexpensive ingredients made into food that you are glad you are at home for. There’s recipes using polenta, that staple of Italian peasant cooking made into Baked Polenta Pie and rice…. risottos made with Black Pudding and Apple and Bacon – just scraps of things added to a basic ingredient and transformed into something you’d be proud to serve to guests.

I don’t really believe in too many sacrifices though. I always like to use butter in my cooking – I certainly won’t use margarine or some cheap, chemically concocted spread, where dubious oils are treated with this and that to make them go solid and spreadable. Butter is better. I don’t use too much and it doesn’t feature in every dish but when I need it, it’s there.

Butter is just milk shaken until it is solid. What could be simpler?

What could be better than calling in at the supermarket and spotting, in the marked down section, a large pot of cream that you know, with very little work indeed, can be made into lovely fresh butter? That appeals to my penny pinching ways and my love of luxury.

I’ve written before about making butter, way back at the start of this blog, when I did it by using marbles in a tupperware box. I still say this is a fun way to make butter and a most excellent way of entertaining children. I don’t suppose you could get them to do it all the time, but as a one-off? A Saturday afternoon’s entertainment? It’s a brilliant way to keep them occupied and then, of course, you can make them buttered toast for tea. 

This time, however, I had plenty to do and didn’t need to entertain myself unnecessarily, so I was going to do it the quick way. It’s probably the way you will end up doing it, too.

I had been shopping to get some ricotta as I was going to make ravioli and as I walked past the Dairy section, I spotted a large pot of double cream… the really thick double cream. It had been reduced  as it had reached the sell by date. This doesn’t mean that it was going off at all, just that the date they had set for it still to be in peak condition was today. Fresh cream, still perfect and at a reduced price?

Well, I had planned to be doing other cooking and I had plenty to do in the kitchen but this was a bargain, calling out to me. And it just shows how easy it is to do if I was going to do it in between making three different sorts of bread and pasta.

I put the cream into the mixer (you can do it with a hand mixer if you haven’t got a standing mixer… it doesn’t take long) and started to whip it.

It thickens quickly.

And you keep whipping.

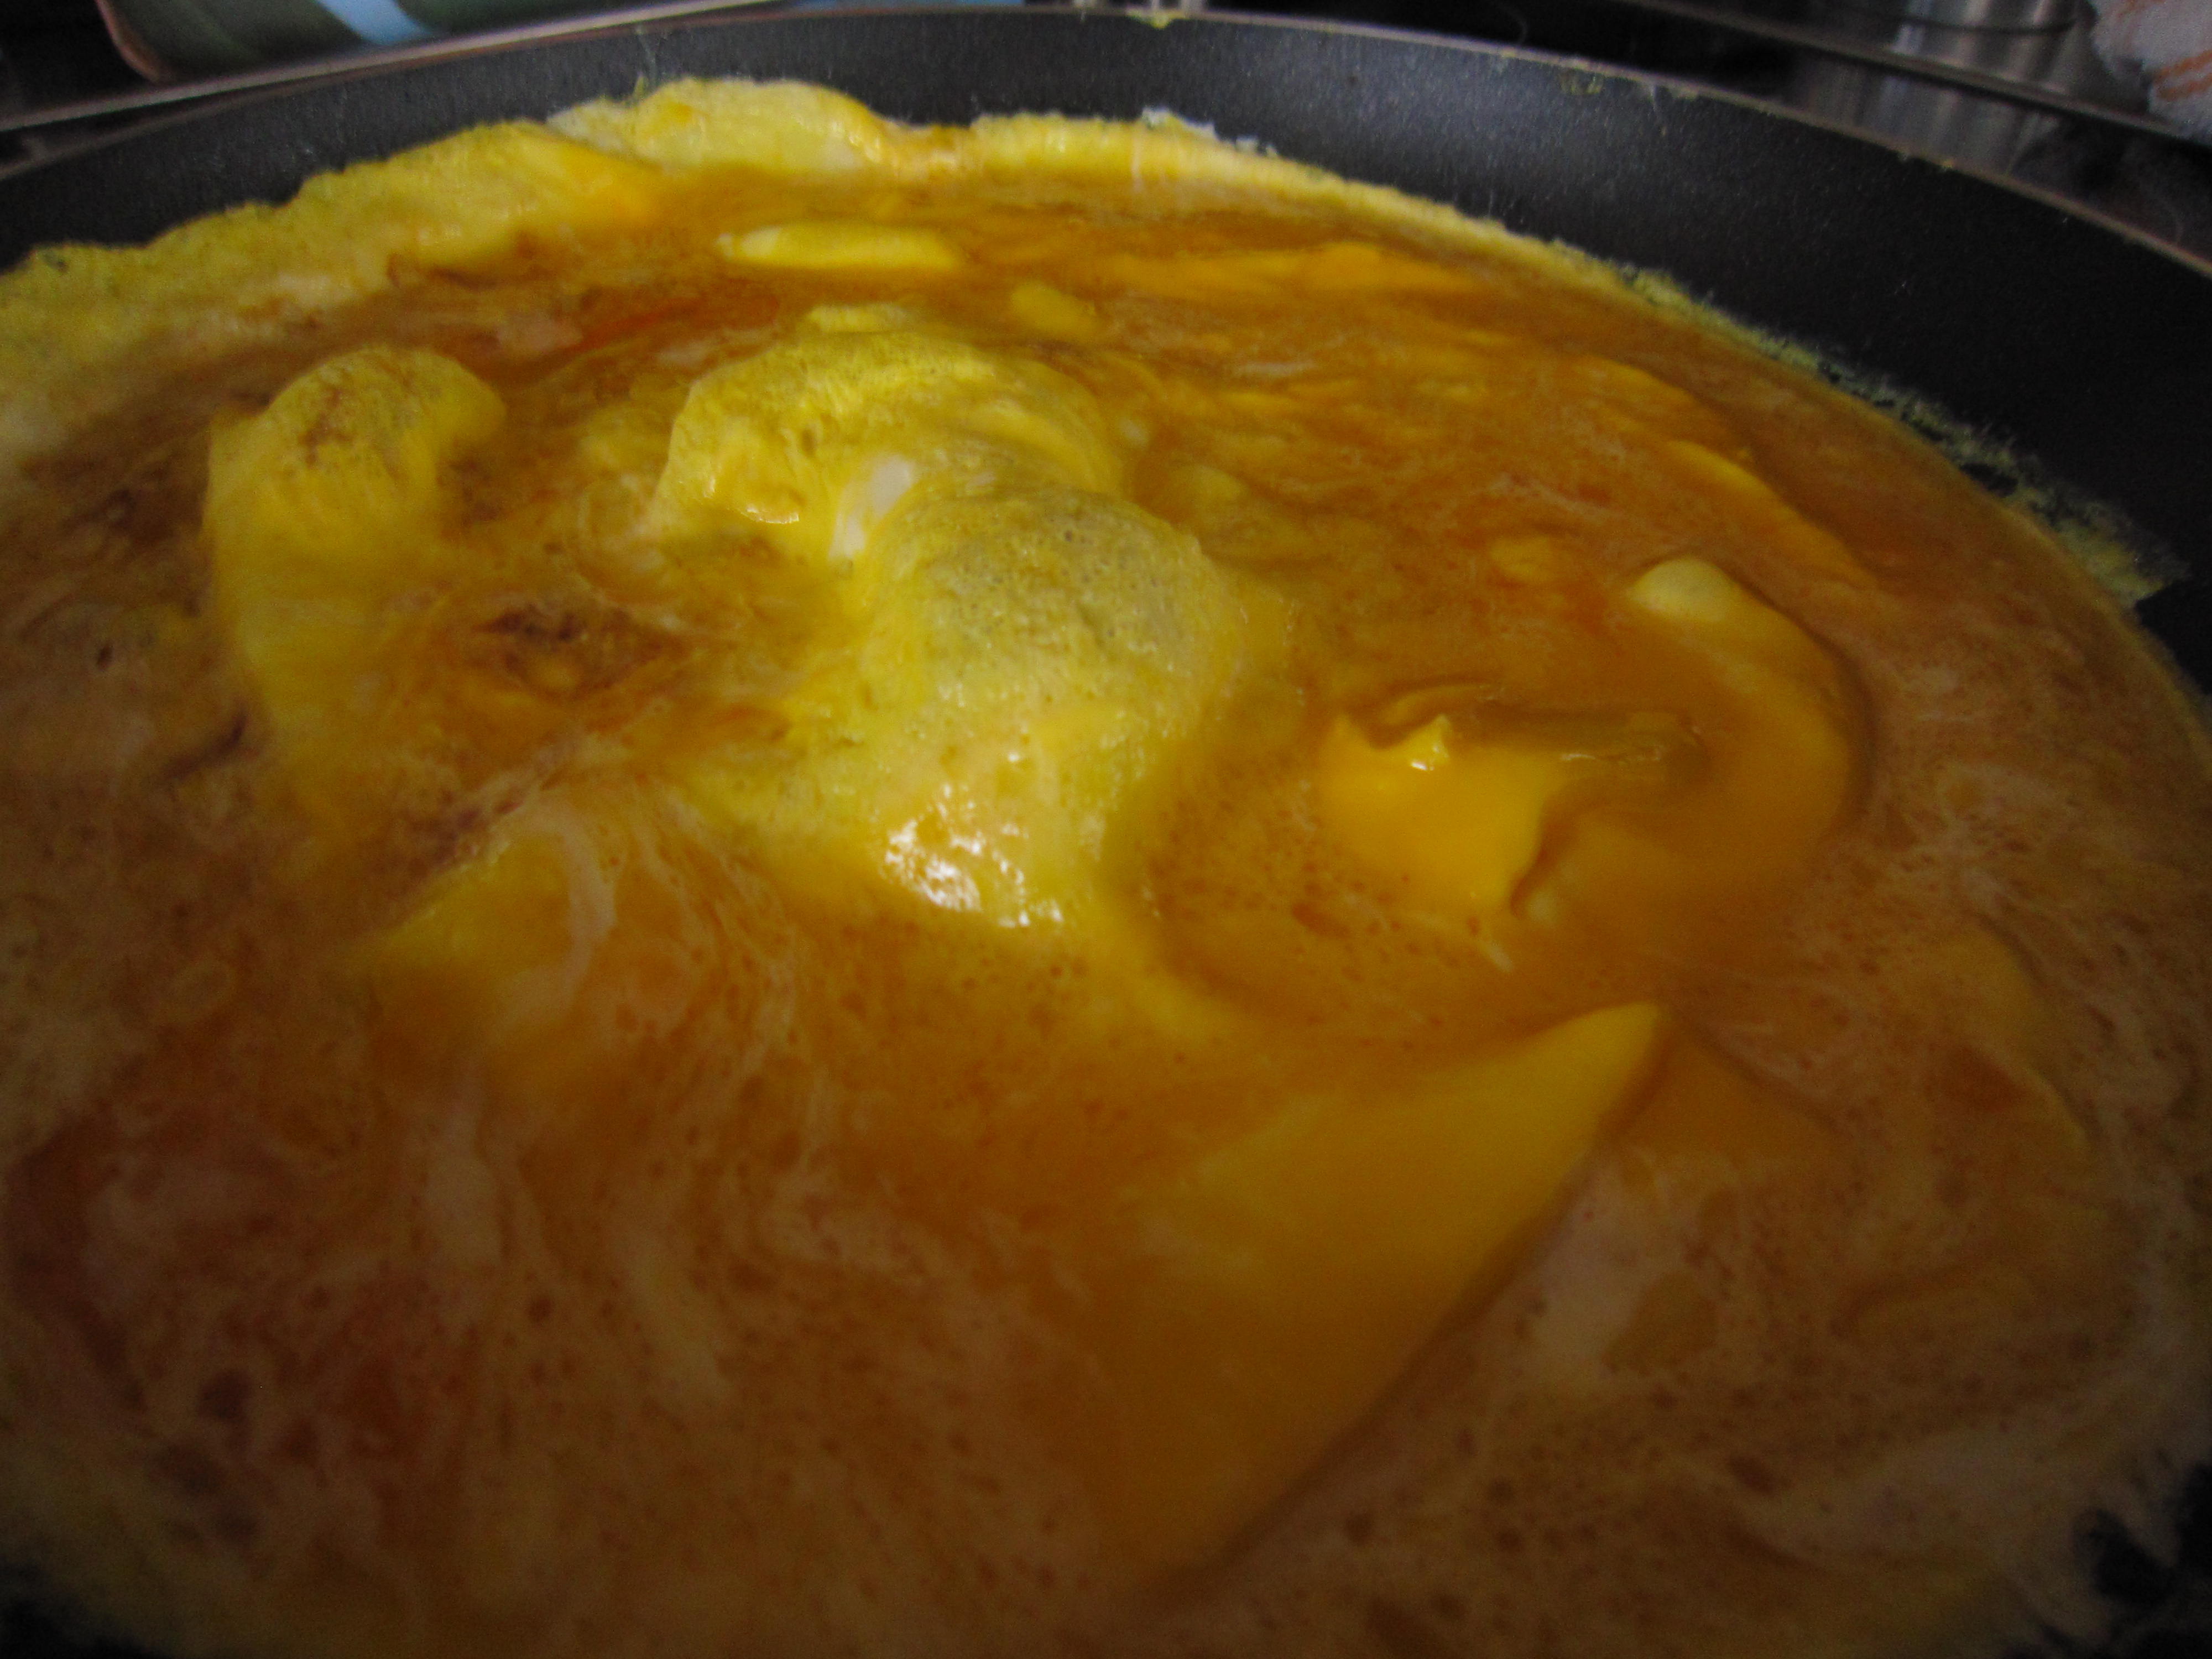
All of a sudden it transforms from a white, whipped mound to a lumpy, granular and yellowy mass. This is not great if you were looking for a topping for a dessert… but it is just what you want to see if you are making butter.

Perfect.

Look at it. Granular and yellow. That’s the butterfat.

Now, if you were using a thinner cream than I was, you would see quite a bit of buttermilk separating out from the creamy globules. The cream I was using was almost solid it was so thick, so there was less liquid.

Pop the lot into a sieve and wash it inder a tap. I gave it a squish with a flexible spatula to get more of the buttermilk out.

You can save the buttermilk for baking, or adding to soups – yet another credit crunch saving.

The Bear came over to help at this point… not because it is difficult but because I needed him to take the picture for you to see.

I got the butter out of the sieve and squeezed it together. More buttermilk ran out.

That’s butter, that is!

The next thing to do was to add salt.

I’m a great fan of Maldon sea salt and a pinch or so of that, scattered over my hand squished butter and then squished some more meant I would have a beautifully salted butter.

I do happen to have some old wooden butter pats  which are ideal for flattening the butter and getting the last of the buttermilk out. It also adds to the fantasy playing in my head that I am the consummate housewife and cook….

If you don’t have any, don’t worry. I just like them, that’s all.

If you look at them you can see they are finely ridged to help force the liquid out.

It helps make the shape of your butter. Again, it doesn’t matter if you haven’t got any, just shape your butter neatly.

And look what I ended up with…283g of best butter.

Surely that counts as being careful with cash? A credit crunch success?

The butter can be frozen if you wrap it carefully…. you can flavour it with whatever you fancy….

Or you can spread it on bread that you made and just enjoy it.

How simple was that?

That was made, while I did other things, in less than half an hour.

Now, as I said,  you can do it in a more relaxed fashion, getting young helpers to shake it about in a jar or a tupperware box, but you know what? This is just as satisfying and oh, so delicious.

Credit crunch money saving at its best.

Pork with saffron cream and mushrooms

I do like a bit of a challenge. Nothing too strenuous, you understand and nothing too difficult.

I like to call in at a supermarket on the way home from work and see what is in the reduced-for-a-quick-sale-as-it-has-to-be-used-today section. It means I am approaching cooking the evening meal with no preconceptions. I start with what’s there and then decide what I am going to cook and what else I need. See what I mean? It’s a bit of a challenge at the end of the working day, but it’s a fun one. And I end up with a surprise while I save money.

When I called in one night, I found lovely pork steaks from outdoor farmed, happy, well-looked after pigs (though I do wonder how on earth you could keep a pig indoors?) Still, this was premium pork and it was half price.

There were also some baby button mushrooms.

That would do I thought. I could make something from that. As I drove back home I was thinking about what else I had in the kitchen….. and remembered that friends of ours had brought home some lovely saffron from their holidays. Pork and saffron…. pork in a cream and saffron sauce… with mushrooms. Bet that would be good, I thought.

Within five minutes of getting into the apartment I had chopped some onion and started to soften it, while I cubed the pork.

A few stamens of saffron were put into a ramekin

And some hot water added to release the flavour and glorious colour.

Little mushrooms were sliced while the pork cooked through and then were added to the pan.

The saffron was added… actually it looked far more golden that this, but hey… I’m not a photographer so I have no idea why it DOESN’T look more golden. Just use your imagination.

Then just over a quarter of a pot of cream was poured in to make the sauce….. I always seem to have cream in the house. Cream and butter – if you have them then you can always make even the meanest of ingredients taste delicious.

While I’d been doing that I put some basmati rice on to cook. That only takes a few minutes to cook and if you measuer the rice to water ratio correctly (just a bit over one and a half times the water to the rice) you can cook it through without having to drain it. A tea towel on the top once the pan is off the oven absorbs any extra moisture and leaves you with tender, fragrant, perfectly separated rice grains.

And there you have it. In less than twenty minutes I had supper ready.

The pork was tender and the mushrooms cooked through… the saffron cream added a lovely savoury hit and the rice mopped up the sauce.

Can’t do better than that, I think. It was quick, easy, tasty, inexpensive and best of all… it was a surprise.

I might just pop into a store on the way home tonight to see what other surprises I can get!

Meatfree Monday – the simplest supper ever – spaghetti with tomato, anchovy, chilli and cream.

I needed to make supper but there was only me to cook for as the Bear had gone out to eat at an incredibly smart restaurant (work, you know… ) and I just couldn’t be bothered to shop. Sometimes, you know, the thought of going food shopping at the end of a working day just defeats me. It’s not that I’m not organised, it’s that while our apartment is beautiful, it doesn’t have a large fridge so it’s not as if I can do a big shop and get everything I need for the week. I have to do little and often.  

I thought first of all that  would just have cheese and crackers but when I got in, I discovered I didn’t even have any cheese, never mind crackers. I would have to see what there was…..

I did find some tomatoes that the Bear had brought back from his Dad’s greenhouse and a head of garlic. The tomatoes were going a bit wrinkly but at least that meant they had ripened.

I’d previously opened a tin of anchovy style sprats (the famous Ikea sweet sprats (essential for Jannson’s temptation, possibly the world’s most succulently decadent comfort food) and had some left over

They had to be used up

And I had some spaghetti.

I had enough for a feast! I set the water to boil and then added the spaghetti.

While the water was heating I chopped the tomatoes and chopped in a dried chilli

Quickly fried them together

Stirred in the remaining anchovies

And then realised that there was the remnants of a pot of cream waiting to be used… would it work?

I often eat chilli, tomato and anchovy over spaghetti, but tonight I felt I needed something a little richer, a little bit more comforting. Cream would help, surely?

I stirred it in……it tasted delicious. Probably beyond delicious. It was a gorgeous mix of sweetness, heat and salt, all softened by the addition of cream which made it into a lovely smoothly rich sauce.

Tossed over the spaghetti it was just what I needed. It was rich and satisfying and, unbelievably, made from scraps.

And all it took was maybe 15 minutes.

Do you know, that was better than anything I could have ordered from that fancy restaurant.

Another Meatfree Monday success!

Meatfree Monday – Baked Butternut Squash Gnocchi

The weather had changed. It was blustery and rainy (and can you believe that this morning the weather forecast included the possibility of hail? Hail?? In August?) I wanted something that would make us feel happy. We needed comfort food… but not too comforting. It was still warm so I needed something that didn’t generate too much heat. Something that I could have with salad. I wanted to have it on Meat free Monday so it needed to be vegetarian. And then, I thought of something I had first made a couple of years ago.
Baked butternut squash gnocchi… it was a comfort food, so that was good… it is great served with salad, so that, too, is good and best of all, it is only 280 calories per serving. And no meat… so perfect for Meat free Monday.
I could have delicious comfort food and still stay on a diet!

When I see recipes that provide, per serving, less than 400 calories, I save them in a folder called 400 and Under so that I can make a delicious supper that leaves room for manoeuvre with side dishes or even a glass of wine.
This recipe first featured in “delicious.” in September 2008, by the equally delicious Jean-Christophe Novelli. Just as well that I copied it out and saved it because I can’t find it online now. Anyway, doing it like that means I can print it out and take it with me when I shop for the ingredients and then work with it at the kitchen bench.
Also, it means I can then insert it, in its entirety, at the end of this post, something that some of you have been asking for.
Anyway, I did this on my return home from work… supper was delayed slightly as I had to roast the squash first, but not by much. This can be done easily as a weekday meal but if you were feeling efficient, the best way would be to roast the squash the day before while you were cooking something else.
No worries though… it was no problem to peel and dice a butternut squash
I put it onto a silicone sheet and drizzled it with oil, garlic puree and sprigs of thyme. Jean-Christophe says to take the leaves off the sprigs of thyme but that is so fiddly because the stems are soft… if you pull off as many as possible, that’s good and any that are left on the sprigs… well, don’t worry about it. Once everything roasts in the oven, the leaves fall off and the stems are hard and bare – you just remove them from the dish at the end! (See, Jean-Christophe is a chef and he does it properly. Me? I am someone who cooks when she gets in, tired from work. I find shortcuts. I have to.)
The covered roasting pan went into the oven at 180 degrees C/160 degrees if it is a fan assisted oven… and for those of you who use Fahrenheit, that is 356 degrees. 45 minutes was enough to soften the gorgeous squash.
I picked off the stems of thyme and then whizzed the squash to a smooth puree.
While the squash was roasting, I grated 40 g or thereabouts of Parmesan cheese
And added it to 9og of polenta (that’s grits to those of you in America!) , stirring it round to make an even mix before I added the (still hot) butternut squash puree and 65g of  butter.
The heat started to melt the butter…you could tell this was going to be delicious.
In another bowl I mixed three lovely eggs with 125ml of double cream and then added that to the polenta/squash mix.
I lined a baking tin with a silicone sheet and poured in the mix….
Back into the oven, covered with tin foil to stop it burning,  for thirty minutes
When it emerged, all golden and flecked with thyme leaves. It feels firmish, if you press it… firmish but not solid. This is the joy of this gnocchi…it uses no flour so it is suitable for those on who are coeliac or who are on gluten free diets (I shall make this for my dear friend Angela if she ever returns from America)  and it has no potato in in it so it is light and fresh.
Let it cool enough so you can handle it – while you are waiting, cut slices of Tallegio cheese (and if you can’t find this, get some other cheese that would melt well)
I didn’t bother with a cookie cutter, as suggested, I just cut the gnocchi into squares and laid slices of Tallegio on top.
And then put it under the grill to melt the cheese…
Then serve with a light green salad…
Perfect.
The texture of the gnocchi is light and delicious – you can tell it is polenta rather than potato or flour. The taste of the cheeses blended together is rich and satisfying and even better, you can eat it cold. Perfect to put in a packed lunch and take it to work. Immensely satisfying and just right for a blustery day…
And now – here’s the recipe, exactly as it was in delicious.
Baked Butternut Squash Gnocchi
Serves 4 as a main course, 8 as a starter
280 calories, 21.3g fat, 8.1g protein, 14.4 carbs, 3g sugar, 0.4g salt
INGREDIENTS
500g – about half of a large butternut squash – peeled, deseeded and cubed
3 garlic cloves
2 sprigs of fresh thyme, leaves picked off
95g  semolina or polenta
40g grated Parmesan or Gran padano
65g butter, softened
3 medium free range eggs
125ml double cream
Tallegio or other melting cheese to serve.
Preheat oven to 180C/fan 160C. Place squash, garlic and thyme in a roasting tin, cover with foil and roast for 45 minutes. Leave the oven on.
Transfer to a food processor and whizz until smooth. Spoon into a bowl and add semolina/polenta, Parmesan and butter. Whisk eggs and cream together and add to the mix. Season.
Spread in an 18cmx24cm roasting tin, lined with baking parchment or silicone sheet and cover with foil. Bake for 30 minutes.
Cool slightly in the tin then cut into rounds using a cookie cutter – or squares if you don’t have a cutter. Preheat the grill to high, while you put the gnocchi on the grill, covered with slices of Taleggio. When melted, serve with a green salad.

Jean-Christophe Novelli, French Horn. Published in “delicious. magazine” September 2008

Try it… it’s another Meat free Monday success!
(Oh, and in case you are wondering why I haven’t got spaces between paragraphs and decent formatting – well, so am I!
WordPress seems to be refusing to do what I want and no matter how many times I change everything – it just goes back to cramming everything together. If anyone has any idea on how to fix it, let me know!)

Cheese and chorizo omelette…. Or, supper from scraps

It was half way through the working week and it felt like it should be the end of the week. I got in from work, too tired to go to the supermarket on the way back  and was desperately craving something tasty and filling to eat. Looking around the kitchen I found various bits… some ends of cheese, a couple of limp looking spring onions,  the last bit of a chorizo, the end of a pot of cream, two wafer thin slices of  Parma ham and, of course, eggs.

I love eggs. I really do. I could happily eat eggs every day.

Some times I do. I mean… they are packed full of protein and they have been shown to have no real effect on cholesterol. If you eat eggs for breakfast, the high protein levels make you feel full for longer, which is just the thing you need to stop you snacking mid morning. Eggs for supper stop you having cravings late at night.

So, it seemed just right to have an omelette. I had that lovely chorizo which neede using up

And  I had that cheese… so Cheese and Chorizo Omelette it was going to be.

There was  the last of the Emmental and Gruyere cheese that I had used in Omelette Arnold Bennett and some farmhouse Cheddar.  The sorry looking spring onions weren’t bad once I had trimmed them down and refreshed them in ice cold water.

I microplaned the cheese and sliced the spring onion.

Dry frying sliced chorizo releases the oil and cooks the outside to a sort of caramelised bronze. Once the slices were browned on both sides, I took them out and left them to cool.

A knob of butter softened the spring onions (I really can’t stand raw onion … it gives me a headache)

I briefly whisked the eggs with a fork and added the last of the cream. That’s what you can see in the egg mix. I didn’t bother to whisk it all in smoothly (it was very thick cream) but I knew that with cooking it would all melt in with the cheese.  That was all poured in over the softened spring onions.

My mother always calls them scallions and I don’t know why. I really should ask her.

Look how gorgeous it looks… I scattered over some sweet smoked paprika because I love the taste and that would be echoed by the chorizo. Don’t add it before the omelette has started to set because otherwise you get a diffuse pinky orange looking omelette. I still like to see the creamy golden yellow of the eggs.

Slices of chorizo would be too much but it is easier to cook them in slices. Once they were cool I cut them in half and scattered them over the still soft egg.

Then a layer of cheese and those two remaining slices of Parma ham, torn into pieces..

I stuck the pan under a hot grill for a minute and the cheese softened and melted over everything… the eggs puffed up a bit more and then…..

Then, it was supper made from scraps.

A truly delicious  omelette. The cheese and chorizo worked perfectly well together and I had not only used up stray items in the fridge but I had made supper in less than twenty minutes.

It really did taste gorgeous. I really must make sure I have more scraps in my fridge.

Broccoli a Bear will eat

As you know, I wage a constant battle to get the Bear to eat what I want him to eat. All in the interest of health, you know, it’s not just me wanting to assert dominance over my poor, beleagured husband. It makes things easier as well, if you both eat the same things. I am having some success – he is now eating prawns and has started to eat broccoli.

Yes, I know, not everybody loves broccoli and for some the slightly bitter tang puts them off, but my reasoning is that if the Bear can eat raw broccoli with a dip as a crudite, or broccoli and stilton soup, or even the deliciously tasty Broccoli and Stilton Pastryless Pie then he can eat it as a vegetable.

And not complain.

Finally, it seems, I may have cracked it.

I’d made the salt and pepper pork tenderloin for supper and knew we needed something with it. He’d started with a crisp salad of leaves, red and yellow peppers and tomatoes so I reckoned that if he didn’t eat what was served with the pork, that wasn’t going to harm him.

Anyway, I love broccoli.

I had gone to our local farm shop and come back with two gloriously green and hard heads of broccoli. We have been on a high protein and low carb diet and butter (thank God) is allowed. I had a feeling that I could make something delicious – well, delicious for me – and if he was hungry enough then he would eat it.

So, I chopped the florets off and sliced the stalks into smaller chunks.

Broccoli stems take longer to cook than the florets so they need to go in a pan first with some butter and a sprinkle of salt. Put it on a medium heat so you don’t burn things.

Give them a couple of minutes to soften slightly before you add the florets.

Toss them round in the butter – you want them to soften and cook but not turn to mush.

It still looks green and delicious and it is holding its shape but now there’s a softness about it.

Sooooo… all well and good but I have to get the Bear to eat it.

I need to up the protein level as well so a great big spoonful of Philadelphia cream cheese goes in and melts over the broccoli.

It is now on a low heat, stir it round and let it cover everywhere.

A spoonful of double cream helps loosen things and makes a delicious sauce.

With salt and pepper added to bring everything together, the creamy, faintly coolly-cheese (you know how cream cheese has that sort of taste) sauce the broccoli feels slightly tamed.

Take the broccoli out and reduce the creamy sauce so it thickens, adding a knob of butter – this makes it taste even more rich and delicious. Just the thing to add to that steaming green goodness.

The bitterness has disappeared and you have a savoury, tasty pile of broccoli, just ready to serve to an unsuspecting Bear.

So I did. There was his pork just asking for something to sit along side it… there was that sauce just begging to be poured over everything. I served it up.

After all, he’d already had a lovely big crisp salad… if he didn’t like the broccoli it wouldn’t be so bad.

It was delicious. Utterly, absolutely, totally gorgeous. I had justified giving myself the larger portion because, after all, he doesn’t like broccoli.

“Did you like it?” I asked.

“Yes…. I just wish there was more broccoli…. ”

Drat. There was more and I had my greedy little eyes on that but in the interests of converting the Bear to a love of broccoli, I just had to do it. This was unprecedented in our lives together – my Bear actually asking for broccoli. He got the lot.

Now, once I have got him to eat it like this I can start to cut back on the cream and Philly – not too much, you understand – and it becomes even healthier.

Maybe I won’t though. Maybe it is just delicious as it is.

Oh, and you know what? He’s asked for, and eaten, broccoli cooked like this several times since. So maybe if you have children who find broccoli just too bitter, try it like this. You never know… one day you might hear the magical words “I just wish there was more broccoli”

Omelette Arnold Bennett

Although we live in a large city, it is a city surrounded by farmland. There are amazing local food producers and farm shops everywhere.

Our closest farm shop, Spring Lane,  is less than a mile from our apartment and I go there every weekend to buy eggs, cheeses, vegetables and meat. There’s a bakery there, too, and sometimes… just sometimes, I buy fresh cream cakes.

But the best things of all, in my eyes, are their fantastic eggs.

Free range, with fantastic golden, almost orange yolks… and oh,  the size of them….

I’d gone there as usual and picked up a dozen extra large eggs and got my fresh vegetables and came back. I had a fancy for an omelette.

Specifically, Omelette Arnold Bennett, the beautiful, open omelette with smoked haddock and a creamy cheese sauce.

(Whenever Arnold Bennett stayed at the Savoy Hotel, he ordered this and loved it so much that wherever else he travelled  he asked for it. Eventually, the Savoy Hotel named it after him and it has stayed on the menu ever since)

I always buy the extra large eggs at Spring Lane and this time, being in a hurry, I grabbed my dozen eggs,  some fresh vegetables and cream, then  set off home again.

I hadn’t checked the eggs because I have never before found a broken one in one of their boxes (they are so careful with all of their produce) so I hadn’t looked inside the box. Anyway, there I was, standing at the bench, about to prepare for the omelette when I noticed that the lid wasn’t down properly on the box.

I opened the box to see this rather surprising sight

Look at the size of that!

That wasn’t just an extra large egg… that was an extra, extra large egg.

In the UK there are regulations about egg sizes. Each egg size, from pullet to small, to medium, to large and then to extra large has a weight range.

 An extra large egg  must be 75g and above.

That beauty weighed 114g.

All I could think was that the hen who was involved in that production was probably just as surprised as I was.

Onto the omelette then – I also had some smoked haddock

(actually, I prefer undyed smoked haddock, but needs must and all that. I wanted that omelette and I wanted it that day so I was prepared to accept the dyed fish)

And some cheese – both Emmental and Gruyere.

And I always have pots of cream in the fridge.

Now there are plenty of recipes available to tell you how to make Omelette Arnold Bennett and some of them are very involved indeed – telling you to make flour based cheese sauces, making you use lots of pans and it is all very labour intensive. What I do would get me thrown out of the Savoy kitchens but, you know, it works for me.

So… here goes… the quick and easy way to make an Almost Arnold Bennett Omelette …

Poach the haddock gently in some milk. You don’t want to boil it fiercely, just sort of bubble along softly for a few short minutes.

While that’s doing, break 4 eggs into a bowl and whisk them gently with a fork and add a good spoonful of cream.

Grate huge handfuls of lovely cheese and add it to another bowl where you have put some more of the thick cream. You want more cheese than cream and the cream needs to be thick.

What you need is a thick and delicious mixture of cheese and cream.

By now, the haddock will be ready, so, carefully, take it out of the pan and flake it.

(Remember to take the skin off before you flake the fish – imagine how difficult it would be to peel the skin off after tearing it to pieces!)

Put the grill on high and get your best omelette pan out and start heating it on the hob with a knob of butter

Pour the eggy, creamy mix into the pan and swirl it round, pulling the softly cooking bits to the middle and letting the runny bits spread out so it cooks gently.

I like to pop it under the grill at this stage so it puffs up slightly in a sort of souffle-ish fashion.

Just a bit though, you don’t want it too cooked because it goes back under the grill later.

Scatter the flaked fish over the omelette and then pour over the cheese and cream mix and then pop it straight back under the grill.

You need a minute or so so the cheese browns on the top

And there it is…..

Fluffy omelette with smokey fish, covered in a creamy cheese sauce…. all you need, perhaps to go with it is a salad

That’s it. Sit down and fork up that gloriously tasty omelette.

Oh, and say a quiet thank you to the hen who valiantly produced such wonderful eggs!

Wild garlic buds

You know how some days you just long for something different to eat? Perhaps the weather is getting you down or the work you are doing seems rather tedious and your mind starts to wander….. you feel hungry (oh, how often I feel hungry. Goes with the territory of being a greedy old thing, I suppose) anyway, you feel hungry and you start to think of nice things to cook. A treat seems to be called for. Something to brighten up your evening…..

And then I thought of my wild garlic.

I’d cut away at the leaves the other week but I still had plenty of buds and as my mind was still unoccupied by pressing problems I started to think of how I could use the buds.

I’ve had them in a light tempura-style batter (but I didn’t want the fuss)

And in risotto (but I didn’t want to eat rice)

And I started to think about the shape of the buds….

Perhaps if I cosseted them in some butter, like tiny tender stems of asparagus…..

I could serve them with some lovely roast lamb. I had a lamb henry in the freezer…that would be quick. Forty-five minutes in a hot oven would get me a deliciously cooked piece of lamb and a few seconds in a pan and I could have the wild garlic ready.

Sometimes it’s worth letting your mind wander.

Besides the weather was awful

The rain was lashing down and if ever a day called for something tasty to cheer me, this was it.

Out in the rain I went and snipped away to get a good handful of slender stemmed garlic buds. I  got a few leaves as well as they would be lovely sauteed with a drop of cream as a base to balance the buds on. It doesn’t have to be like that of course… it’s just I had an abundance of sweetly mild leaves and some cream.

And I’m greedy. Have I mentioned that before?

So, a good handful of leaves

And some juicy buds … all I needed now was a knife, some butter and a pan or two.

Roughly chop the leaves while a knob of butter starts to sizzle in a pan

Then pop in the shredded leaves with a pinch of salt and let them saute gently.

A lovely dollop of thick Jersey cream makes a deliciously smooth and savoury sauce for the sofetened leaves.

Pop those tender buds and stems into more hot butter and quickly (very quickly) let them cook through.

And that was it.

My lamb was ready and all I did was serve those soft and buttery wilted garlic buds and stems over the lamb alongside a smooth and rich spoonful of creamy, shredded wild garlic leaves.

Remarkably delicious, though I say it myself.

Broccoli and Stilton Pastryless Pie

At long last the days are becoming brighter and the weather seems to be improving. Today at work I had the windows open as it was getting rather hot, sitting behind glass with the sun shining in. It’s time, I think, to start freshening up food…. making it lighter and more summery.

Time, in fact, to make something like a pastryless pie.

I often make this because it is perfect with a light, dressed green salad for supper and also because it is absolutely ideal to take to work for an easy packed lunch.

A pastryless pie is, in effect, a quiche without pastry. The quiche filling is baked inside strips of ham. What that means is that if you are baking it to share with friends then anyone with a wheat intolerance or coeliac disease doesn’t have to miss out.

If you are trying to cut carbs from your diet, well, it isn’t exactly Atkins because there’s plenty of vegetables in there but it does, at least, avoid pastry.

So then… what do you need?

I had some broccoli in the fridge and that, along with a lovely piece of Stilton cheese would make a lovely pie.

I had half a dozen free range eggs, a small pot of cream, a packet of sliced Serrano ham, 200g of Emmental cheese (which I love for its sweet nuttiness) a courgette, a handful of cherry tomatoes and few baby salad potatoes.

For those of you who don’t have access to Stilton or Serrano ham or, in fact, anything else I have listed, just remember I am putting those ingredients in because that’s what’s in my fridge.

As long as you have eggs, cream, some ham (some kind of air dried ham, sliced thinly) some cheese and some vegetables you can make this.

Now, because you are making what is really a quiche filling, it is going to be runny. And you don’t have a pastry shell to pour it into. I told you we were wrapping some air dried ham around it but that isn’t going to stop the filling from running out, so this is what to do

You can buy silicone paper cake liners from most places now – one of these popped inside a springform cake tin makes the ideal liner to keep all your lovely ingredients from seeping out when you bake it.

Open your packet of ham and drape the slices round the edge.

You don’t need to completely cover the sides and you don’t need to cover the base. What you are doing is making what will turn out to be a lovely, savoury, lightly crisped ham edging. It helps keep it in one piece when you cut it.

The bottom of the pie will be lined with a layer of steamed and sliced potatoes – it makes for a firmer base. Either slice them and steam them now, or use left  over cold salad potatoes. Because I am using broccoli, I steam that at the same time.

See? Just a thin layer of little slices of potato.

Followed by a lovely layer of broccoli florets

I found a courgette in the fridge and if you use a julienne cutter, you get a glorious tangle of shredded courgette. When this cooks it disappears into the gorgeousness of the creamy, cheesey, eggy filling so even for avowed courgette haters… this would slip right on past them. Another vegetable chalked up!

Scatter those shreds over the broccoli layer

And as it is a broccoli and Stilton pie, now is the time to slice that piece of Stilton you saw earlier.  You could crumble it if you want to, and scatter it across but I thought how pretty and symmetrical it looked to arrange it in thin slivers.

I had half of a red onion left over from something else I’d made so I thought that, sliced finely so that it would cook through while the pie was baking, it would add an extra hint of savouriness.

 That was scattered on top of the cheese.

That’s the vegetables taken care of, the next thing is the delicious cheesey, eggy mix.

6 beautifully golden fresh free range eggs need breaking into a bowl and whisking round with a fork.

A small (150 ml) pot of cream gets poured in and whisked around again.

And pour it in……

Give the springform tin a gentle shake from side to side to make sure the eggy mix falls down around those lovely vegetable layers.

I had some sliced Emmental to use up as well, so that was shredded and scattered over the top.

Little cherry tomatoes (there were only 4 or 5 left) were quartered and added to the top layer before the ends of the ham were folded over.

You can see when you do this that the egg and cream mixture seeps between the slices of ham and then you realise just what an excellent idea it was to use the paper liners…

Into the oven with it at 160 or so degrees C for approximately 30 -40 minutes.

You can tell when it is done when the top looks golden and if you give it a gentle side to side shake the pie quivers just a little bit… and if you press it with your finger it feels soft but firm…

The only thing to do now is to free it from the springform tin, peel back the paper liner and slide it onto a serving plate

The hardest part is waiting for it to cool slightly so you can slice into it….

With a green salad it truly is the perfect lunch or supper.

Tasty, easy to make, easy to take for lunch… cunningly packed full of vegetables in the midst of that delicious filling… just the thing for the summer months!

Kidneys and rice… offally good!

You might have noticed, if you have read anything here before, that I am very fond of cooking the cheaper and often forgotten cuts of meat because they can, if treated well, turn into the most delicious meals. The same with offal.

When I was a schoolgirl I was forced to eat dry, rubbery liver and bouncingly hard kidneys and I swore that when I grew up I would NEVER be made to eat them again… until I cooked them myself and realised that offal wasn’t awful at all.

Now, one of my favourite quick suppers (only when the Bear is away….. he’s still rather stubborn when it comes to kidneys, but I have no doubt with training he’ll get there) is kidneys in a cream sauce on basmati rice.

Kidneys are so cheap – I think that pile of beauties cost me less than a £1 – and all you need otherwise is some basmati rice (a cup full) a few spring onions, some butter, cream and a dash of something alcoholic and either some flour to thicken the cream sauce, or, like I did tonight, some thickening granules. Now, I would normally avoid produced goods and shortcuts like this, but they really are rather good. They USED to say they were gluten free, which made them a great option if I was doing something for my brother…now I think they have to say that the product is made in a factory that also produces products containing gluten. Anyway… that’s why I started using them and I still use them today. The granules are just stirred in to whatever you are cooking and they thicken… It’s an option, isn’t it?

So, let’s start.

You need to remove the centre core and the tubules from the middle of the kidney. It’s easy enough to do – just slice them in half and then snip out the white core and tubes with scissors.

Chop the spring onions into pieces and add them to a pan with a spoonful of butter and a dash of oil (this stops the butter burning too quickly)

I used my favourite chilli infused oil just to give the dish a hint of a bite.

Cooking takes just a few minutes – you’ll be able to tell because the kidneys go from fresh. bright red to a rich brown.

In the meantime, I put a cup of basmati rice in a pan, add a cup and just under a half cup  of water, a pinch of salt and set it away to boil. Basmati only takes a few minutes to cook and doing it this way means there’s no need to drain it. If you cover it with a teatowel and put the lid on after the water has been absorbed, then the excess moisture is absorbed and you are left with fluffy, dry rice.

When the kidneys have just cooked, I like to add a dash of something alcoholic to perk up the final dish. If you are cooking this for children then you don’t have to add it… though I have to say, any alcohol will be cooked off, so it shouldn’t affect them.  Tonight, I am using port.

Why port? Well, there’s a bottle open and also I think the sweetness will combine well with the musky tang of the kidneys. Sometimes I use brandy, or whisky. I’m tired tonight and i think I might fancy a touch of sweetness in there, so port it is.

Then, a sprinkle of thickening granules, stirred in

And, because I have some in the fridge and it needs finishing off, I add a spoonful or so of cream

And that’s it.

Just stir the cream round, taste for seasoning – maybe a pinch of salt or a grating of pepper and then pour it over your lovely, fluffy rice.

Supper in less than 20 minutes.

Comforting, rich and smooth. Gently cooked kidneys (no rubbery, bitter bounce here!) in a delicious, creamy sauce on fluffy rice.  Just what you need to brighten a lonely evening.