Meatfree Monday – Seed and grain bread for egg mayonnaise sandwiches

The Bear was about to set off on his travels again and would be getting up at some ridiculous time in the morning so he could get to the airport. What that means is that he doesn’t really feel like eating too early in the morning and would rather have something to eat at a more normal time.

What THAT means is that he is loitering around an airport and picking at stuff. Now I’m sure that what is served at outlets or in the Business Lounge will meet with all Food Health guidelines… it just doesn’t meet with mine. Obviously, food produced on an industrial scale, for sale at some point in the future is going to be packed with preservatives or dodgy fats that we don’t want and would never have in freshly made food. He knows not to risk my wrath by buying a plastic wrapped muffin or going to a fast food outlet for a burger and he does try to get something looking vaguely healthy but the fact remains, he has to eat at some point while he’s travelling. He could try looking a sandwiches but, even there, there are problems.

A simple egg sandwich, for example, will be made with bread that has preservatives, the eggs will probably not be free range (as I’m sure they would be plastering that fact all over their packaging), they are likely to be using margarine instead of butter and goodness knows just when they boiled the eggs.

So I decided to make sure he could have something to eat that he could carry easily, would taste nice and be good for him.

His favourite sandwich is an egg mayonnaise one so I decided to do that.

First I needed to make good bread and as he is particularly fond of seeded or granary loaves, I decided that would be just the thing to bake.

I got a packet of Allinson’s Seed and Grain Bread Flour, which is white flour with wheat and barley flakes, kibbled rye, sunflower seeds, millet and linseed. Healthy, tasty, nutritious and perfect to make into a lovely sandwich.

There was a recipe on the back that looked good and I thought I would follow that as I had never used that flour blend before. It looked quick enough, too.

First thing was to preheat the oven to 230 degrees C/450 degrees F, whilst measuring out 650g/1lb 7 oz of the flour, 10 g/2 tsp of salt, 5g/1 tsp sugar and a 7g sachet of yeast.

That was mixed together first to get an even distribution of all the dry ingredients, then 15g/ ½ tsp of soft butter or 15 ml/1 tbsp of vegetable oil was rubbed through.

400ml/ 14 fl oz of warm water was added and mix to make a soft dough.

The recipe says to knead it for ten minutes on a floured surface – I did it in the mixer with a dough hook and added extra flour to get it to come together.

Well I did give it a knead myself…just to show willing and besides I like to feel the dough and by feeling you can judge when it is properly ready.

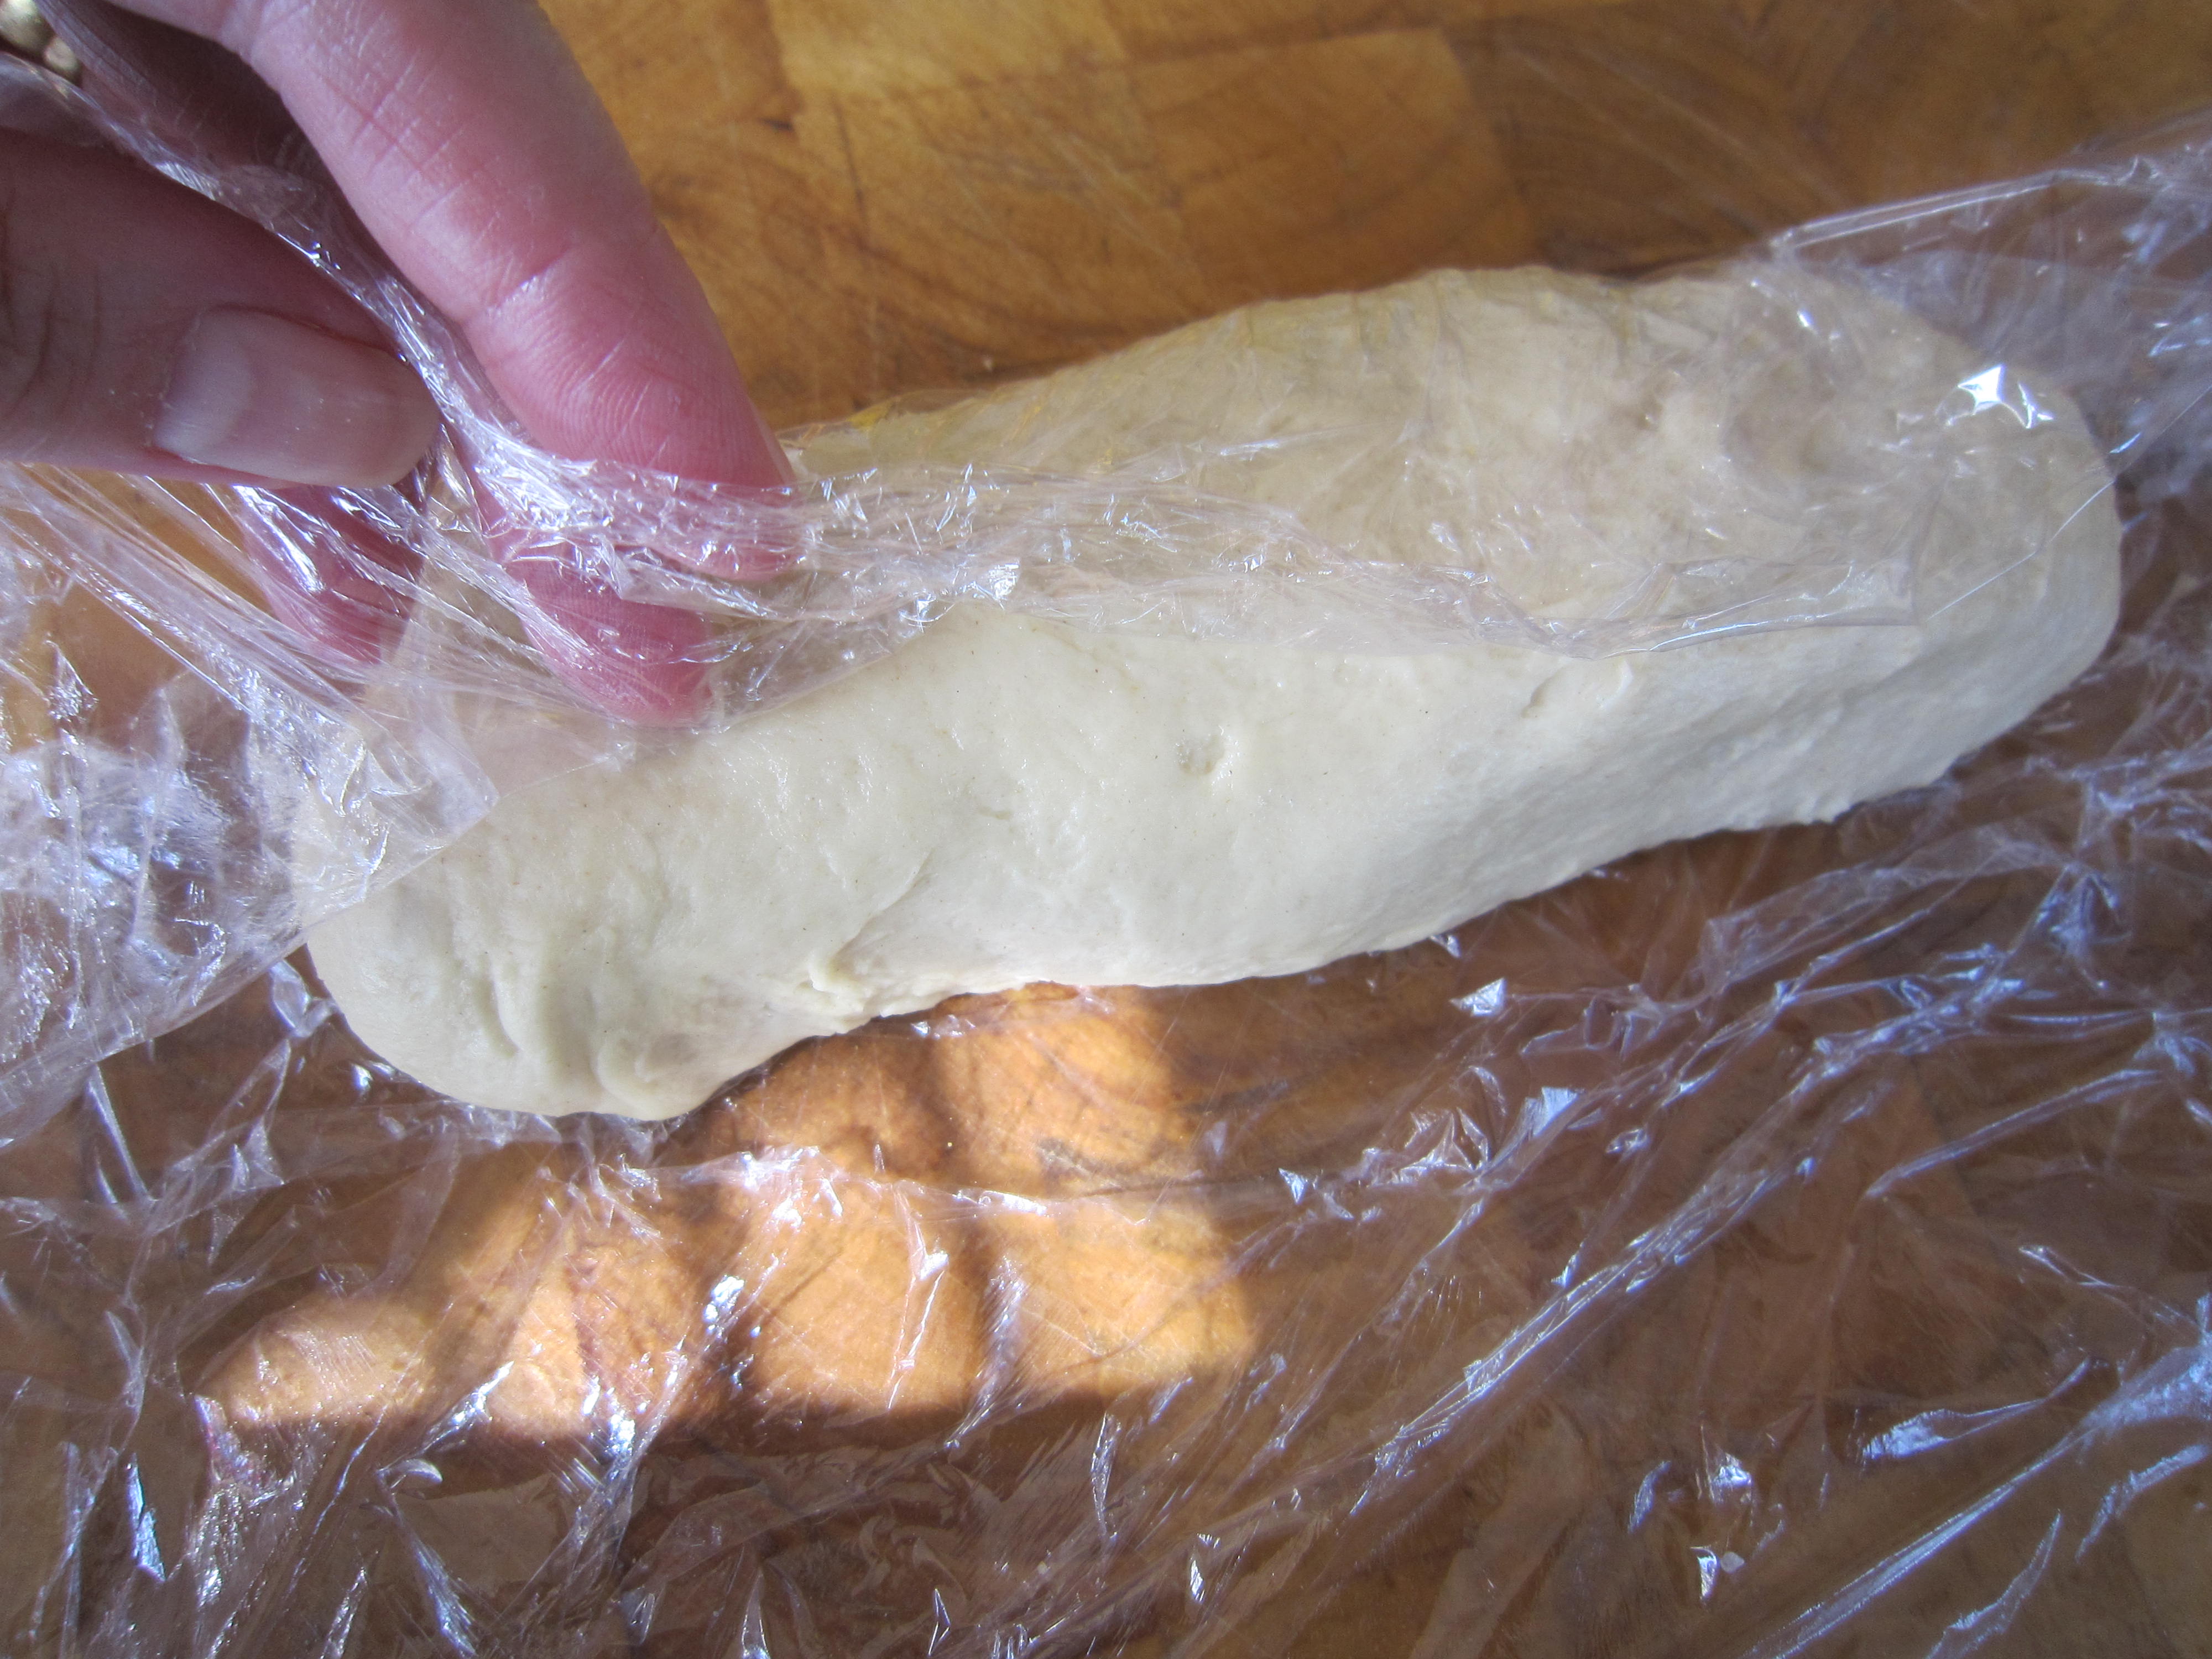
Look at how the dough looks now… smooth and bouncy. If you’ve ever patted a baby’s bottom.. well that’s what it should feel like!

It had to be put in a greased tin (they suggested two 1lb loaf tins but as I wanted it for sandwiches I put it in a long 2lb tin

and covered it with a tea towel for 30 minutes until it doubled in size.

Into the hot oven it went for half an hour or so

Perfect. When I knocked the bottom it sounded hollow which means it had cooked properly.

It looked and smelled delicious. We might have shared the end crust with some butter on…. just for checking purposes you understand.

The next thing was the filling. I always use free-range eggs and buy these from our local farm shop so I know exactly where they come from and just how fresh they are.

Boil them for four minutes then immediately tip away the boiling water and start filling the pan with cold water because otherwise you get that horrid black ring round the eggs and that terrible sulpherous smell.

I like the eggs to look like this – mainly cooked but with just a hint of soft yolk.

The eggs were  chopped then two slender spring onions are also chopped and added. I wish we still had some chives left but with Autumn rapidly approaching they are all gone now.

A tablespoon of Hellmann’s Mayonnaise and a pinch of salt go in next (Hellmann’s switched their production to free range eggs so that’s good, otherwise I would have had to make my own, which I have to say is really easy…. but this was easier!)

White pepper enhances the egg mayonnaise mix really well,  so a shake or two was added to taste.

And that was it for the afternoon. I was going to get up early the next morning and make the sandwiches. The egg mix went into a lidded box in the fridge and the bread was put to one side.

Next morning, at around 5.30 am, I got up to sort things out. The bread cut well and is ideal for sandwiches. It was a good even texture and the seeds and grains made it slightly dense, which is a good thing for a sandwich. You need the bread to hold together and not collapse, spilling your filling everywhere. Especially when the person about to eat it is in a business suit… This might have happened on another occasion.  not this time, though. That bread looked like a winner in the samdwich stakes.

It’s important to spread the bread with butter as this makes a waterproof layer and stops the filling seeping through. And butter is important because, well, it just is. I believe in butter and I do not believe that some weird kind of vegetable fat with emulsifiers added to it could possible make anyone believe it wasn’t butter.

Butter is cream shaken up until it turns to butter. A pinch of salt can be added but that’s all. No chemicals, no E numbers. Nothing but creamy milk and salt. Healthy, that is, I’m sure of it. Anyway, we don’t have any margarine or spread or whatever it is called. Butter it is and that’s an end to it.

Delicious. And I always make sure I spread to the edges. I hate it when you get a sandwich and there’s just a tiny dot of the filling in the middle.

Sliced in two so it’s easy to eat

And wrapped in a sandwich bag so he can throw it away afterwards.

So, the Bear left for some other country and I went back to bed, happy knowing that he would have something to eat without having to buy an overpriced, low quality sandwich.

Was it worth it? Yes, it was.

Making the bread took quarter of an hour mixing and kneading. The bag of flour cost less than £1 and there’s still a well over a quarter left. What I used made a 2lb loaf so there’s plenty left for sandwiches for me for work. I suppose the two slices I cut for him would work out at maybe 15 or 20p. The eggs cost £1.65 for a half dozen, but what I used on his sandwich was probably less than one egg so there’s another 28p. Maybe adding in 10p for the other ingredients and you have a perfect additive free sandwich for 58p or thereabouts. Even if you add in 20p for using the oven it is still incredibly cheap when you consider that in an airport the average cost of a sandwich is £2.80. And if you wanted decent bread and free range eggs? That would be another £1 or so added onto it.

For all of you who are wary of making bread (and you know who you are) this was a simple, quick and very tasty loaf. It saves an incredible amount of money for what is really very little work.

Go on – get baking!

Meatfree Monday – Baguette baked with cheese, tomatoes and peppers

For me, there’s something so soothing about baking bread. I love getting out a big bag of flour, some yeast and some good salt and knowing you can turn it into something delicious. Those ingredients, by themselves, could never be a meal (unlike quite a lot of things we cook with) but together, in some almost alchemical way, become something nearly essential to our day to day life. We talk of “breaking bread together” to refer to eating together. Bread in the Bible is called “The Staff of Life”  and means it is a staple, or a necessary food. We talk of  “Our daily bread”  both in prayer and conversation. It doesn’t matter if you aren’t religious in any way, it’s just the Bible tends to be the oldest, most widely accessible book in the world and phrases and proverbs from there crop up in our everyday language without the majority of us even noticing, or realising where they come from.

The fact that these terms have entered our language and are used daily point to the importance of bread for the majority of people. “Bread” and “dough”  are even used as slang terms for money.

Anyway, I love the action of making bread. I love the smell of it baking and I especially love cutting into a still warm loaf. I think I could get away with murder in our house as long as the Bear can have his fresh loaf. His favourite is the No-Knead Bread but sometimes I make soft white bread because, really, there’s nothing like it for a fried egg sandwich which is one of our favourite weekend breakfasts.

This  wasn’t planned as a breakfast , however. I wanted to make us something nice for lunch. Something light and tasty but also something that would brighten what was a rather vile day. There were thick clouds everywhere and violent rain storms. The Met Office were issuing storm and flood warnings. A typical British Summer, eh?

I had a fancy for a sandwich but a kind of baked and stuffed sandwich. Sort of like a calzone pizza but with lovely white bread. I wanted a light and fresh toasted sandwich – certainly not a heavy meaty one…and it had to be suitable for Meatfree Monday.

But first of all I had to make the bread.

That’s as easy as anything, really.

250g of strong white bread flour with a teaspoon each of dried yeast and salt are stirred together so you have all the dry ingredients evenly dispersed

50g of butter can then be rubbed through, rubbing the butter lumps with your fingers so they make a fine, almost granular in appearance, mix.  (Yes, the Bear took that photograph as my hands were messy)

5 fluid ounces of warm water need to be poured in and mixed through. The warm water helps the yeast become active, so don’t have it too hot as this will kill the yeast and too cold means it won’t start to work its yeasty magic and make the bread rise.

The dough will come together quickly and then you need to knead it. Either do it by hand (and it’s not a tough job as this is only a small quantity of dough, just enough for two people) or if you have a mixing machine with a dough hook, stick it in there for 5 minutes. If you are doing it by hand, take ten minutes and think of it as a meditative exercise… I stretch the dough away from me and pull it back again and again. The texture of the dough changes from an uneven, lumpy mass into a smooth and almost silky ball of dough that bounces back when you poke it. It’s a marvellous way of calming down or settling your mind.

Once the dough looks right – and you will be able to tell the difference from when you started out – make it into the shape you want and leave it to rest, lying in either a greased loaf tin, covered with a damp tea towel to stop it drying out or, as I have done, lying on some lightly  oiled cling film and loosely wrapped. I wanted a baguette shape so I rolled it between my hands for a free form shape.

That needed to rise quietly by itself until it had doubled in size, which, in normal temperatures, takes about an hour or maybe an hour and a half. In the depths of winter it can take longer and you might have to find a warm place so the dough can rise.

Once it had grown into the size it should be – i.e. a baguette big enough for two – I pulled it apart and started putting the filling in.

Sun dried tomatoes went first.

Slices of lovely, tangy Tallegio cheese on top of that. I chose Tallegio because it melts well and tastes divine. You choose whatever you think is the nicest.

And remember those roasted red peppers I made?  I thought they would add an extra layer of flavour, so the last of them were laid on top.

Then it was simply a matter of making sure the oven was heated to 230 degrees C/45o degrees F and the edges of the dough pinched back together

A few slashes across the top to let it expand and then it went iinto the oven for half an hour or so.

You’ll be able to smell it when it’s ready – that gorgeous baking bread smell fills the apartment and the Bear starts to look around, sniffing, realising his lunch is nearly ready.

The bread has risen nicely and browned gently… some of the cheese has started to ooze out….

And cut into? It’s not doughy at all but a lovely, well risen soft white baguette with a hot and savoury tomatoey, cheesey and smokey peppered middle!

A success, if I say so myself.

The Bear thought so too and, really, that’s what counts for me.

Try it… put whatever filling you like in – the heat of the oven will heat the filling as it bakes the bread. It really is worth it… delicious baguette stuffed with your favourite things. Just what you need to brighten a wet and windy August day!

Sweet Basil Biscuits

As you will have noticed from the previous post about my balcony garden in the sky, one of the things I love to do is grow my own basil – one of the most aromatic and useful herbs there are.

It saddens me when I see it in little pots in the supermarket. All you get are weedy, little, soft stems and a poor plant that is far too big for the pot. The seedlings are grown indoors in their thousands and, once bought and brought home, tend to die quickly in their thousands too. The best basil is grown from seed and allowed to get good and strong outside. I’m certain that the buffeting of the wind strengthens their stems. The sunshine concentrates their scent. Is there anything nicer than the scent of fresh basil? It’s enlivening.

OK, there’s a lot of the time when you simply CAN’T grow basil outside but when the opportunity is there – make the most of it. Failing that, of course, you must have a windowsill?

I like to grow the usual sweet basil, with its large soft leaves and the smaller leaved variety, Greek Basil. It’s not really Greek at all, but Italian, originating in Chile. An international basil with the most wonderfully strong scent. It grows tidily too, like a tight,  little ball. I keep promising myself that next year I will grow it in two, tall and elegant pots and put them on either side of the french doors to the balcony. Can you imagine the smell of that, wafting into the living room on a hot night? Scented topiary. Blissful.

I use my basil in traditional ways in tomato based sauces, scattered on top of  beautiful buffalo mozzarella with tomatoes as a delicious salad, in pesto for a simple pasta dish and in oil that I would make to drizzle over salads or cheese or bread later. Always it seemed in savoury ways. I’d never even thought of using it in something sweet.

And then, in last month’s Observer Food Magazine,  Nigel Slater wrote about going to the Royal Horticultural Society’s Chelsea Flower Show and meeting his friend, Jekka McVicar (she of the famous Jekka’s herbs). She handed him some basil biscuits…..

Basil biscuits?

Could this be a new use for some of the basil I was growing? I had to try.

And a biscuit, too…. well, it would be in the interests of research, obviously. You are allowed research on a diet, I’m sure of it. Obviously, me working in a University has caused me to develop serious academic concerns.

Besides, it was quick and easy. What more prompting did I need?

No more prompting but I did need 100g of butter, 50g of sugar, 50g of ground almonds, 100g of plain flour and a large bunch of basil leaves.

I like the symmetry of that recipe – easy to remember quantities and not many ingredients. Perfect!

The oven was switched on to 180 degrees C ( 160 degrees if you have a fan assisted oven) 350 degrees F.

It was a simple matter of creaming the butter and sugar together

Then adding the ground almonds and then the flour.

Pop that out onto a floured board and knead it into a dough.

Then, chop your basil and start rolling the dough into it… the basil will  get right in there and the smell is magnificent.

See?

All you have to do now is slice the roll into biscuits! The recipe says 15 -20 biscuits from this amount of dough so use your judgement. I can never work out, with any speed, just how big 1cm is. It’s about the width of a little finger, if that’s any help? And yes, I did just measure it with a ruler to check.

(Comes of being a child of the crossover age when we switched from Imperial measurements to metric, I suppose, although I do think all of us Brits are like that. It doesn’t matter how long we have been metric, or how many regulations there are to stop shopkeepers selling us half a pound of butter when we should be asking for grams, or a pint of milk  instead of 0.5862 of a litre; we still, generally, think in pounds and ounces, pints and gallons, feet and inches.

Look at when a baby is born – we still coo with delight (and understand exactly) what a good 8lb baby will be like. Same goes for feet and inches. I am five feet three inches tall. I can understand that. 160 odd centimetres? Sounds like a giant! And my waist… well that used to be 24 inches – though with age and greed that has certainly increased. 24 inches? You know where you are with that. But 61 centimetres? Dear me.)

So, slice your biscuit dough into the appropriate size. Use whatever measurement you like. I am most fond of commonsense as a measurement.

Put them onto a baking tray – either grease it well or use, as I do, a silicone baking sheet so the cooked biscuits can slide off easily. (Saves on the washing up, too!)

Into the oven for 15 – 20 minutes and then you get this….

Deliciously golden, green flecked biscuits… the smell is utterly gorgeous. The taste is subtle, sweet and delicious.  very definitely more-ish.

Whoever would have thought that putting basil into a biscuit could be so inspired? Jekka McVicar deserves a medal.

I took some in to work and they were devoured there too.

All I can say is, basil is not just for tomatoes but for biscuits too!

Strawberry Pistachio Shortbreads

I love reading. I especially love reading food writing.  I think there’s nothing better than reading the story behind the recipe. A recipe just set down by itself doesn’t grab me the way a recipe does when I get to know more about the cook… the reasons why they made that recipe and just how they did it.

 I have quite a large collection of cookery books  (well over 150) and a mountain of food magazines. The Bear is always on at me to do something with them but I just can’t. I suppose I should go through the magazines at least and cut out the recipes I really want to try but I just haven’t got around to it yet. Part of it is, I think, that I was bought up never to despoil a book (and by extension, a magazine.) I would no more take a pair of scissors to a book than I would turn down the corner of a book or crack its spine. Books are to treasure and read again and again.

Jeffrey Steingarten – now, there’s a writer! A lawyer turned food writer for Vogue, his books “The man who ate everything” and “It must have been something I ate” kept me enthralled for hours and I still go back and read a chapter every now and again. That’s not so much recipes as mini essays and it is one of the things the Bear and I bonded over when we first met. If you are looking for entertaining (hugely entertaining) and erudite, informative stories about food, he’s your man.

Nigel Slater is another – endlessly fascinating with a huge list of cookery books to his name. “Toast: The Story of a Boy’s Hunger” is his autobiography… start to read that and I bet you won’t put it down. His “Kitchen Diaries” is one of my favourite books of all time. Nigel also writes for The Observer and the monthly Observer Food Magazine is one of my treats. There’s always something I want to cook from his articles –   everything he does is so beautiful – just look at his website and see what I mean.

The last Observer Food magazine (June 2010) featured his garden recipes and there was one in there that instantly appealled – Strawberry Pistachio Shortbreads. Strangely, for England, we have been having a marvellous summer – lovely bright days with lots of sun and the strawberries are making the most of it. There are mounds of fresh British strawberries everwyehere and this was my chance to make the most of them.

I wanted to take something nice to a friend’s house and the thought of lovely shortbreads topped with strawberries and vanilla cream seemed to be a brilliant idea. Very summery. Very British. Which would be good, because we were going to J’s house (he’s from Catalonia) and meeting N (from Argentina)  and L from the Czech Republic! Our get togethers are always brilliant international affairs.

Anyway, that was what I was going to make.

I needed  100g of butter, 3 tablespoons of caster sugar, an egg yolk, 200g of plain flour and 100g of finely ground pistachios for the shortbread….

And that is when I started to wonder. If you look at the article you can see a picture of the shortbreads and they seem to have bits of pistachios in there… not finely ground at all. So what should I do?

I sat at my desk (OK, so I was at work, but a girl can’t work constantly…) and flicked through the article again… it definitely said ground pistachios and the picture didn’t show that. Then I noticed at the end of the article was Nigel’s email address at the Observer.

Nothing ventured, nothing gained has always been my motto, so I emailed him, just asking for clarification. I mean, had he done it one way and decided the other way was better?

I didn’t really expect an answer but within 20 minutes he had replied! How marvellous was that? I never for a minute anticipated a reply.. or if I had got one, it would have been a standard response, copied and pasted into an email some weeks later. What a gentleman!

And the answer… you can use ground or roughly chopped as you choose. the resulting difference will only be the texture.

I liked the look of the ones in his photograph so I decided to do roughly chopped pistachios.

So… I was ready…

I weighed 100g of butter, beat it until it was soft and fluffy with 3 tablespoons of caster sugar (that’s superfine to those of you across the Atlantic)

Roughly blitzed (briefly) 100g of pistachios so I got a range of shapes and sizes of bits of nuts

Then dropped the pistachio bits into the buttery mix and mixed it in well

One egg yolk was added to bind it together and then the  200g of flour was added.

It was a stiff mix and Nigel advised adding a tablespoon of water to it all to make it into a firm dough.

This had to be kneaded into a ball and then rolled into a thick sausage shape. As this was to serve 8, I could see how big the roll should be.

Don’t they look pretty?

I pre-heated the oven to 180 degrees C/355 degrees F (actually, Nigel didn’t put the temperature on the recipe but I used what I thought would be appropriate and anyway, it was a bit late to be emailing him again. I couldn’t really expect him to be sitting there just looking at his emails)

In they went, lying on a silicone sheet for ten minutes or thereabouts. They weren’t to get coloured really,  just dry to the touch.

The cream was made by mixing extra thick double cream with some vanilla seeds…

 just slit the pods with a sharp knife and scrape out the seeds

and mix it through for the most gorgeous vanilla cream.

I sliced my beautiful strawberries and they were ready to be balanced on great, generous spoonfuls of delicious cream… on top of those gorgeous shortbreads.

What could be more British than strawberries and cream on a hot summer’s day? Our international gathering made short work of them.

Thanks, Nigel. Thanks a lot – they were lovely. And thanks for replying!

Meringue, dulce de leche and cream… what’s not to like?

After I’d made the dulce de leche, the important thing was , first of all to use it and secondly, use it sensibly to get as much joy as possible from eating it for as long as possible.

It would be so easy just to spoon it down…. but I resisted and set to, thinking about what to do with it all.

It just so happened that we were going to a barbecue with our friends and I had promised to make the desserts. An ideal opportunity to make something truly delicious…..I had once made a rather delicious meringue, cream and dulce de leche dessert when we had everyone round to out house. I’d bought the dulce de leche then, of course, I wouldn’t have dreamed of making my own.

I’m sure there should be a name for this but I don’t know what it is… think Pavlova base, spoonfuls of dulce de leche, piles of whipped cream, studded with little nuggets of the best fudge you can get…. mouth watering yet?

It’s not a Pavlova, of course, because Pavlova has fruit as a sharp contrast to the sweet crunchy and chewy (yes, a good meringue should be like that!) base and the smoothness of the cream.

This was going to be sweetness personified, mellowed with the whipped cream. That was good though, because the people that were going to eat it have a distinct liking for sweet things. Anyway, it was a good day – we would be meeting with our friends, the weather was marvellous and a barbecue was planned. The fact that the World Cup was on that afternoon seemed to heighten the joy of some people….

So, first things first. I needed to make the meringue base.

Start by preheating the oven – 150 degrees C (130 if it is a fan oven) or 300 degrees F.

Make sure you have a good baking tray and line it with either baking parchment or a silicone liner. You will need something like that so you can peel the meringue off when it has cooked.

The important thing about making meringues is that you must – absolutely MUST – make sure there’s not a speck of fat in the egg whites. So when you are separating the eggs be careful, very careful. Make sure the bowl you will be using is spotlessly clean.

When I make meringue, I use my copper bowl.  My all round hero food-guru, Harold McGee told me to do so because it stabilises the egg whites and makes a better foam with less risk of it all collapsing. It’s not just a wild fancy to have yet more gorgeous kitchen equipment, you know… it does work.  You don’t have to have one but I bought that back in the days when I had a well-paid job and I  could indulge myself.

If you haven’t got one, don’t worry. A pinch of cream of tartar can do the job of stabilising just as well.

The important thing is that you whisk the whites well, no matter what bowl you are using.

Three egg whites in a spotlessly clean bowl can be whisked to meringue perfection in a few minutes. 

Before you start whisking, though, weigh out your sugar – you need 175g/6oz of caster sugar (which for those of you in Canada – Lorraine- or America, means super fine sugar.) When it is time to start adding the sugar, little by little, you want to have everything ready.

Whip until the egg whites have formed soft peaks and you can tip the bowl up without it all falling out. Only then do you start to add in the sugar, bit by bit.

You can see the whites becoming glossy

When everything has been whisked together and you have a mound of glossy, white fluffed up meringue mix, spoon it out onto the parchment or the silicone liner, making a circle as the base. Some people draw circles on the paper to make sure they get a proper circle but I never do. It’s a meringue for goodness sake… it is going to be pillowy and blowsy and laden with whipped cream. We aren’t talking architecturally precise. I like the organic look of it when it comes out – so very obviously not manufactured in an industrial complex.

Once you have the circle, you make a sort of blobbed wall around the edge with more spoonfuls of meringue. You are supposed to twirl each blob round with a cocktail stick to make little pointed swirls of meringue…. but….

And this is a big but.

Normally my meringues are fine. But normally I am not attempting to make then in a boiling hot kitchen on one of the hottest days of the year (31 degrees C) with lots of humidity.

Humidity is the killer of meringues. I waited until 8 at night in the hope the weather would break and the humidity lessen.. but it didn’t happen. I had to have the not-really pavlova ready for the next day. I had to get cracking.

Reasoning that it would be OK, if not as beautiful, I got on with it. Into the oven it went and the temperature was immediately turned down to 275 degrees F/140 degrees C/120 degrees fan assisted.

It was going to take an hour to cook and once that hour was up, the oven is switched off and the meringue left there overnight. That lets it dry out perfectly.

So, the next morning, I opened the oven to take out the base.

Ah. It was as I thought. As I knew really, when I first put it onto the baking sheet. Despite whisking and using my copper bowl that dratted hot and wet air had wreaked havoc. It was OK but it wasn’t billowing into crisp peaks of perfection.

 It wasn’t the most beautiful meringue I have ever made but, what the heck. It was going to be the most delicious meringue I’d ever made and that’s what counts.

The next day was brighter and hotter than ever. I carefully peeled off the silicone paper and put the meringue onto a plate so I could take it to J’s house.

Once there, while he and N busied themselves with the barbecue, I spooned the delicious dulce lecheover the base of the meringue.

Just look at it….. thick and rich and caramelly

Next, great luscious spoonfuls of whipped cream

Then, pieces of delicious fudge scattered over the top….

And more whipped cream on that.

It was delicious. It was a triumph.

Which is more than you can say for the football.

England were out of the World Cup but the not-really pavlova was a winner. Not a scrap left. Depite it not being the most beautiful meringue base ever.

Don’t despair if your meringue isn’t perfect. Looks aren’t everything you know. Taste is.

Maggie’s Lemon Drizzle Cake … an homage to my aunt

As some of you know, my aunt passed away a few weeks ago. What you might not know is just how much of an influence she was on my life.

When I started this blog, I told you how I had spent a lot of my life not cooking. I ate, obviously, but I got other people to cook for me. I didn’t need to cook as I lived on my own and anyway, I was always travelling. I ate in great restaurants and had a marvellous time.

I come from a family that always celebrate things with a family meal. Every occasion was marked with a get together. My mother and my aunt used to swap occasions… Christmas Day, one of them would cook, Boxing Day, the other would do it. Whoever did New Year wouldn’t do Easter. Everybody’s birthdays were a reason to come together as a family and eat.

My aunt was a great cook and always made the most superb cakes. Her Christmas pudding really couldn’t be beaten and, since I started cooking,  I always used to ask for some to take home with me so I could use it in Christmas Pudding Icecream. She always believed that a person should be able to cook and, more to the point, be able to cook well.

She was so pleased when I started cooking and asking her how things were done. I used to ring her from my car as I drove the thousands of miles I used to do on motorways in my other job. She would tell me how I was supposed to make things and patiently go through the shopping I would need to get in order to make whatever it was she was helping me with. I would stop in some far away town, get my ingredients and carry on driving home. Then, when I got there, I’d ring her again and check I had everything right in my head.

She was the one who taught me how to cook ham properly….. she taught all of us.  My brother adapted her recipe and came up with Gingery. Which is, in our eyes at least, possibly the world’s most delicious roast ham. Her daughter, my cousin, has been baking for years and is the maker of the world’s most delicious chocolate cakes which pleases her sons and her nephew no end. My aunt was never happier than helping people learn – she was a teacher all of her life. She even taught my postman when he was a little boy and whenever I saw him he would always send his best wishes and tell me that my aunt and uncle were the best teachers in that school.

Anyway, while my cousin and I were sorting things out at my aunt’s house, she dragged me to a bookcase and said she had found this….

………An ancient copy of Mrs Beeton’s Book of Household Management.

My cousin said she wanted me to have it, tattered though it was, because it was something my aunt had had for years. It’s falling apart, as you can see and the covers are hanging off. I wish I’d asked my aunt about the book … who it belonged to before her and what she had learnt from it….anyway, I have it now and it is on my cookery bookshelves. You never know, it might get picked on the next round of Cookery Lotto!  How proud she would have been to think that I was even contemplating cooking something from it.

The very first cake she taught me to make was her simple and delicious Lemon Drizzle cake. I found the recipe in my cook book, scrawled on a piece of paper. She will have dictated that to me as I, no doubt, sat in the car at some motorway services, parked up in the rain.

I think she chose that as it is the simplest cake in the world to make and if she was going to entice me into the world of baking, she would need to make sure that I could manage. I think she was reckoning on a small cake, emerging triumphantly from the oven, would be the first in a line of cakes.

And, I suppose, in a way, it was. I decided, this weekend, to bake the Lemon Drizzle cake because it reminded me of her.

The ingredient list was simple and concise – 4 oz each of soft butter, caster sugar, self raising flour and a couple of large eggs. How hard could that be? And some lemons for the lovely drizzle to be poured over the top.

My note did say to cream the butter and sugar together and I’m certain she meant doing it with a wooden spoon… but you see the Kitchen Aid mixer? She bought me that as my wedding present. I have to use it, then, don’t I? I think she realised by the time I eventually got married that I was turning into a cook and a Kitchen Aid was going to be far more use to me in my married life than some standard wedding present of crystal or maybe bed linen. It was an incredibly generous gift, from an incredibly generous aunt.

A couple of the brilliantly golden-yolked free range eggs turn the mix into a vibrant yellow. Finely grate some lemon zest in there – you will be using the lemons later. Just remember to make sure you used unwaxed lemons and if you don’t, give the lemons a good scrubbing first.

That 4 oz of flour (she told me to sieve it) was folded in and then everything put into a lined loaf tin.

Those silcone paper tin liners are an absolute godsend. No more snipping about with pieces of greaseproof paper or baking parchment… the hours they must save across the world!

And into the oven for about 30-40 minutes at 140-150 degrees.

Now to make the lemon drizzle…

That too, is simple…. Just the juice of one and a half lemons and some icing sugar – a good 2 ounces.

(I know that whenever you see chefs on the TV they squeeze lemons in their hands but I always use that glass lemon juicer. I don’t think you need to get your fingers covered in juice and besides, the pips will always drop in whatever it is you are making. Anyway, you get far more juice out of the lemon or the lime with one of them than you do by just squeezing. Maybe my hands aren’t strong enough? )

Heat it gently in a pan until the icing sugar dissolves.

Then let it cool.

At the end of the cooking time, take the cake out and peel back the paper to let it cool for ten minutes or so.

Once that’s done, take a fork and prick over the surface of the cake

This will let the lemon sugar syrup sink in when you gently drizzle it over the surface.

And there you have it.

The simplest cake in the world… but also one of the most delicious.

Golden cake with a lovely, sweetly sharp lemon drizzle. The first cake I made and one that will always remind me of my darling aunt.

Thanks for everything, Maggie.

Toffee Apple Crumble

Because I have just got a new job (my contract arrived today) and my birthday is next week, we are having a couple of our dearest friends round for supper, to help celebrate.

I don’t normally make puddings or desserts for everday meals but when I am cooking for friends, I always do something. This wasn’t going to be a fancy, high-end cuisine extravaganza, this was going to be laughter and celebrating with friends – we wanted good food but easy food. I wasn’t looking to show off, just feed us all well and keep us happy and relaxed.

You know the kind of meal I mean.

I made broccoli and almond soup to start with and then for the main course I made slow roasted plate of beef, as I did at Christmas for other friends. The pudding had to be something that would fit well with that and as it was bitingly cold outside I felt I was justified in making what could, perhaps, be called a substantial pudding.

The weather has been improving recently and, at long last, there’s sunshine and brightness in the day time.  Soon, I’ll be moving towards lighter and fresher meals, something with more zing about them, but there’s time enough, I reckon, for one more rib-sticking pud.

Apple Crumble. That would be just the thing… the slightly crunchy yet soft, crisp top, over sweet and molten apples, with a river of thick cream poured over the top…. except…. except I wanted to make it even nicer. But how? I thought and looked through my cupboards…..

And the answer? Toffee Apple Crumble.

The secret ingredient? A bag of fudge – good, crumbly, buttery fudge.

First of all though, I needed apples. I wanted good, crisp and sweetly-sharp apples so these juicy Braeburns were perfect.

So, peel and cube those four lovely apples and then, because I am getting this ready mid-afternoon so all I have to do is tonight is pop it in the oven as we sit down to dinner and as I don’t want those apple pieces to look horribly brown

 the juice of a squeezed lemon sprinkled over the apple will keep all the pieces bright and also add a touch of sharpness, which will be a lovely counterpoint to the lovely sweet softness of the rest of the crumble.

After rubbing round a lovely deep oven proof bowl with butter, just drop the apple in and scatter with a sprinkle of sugar

And then… remember that fudge?

That needs cutting into smaller pieces and do try not to eat too many bits. Both the Bear and I might have stolen a piece or two…..

and scatter them amongst the apple.

Now you need to make the crumble, which is probably the easiest thing in the world to do.

In a big bowl put 300g of plain flour, 200g of softened butter and 175g of golden granulated sugar and start to rub it between your fingers so it blends together and starts to look a bit like breadcrumbs

         which can then be sprinkled over the apple and fudge pieces.

If you give the dish a gentle shake from side to side the crumble mix settles down around the apple.

And that’s it.

Now, though, for a confession.

Our friends arrived, just after 8 pm and we started toasting each other with pink champagne… then we started eating. I put the crumble into the oven at 180 degrees and we swapped to red wine to go with the long roasted plate of beef.  We were getting slightly giddy. We carried on laughing and pouring wine.

Then, forty minutes later, or thereabouts,  it was time to have pudding…. and oh, it was gorgeous.

Beautiful, bubbling fudgey-toffee-appley sauce coming up round the edges of the crumble… the smell…. oh it was beyond divine. The thick Jersey cream was perfect poured all over it…

So perfectly divine that I completely forgot to take a picture of it. 

All I can say was well, you know what crumble looks like – it looked like that.

What you need to know was that the fudge pieces were an inspired addition and it was so utterly gorgeous our friends took the rest of the bowl back home so their children could finish it off today.

The only other thing? I wish I had made another one so we could have some more today!

Fairtrade Fortnight (22 Feb – 7 March 2010)

A couple of weeks ago I got the following email from a friend I have known for years… years and years.

And I thought you all might like to see what she said, because we are, of course, not only massively interested in delicious cooking but we are all supportive of Fairtrade.

So, read on and see if you can do something. After all, baking is not just for tea-time….

To encourage fairer baking, Tate & Lyle  and cupcake queen and author Lily Vanilli, have developed a trio of delicious and unusual recipes using Fairtrade ingredients, which I am delighted to share with you.  You’ll probably be aware that the Fairtrade mark is the only independent consumer label that ensures farmers in developing countries receive an agreed and stable price for the crops they grow that covers the cost of sustainable production… so it deserves support

 
Two years ago, Tate & Lyle announced plans to move its retail cane sugars range to Fairtrade with no resulting price increase to consumers.  In the first year alone, this switch created a return of  £2 million in Fairtrade premiums for cane farmers.
I hope that you will feel able to support Fairtrade Fortnight  through your blog and encourage “Fair” baking during the run up to Fairtrade Fortnight. Maybe you would also try one of Lily’s recipes with a view to sharing the results with your readers?  What could leave a better taste in one’s mouth than a delicious cake made from fairly traded ingredients?!
Emma
Lily Vanilli’s Fairtrade Bacon and Banana Cakes
 
4 rashers unsmoked organic back bacon
150g ripe Fairtrade bananas (approx 2 small)
60g Fairtrade honey
100g unsalted organic butter (at room temperature)
40g Tate & Lyle Fairtrade caster sugar
140g organic plain flour (sifted)
1/2 tsp baking powder
Pinch of salt
2 large, free-range organic eggs (at room temperature)
Handful Fairtrade Brazil nuts (toasted & chopped)
1/2 tsp grated Fairtrade nutmeg
1/2 tsp Fairtrade ground cinnamon
12 paper cupcake cases


1. Lay rashers of bacon on a foil lined sheet and place in a cold oven with the temperature set to 200c for approx 20 mins or until crispy. Allow to cool

 2. Turn heat down to 180c

 3. Mash bananas with honey in a small bowl and set aside

 4. Sift together all the dry ingredients into a large bowl – flour, sugar, baking powder, salt

 5. Cut butter into small chunks and add to the dry ingredients, blend with an electric mixer on medium speed until evenly incorporated

 6. Add eggs, one at a time, beating after each addition

 7. Mix in the banana/honey mixture, spices and Brazil nuts to taste

 8. Spoon into cupcakes cases, filling almost to the top 

 9. Bake in preheated oven for 15 mins or until a toothpick inserted in the centre comes out clean

 10. Remove and leave to cool in the pans for approx 3 mins – then transfer to a cooling rack and leave to cool completely.

 Frosting:

55g unsalted organic butter (at room temperature)
325g Tate & Lyle Fairtrade icing sugar
1/2 cup (4fl oz) organic double cream
2 tbsp Fairtrade honey

 1. Beat the butter until smooth, then add half of the sugar, the double cream and the honey

 2. Continue beating, slowly adding the rest of the sugar to achieve a smooth, even texture

 3. Ice each cooled cupcake with a thick swirl of frosting and top with strips of cooled bacon and chopped Brazil nuts.

Fairtrade Devil’s Food Ale Cakes
 
115g unsalted organic butter (at room temperature)
45g Divine Fairtrade cocoa
155g Fairtrade ale (Honey Ale)
170g organic plain flour (sifted)
Pinch of salt
2/3 tsp baking soda
225g Tate & Lyle Fairtrade caster sugar
1 large free-range, organic egg (at room temperature)
3 fl oz (3/8 cup) organic buttermilk
12 paper cupcake cases


Preheat the oven to 180c

 1. Bring ale to the boil in a saucepan. Remove from the heat and stir in the cocoa.  Leave to cool until it reaches room temperature

 2. Sift together the flour, salt and baking soda and set aside

 3. Cream the butter and sugar together with an electric mixture until very light and fluffy (about 5 mins)

 4. Add the egg and beat until just incorporated

 5. Beat in the cooled ale/cocoa mixture

 6. Add the sifted dry mixture in three parts, alternating with the buttermilk in two parts – beginning and ending with the dry and beating after each addition

 7. Spoon the batter into a baking tray lined with cupcake cases (2/3 of the way full)

 8. Bake in preheated oven for 15 mins or until a toothpick inserted into the centre comes out clean

 9. Cool briefly in the pans and then transfer to a wire rack until cooled completely.

 Frosting:

1. Boil ale in a saucepan, remove from the heat and stir in the cocoa. Allow to cool completely – transfer to a bowl and place in the fridge if necessary

 2. Beat the butter until smooth

 3. Add the vanilla, ale/cocoa mixture and half the icing sugar and continue to beat. Gradually add all of the sugar – beating continuously until you reach a consistency you like

 4. Spread onto cooled cupcakes and top with shavings of Fairtrade chocolate and Brazil nuts. Or do as I did and just add more chocolate!

Fairtrade Burnt Butter, White Chocolate and Brazil Nut Cookies
 
280g organic plain flour (sifted)
1/2 tsp baking soda
1/2 tsp salt
170g Unsalted organic butter (at room temperature)
220g Tate & Lyle Fairtrade light brown sugar
100g Tate & Lyle Fairtrade granulated sugar
1 large free-range organic egg (at room temperature)
1 free-range, organic egg yolk (at room temperature)
1/2 tsp Fairtrade vanilla essence
Handful Fairtrade white chocolate chunks
Handful Fairtrade Brazil nuts (chopped)
Zest of one Fairtrade lemon


Preheat oven to 150c

 1. Sift together the flour, baking soda and salt

 2. Melt the butter in a saucepan and heat, stirring continuously until brown bits begin to form at the bottom of the pan (approx 5 mins)

 3. Beat the melted butter together with the light brown sugar and granulated sugar until smooth 

 4. Add the egg & egg yolk and beat to incorporate into sugar/butter mixture

5. Set the mixer to a low speed and gradually add the sifted dry ingredients

 6. Add lemon zest, chocolate and Brazil nuts to taste

 7. Roll dough into 2 inch diameter balls and lay on a lined baking sheet, approx 2 inches apart, bake in preheated oven 15 mins or until brown around the edges and soft in the centre.

So what do you think? Fancy a try at any of these? It’s not just for our own enjoyment – well, it is, but think of the greater good – this is your chance to help Fairtrade!

Thanks, Emma!

(Oh, and have something nice for tea!)

Cooking with kids… gluten-free Bear Bars

When I was a kid, we used to spend Saturday afternoons watching the wrestling on TV. Not the kind of wrestling that’s on now – in those days it was English wrestling with the likes of Giant Haystacks and Big Daddy. And, I have to say, we watched it on a black and white television. My parents didn’t really like us watching television, so it was only while they were out and we were being looked after by one of our parents’ more indulgent friends that we could manage to sneak the TV on.

It was all faked, you know. The wrestling, that is. But we used to love it. I’m sure we should have done something more constructive, but, somehow, sitting down on the floor with a bag of sweets and watching staged fighting was great fun. I suppose we knew, even then that it wasn’t real, which is why it didn’t frighten us all. Kids are OK with play acting.

Actually, now I think of it, I’m sure we couldn’t have watched wrestling every weekend. For one thing, I can’t believe that our parents would have been out every single Saturday. Funny how things like that stick in your memory.

It would be nice if I could be part of a child’s memories of growing up though…….

Last week my friend came round with her daughters and we made pasta and we had such good fun that we decided to spend this Saturday afternoon cooking something else. We needed to choose something that the children could make easily at home and it would be good to make sure that the   something was something that would taste good enough, while being healthy, and might just replace chocolate biscuits.

This time, one of their brothers came with them. We decided to make Bear Bars, but as I was trying out recipes to see what they were like gluten-free, we thought we would adapt our usual recipe and make sure that everything we used would be safe for coeliacs.

I got my little helpers to carry the jars of nuts, seeds and fruit from the larder. Because I want them to learn that so much of cooking is just good judgement (well apart from fancy sugarwork or pastry, say) we got out a big bowl and a scoop. I wanted them to see that cooking could be relaxed and fun.

We had pistachios, goji berries, green sultanas, dessicated coconut, raw flaked coconut, chopped mixed nuts, golden granulated sugar, ground almonds, dried cranberries, raisins, two small jars of Bramley Apple Sauce (thank you, Tesco!) two eggs and, because we were making this for coeliacs or gluten intolerant people

instead of using my normal wholewhat self raising flour, I bought gluten free flour and (and this is a rarity, according to my coeliac friend, A)  porridge oats that are guaranteed to be gluten free.

It’s not the oats that cause a problem…. it’s the fact that they are usually processed in a factory that processes other grains so the oats are liable to pick up some trace of contamination. For a coeliac this can cause (even in minute amounts) severe problems. If you are using oats make sure that they, like these, are made in a controlled environment and are certified as being gluten free.

We started off with two scoops of gluten free porridge oats

A scoop of gluten free self raising flour

And then we set about, taking turns, adding a scoop from every jar. The one who scooped, couldn’t stir… the one who stirred could scoop the next time.

We loved looking at all of the different colours.

All of the dried ingredients have to be mixed together with a scoop of sugar and a pinch of salt added.

With a bit of help, two eggs were cracked into a jug and enthusiastically whisked with a fork and that, along with the contents of two small jars of Bramley Apple Sauce into the big bowl and stirred round.

This was probably the hardest bit of the job – partly because they both insisted on mixing the egg and apple in together.

One of the good things about having lots of ingredients was that it makes lots of Bear Bar mix. That means the two of them could have a flapjack tin each to spread out the mix

I’d lined the tins with silicone sheets so the bars would be easier to get out once they were baked and the two of them decided to race each other to see who could get the smoothest mix….

The oven was lit , heated to 160 degrees and the tins went in for half an hour.

Now, good and clever those children are (they knew, for example, the difference between herbivore, carnivore and omnivore)  they somehow hadn’t managed to grasp the concept of time….

“Is it half an hour yet? Are you sure? I can smell the Bear Bars… are they ready?”

Eventually they were. The only problem I had then, was keeping them from snaffling some until they were cooled.

The children went home clutching a ready supply of gluten-free Bear Bars, that, I have to say, were no different from normal Bear Bars.

The only question they had was that if they were made for the Bear (our lovely Omnivorous Bear) was that because they had everything in that a Bear would eat? I said yes, of course.

“So where’s the meat, then? A bear would eat wolves and there’s no wolf meat in there”

How very true. We appear to have made gluten-free and wolf-free Bear Bars.

Saturday – snow bound breakfast

Even though it is the weekend, I still wake up before 6am, just as I do for work.  And, just as I always do, I go, quietly, upstairs to our kitchen to make coffee and look out at the city below us.

It’s been snowing again and even though we are right at the top of our apartment block and even though it is bitterly cold with the wind howling past, the snow is piling up against the windows.

I know I said I wanted to be snowed in but this is ridiculous.

This is not the morning for having a cold breakfast. This is the kind of morning that something like a fried egg sandwich, say, is just what is called for. White bread, all soft and giving, with a hot, fried egg, sizzling as it drops on to the bun, then oozing golden egg yolk down your chin as you bite into it.

There is, as there so often is, a problem…. we have no white bread. There’s time enough, though, to make some buns  – and, as an added bonus, putting the oven on will help warm the place up a bit.

As I get the flour out of the larder, I see there’s a recipe on the back of the Hovis bag. I usually make slow risen bread, bread that has some texture, taste and strength to it, but today I want soft, white rolls. I just want fresh white bread that will mop up buttery, eggy, tomato saucy dribbles…….

Good old Hovis, eh?

500g of flour, 25g of butter, 1 and a quarter teaspoons of salt, 1 and a half teaspoons of fast action yeast (that’s one sachet of the instant yeast),  300 ml of warm water and 2 teaspoons of sugar ( that adds flavour and thickens the crust, apparently)

Add the dry ingredients to the flour and mix them through (it’s the only way to make sure it all mixes evenly before you add the butter and the water) Then add 25g of butter – cut it into pieces so it is easier to deal with

Then, using the tips of your fingers, rub the butter through the flour – you need to get the bits of butter evenly distributed through the flour… just rub it through till there are no more big bits left

Then add 300 ml of warm water and stir it together.

I wanted to go and read the papers on line while I drank my coffee (that weighing and mixing everything together only took a few minutes) so I put it all in my mixer, with the dough hook and set it away to knead.

You can do it yourself, of course, but luckily… I don’t have to! I left the Kitchen Aid  whirring softly, at a gentle speed, for five minutes as I read about the widespread snow and the probability of more.

There you go… beautifully silky dough, ready to make into buns and let it rise.

A quick roll into bun shapes, then pop them onto a silicone sheet on a baking tray and cover them with a dampened tea towel to stop the dough getting a crust before it is ready to bake.  The buns need to rise for an hour or so before you bake them

But it was, still,  just after 7 am so there was plenty of time before I needed to make breakfast… and it was snowing again.

The oven went on at 230 degrees and when the dough had doubled in size… in those buns went for half an hour so so…

Oh they were lovely! The kitchen was warming nicely, the smell of baking bread was filtering downstairs to wake the Bear….. beautiful little plump, white breadbuns emerged from the oven… time to get the breakfast ready

There are some lovely free range eggs from the farm shop….

some butter to spread on those warm buns….

a squirt of tomato sauce…..

Breakfast bliss…….now that was an easy way to happiness.