….and there was ginger beer, lashings and lashings of ginger beer!

It sounds like an Enid Blyton novel, doesn’t it?

Well that’s what it could have been… the Famous Five go wild in 

Sherwood Forest.

And that’s why there has been no real cooking…..

What happened is that  5 friends decided to hire a villa in

 Center Parcs in Sherwood Forest for a girls weekend.

The villa was fabulous with a flat screen television, a real fireplace,

comfy seating for all of us and free internet access.

The living room windows opened out onto that fantastic view.

And at the edge there was a lovely river.

There were ducks and swans and moorhens

Some of them came to stare through our windows in

the hope of getting something to eat…..

Swans appeared and pecked at the windows as we walked past

And those of you who are friends with Omnivorous Bear on Facebook

will recognise one of the victims being pecked!

It was like a Disney movie with all the animals coming up

to the window to ask for food.

There was even a strange dark grey swan.

The Subtropical Swimming Paradise was just that….. with rock pools and spa pools.

We lazed and chatted in the bubbles, we swam outside in the heated pools in

the moonlight…

 …and careered down water rapids, face first.

 And because it was Sherwood Forest, home of Robin Hood ,

we took archery lessons.

Walking through the woods, we  found  toadstools – the Amanita muscaria 

– the sort of toadstools you might expect to see with gnomes…..

Or even small bears…

We hired bicycles and cycled through the woods….


and got something to eat from the pub…..

And raised glasses to ourselves as we made toasts to what was turning out to be

 a brilliant weekend.

And that’s where the ginger beer entered the equation…

Crabbies Alcoholic Ginger Beer to be precise.

Oh it was delicious…and oh, how it made us laugh!

That would be the 4% alcohol, I bet.

And I’m assuming that none of the real Famous Five had THAT kind of kick

from their ginger beer!

And that is why there was no real cooking….

we were too busy laughing and eating and drinking!

Cheers girls! It was a fabulous weekend and you were all fabulous company.

                                                                                                                             Normal service will be resumed shortly.

Angela’s Apples … another T.O.B Cook

Everybody, welcome Angela, the newest T.O.B. Cook. Angela is my dear friend from the North.

We were both Northern girls and adored our birthplace… but I married and moved to the Midlands to be with the Bear and she married and then moved away even further. She’s ended up in Georgia, USA.

Angela’s the one I think of when I try and do gluten-free food as she is coeliac (or celiac as they spell it in the USA) We keep in touch, most days, through email and Facebook and she follows what happens on here. She’d read the posts on Apple Butter and Apple Butter Cake and, after a jaunt out with her neighbours where she picked apples, decided to see what she could do….this is what she wrote to me this morning:

“I needed to make some bread so, I thought, as I was putting the oven on, I might as well make the apple cake. And as I was chopping apples, I thought, I might as well make the apple butter. OK, I’m not a novice in the kitchen, but I’m not an accomplished chef either…. maybe it was all a bit over-enthusiastic…

Oh, I started off by sterilising the jars and the lids – in the dishwasher!!! Only the Americans could come up with such an easy way? That gave me a couple of hours to get everything done….

So I mixed the gluten-free bread mix, put it in the laundry room to rise. That gave me 45 minutes….

I chopped all the apples, putting 4 ½ lbs in a pan with apple cider vinegar, which then got left whilst I…

… made the cake mix. I used “Bob’s Red Mill All-Purpose Baking Flour” to which I added Xanthan Gum. I had no yoghurt so used low fat sour cream. I, for some reason, bought brown sugar instead of caster sugar.

I, for some reason, bought canola oil and can’t find out why.

(I’d already been shopping on Thursday, but then went back up again on Friday! But – I did see a good yard sale……)

Vanilla pods were replaced by ‘fake’  vanilla and I had no bicarb!!! Instead of “3 smallish apples and a box of stewed apple” I used 3 large apples – too many apples to be honest!

45 minutes was up, so the bread and the cake went in the oven.

Apples by this time had been left for over an hour… but were nicely mushy. I don’t have a Mouli and, to be honest, I do as little transferring and dirtying of dishes as possible.

(Hey, I’d already used two bowls for the bread, two bowls for the cake, chopping boards, pans, cake tins, bread tins…. the kitchen looked like a massacre… and by this point last night’s empty wine glass kept catching my eye….)

So, I used ‘Billy Blender’… I have to say I thought it would be really sharp – apples plus cider vinegar, but it tasted good – so no sugar was added.

It was 6.30, what about tea? So on top of all that I started making a salmon and prawn risotto.
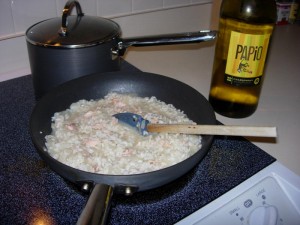
Stir the apples, stir the risotto. Wine was required for the risotto……

Bread was taking an age, so turned the oven down for the bread and the cake. I think they were both in for an hour, maybe the cake was in for a bit longer.

Risotto was nice, if a little too much wine had been added!!!

Bread was normal – takes longer than it says on the packet, but gets there in the end.
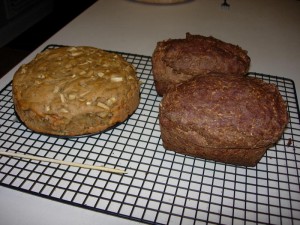
Cake was absolutely gorgeous. Very moist – quite heavy. As I don’t eat cake or biscuits very often it was absolute bliss. I had been cooking since 4.30. By now it was 8 – 8.30 pm.

The spoon was leaving a trail. So…. jar filling….

What the hell happened?!?!?
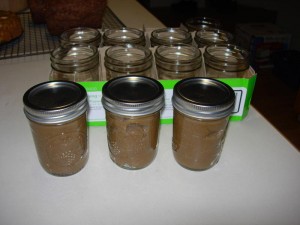
3 jars? 3 jars is all I got.

Four bloody hours of cooking and I got 3 measly 8 oz jars!!!

I’d bought 12 Mason jars! Cost me 10 bucks!

4½ lb of apples and I got 3 measly jars. What went wrong?

I used 4½ lb  and I got 3  jars.  Lorraine got 10 jars – dunno what 14 cups translates as? You used 3lbs – how many jars did you get?

Maybe I cooked it for too long? Maybe I didn’t cook it for long enough – it’s more like jam/spread than ‘butter’.

It tastes OK – very, very rich taste though. But with vinegar – no need for sugar, which is good?

I won’t be making apple butter again, but will, most definitely, make the cake! And bread. And risotto…..”

I read all of this when I got to work in the morning and yes, I laughed.

Not in a mean way, you understand, but as I often laugh when I read her emails. I could just picture her glaring at the pans and staring at the wine bottle. I laughed at the thought of her looking at the canola oil and wondering why she bought it. I could just imagine her outrage at only ending up with 3 jars… “THREE measly jars”.

I suppose I should have told her than when I did my second batch of Apple Butter I did, in fact, use at least ten or twelve pounds of apples….

Still, she has cake that she can eat while she plans going out to get more apples!

Let her eat cake, I say…..

Roasted pumpkin seeds

Sometimes we all need a little treat.

I don’t tend to buy crisps, crackers or olives  to nibble at with a glass of wine unless we have guests. I don’t know why… maybe I think we don’t deserve it or maybe it is that we are fat enough and having extras isn’t a necessity. Perhaps I think it is a needless extravagance?

But you know what? We do deserve to have something every now and again. After all, the person I like best in the world would be sharing them with me and I’m happy enough to put stuff out for people I don’t love half as much.

So, what follows is the ideal compromise. It’s healthy, it’s tasty and it doesn’t cost very much at all.

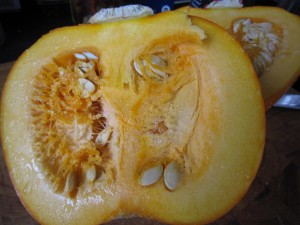
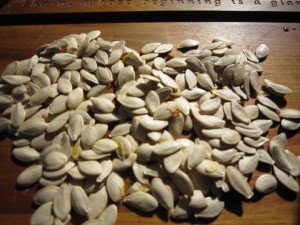
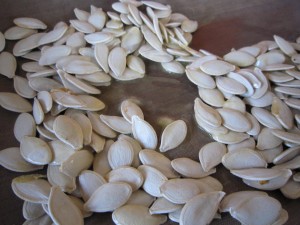
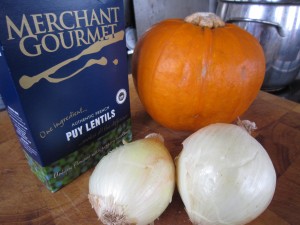
I’d bought a small pumpkin to make some Puy Lentil and Pumpkin Soup and I’d had to scoop out all of those plump seeds. What better than to use something that others might just throw out?

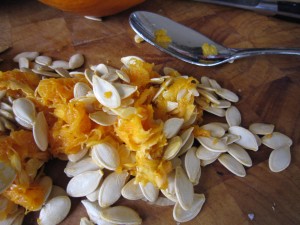
They are all embedded in the fibrous middle but they are easy enough to remove if you gouge at it all with a spoon.

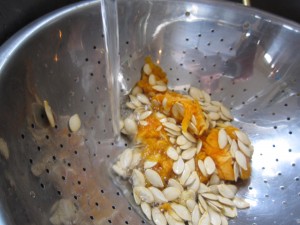
If you put them in a colander and run water over them it’s quite easy to pull the orange fibres off, leaving just the seeds behind. They will feel very slippery so give them a good rub in fresh water.

Once they are clean, spread them, out on a board and leave them to dry off.

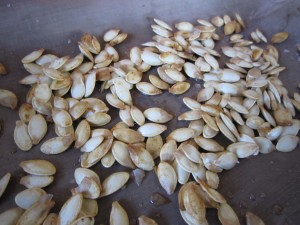
This time I wanted plain and simple butter and salt roasted pumpkin seeds (I often make them and flavour them with things like chilli powder or spices ) but there’s something rather delicious about the plainness of the roasted seeds… plain, certainly but tasting deliciously of butter and salt!

Get a flat baking tray and put a knob of butter and some salt on it (I always use a silicone sheet because it is so easy to clean and doesn’t tear if you scrape at it. If you haven’t got any, it doesn’t matter – use tin foil or be prepared to clean the baking tray)

Put the tray in a pre heated oven at 200 degrees C/390 degrees F and get the butter melted and hot.

Toss the pumpkin seeds in the melted and salted butter and put them back in the oven for ten minutes or so.

After ten minutes, give them a shake… they should be browning nicely.

Put them back in if they need a few minutes more – this will depend on how much moisture was left in the seeds.

Once they have cooled… put them in a bowl and share with your best friend.

A glass or two of wine makes this the perfect pre-dinner snack – healthy, tasty and all it took was a knob of butter, ten minutes and some otherwise thrown away seeds!

Meatfree Monday – Puy Lentil and Pumpkin Soup

At this time of year, the shops start to fill with pumpkins. Halloween is not far off and millions of pumpkins will be bought to make into Jack O’Lanterns.

You can’t just buy a pumpkin and carve it… you have to DO something with it. Last year I made Pumpkin Soup, flavoured with smoked sweet paprika and drizzled with Chilli Oil

I separated the seeds from the fibrous middle and roasted them with jerk seasoning to make a tasty roasted pumpkin seed snack

This time, though, I wanted to make a soup that would be a meal in itself.

I had a small pumpkin that would be ideal for soup. I also had a craving for something with a bit of spice because I had a cold that was dragging on. I needed a burst of heat in that soup to burn through the fogginess that an autumn cold makes you feel.

I remembered a soup I had seen in the Australian Gourmet Traveller for Green Lentil Soup with Pumpkin and Harissa that would be perfect. My little sister lives in Australia and sends me (if I’m not there to buy a copy) the Gourmet Traveller Annual Cookbook as my Christmas present… the fact it costs way more in postage to send than it costs to buy is neither here nor there – it truly is the magazine I most look forward to getting.
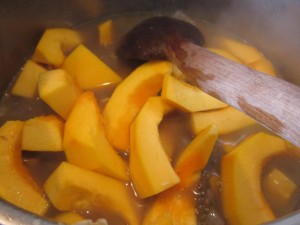
It looked a fabulous recipe. I knew that adding my favourite Puy lentils would add heft to the soup and jazzing it up with Moroccan spices would enliven the whole bowlful.

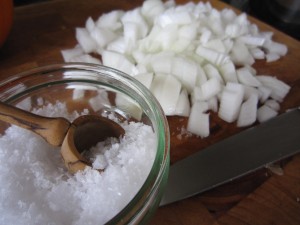
I chopped two sweet white onions, then put them in a pan to soften with a teaspoon of Maldon Sea Salt.

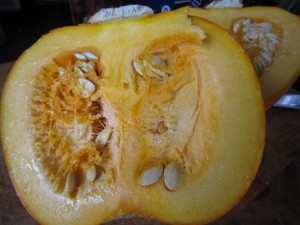
While they were cooking I halved the small pumpkin I had and scooped out the seeds.

Don’t throw the seeds away, because you can roast them later for a lovely, healthy snack.

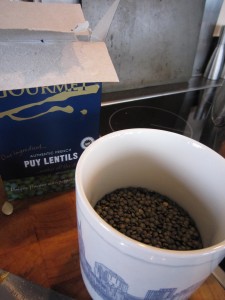
I roughly measured half a mug of Puy lentils – now, this is one of my Starbucks City Mugs that roughly hold 20 fl.oz, so the equivalent measurement will be 10 fl oz if you use a Pyrex jug… or, about a full normal coffee mug size. Me? I like coffee so I have a very big mug!

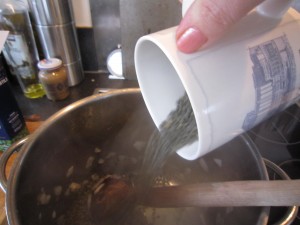
Once the onion has softened and looks translucent, add the lentils and then pour in a mug and a half of water (that’s roughly a pint and a half) and let the onion and lentil mix slowly cook.

Add in a vegetable stock cube for flavour.

While that is gently cooking, start preparing the pumpkin.

The rind of the pumpkin in very hard and I have found that the best way to peel it is to cut the pumpkin into segments and then slice off the rind.

By the time you have it all segmented, the lentils will have started to soften and the colour will have leached out into the water and stock.

Now add in the segmented pumpkin

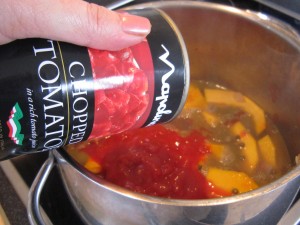
And then add a tin of chopped plum tomatoes.

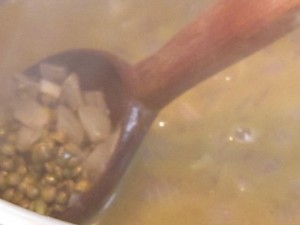
Stir it all round and let it simmer gently.

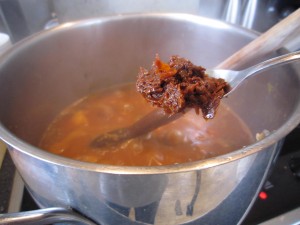
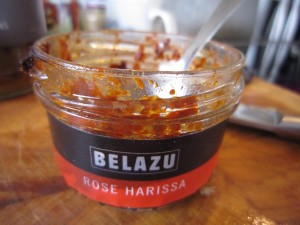
I wanted a bit of heat in the soup and a Moroccan feel so Rose Harissa paste was the obvious choice. You can buy Harissa paste in most supermarkets now – this one has rose petals in it and a deep and complex flavour. It is essentially a chilli paste so add it according to your preference. A teaspoon full will not make it too hot – if you want more heat (and I do) add another.

Stir it in so it blends with the lentils, pumpkin and tomatoes.

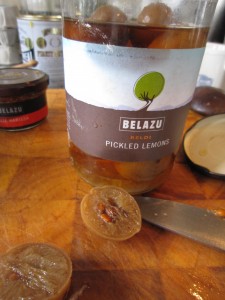
I also have some Belazu Pickled Lemons which will add a marvellously sharp-sour element to the rich and earthy soup.

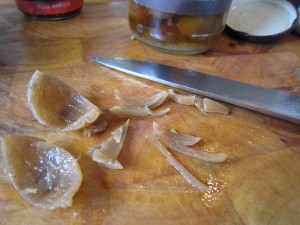
A quick scoop out of the middle of the lemon and the rind is ready for slicing then adding to the soup. I used two small lemons.

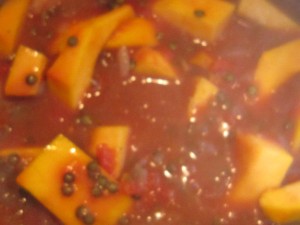
And then stir it all round… the pumpkin should have softened, the lentils will be tender and the flavours will have come together to make a deep, rich, spicy soup with sharp overtones

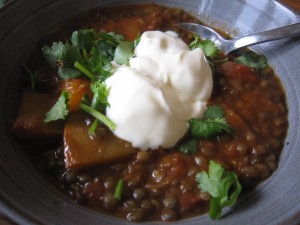
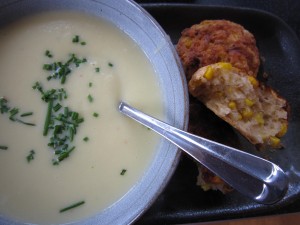
Serve it in a bowl with a spoonful of natural thick yoghurt and a sprinkling of coriander.

And there it was. Steaming perfection in a bowl.

Meatfree and delicious.

Hot Toddy for a cold

There’s a reason for me being so quiet over the past few days… I have had a cold that has made me feel dreadful.

A rattling cough, a pounding head and aches all over made me feel so bad that I actually came home from work.

I knew what I had to do, of course.

The best cure for a cold is to go to bed, clutching a hot toddy and try and sleep.

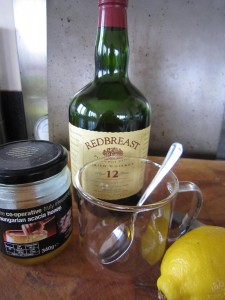
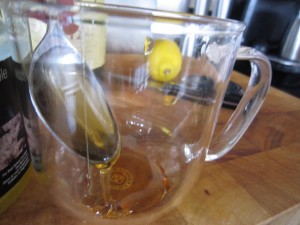
So, first of all, a spoonful of lovely honey in a mug

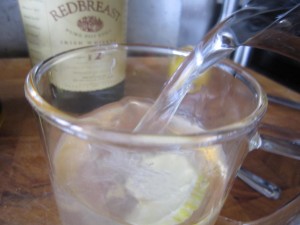
The juice of half a lemon and a slice of lemon go in next, topped up with hot (but not boiling) water

Then stir it round to make a hot, sweetly-sharp mix

Then, to help those poor, tired muscles relax and the pounding head to ease…. find a bottle of whiskey.

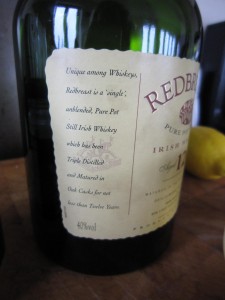
This is Redbreast, a gorgeous Irish pot still whiskey (there’s a difference, you know – Scotch whisky is classed by some as the only true whisky and it is spelled without the ‘e’. Irish whiskey has the extra ‘e’ and gets an extra distillation. Three as opposed to Scotch’s two) It doesn’t matter what you use – that was just at the front of the drinks cupboard.

Just a drop or so adds a deep, soothing, rounded flavour to the hot honey and lemon… and with a couple of cold cure capsules is the ideal medicine for a rotten cold.

The next step is the most important – get off to bed and curl up while you sip your hot toddy. Cocooned in a duvet and propped up on pillows, the delicious hot toddy soothes and relaxes….

Sleep really is the best medicine, you know.

After a couple of hours of sleep I felt so much better.

Just remember that, next time you have a dreadful cold!

Remembrance of Things Past… madeleines for an anniversary tea.

One year ago today I started this blog. I can’t believe how many things I have cooked since then. One good thing about writing about what I cook is that I have been forced to cook new things. I know how easy it is to rely on the same old favourites all the time. I have been inspired by reading all the blogs my new friends have written or have pointed me to. I have made things I had just previously read about and discovered that things are never as tricky as they might seem. All it ever takes is a bit of time to read things through so you understand the process and love and determination in your heart. My main inspiration is the Bear – I just want to make good things for him… and after all, this blog is named after him.
When I look back at all the posts I’m amazed that anyone read them or that they continue to read them.
I had to celebrate a full year of blogging and all the friends I have made because of it. I’d love to be able to celebrate with you all here.. maybe laughing and talking about the past year over cups of tea and cakes….

And that made me think of Marcel Proust. And madeleines. Proust talks of eating a madeleine with a cup of tea and being transported back to earlier times….

She sent out for one of those short, plump little cakes called petites madeleines, which look as though they had been moulded in the fluted scallop of a pilgrim’s shell. And soon, mechanically, weary after a dull day with the prospect of a depressing morrow, I raised to my lips a spoonful of the tea in which I had soaked a morsel of the cake. No sooner had the warm liquid, and the crumbs with it, touched my palate than a shudder ran through my whole body, and I stopped, intent upon the extraordinary changes that were taking place…at once the vicissitudes of life had become indifferent to me, its disasters innocuous, its brevity illusory…”
— Remembrance of Things Past, Volume 1: Swann’s Way.

What better cakes to bake for a wet Sunday afternoon when I want to look back on the last year?

The rain was lashing against the windows and all over Britain people were staring at the dismal weather and deciding to stay inside. We were going to do the same but I was going to make tea time special to celebrate this special day.

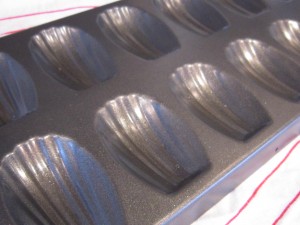
To make madeleines you need a madeleine tin. These have a wonderful scalloped base that are essential for the perfect madeleine. You won’t regret buying one (if you need any encouragement, that is) If you are looking at kinds to buy, avoid the silicone ones – the metal heats better and is  much easier to handle than a wobbly, rubbery tray.

You also need good instructions and the best I have found (after intensive searches) is from David Leibovitz  on “Living the sweet life in Paris”

First of all melt, then let cool, 120g unsalted butter.

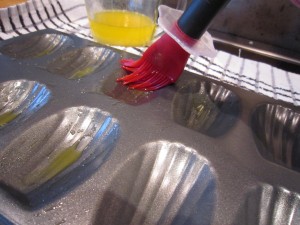
You will use most of it in the cake batter but just lightly brush the madeleine tins with a quick wipe of melted butter.

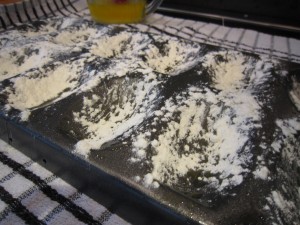
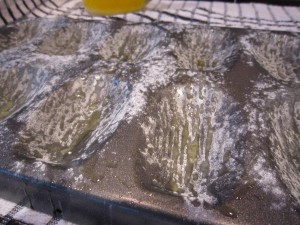
Sprinkle the buttered tins with flour

Then upend the tin over the sink and shake off the excess.

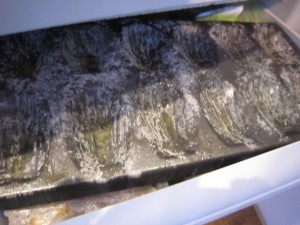
Put the tin in the freezer to chill down properly.

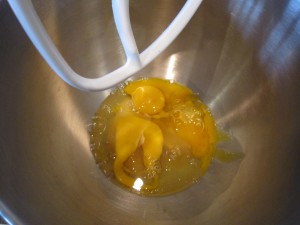
In the bowl of a mixer, put a pinch of salt, 130g of golden granulated sugar and three large eggs (that have been allowed to come to room temperature)

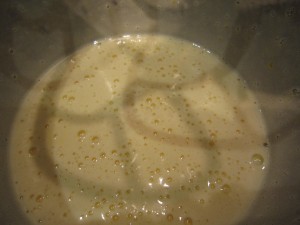
Whisk them together for five minutes until the mix becomes pale and thickens slightly.

Weigh out 175g of fine plain flour – I always use ’00’ (it’s available in most supermarkets now, in the baking aisle) and add 1 level teaspoon of baking powder. The baking powder makes them rise well, giving the traditional (and desired) “humpy” effect on the back of the finished madeleines.

Sieve the flour mix into the egg and sugar bow and fold it in carefully.

Zest a lemon and add it to the melted butter. Remember to scrub the lemon if it is a waxed one.

Once the flour is in, add a little of the melted butter and fold it in gently.


Gradually, add it all slowly and carefully. Don’t overwork it because all that will do is toughen the gluten. Just fold it in as lightly and smoothly as possible.

Pour your beautifully smooth and silky batter into a jug and put it in the fridge for at least an hour. You can make the madeleine batter up to 12 hours ahead, if that will suit you?  What a great thing that would be if you had people coming round!

When you are ready, heat the the oven to 220 degrees C/425 degrees F

Get your beautifully frozen tin from the freezer

… and spoon in a dollop of the madeleine mix

The madeleines will only take between 8 or 9 minutes, so while they are baking, make some  tea.

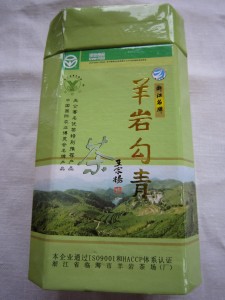
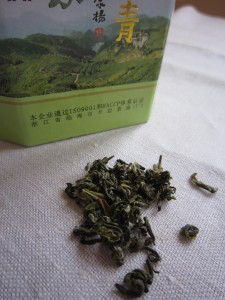
We love beautifully fragrant green tea and I think the pure, delicate taste would be perfect with the light, sweet cakes.

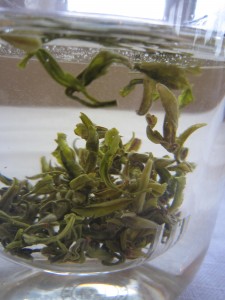
As the tea infuses the leaves unfurl.

At the same time,  the madeleines are ready.

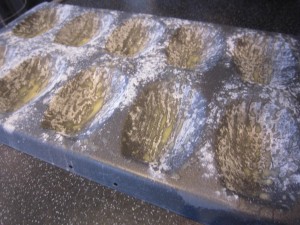
Beautifully humped and golden.

They are tipped out onto a wire rack to cool slightly. The underside has the gorgeous scalloped markings of the perfect madeleine.

Golden, sweet, warm cakes. Light and delicious.

We ate them with our steaming cups of tea as we looked back over the past year. We used the random post picker button on the main website page (which you can also get to by clicking on the Bear in the top corner) and read about meals and treats and smiled as we did so.

The weather may have been awful but the madeleines were fabulous.

Happy Anniversary to the blog!

Red cooked shin of beef

The weather has definitely changed. The winds are getting stronger and I have started to wear a coat to travel to work.

It been raining a lot as well and when I look out of the window of my office at work I can see waves being whipped up on the lake.

Even the ducks, swans, geese and the heron are all in hiding.

You can see the trees are being bent over in the strong winds. The rain is splattering against the window and the skies are getting more grey.

What we need is something warm and sustaining. I want meat… I want tasty meat. I want something to fill me and make me smile.

So I decided upon shin of beef which is a British, inexpensive cut of meat from the front legs of cattle. Just over 500g costs  just over £3. That’s enough to easily feed four people. Shin needs long and slow cooking which transforms it from incredibly tough to  the most melt in the mouth meat ever, with a real depth of flavour.   If this cut isn’t familiar to you, look at the link  which shows you the difference between American and British cuts of beef.

When you look at shin of beef you can see the tendons and the fat running through it. This has to be cooked slowly and the meat becomes transformed into the most tender morsels imagineable. The gravy served with it reduces and becomes intensely rich and flavoursome. It is perfect in a beef stew with dumplings  and that, I have to say, is how I normally cook it.

Except this time I wanted something different. I wanted something with a bit of a zing to it…and I had a fancy for some kind of Chinese flavouring. I have always adored the taste of star anise flavoured sauces and I remembered that when I was a poor student and wanted a treat I would order fried rice with a drizzle of Chinese barbecue rib sauce on it. That would be it. Just rice with some sauce… I think the takeaway was used to poverty stricken students asking for the bare minimum. (Mind you, there was an Italian restaurant in town that once served a group of us a side dish of peas between us because that was all we could afford and one of our friends fancied someone working there…)

Anyway. Here I was, years later, with enough money to actually buy some meat and I was going to make the most of it. I didn’t have a classic Red Cooked Beef recipe but I could make a fair attempt at it. No doubt the purists will think this isn’t the way to do it but this works for us. The flavour at the end is amazing and that’s good all we are concerned with.

Slow cooked meat is the easiest thing in the world. All it needs is time. You really do very little to it.

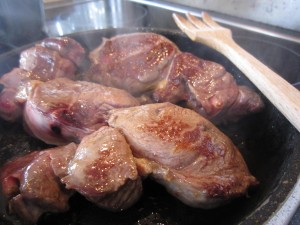
First of all, sear the outside of the beef as this gives it a good colour and a better taste.

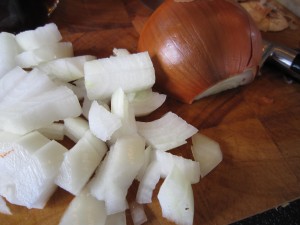
Chop an onion into pieces. There’s no need to worry about making it neat – after a few hours in the slow cooker this will jsut disappear into a lovely rich sauce.

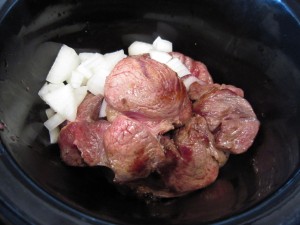
Put the onion in the bottom of the slow cooker (or casserole dish if you are using that) and lay the browned meat on top of it.

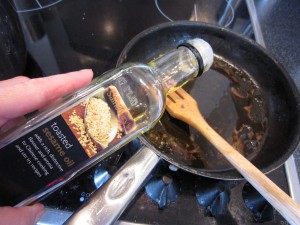
Add some oil to the pan juices (yes, I know that using sesame oil might seem extravagant, but once oil is opened you must use it as it will go off. You might as well use it in an appropriate dish rather than waste it. The delicious smell will disappear, I know, but you know the mantra, waste not, want not!) Use vegetable oil if you have it. What you are doing is getting the rich caramelised bits of meat from the pan.

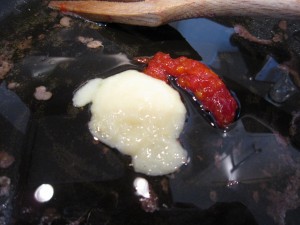
Stir in a good teaspoon of minced ginger, the smae of garlic and half a teaspoon of  chilli – here I am using the tubes of freshly minced herbs and spices a) because I have them and b) my chillies have failed this year and my ginger is dried up and horrid. They are great to keep in the fridge, ready for an emergency. Add a good splash of soy sauce to add a salty, savoury element.

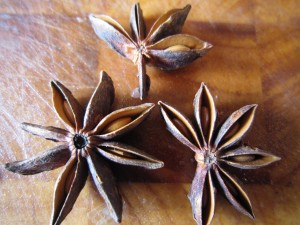
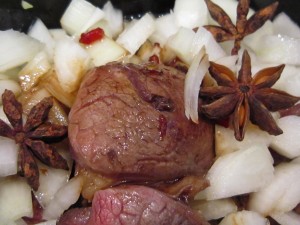
And star anise. Aren’t they beautiful?

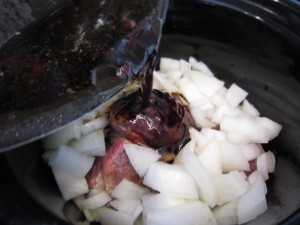
Pour the oil and meat juice mix over the meat and onions and add the star anise.

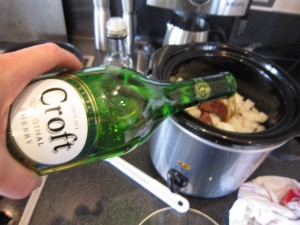
Normally I’d add Chinese rice wine but we had none left… we did have sherry though and that is a good compromise. Half a cup of sherry adds an extra layer of aromatics to the dish.

A cup of water is added to bring the liquid content up to almost the top of the onion and meat. Don’t cover it, though as that will boil it and toughen the meat. You are aiming for a lovely gravy that will cosset the meat until it relaxes into tender submission.

And that’s it. Five minutes to prepare.

All you have to do now is to start the slow cooker, or put your casserole in the oven on a low heat and then just walk away for a few hours. Relax and enjoy the sense of anticipation.

Four hours later, the apartment smells of delicious, fragrant, spicy meat.

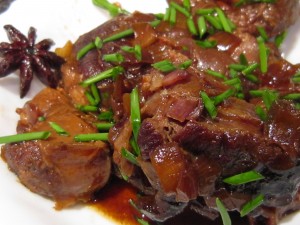
The meat is so tender it just falls apart when I lift it out with a spoon. The long, slow cooking has turned the tough meat into soft and delicious morsels.

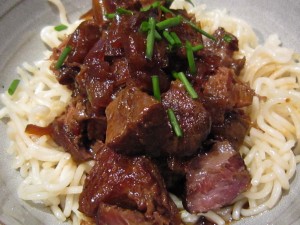
Served in a bowl on top of some noodles with a few snipped chives over the top of it and we had the perfect supper. Delicious, tasty, spicily aromatic beef piled on top of soft and filling noodles… heaven in a bowl.

It made the grey day go away and we felt warm and happy.

What more could you ask for? A meal that tasted delicious and cost £1 per serving. That’s pretty good going.

Cheese and Sweetcorn Scones

When I made the delicious Roasted Garlic and Marrow Soup, I wanted something to go alongside the soup to make it a substantial lunch as I knew we weren’t going to be eating until late that night. What better, I thought than a savoury scone? One still warm from the oven? Maybe a good cheese scone would be just the thing.

Those of us who are British will know what I mean by a  scone – it’s what American’s call biscuits. What they call cookies, we call biscuits. Confusing, eh?

(A scone is an essential part of a British tea and  as Wikipedia points out ” According to one academic study, two-thirds of the British population pronounce it /?sk?n/, rhyming with “con” and “John”, with the preference rising to 99% in the Scottish population. The rest pronounce it /?sko?n/, rhyming with “cone” and “Joan”. British dictionaries usually show the “con” form as the preferred pronunciation, while recognizing that the “cone” form also exists”. I say “skon”  and as my husband will tell you, I am invariably right……..)

When I walked to the local shops I saw that the greengrocer was selling corn on the cobs, locally grown.

I knew from experience that these were sweet and delicious so I bought a couple. I’d seen a recipe in Good Food for cheddar and sweetcorn scones  so I thought this was the ideal opportunity and recipe to try out. I got some really good Cheddar from the Farm Shop and came home, knowing that it wouldn’t take more than half an hour to get them made.

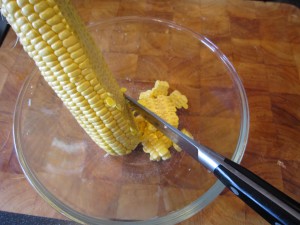
The first thing to do was to cut the sweetcorn kernels off the cob. The easiest way to do this is to stand the cob in a Pyrex jug or bowl and run the knife down so the kernels fall into the jug. If you don’t do this then the kernels scatter everywhere. I know this because I have done it. What that means is that you then waste time looking for the sweeping brush and clearing up the mess. Do it in a bowl or a jug, eh?

It’s quick and its easy.

The next thing is to cook the kernels quickly. I  put a knob of butter in the bowl and microwave them for a couple of minutes if I am serving the corn as a side dish, but as these were to go into scones I decided that a small amount of water would do just as well. Adding extra butter to the recipe would skew things. It will only take a couple of minutes and then you can drain them, ready for the next step.

Start by heating the oven to 220 degrees C/430 F.

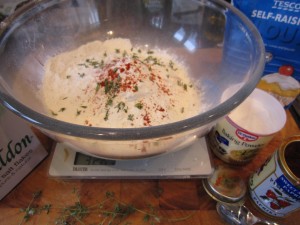
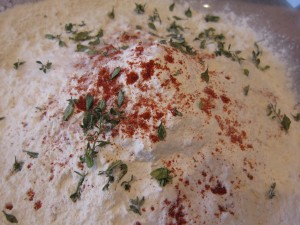
Mix, in a large bowl, 350g self raising flour, 1 teaspoon of baking powder, ½ teaspoon sweet smoked paprika, 1 teaspoon of salt  and some thyme leaves.

The original recipe called for mustard powder too, but mustard is one of the Bear’s Big Hates so I tend to avoid it whenever possible.

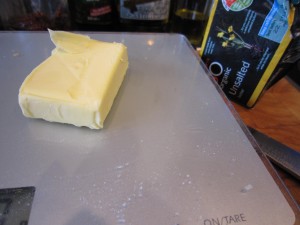
50g of unsalted butter must then be rubbed through until the mixture looks like fine breadcrumbs.

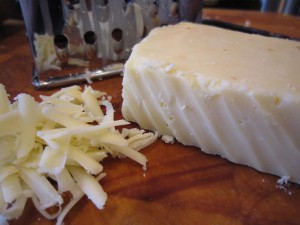
Grate 175g of good strong Cheddar cheese and add most of that to the flour mix.

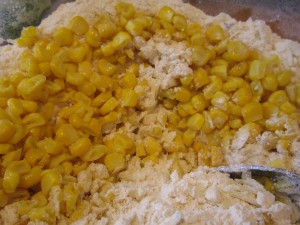
Add all of the cooked and drained sweetcorn and mix it all well, so there’s an even distribution of ingredients.

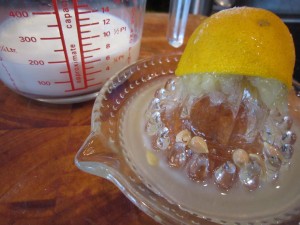
Add the juice of half a lemon to 175ml of semi skimmed milk.

My mother always used to save soured milk for scones when we were little… which makes me wonder, did milk go off more quickly years ago? I hardly ever have soured milk nowadays. maybe it is that fridges are better?

So, with no soured milk available, lemon juice does the job.

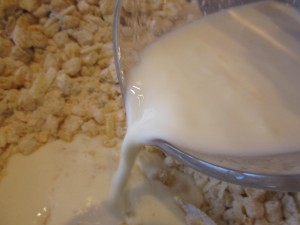
You can see that the milk looks almost lumpy… the lemon has acted on the milk, souring it and that’s the way to get perfect scones.

Mix it all together.

The dough will be sticky, but don’t despair and DON’T faff about with it. You need minimal interference for scones, otherwise the gluten in the flour toughens then and you end up with hefty, solid lumps, when you were wanting light and delicious morsels.

Sprinkle some flour on the board and knead the dough briefly so it comes together.

Make into 10 or 12 little balls by roughly rolling them.

Flour a baking tray or a silicone sheet on a baking tray and put the scones on.

Brush them with some milk, then scatter them with the rest of the cheese, some paprika nd any remaining thyme leaves.

Into the oven for 10 to 15 minutes until they are risen, golden and sound ready… that is, when you tap the bottom, they should sound hollow.

And just look at them!

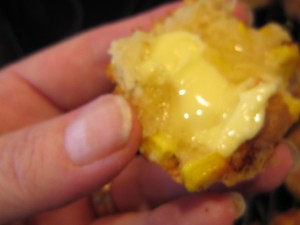
Of course, we had to try one with some butter to see how they were……..

Before I served them with soup for lunch.

A perfectly light and deliciously tasty scone makes a great accompaniment to soup and now that the weather is changing I’m going to be making a lot more. Whyever wouldn’t I when in half an hour I can have beauties like these emerging from the oven?

Meatfree Monday – Roast Garlic and Marrow Soup

It’s the time of year when everyone who gardens starts to look around for people to take their extra produce off their hands. There are messages at work telling people if they want apples or pears they can help themselves, people come to work carrying bags of fruit and vegetables and we all start to look for recipes to use up the glut. This week’s harvest is vegetable marrow.

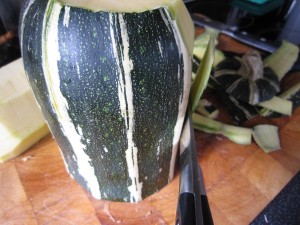
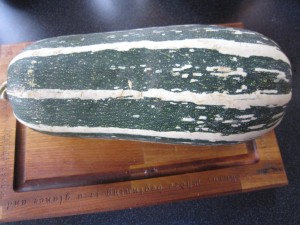
Vegetable marrow, for those of you who aren’t British, are a kind of squash with a very pale, slightly sweet flesh. They are quite large, as you can see – that’s one lying across my large chopping board – and when they are ready for harvesting, there are bound to be lots of them. That’s quite a lot of marrow to deal with.

I need to think of something tasty and warming. I also need to keep an eye on the calorie count. It’s so easy to go wild when the weather turns cold and treat yourself with calorific goodies. I want the best of both worlds – rich and delicious as well as low calorie and healthy.

The weather is changing and this weekend has been very grey and miserable. The temperature is dropping and the winds are picking up. Looking out of our windows I can see rain coming down on the horizon and it is moving our way. I want to stay inside and be cocooned in warmth and comfort.

Soup, I thought. A big bowl of silky, tasty soup. That was what I needed.

Now, vegetable marrow has a very delicate flavour that can, if handled badly,  seem insipid. What I wanted to do was enhance its lovely sweetness and one way of doing it is to add roast garlic to the soup. Garlic, when roasted, develops a lovely sweetness of its own and it works well with the pure taste of the marrow.

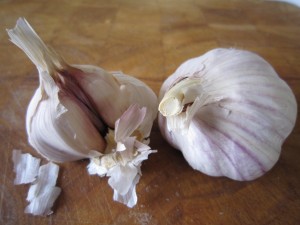
So, first roast your garlic. I have one and a half bulbs, which might seem a lot but once garlic is roasted gently it loses its pungency and becomes almost sweet.

Heat the oven to 200 degrees C/390 degrees F.

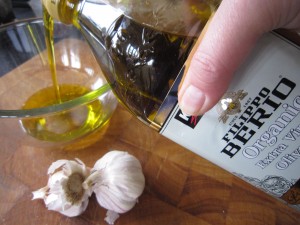
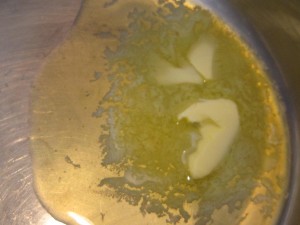
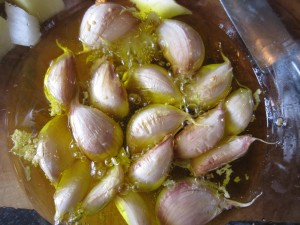
While the oven is getting to the right temperature, pour some olive oil into a heatproof bowl. You need enough to cover the cloves of garlic, but don’t worry – once the garlic has cooked gently you can save the oil to use again. Not only have you made a necessary ingredient for your soup but the by-product is a gorgeously flavoured garlic oil that you can use in all sorts of things later.

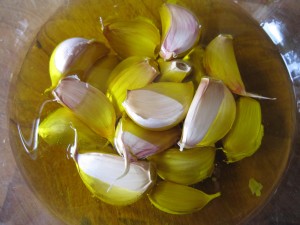
Separate the cloves, removing the outer layer but leave the skins on. Put them all in the bowl with the olive oil, making sure there’s enough oil to cover the cloves and put the bowl in the oven for 10 to 15 minutes.

While that is cooking, get started on the marrow.

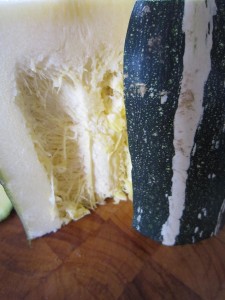
The skin of a vegetable marrow is extremely hard so the only way to peel it, I found, is to cut the marrow into manageable pieces and then cut the skin off.

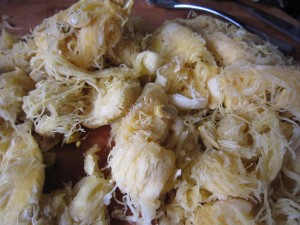
Scoop out the seedy, fibrous middle and cut the flesh into cubes.

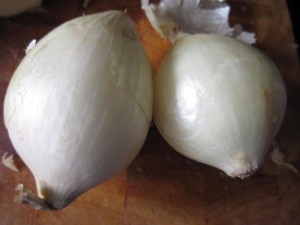
I wanted to emphasise the sweet and aromatic flavours in the soup, so I chose sweet white onions for the base.

A good tablespoon of butter was heated in a large pan. And when I say large pan, that’s what I mean.

Until the marrow cooks down you will end up with what seems like an enormous quantity so use your biggest pan.

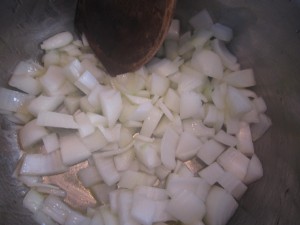
Peel and dice the onion and start to soften it gently. Add a pinch of salt to keep the onion soft and white. You don’t want burned or browned onion as the final soup is a lovely pale cream colour.

By now, the garlic will be cooked so take the bowl out carefully and remove the cloves of garlic with a slotted spoon so they can cool enough to be handled. Remember to keep the oil and bottle it when it is cooled so you can use it later.

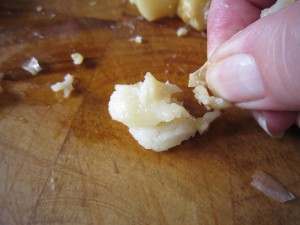
Once you can touch the garlic cloves easily, snip the end off the papery outside covering and squeeze out the soft white inside.

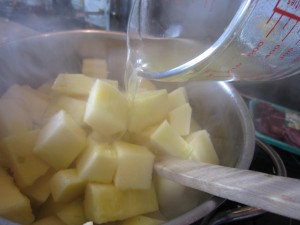
Add the garlic, the marrow and a pint and a half of vegetable stock.

Add a small amount of chilli. I get those tubes of chilli, ready prepared, and keep them in the fridge. Very labour saving and, seeing as this year’s chilli harvest has been a dismal failure to date, an absolute god-send.

Stir everything round, bring to the boil, then cover and simmer gently until the marrow is soft.

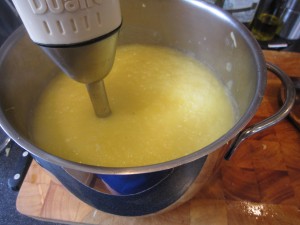
Whizz the softened marrow mix to a smooth consistency.

You’ll see that it looks rather watery and it needs something to pull it together into a rich and delicious soup.

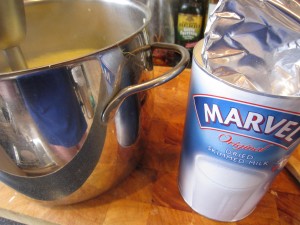
And this is it.

Dried skimmed milk powder. Almost totally fat free.

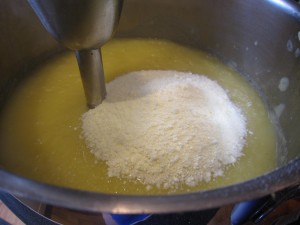
Adding a ladle full of Marvel will make the soup taste rich and creamy with negligible addition of fat. Trust me, this is a brilliant way to make soup taste like it is made with cream. You have plenty of liquid already in the soup base, the milk powder dissolves into that  and enriches the whole pan without adding extra liquid.

Whizz it round and you can see the texture change from  an almost granular in appearance puree, to a smooth and silky soup base.

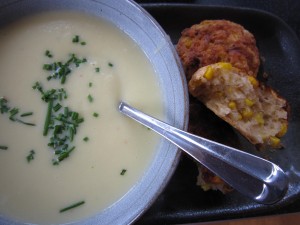
Snip some chives to go on the top of the soup and serve it up.

That was, when served with some savoury scones, absolutely gorgeous.

Each big bowl of soup contained minimal calories yet it felt as rich and luxurious as if it was made with double cream. Of course, if I had been really serious about cutting calories I wouldn’t have made the scones as well…. but hey ho. It’s a start, isn’t it?

Vanilla Vodka cocktails

After the great news that over a thousand people had, this month so far, looked at the blog, I thought I deserved a celebratory drink.

Yes, I know it was a work night but some things deserved to be celebrated. It was time, I thought, to try the vanilla vodka. I’d had great success with the basil vodka and tomato essence cocktail  so maybe the vanilla vodka would prove to be as much of a triumph.

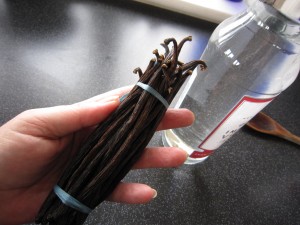
I’m very lucky in that all of my lovely friends know how much I love cooking and when they travel I am often the happy recipient of some local delicacy. Far better that than a teeshirt with the name of a resort on it, I always think. I have had gorgeous cheeses from Catalan, spices from Istanbul, chorizos from Spain, sweets from South America, bush herbs from Australia, strange herbed alcohol from Germany, delicious vodkas from Poland, salamis and cheese from Italy… but possibly the most luxurious of all was a gorgeous bundle of vanilla pods from Flores, Indonesia.

Friends of ours, C & C, had gone on a wonderful trip, island hopping round Indonesia and when they returned they sent me a parcel through the internal post at work. I’d collected the post from the post room and walked back to my office, wondering what the parcel addressed to me was… and why it smelled so deliciously of vanilla.

I couldn’t believe it when I opened it… all those pods. Now THAT is luxury on a grand scale.

There were 25 plump, juicy and aromatic pods.

You know how expensive vanilla is…I’d never had so much vanilla. This was my chance to experiment.

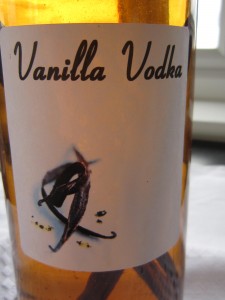
Apart from cakes and sweet things, I had wanted to try infusing vodka with vanilla.  All I needed was a bottle of vodka and I was ready to go.

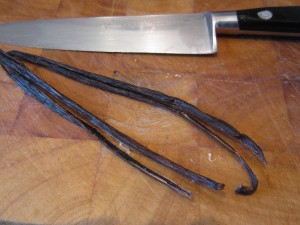
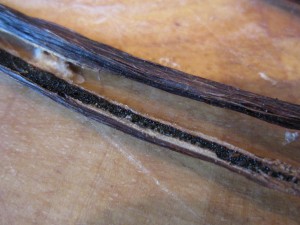
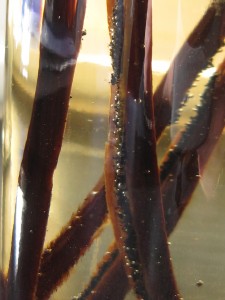
When I slit open the pods they were absolutely crammed with glistening black vanilla seeds.

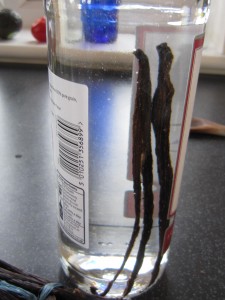
They just had to be dropped into the bottle.

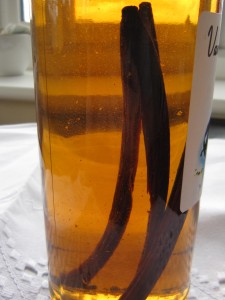
Within half an hour the vodka had started to take on a gorgeous golden brown tint as the essence of vanilla seeped into the alcohol.

And that was it. I left the bottle in the larder, with the pods releasing their flavour, for a couple of weeks. I was saving it for a special occasion.

And now, it seems, was a special occasion.

I’d been looking around for cocktail recipes involving vanilla infused vodka and a recurring theme involved using ginger ale. According to what I’d read it tasted like “creamsicles”… now I haven’t the faintest idea what that was but it sounded good to me.

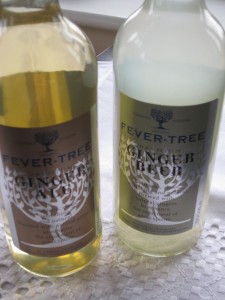
When I called in, on the way home from work, to buy some ginger ale, I saw Fever-tree Ginger Ale and Ginger Beer so I bought that. Fever-tree mixers are probably the best I have come across (and yes, that is an independent choice by me. No bribery here.) Their tonic is my favourite to have in a Gin and Tonic

I thought I’d see what was best, ginger ale or ginger beer.

First of all, we tried ginger beer.

One generous measure of vanilla vodka was poured over ice

And then topped up with Fever-tree Ginger Beer.

Verdict? The Ginger Beer is a powerful drink with a hefty kick of ginger, which rather overpowered the smooth and luxurious vanilla vodka. You could just about tell it was there but, as the Bear said, putting the vanilla vodka in there was probably just a sneaky way to get someone tiddly. As a ginger beer by itself  though, it was fantastic with a gorgeous bite to it. And I say that as someone who happens to be a ginger beer connoisseur.

On with the experiment… well I was entitled to celebrate, wasn’t I? Ginger Ale next.

More vanilla vodka, poured over ice

… and topped up with ginger ale….

It was delicious. It was creamy and smooth with a gorgeous overlay of vanilla and a bright tang of ginger. very more-ish.

As to whether it tastes like a creamsicle or not, I have no idea. Whether I will do it again?  Yes, I definitely will.

Vanilla vodka is a winner whether you drink it neat, poured over lots of ice or add it to a mixer.

And to think it is as easy to make as that. Get some vanilla pods and a bottle of vodka and invent a reason to celebrate yourself!

Thanks, C & C… or, as it should be,  CHEERS!