Breakfast for a Bear

I do my best to make sure that Bear is fed properly and the most important meal of the day, as my Granny always said, is breakfast.

What else would I make The Bear, then, but porridge? But it is no good just making him healthy food – it has to be delicious as well….. so here is how to make Porridge for a (sometimes) Grizzly Bear!  This sweetens an early morning start and makes sure he starts the day properly, because boys and mornings aren’t always the best mix

Bear's breakfast, slow roast pork 002

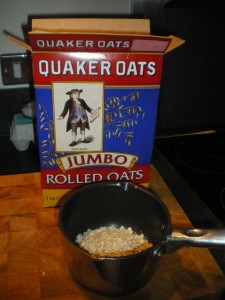
First, get your oats….. and your spurtle.

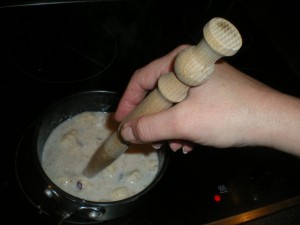
A spurtle is, as I am sure you are aware, a porridge stirring stick. Surely you have one? And if not, surely you are now inspired to get one? It makes the porridge smooth and creamy…. There’s even a porridge making championship where the winner of the most delicious porridge is awarded The Golden Spurtle.

Porridge 002

A tiny pinch of salt added when you put the milk in rounds out the flavour.

Porridge is all well and good but to make it delicious then you have to add good things to it

Bear's breakfast, slow roast pork 003

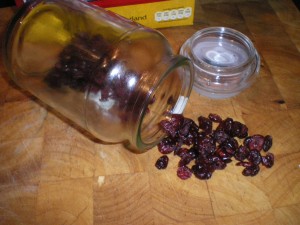
At the moment, one of the Bear’s favourite things to have in there are sweened, dried cranberries

Bear's breakfast, slow roast pork 004

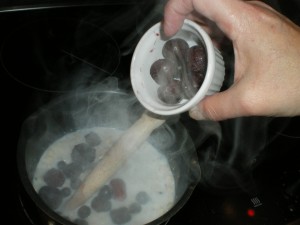
And I always have frozen fruit in the freezer so as the porridge nears the end of the cooking I add a handful of cherries, blueberries, raspberries and redcurrants to the bubbling mix… the heat from the porridge thaws out the fruit to perfection

Bear's breakfast, slow roast pork 006

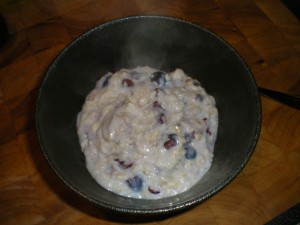
Another gentle stir with the spurtle and you are ready to put it in a bowl

Bear's breakfast, slow roast pork 007

… but not quite ready to serve…..

Bear's breakfast, slow roast pork 008

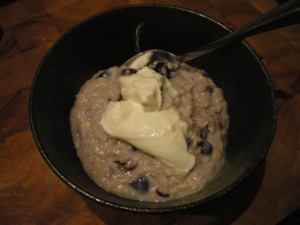
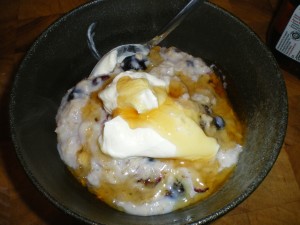
A dollop of yoghurt on the top

And then the finishing touch

Bear's breakfast, slow roast pork 012

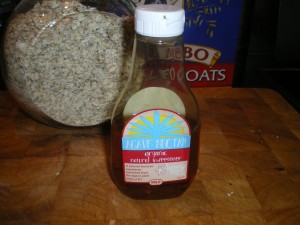
I used to put syrup on his porridge but I have started using Agave Nectar, which a natural sweetener from the Agave cactus… less calories but really, really gorgeous, rich and deep, sweet and delicious

Bear's breakfast, slow roast pork 010

So there you have it.. healthy and delicious. Guaranteed to feed even the hungriest Bear and keep him going for hours.

And it takes maybe 5 minutes to make. Oh the brownie points you can score with this…..

Garlic and Rosemary Focaccia

Well, if you are going to make soup then you need bread to go with it. You could buy stuff, I suppose, but as we are becoming Domestic Goddesses and nothing fazes us… obviously, the way forward is to make the world’s easiest bread.

Soup and Foccacia 003

All you need is less than an hour,

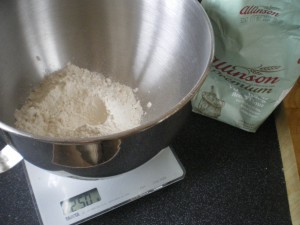
250 g of strong bread flour

Soup and Foccacia 004

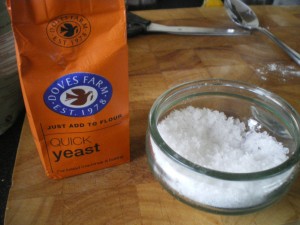
7g of instant yeast (that’s a sachet or a teaspoon of instant packet yeast – yes, you eagle eyed baking detectives, I am using a different packet from the  last time. Just thought I’d give it a go, that’s all)

Olive oil

Garlic

Rosemary

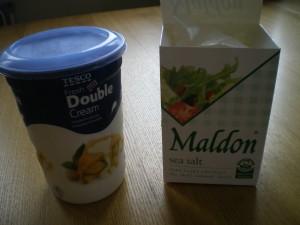
Salt – you know I love that lovely, crunchy, large crystalled Maldon.

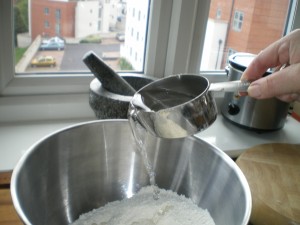
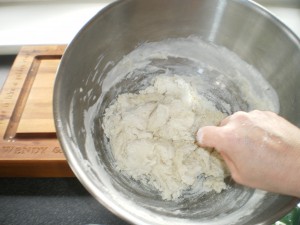
In a large bowl, put the flour, yeast and a teaspoon of salt and add 1 tablespoon of olive oil.  I did it in my food mixer because (am I boring you with this? I only have one working arm you know) I needed to give it a good mixing and there’s only so much I can do…. add in 150 ml of warm water and mix it till it becomes a smooth dough.

Soup and Foccacia 005

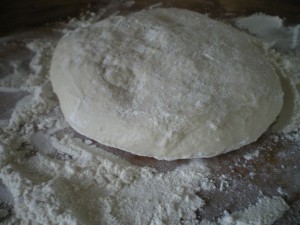
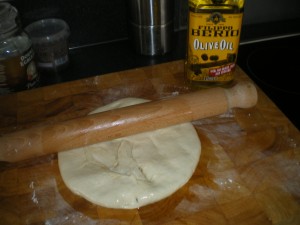
Get it out onto a floured wooden board and knead it till it looks smooth and bouncy. Then, on a clean surface, put down some olive oil, flop the dough onto it and using a rolling pin, roll it out…

Soup and Foccacia 006

It just needs a rough roll to get it smoothed out.

I use silicon sheets – you can get them anywhere nowadays – I even got some in a Pound Store.  Absolutely brilliant for baking and cooking with. Anyway, put a silicon sheet on a baking tray and put your oiled dough on there.

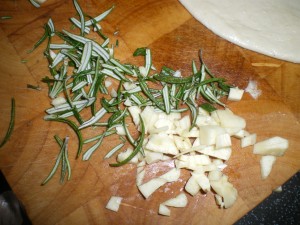
Chop some garlic and rosemary leaves finely

Soup and Foccacia 007

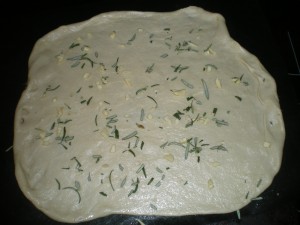
… then scatter it over your dough, then sprinkle it with lovely crunchy salt

Soup and Foccacia 008

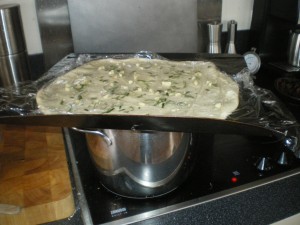
You need to let the dough rise in a warmish place for half an hour or so. Cover it in greased cling flim and let it rise.

I have been known to help it by standing the baking tray on top of the soup pan. Apart from anything else it frees up bench space so you can have a quick wipe down…

Soup and Foccacia 016

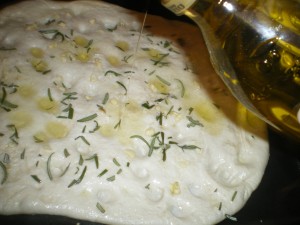
Then, when it has risen up and become puffed up and bouncy. turn the oven on to 200 degrees and while that is heating, peel back the cling film, poke the foccacia all over with your fingers and drizzle it with olive oil

Soup and Foccacia 026

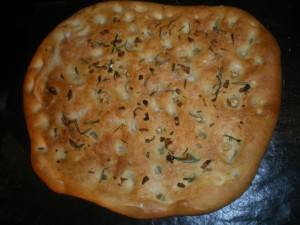
Into the oven with it for fifteen or so minutes until it is golden brown

Soup and Foccacia 031

Let it cool just a bit and then…. serve it up. Beautiful garlic and rosemary focaccia, perfect for your soup…. in fact, just perfect.

Mmmmmm…. Mushroom soup


So. It’s cold. I’m bored and then H rings to tell me I have some temping work when I can work again. That cheers me up immensely but I feel even happier when H says she has been reading this blog. And she has a request – H wants soup, mushroom soup in particular. Well, what H wants, she can have… and that also solves the dinner dilemma. I hadn’t the faintest idea what to cook and now I know.

I set off to the greengrocers to get the necessary ingredients… mushrooms! Mushroom soup is easy and simple but it can equally easily be given extra bits to make it more luxurious.

Soup and Foccacia 013

I got mushrooms – a brown paper bag full.

An onion and some garlic.

Some single cream

I already have dried mushrooms at home – but you don’t have to add them if you don’t want to.

Chicken or vegetable stock cubes or granules.

And my added extras – I have yoghurt in the fridge and from the cupboard some porcini powder and truffle oil for drizzling

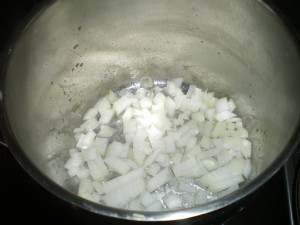
First of all, chop onion and saute it

Soup and Foccacia 011

Putting salt in keeps the onion soft. You don’t want crispy brown onions as the basis of the soup.

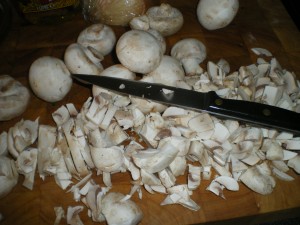
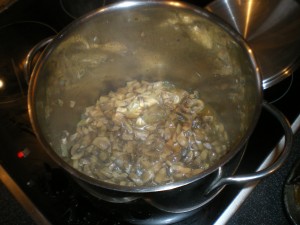
Chop your mushrooms roughly – it doesn’t matter because you will be whizzing them later to get a deliciously smooth soup. Add that to the softened onion and throw in a couple of chopped garlic cloves. You’ll see all the juices start to come out and it starts to smell gorgeous. Add a couple of stock cubes, crumbling them into the mix.

Soup and Foccacia 014


Soup and Foccacia 018


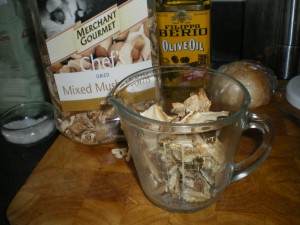
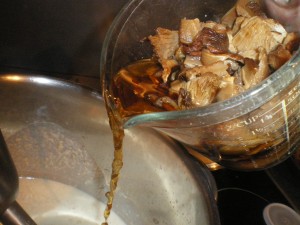
The next bit isn’t essential but it’s what I’m doing today… I have decided to add dried mushrooms to the soup for extra flavour. Packets of dried mushrooms usually contain, amongst other varieties,  porcini mushrooms which have a deep, intensely mushroomy flavour. Get a jug and put some dried ‘shrooms in… top up with boiling water and let it steep

Soup and Foccacia 012


Now that soup base is coming along beautifully – how about making it even more delicious?

Soup and Foccacia 019


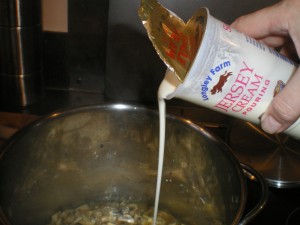
Yup. Add some cream.

(But here’s a handy hint.. you can use milk instead or… and this is so handy to know… always keep some dried milk in the larder. It is always skimmed milk powder and that means lower fat, obviously. If you add the dried milk powder to the liquid of the soup, whisking it well, or using the hand blender, then you keep the liquid balance right but add flavour whilst not adding fat! It does make it taste creamy and rich and unlike a pot of cream, it stays in the larder without going off! Result eh? Try it. It works. )

Soup and Foccacia 022


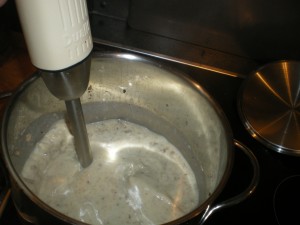
Then this is when those brilliant hand stick blenders come into their own. Start whizzing it to make a lovely smooth base…


Now, if you are using the dried mushrooms, this is where you add the mushroom water

Soup and Foccacia 023


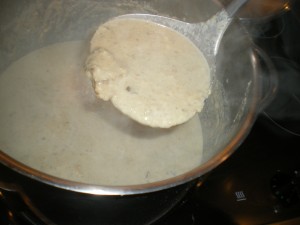
See how it has taken on the colour of the rehydrated mushrooms? Stir it all in and check the taste… it might need a bit of a lift from something.. salt? Pepper?

I leave the rehydrated mushrooms mainly whole, those I do a quick whizz round to partially chop them (The Bear tells me he prefers it all whizzed smooth but I like pieces of mushroom in it. It’s up to you. Do what makes you happy)

Soup and Foccacia 029


Now for some added extras – if you want to add them do so. If you don’t……then don’t.

Soup and Foccacia 028


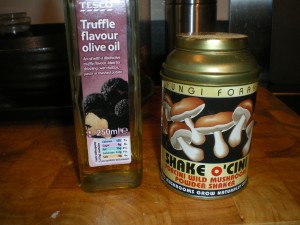
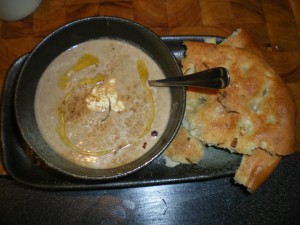
The truffle flavour oil can be drizzled across the top to give a really heavenly truffley, mushroomy scent and the porcini powder dusted over the top of that for another layer of ‘shroomy luciousness.  Drop a spoonful of yoghurt in the middle, drizzle and dust away and you get this…..

Soup and Foccacia 032

 So, mushroom soup – as simple or as layered as you’d like.  If you make the foccacia bread to go with it you can expect yet more declarations of love from those around you.

Going to do it then?

Cracking crackling

What can you get for £3.50 these days that will feed everyone? Not an awful lot unless you are prepared to put just a little bit of effort in… and when I say a little bit of effort that’s all I mean. That and planning to start things maybe 5 or so hours ahead. When  I went North, one of the things I did was go to the  butcher’s and I got a lovely piece of rolled belly pork.

Bear's breakfast, slow roast pork 015

Belly pork… with crackling…. that has to be good. And the effort involved?

Bear's breakfast, slow roast pork 016

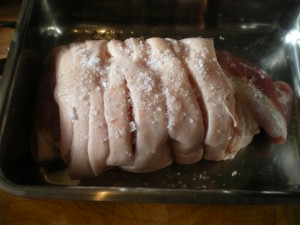
Pat it dry… and then rub salt in the scored skin. The butcher will do that for you to save you having to run amok with a sharp knife – and let’s face it, he will have sharper knives than you will. Then, put the oven on as high as it can go and get it really hot. Only when you are sure that the oven is heated properly, put the pork in and let that meat sizzle! What you are doing is making a start on the world’s most delicious crackling!

Bear's breakfast, slow roast pork 021

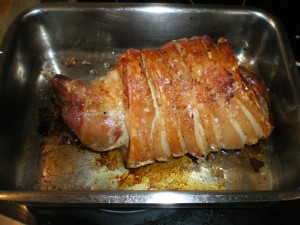
See? Half an hour or so and it has started to brown and crisp. There’s your  effort… you turned the oven on and kept an eye on the time. Now you can turn the oven down to 120 degrees or so and just leave it to cook slowly for the next 5 or so hours.

You can do what you like for a while then although, I suppose, you do need to think of vegetables to go with it. Not too much work there, either……I decided that shallots and apple would be just the thing to go with the pork – the shallots would be lovely, cooked slowly till they were soft and savoury and some apples (scrumped from my aunt’s tree) added to it to sharpen things up a bit and offset the richness of the pork… and maybe some roast potatoes just to make it all come together?

Bear's breakfast, slow roast pork 017

       I’d also bought some broccoli that I thought might come in handy … well, I do so love it and if I slide some on the Bear’s plate, he will make a vague attempt to eat it … and I was thinking that maybe steamed and with a sprinkle of oil and lemon juice on? Hmmm? See that WOULD be nice, wouldn’t it?   

We have rosemary and sage growing in pots on the balcony so I went and got a few snippets, stripped the leaves from the stems and chopped it roughly

Bear's breakfast, slow roast pork 022

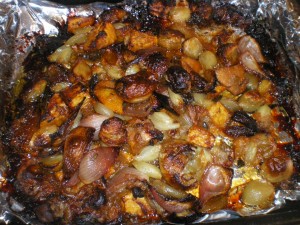
 Then I peeled the shallots and the apples, sprinkled them with some salt, oil and the herbs… oh and a red onion peeled and quartered (well, it was just sitting there, asking to be included)

Bear's breakfast, slow roast pork 023                                                                                                     … put some foil over the top and put that in the oven as well. Long slow cooking alongside the meat would make the shallots cook down to a lovely soft sweetness……

The potatoes were put in round the meat about two hours before we were ready to eat (remember this is a low oven you have the meat on so they will need a bit longer to cook) … I’d normally steam them and peel them and then roast them in hot fat but all this carry on with my poor old arm meant that I was taking short cuts. They could get in there alongside that meat and cook alongside it.  And cook they did…….

Bear's breakfast, slow roast pork 026

The broccoli….steamed for 4 minutes then sprinkled with oil and lemon juice…. salt and pepper…

Bear's breakfast, slow roast pork 028

And now things were coming together.

The pork had been in for 5, maybe 6, hours… it had had that scorchingly hot start that makes all the difference to the crackling and then it had the rest of the time, cooking gently, the fat slowly basting the meat until it was soft and tender.

Bear's breakfast, slow roast pork 031

Get that out and let it rest while you turn the heat up on the vegetables in the oven to get them beautifully coloured

Bear's breakfast, slow roast pork 027

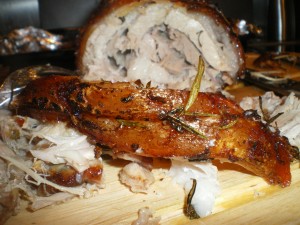
Then… slice your meat

Bear's breakfast, slow roast pork 029

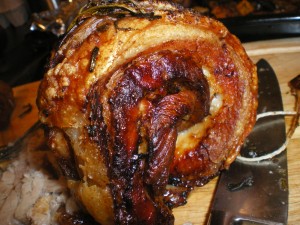
The crackling… oh my word… the crackling………..

So there you have it. Minimal work,  just a little bit of preparation – again, for less than a fiver you have a meal that would serve 4 easily and even leave some meat over for sandwiches the next day. Or, if you were any kind of a friend, you would make sandwiches for your friends who were drooling over this……and had had to listen to you crunching on the crackling.

So… get cracking for the best crackling ever! The meat’s not bad either 😉

The Bear steps in

Today has not been a good day for me – my arm is hurting and I have just idled around, wanting sympathy. Thinking of what to cook for supper was beyond me so The Bear (who got home at midnight, last night) took matters into his own hands and rummaged through the cupboards for something to make.

I haven’t been shopping for ages so the cupboards and fridge are empty……. except for basics….

Bear steps in 005

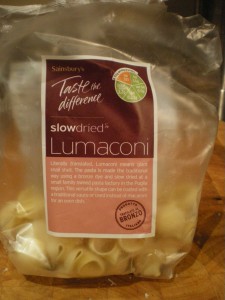
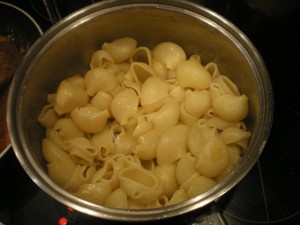
He grabbed some pasta – a lovely large, snail shaped pasta shell that catches the sauce you serve with it – and then started to look for something to make sauce with.

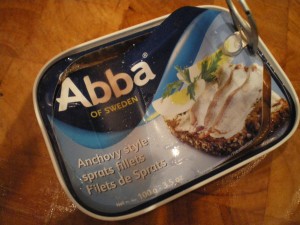
In the fridge he found the last few baby pomodorino tomatoes and some parmesan cheese. There were chillies growing on the balcony, some garlic in the vegetable box and… on the shelf at the back of the fridge

Bear steps in 002

Of course, the tin wasn’t opened then.

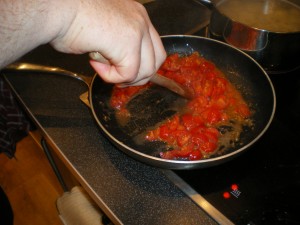
That was it. He started boiling the pasta and while that was going, he roughly chopped the tomatoes and garlic, with half a chilli (to give it a bite) and sauteed them in some chilli flavoured oil. Then (this is the hidden masterstroke) he put in half the tin of anchovies and stirred them all together

Bear steps in 001


By now the pasta was ready so he drained that, adding a couple of spoonfuls of the pasta water to the tomato sauce to loosen it all up a bit

Bear steps in 003


A quick stir round, then into the bowls with the pasta, and then top it with the sauce and a grating of parmesan

Bear steps in 004

And there you are. A perfect supper. The anchovies dissolve away and give the sauce a gorgeous depth of flavour and the chillies give it a bite. All from scraps and bits and made in minutes.

Delicious. Everyone should have a Bear who can serve up dinner in minutes from the bare scrapings of the larder.

Thai Chicken Soup – the work of moments

When I first started cooking for the Bear I would assure him that whatever I was doing, it was merely the work of moments. You know how it is when you have just met someone? You want to spend as much time with them as possible……and you also want to impress them with your speed at preparing wonderful food. This soup, though, really is the work of moments.

I call it Thai Chicken Soup as it does use Thai flavourings. It’s not authentic – I made it up and I dare say people might complain that I haven’t followed a real Thai recipe but I don’t care. It has got Thai ingredients in and it tastes just like Thai soup. I love this soup. It is possibly my favourite soup … though there are many contenders. It is definitely my favourite soup that can stand alone as a meal, put it that way. It has the perfect mix of savoury and sweet flavours, the creaminess of coconut milk, the meatiness of the chicken and the gloriously golden, juicy pop of sweetcorn kernels.

Probably that’s where people might complain.. after all, corn is South American and this soup is supposedly Asian. I don’t care though. If you are to use that argument then no one but Peruvians can use potatoes. Or tomatoes…. We don’t care though. All we care about is making a deliciously tasty soup that will delight everyone.

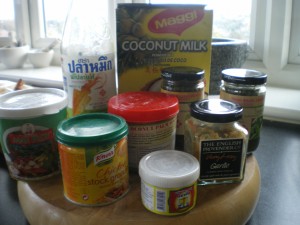
Anyway…. ingredients. I have a selection of Thai ingredients now, so I will list them for you – but to do the soup you don’t HAVE to have them all. I just think that you probably will go out and get them.

Thai Chicken Soup 002

Thai Green Curry Paste

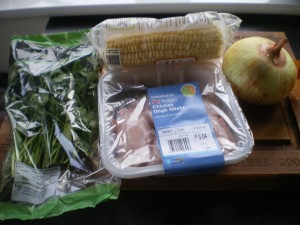
Chicken thighs – boned and skinned

Tin of coconut milk, or coconut milk powder

Thai fish sauce (Nam Pla)

Chicken stock

Palm sugar

Coriander leaves                                                         Thai Chicken Soup 003

Sweetcorn on the cob

Onion

Ginger

Garlic

Lemongrass (you can get these last three ready chopped, which just adds to the speed of making this)

I also add, though the soup can be done well enough without, some Kaffir lime leaves and some Thai basil and a scraping of Thai shrimp paste. Maybe if you love the soup as much as we do you might go out and get the extra bits for the next attempt.

First, peel and chop your onion and saute in a little oil until it is translucent. While that is cooking, cut your chicken thighs into bite sized pieces.

Thai Chicken Soup 004

Put in a teaspoon or so of Green Curry paste, a squeeze of garlic, ginger and lemon grass and then put the chicken in and stir it round so it gets coated…. keep the heat medium to low, you don’t want to burn it. Add some Kaffir Lime leaves (which come shredded) if you are using them

Thai Chicken Soup 011

Chop your coriander and add the stalks to the chicken and spices.

Thai Chicken Soup 012

Thai Chicken Soup 013

Make up some chicken stock – a pint or so and when the chicken is cooked though (it looks opaque) add that.

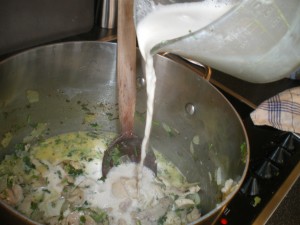
Then the coconut milk and a splash of fish sauce.  Add a teaspoon or so of the Thai Basil if you are using it.

Thai Chicken Soup 014

Cut the kernels off the sweetcorn cobs and put them in to cook

Thai Chicken Soup 015

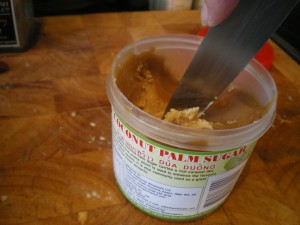
Then add the coriander leaves and stir in a tablespoon of palm sugar…… taste the soup…..

Thai Chicken Soup 017

The thing is, you really do has to taste this to get it right…. does it need more salt? Could you add more chicken stock? Or is it the chillies… need a bit more? Just chop a little bit finely and add that. Perhaps you want just a little bit of extra sweetness…. all of this is up to you.

Thai Chicken Soup 020

You can add those lovely, flat, translucent rice noodles if you want to make it more substantial… but remember to snap them into smaller bits as there’s nothing worse then getting started on a spoonful and having to keep on sucking at a never ending noodle!

And there you have it.  Beautiful soup with lovely fresh ingredients, ready to eat in under 45 minutes. And the taste…. ohhhh the taste…  that will make anyone who eats it love you.

Ask the Bear.

Something for the weekend? Bacon wrapped, cheese stuffed chillies!

I do so love a Saturday – there’s the knowledge that you still have Sunday to come and that tonight you can treat yourself knowing that the weekend is still stretching ahead….

I have a really horrible cough (caught while in hospital) with no Bear about to look after me so I need something that will make me feel better and burn away all those germs… what better than bacon wrapped, cheese stuffed chillies? Actually, I don’t need a cough as an excuse to make these. They are the kind of delicious snacketty bits that you might want to make every weekend. I read about them in one of my favourite blogs “The Pioneer Woman” and tried them out. Ree, The Pioneer Woman, describes herself as a desperate housewife, living in the country- with a description like that, how can you NOT read her blog?  It really is one of the best on the web.

She’s right, however many you make, you will wish you made more.

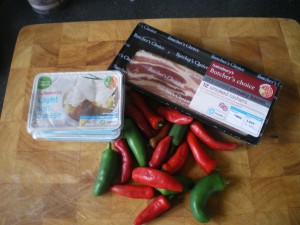
You need chillies (obviously) bacon  and cream cheese…..

Bacon wrapped, cheese stuffed chillies 004

Slice the chillies and scoop out the seeds. The first time I did this I scrupulously removed all the white membrane as well… but then when they were cooked there was no real chilli hit. Best leave a bit in, I think. I love it when my eyebrows start to sweat after I have been gobbling chillies… classy, eh?

Bacon wrapped, cheese stuffed chillies 005

Bacon wrapped, cheese stuffed chillies 006

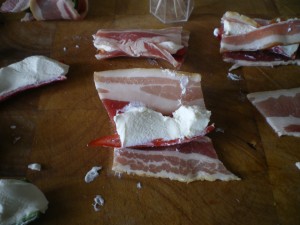
Then… shove in some cream cheese with a spoon… it isn’t neat and it won’t look tidy but that hardly matters, does it?

Bacon wrapped, cheese stuffed chillies 007

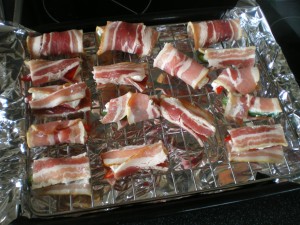
Then, wrap those little tinkers in bacon! The Pioneer Woman stabs hers through with cocktail sticks, but mine seem to be OK like this. They have to be. I just can’t manage to do it.

Bacon wrapped, cheese stuffed chillies 008

Put them on the grill pan (put some tin foil underneath to catch the drippings unless you positively enjoy scouring grill pans) and put them in a preheated oven at 200 degrees.

Bacon wrapped, cheese stuffed chillies 009

Keep sneaking a peek and sniffing at that lovely bacony aroma… when they look good and crisped (maybe 15 to 20 minutes) get them out!

Bacon wrapped, cheese stuffed chillies 010

Not as neat as Ree’s but pretty good for a person using one arm….

I’d like to think I have the kind of life where I would make these as appetisers, perhaps to be served with an aperitif or two, whilst looking ineffably elegant and making conversation with a variety of sophisticated guests at my regular cocktail party. The truth of the matter is I am just going to gobble these down whilst watching something on TV, or reading more of Ree’s blogs. Just as I imagine you will.

They are so gorgeous I don’t think I want to share them with anybody.

Actually, I am sure they are a health measure and will drive away any evil cough and cold germs. You’d better make them. You wouldn’t want to let your family down by succumbing to illness would you?

Churn baby, churn… Or, how to make butter

This morning I realised, as I struggled to get dressed with only one working arm, I would have to make things easier on myself. If I did do a loaf as normal, even calling in help to get it out of the oven, I probably wouldn’t be able to slice it. I could gnaw at it, I supposed, but descending into savagery was a slippery slope.

I wouldn’t be able to lift the Le Creuset casserole, or any casserole, come to that. I did have a bowl of dough ready to be baked……the answer, my friends, was to cut the dough into little bits and then put the little bits into mini covered pots and make buns! It has to work, right? Reduce the time, I suppose, but it should be plain sailing.

Lamb Henry, bread and butter 010

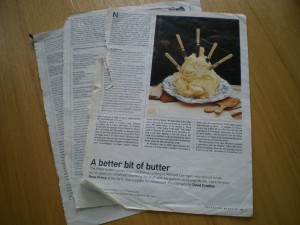
And what would I want on these delicious morsels of bread? Why, butter! Ages ago (and no, I don’t know when because despite Googling for quite some time for the article, I can’t find it) anyway, ages ago, The Telegraph Magazine had an article about Richard Corrigan, making butter.

Lamb Henry, bread and butter 011

Luckily I do have my tattered bits that I ripped out of the magazine and I promise to copy out exactly the bit about making butter. How easy it would have been to have given you the link but, hey ho, one does what one can.

I first made this when I was wandering through a supermarket and saw a large pot of cream reduced for quick sale as it had to be sold that day. Never being one to miss a bargain, I thought this would be a cheap way to try out what Richard Corrigan assured me, was a quick and easy way to make butter.

How could it not be good for you? All it was was, was cream and a pinch of salt….Lamb Henry, bread and butter 016

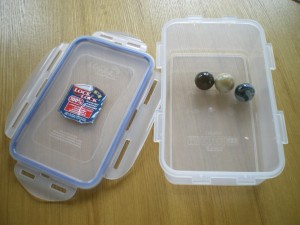
Richard explained that one way of doing it was to put the cream into a plastic box with some marbles and shake… or you could go the easy route and whip it. Guess which way I did it? Think of the fun for the family… everyone having a go shaking the box.

First, find some marbles. These are beauties – my sister in law in Australia gave them to me, and she was sent them from her cousin in law in America. How international is that?

Lamb Henry, bread and butter 014

Then put them in a plastic box that seals tight. You really don’t want cream going everywhere, do you?

Lamb Henry, bread and butter 015

The put in your cream and start shaking!

This is what Richard Corrigan says

” To make butter

The simplest way to make butter is in a standing mixer, but it is also possible with any vessel that can be agitated back and forth. A Tupperware box with a couple of glass marbles is a perfect makeshift churn for a child to use.

Pour fresh double cream into a very clean mixing bowl and whisk at medium speed until thick. When it becomes stiff, slow down the mixer. The whipped cream will collapse and form into butterfat globules and the buttermilk will flood out. Strain through a sieve, reserving the buttermilk to make milkshakes or soda bread. Return the  the butter fat to the mixer and mix slowly for another 30 seconds. Fill the bowl with cold water. Wash your hands well and knead the butter, allowing the water around it to wash it. Drain off the water and repeat twice. Weigh the butter, then, if you wish to salt it, add a quarter of a teaspoon to every 115g/4oz. Pat it into a shape with wooden spatulas or butter pats, wrap in greaseproof paper and store in the fridge.”

So, you can do it in a mixer, but I have always done it in a box with the marbles. Cream in, marbles in and shake it up baby…

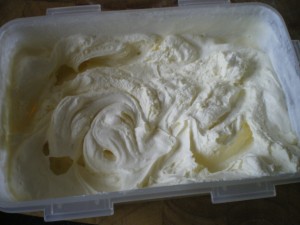
You can hear the change as it goes from liquid cream to whipped cream and then to a strange thickness, almost as if it is one solid mass slapping against the sides of the box. Take a look at it…

Lamb Henry, bread and butter 020

Keep going and then all of a sudden the colour seems to change and it looks different, almost granular. It becomes a yellowy golden substance, almost cottage cheese like in texture and you can see the buttermilk is separating out and you have almost-butter!

Lamb Henry, bread and butter 022

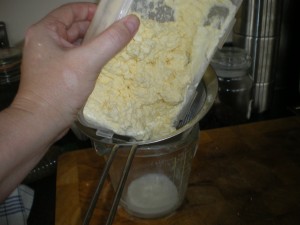
You need to drain the excess liquid off, so put a sieve over a jug and pour in the almost-butter.

Squish it about with a wooden spoon getting more and more of the buttermilk out of there. Then you need to rinse it with cold water. You need to get the buttermilk out, leaving only the butterfat. If you don’t then it will go off sooner, though I have to say, there’s never been any left lying around to go rancid in this house.

Lamb Henry, bread and butter 024

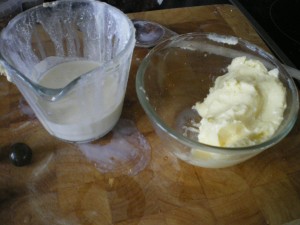
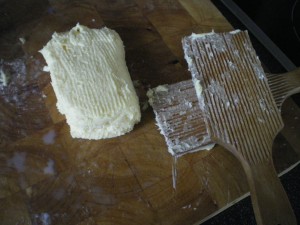
At this point I add some salt and mix it in, giving it a good slapping. The first few times I just used a wooden spatula and that worked brilliantly but The Bear found some wooden butter pats at an antique place at some ridiculously low price (maybe £3?) and bought them for me. You can slap the butter from both sides then. They aren’t essential at all unless you are looking at it from a style point of view. Just whack it with whatever you have. More of the buttermilk will come out and what is left looks just like…… butter!

Lamb Henry, bread and butter 026

There you go, rough and ready, but that is undeniably butter. I usually make it look a lot better but as I keep telling you, I only have one working arm, so what do you expect? But if I can do that in under half an hour? What could you do?

Think of the fun if you have children to entertain – you can make bread and they can be put to forced labour shaking a plastic box filled with cream and a couple of marbles.

I have chopped herbs into it before and even mixed in truffle oil to make gorgeous flavoured butters….You can freeze it too, all you do is  make sausages of the  butter and wrap it in cling film and then freeze it, ready for when you need it.

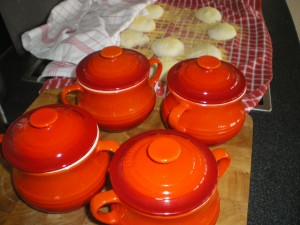
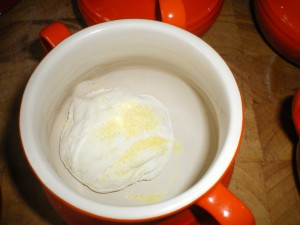
So now I have butter, ready for my buns. I told you I  had made the dough as normal and then I put it into heated mini Le Creuset pots….

Lamb Henry, bread and butter 017

Lamb Henry, bread and butter 019The oven was hot and in they went. There they stayed for 30 minutes, with their lids on and then another 15 minutes to brown… what little beauties they are? Don’t they deserve the beautiful butter?

Lamb Henry, bread and butter 028

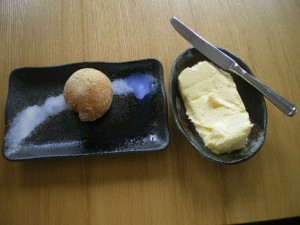
There you go. Wonderful home made bread and butter.

Easy, isn’t it? I reckon it would be easier still if you did what Richard said and used a food mixer……

A one armed cook

… is actually not much use. Particularly a one armed cook who wails a lot whilst wearing a sling. I’m hoping things will  better tomorrow so in the meantime I am lying in bed, reading cookery books.

I was up early, to get a glass of water and looked out at the city below

bread 008

That makes me think, hmmmm,  comfort food…. and somehow, because I feel so awful, I thought of what my mother would have done to look after me.  Autumn afternoons, curled up on a sofa, covered in a blanket with Ma bringing me hot toasted crumpets with butter and honey….

So I took out “Bread: River Cottage Handbook No 3” and looked up crumpets. Hugh Fearnley-Whittingstall is producing a series of River Cottage handbooks and this one, on all aspects of bread and baking, is excellent. It’s also a very good read and I’m sure that’s nothing to do with the drugs I’ve been given.

I don’t know why I haven’t thought to make crumpets before, or why I must have thought they would be difficult… So, as soon as I can manage to move my arm, guess what I am going to be baking? 

Well then, who’s with me? If I do it first will you have a go? How good would that be? And with butter and honey melting on top of them …….

No Knead Bread and the one armed cook

One of my favourite things is making bread. I love the smell of it as it bakes and the

way the smell filters everywhere.

It’s when I bake bread that I feel that I am doing a good job of feeding the Bear.

Sometimes, it is just what I need to do to make up for any housewifely transgressions.

I’m a better baker than I am a housewife and he forgets my faults when he sees

a lovely fresh loaf.

I’d seen various people talk about The No-Knead Bread,  by Jim Lahey at the

Sullivan Street Bakery  in New York

 and found links to it in the New York Times by Mark Bittman – and thought

that I would give it a go.

Read those articles. Trust me, it works.

And it works well enough that we prefer it to any other bread we can buy here.

The plus point is that there is no kneading. A good enough reason in itself to

try it, but it will be especially useful this week.

Tomorrow I will be in hospital having an operation on my arm to repair a

damaged tendon and I will be unable to do anything much with it for some time.

I have a feeling things might get tricky……

Anyway, back to the bread. It takes time to do – 12 – 18 hours but the thing is,

it isn’t 12 -18 hours of work.

The yeast does the work…. very slowly. All you have to do is mix the dry

ingredients together, add water and then leave till the next day.

Then stick it in the oven. How easy is that?

Right then
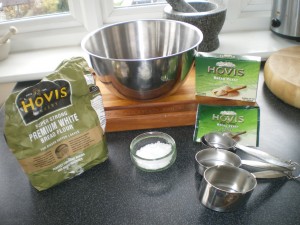
Steak, bread and Cookery Lotto 007

Get some decent bread flour

and some yeast

and some salt.

The recipe  uses American cups – most of us have cup measures in the house,

failing that, remember that American measures are based on volume,

not weight, so if you use, say a teacup,

remember to use the same measure throughout.

 Get a big bowl and measure into it 3 cups of the bread flour.
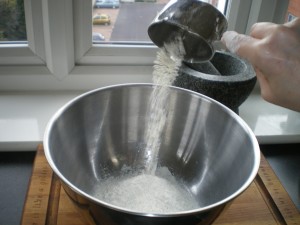
Steak, bread and Cookery Lotto 011

Sprinkle over that a quarter teaspoon of dried yeast and

one and a half teaspoons of salt.

Stir them all together.
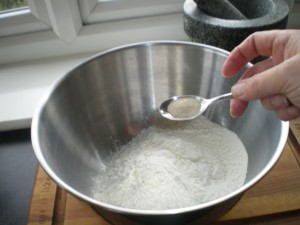
Steak, bread and Cookery Lotto 012

See, easy so far, eh?

 Steak, bread and Cookery Lotto 013

Then add one and a half cups of water

(the original recipe says one and five eighths,

so put an extra spoonful in)
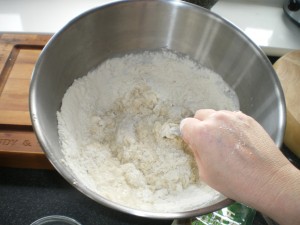
Steak, bread and Cookery Lotto 014

Stir it together

Steak, bread and Cookery Lotto 015

And then it looks like this. Rough and ready. Lumpy, even.

But it doesn’t matter!

You don’t have anything more to do other than cover it in cling film

and leave it to one side for 12 -18 hours or so.
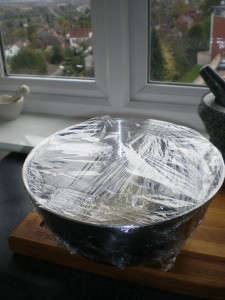
 Steak, bread and Cookery Lotto 016

Because you use so little yeast it is very easy to digest –

none of this partially fermented stuff you get in shops.

This is a long slow rise……..

The next day, flour a board thoroughly and take a look  at your bowl.

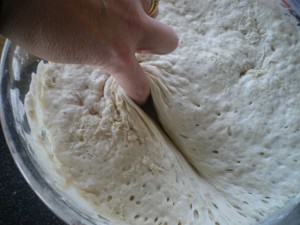
The dough seems impossibly wet  and

people have been known to feel slightly panicked at this stage…
No knead bread edit 001

That can’t be right, you are thinking……
No knead bread edit 002

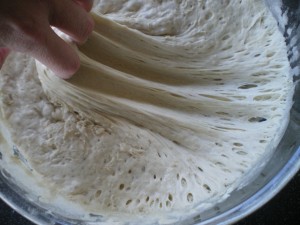
Look at it pulling… but is IS right. See those bubbles,

stretching and tearing?

They are going to transform this wet and sticky lump of dough into

the most delicious bread…

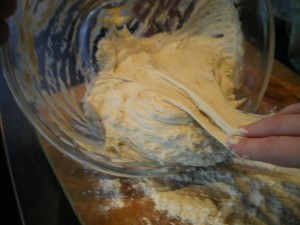
You have to tear it out of the bowl
No knead bread edit 003                                                                                     

It is incredibly wet and sticky but don’t worry about that,

it is just how it should be.

Roll the messy lump in the flour and it magically

transforms itself into this lovely smooth ball.

bread 002

 Just roll… no kneading…..leave it for ten minutes or so,

covered in the clingfilm you took off the bowl and then…
bread 003

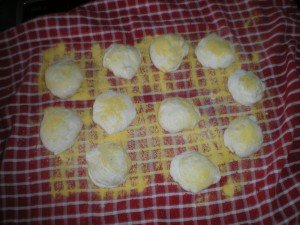
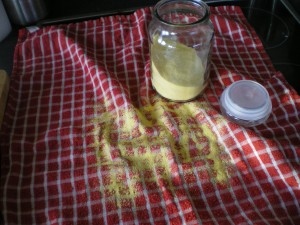
….dust a tea towel with flour, or, as I am using here, cornmeal (fine ground polenta)

I like cornmeal because it does give a light crunchiness to the crust and also

 because it looks so very pretty! 

It doesn’t matter if you haven’t got any, just use flour.
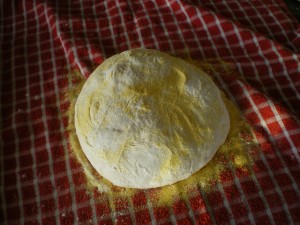
 bread 004

See, a good dusting of whatever you are using and then wrap it

lightly in the tea towel
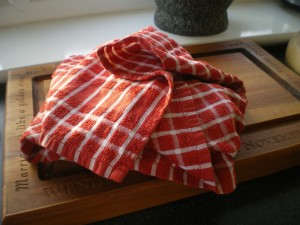
bread 006

Then just leave it for two hours to finish rising gently.

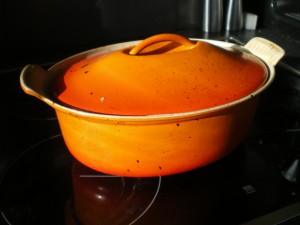
After one and a half hours, turn your oven on to just over 200 degrees C/ 392 degrees F

and put in your lidded casserole. You need a lid because it traps the steam

and helps turn the crust into the most delicious chewy gorgeousness…

and you need to get your pot hot. Very hot.
bread 009

Then, using oven gloves, (that pot will sizzle your fingers otherwise) get the pot out of the oven

and take the lid off…..then chuck in the dough.

See?
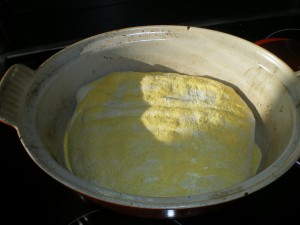
bread 012

Still no kneading. Give the casserole a shake to settle the dough,

then put the lid back on and put it in the oven for 30 minutes.
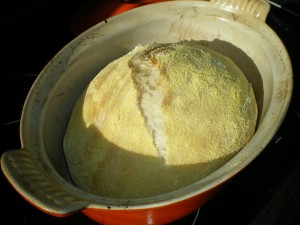
bread 013

After half an hour, take the lid off and just look at that……

Then, back in the oven to finish off and get brown.

bread 015

And there you have it. Get it out of the oven  and leave it to cool.

I know that is hard because it really does smell gorgeous but

cooling is essential. 

That truly is the most delicious bread – all you have to do is give it time to make

itself. Even a one armed cook could make that.

Well, if a one armed cook had someone to get the pot out of the oven, that is.