Making Butter.. how to have luxury in a credit crunch kitchen

As I look out of the window I see greyness everywhere…the skies are grey, the pavements are grey and even the people look grey. It’s the Age of Austerity, say the Government and the financial whizz kids who got us all into this mess.

Time to tighten our belts… cut back…spend less. We have to suffer….

The papers are full of articles on the cost of living and how food bills are soaring, utilities bills are going through the roof and how the ordinary person must make sacrifices.

Well, I agree. I agree on the cutting back, anyway. If we cook at home with care we can all produce marvellous meals for much less than you would spend on a takeaway or a pizza, or even fish and chips.  I have made a habit of cooking carefully and spending very little and, truth be told, have often turned out meals that are better and tastier than many meals I have had in restaurants. Look through the Credit Crunch section and you’ll see recipes for Beef Cheeks (the most wonderfully tender beef casserole you will ever eat); delicious soups like Roast Garlic and Marrow or Puy Lentil and Pumpkin or the gorgeous Tomato Rice Soup – simple, inexpensive ingredients made into food that you are glad you are at home for. There’s recipes using polenta, that staple of Italian peasant cooking made into Baked Polenta Pie and rice…. risottos made with Black Pudding and Apple and Bacon – just scraps of things added to a basic ingredient and transformed into something you’d be proud to serve to guests.

I don’t really believe in too many sacrifices though. I always like to use butter in my cooking – I certainly won’t use margarine or some cheap, chemically concocted spread, where dubious oils are treated with this and that to make them go solid and spreadable. Butter is better. I don’t use too much and it doesn’t feature in every dish but when I need it, it’s there.

Butter is just milk shaken until it is solid. What could be simpler?

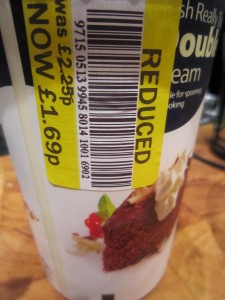
What could be better than calling in at the supermarket and spotting, in the marked down section, a large pot of cream that you know, with very little work indeed, can be made into lovely fresh butter? That appeals to my penny pinching ways and my love of luxury.

I’ve written before about making butter, way back at the start of this blog, when I did it by using marbles in a tupperware box. I still say this is a fun way to make butter and a most excellent way of entertaining children. I don’t suppose you could get them to do it all the time, but as a one-off? A Saturday afternoon’s entertainment? It’s a brilliant way to keep them occupied and then, of course, you can make them buttered toast for tea. 

This time, however, I had plenty to do and didn’t need to entertain myself unnecessarily, so I was going to do it the quick way. It’s probably the way you will end up doing it, too.

I had been shopping to get some ricotta as I was going to make ravioli and as I walked past the Dairy section, I spotted a large pot of double cream… the really thick double cream. It had been reduced  as it had reached the sell by date. This doesn’t mean that it was going off at all, just that the date they had set for it still to be in peak condition was today. Fresh cream, still perfect and at a reduced price?

Well, I had planned to be doing other cooking and I had plenty to do in the kitchen but this was a bargain, calling out to me. And it just shows how easy it is to do if I was going to do it in between making three different sorts of bread and pasta.

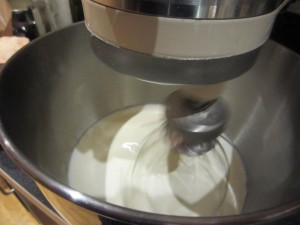
I put the cream into the mixer (you can do it with a hand mixer if you haven’t got a standing mixer… it doesn’t take long) and started to whip it.

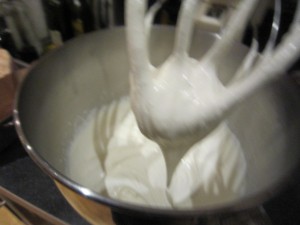
It thickens quickly.

And you keep whipping.

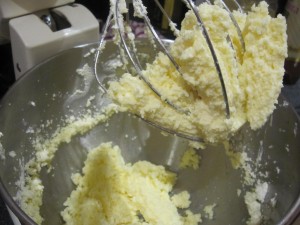
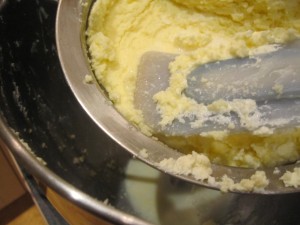
All of a sudden it transforms from a white, whipped mound to a lumpy, granular and yellowy mass. This is not great if you were looking for a topping for a dessert… but it is just what you want to see if you are making butter.

Perfect.

Look at it. Granular and yellow. That’s the butterfat.

Now, if you were using a thinner cream than I was, you would see quite a bit of buttermilk separating out from the creamy globules. The cream I was using was almost solid it was so thick, so there was less liquid.

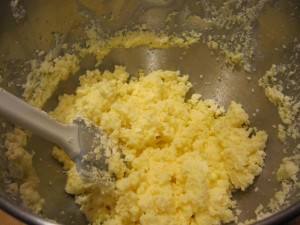
Pop the lot into a sieve and wash it inder a tap. I gave it a squish with a flexible spatula to get more of the buttermilk out.

You can save the buttermilk for baking, or adding to soups – yet another credit crunch saving.

The Bear came over to help at this point… not because it is difficult but because I needed him to take the picture for you to see.

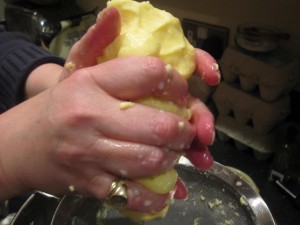
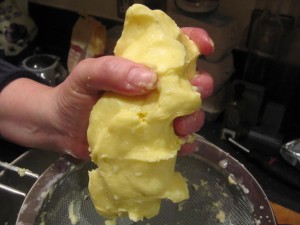
I got the butter out of the sieve and squeezed it together. More buttermilk ran out.

That’s butter, that is!

The next thing to do was to add salt.

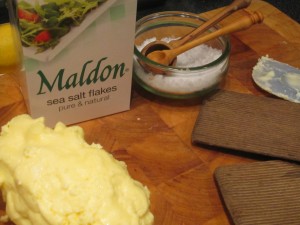
I’m a great fan of Maldon sea salt and a pinch or so of that, scattered over my hand squished butter and then squished some more meant I would have a beautifully salted butter.

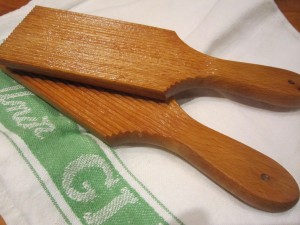
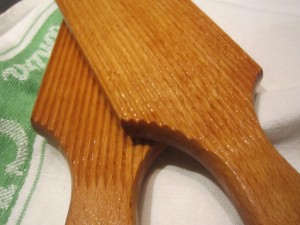
I do happen to have some old wooden butter pats  which are ideal for flattening the butter and getting the last of the buttermilk out. It also adds to the fantasy playing in my head that I am the consummate housewife and cook….

If you don’t have any, don’t worry. I just like them, that’s all.

If you look at them you can see they are finely ridged to help force the liquid out.

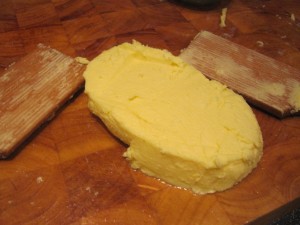
It helps make the shape of your butter. Again, it doesn’t matter if you haven’t got any, just shape your butter neatly.

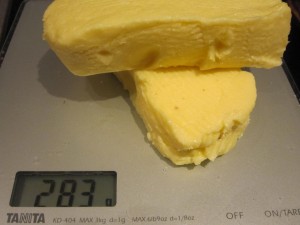
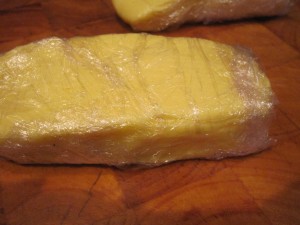
And look what I ended up with…283g of best butter.

Surely that counts as being careful with cash? A credit crunch success?

The butter can be frozen if you wrap it carefully…. you can flavour it with whatever you fancy….

Or you can spread it on bread that you made and just enjoy it.

How simple was that?

That was made, while I did other things, in less than half an hour.

Now, as I said,  you can do it in a more relaxed fashion, getting young helpers to shake it about in a jar or a tupperware box, but you know what? This is just as satisfying and oh, so delicious.

Credit crunch money saving at its best.
Slow roast shoulder of pork with perfect crackling

The weather is getting worse and, while it is lovely to live in an apartment where three of the walls are windows, it does get gloomy when you are surrounded by rain spattered glass and grey clouds. When that happens, the only thing to do is put the lights on and make everything look cosy and then curl up, knowing that something meaty and tasty is in the oven….. just relaxing while the smell of roasting meat fills the room. It’s a smell that has always reassured me that things are happy and well in the family.

 A smell that was a constant in my childhood and it means home and happiness with loved ones. My wonderful brother and I are very similar in many ways. One of our favourite things is the crispy, fatty bits on a roast joint… all juicy and packed with flavour.

Not everyone likes this of course….The Bear has many good points and I am always glad I married him, but one of his finest points is that he doesn’t like crackling or the fat on a roast. That, of course, is good for me as it means that I don’t have to share. My brother used the same criteria when he got married – my sister in law is absolutely fabulous and we all love her dearly (he made a brilliant choice, marrying her) but again, she hates that sort of thing. Perfect. There’s nothing finer in our eyes that a gorgeous piece of crackling and the two of us have been known to stand in the kitchen at home dividing up the crisp and tasty skin….

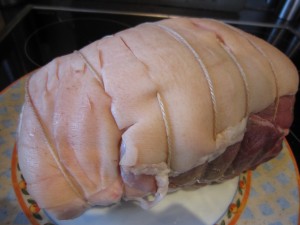
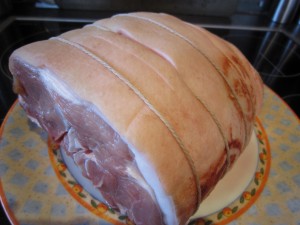
Anyway, while I was shopping I’d spotted this marvellous piece of pork. Outdoor reared and free range meant that it was guaranteed to be tasty. The rain was bouncing off the pavements outside and I just knew that roast pork would be the perfect  antidote to the gloomy rain blues.

Pork shoulder is a great cut because it isn’t expensive but, as with most things, treated with care and respect you can produce the most delicious meals. Time is what shoulder needs, time and heat and salt. That’s all.

This was a lovely piece of pork shoulder with a good layer of skin around it, which is just what you need to get perfect crackling.

Pork shoulder needs slow cooking and it will turn into the softest, tenderest piece of meat ever. The rind will crisp up (if you slice at it) into delicious strips of hard, crunchy and tasty crackling.

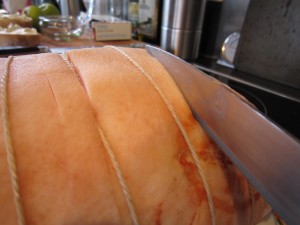
But the rind is tough and to get through it you need a very sharp knife. Butchers will slice the rind for you and, in fact, most joints come with the skin cut already but I like to get a lot of narrowly spaced slashes so I start by sharpening my favourite filleting knife.

I’ve never yet managed to use a sharpening steel so I use the Chantry knife sharpener which is one of my better kitchen equipment buys. All you have to do is run the knife through the middle a few times and the blade is perfectly sharp, which is something I have never achieved using a steel.

While you are doing all of this, get the oven preheated to 230 degrees C/450 degrees F

There were some slashes in the rind already but I sliced between them, so each strip of rind was about 1 cm wide, if that. Be careful, if you are slashing not to slice into the meat itself – just cut the rind and the fat below.

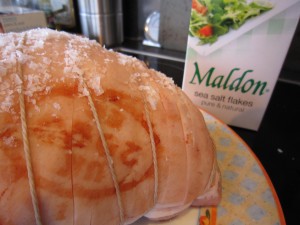
The next thing is to get some kitchen roll and dry off the rind before rubbing it over with a smear of oil and then some salt.

What you have done is wiped off the water and added some oil to help start the crisping process and salt to drive out extra moisture and add flavour.

I like to use Maldon sea salt as the crystals are large and easy to pack into the slices of rind. Maldon has a great taste as well. When the pork comes out of the oven the rind will have crisped and almost bubbled up with flecks of salt crystals embedded into it to make the crackling taste divine.

By now the oven will be bouncingly hot so get the pork into a roasting tray and put it into the oven for twenty to thirty minutes.

This is a very hot oven and what it does is sear the rind and start making the crackling. If the oven isn’t hot then the rind won’t ever get crispy.

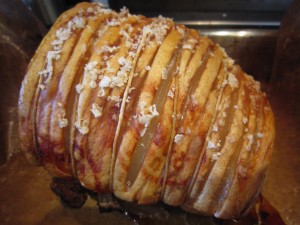
After the first burst of heat you will see, when you peek inside, that the slices are separating and the rind is starting to cook. You just know, when it looks like this after half an hour that it will have the perfect crackling when it is finished!

You can turn the oven down now to a moderate 170 degrees C/340 degrees F and just leave the joint to cook slowly for a two and a half hours……

There now.

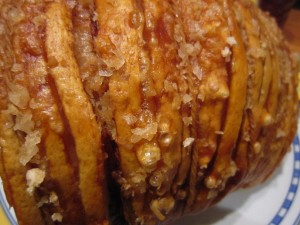
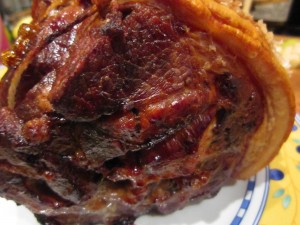
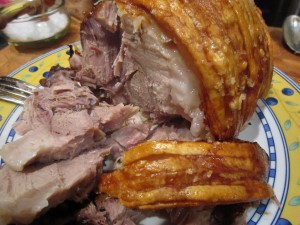
Golden, bubbled and crisp. Studded with salt crystals promising that every mouthful will be deliciosuly savoury.

When you get it out of the oven if you rap on the top of the crackling it makes a hollow sound.

The meat is dark and caramelised from the fat dripping over it as it roasts.

The fat layer has almost disappeared in the long slow cook, making the meat juicy and the crackling crisp.

The crackling strips snap easily into bite sized bits…. perfect for nibbling at while you slice the pork……

A wet grey afternoon can be ignored because you are inside, in the warmth with a marvellous meal, just ready to share with your loved ones.

That is Heaven… that is my guilty pleasure and that is one more reason to appreciate the Bear not liking everything I adore!

Meatfree Monday – Seed and grain bread for egg mayonnaise sandwiches

The Bear was about to set off on his travels again and would be getting up at some ridiculous time in the morning so he could get to the airport. What that means is that he doesn’t really feel like eating too early in the morning and would rather have something to eat at a more normal time.

What THAT means is that he is loitering around an airport and picking at stuff. Now I’m sure that what is served at outlets or in the Business Lounge will meet with all Food Health guidelines… it just doesn’t meet with mine. Obviously, food produced on an industrial scale, for sale at some point in the future is going to be packed with preservatives or dodgy fats that we don’t want and would never have in freshly made food. He knows not to risk my wrath by buying a plastic wrapped muffin or going to a fast food outlet for a burger and he does try to get something looking vaguely healthy but the fact remains, he has to eat at some point while he’s travelling. He could try looking a sandwiches but, even there, there are problems.

A simple egg sandwich, for example, will be made with bread that has preservatives, the eggs will probably not be free range (as I’m sure they would be plastering that fact all over their packaging), they are likely to be using margarine instead of butter and goodness knows just when they boiled the eggs.

So I decided to make sure he could have something to eat that he could carry easily, would taste nice and be good for him.

His favourite sandwich is an egg mayonnaise one so I decided to do that.

First I needed to make good bread and as he is particularly fond of seeded or granary loaves, I decided that would be just the thing to bake.

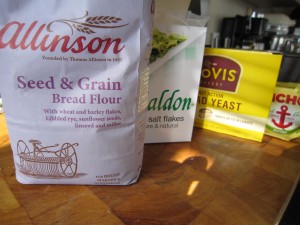
I got a packet of Allinson’s Seed and Grain Bread Flour, which is white flour with wheat and barley flakes, kibbled rye, sunflower seeds, millet and linseed. Healthy, tasty, nutritious and perfect to make into a lovely sandwich.

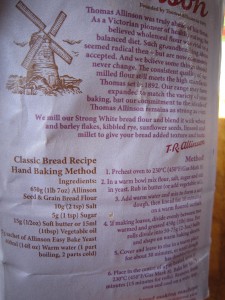
There was a recipe on the back that looked good and I thought I would follow that as I had never used that flour blend before. It looked quick enough, too.

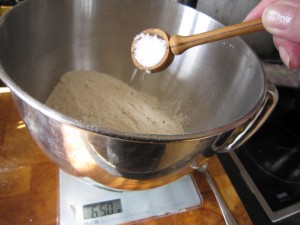
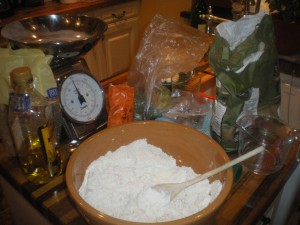
First thing was to preheat the oven to 230 degrees C/450 degrees F, whilst measuring out 650g/1lb 7 oz of the flour, 10 g/2 tsp of salt, 5g/1 tsp sugar and a 7g sachet of yeast.

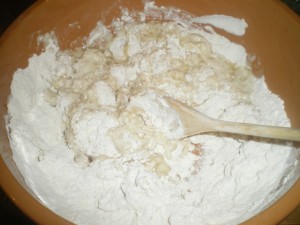
That was mixed together first to get an even distribution of all the dry ingredients, then 15g/ ½ tsp of soft butter or 15 ml/1 tbsp of vegetable oil was rubbed through.

400ml/ 14 fl oz of warm water was added and mix to make a soft dough.

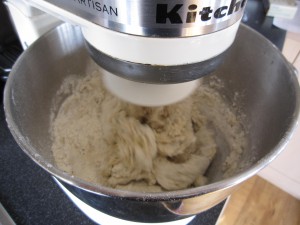
The recipe says to knead it for ten minutes on a floured surface – I did it in the mixer with a dough hook and added extra flour to get it to come together.

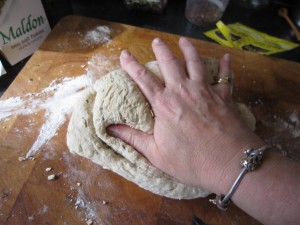
Well I did give it a knead myself…just to show willing and besides I like to feel the dough and by feeling you can judge when it is properly ready.

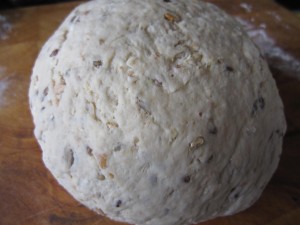
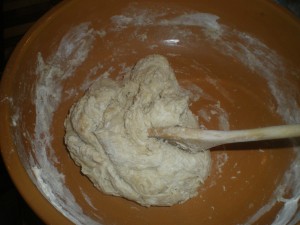
Look at how the dough looks now… smooth and bouncy. If you’ve ever patted a baby’s bottom.. well that’s what it should feel like!

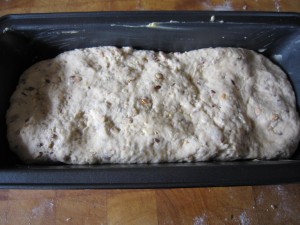
It had to be put in a greased tin (they suggested two 1lb loaf tins but as I wanted it for sandwiches I put it in a long 2lb tin

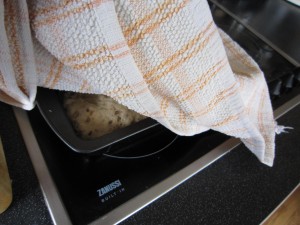
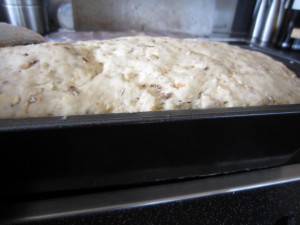
and covered it with a tea towel for 30 minutes until it doubled in size.

Into the hot oven it went for half an hour or so

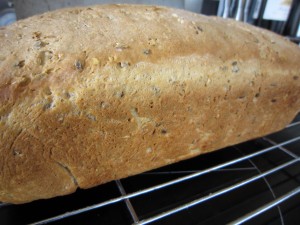
Perfect. When I knocked the bottom it sounded hollow which means it had cooked properly.

It looked and smelled delicious. We might have shared the end crust with some butter on…. just for checking purposes you understand.

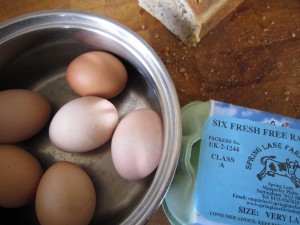
The next thing was the filling. I always use free-range eggs and buy these from our local farm shop so I know exactly where they come from and just how fresh they are.

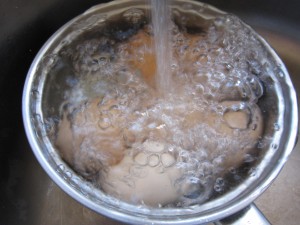
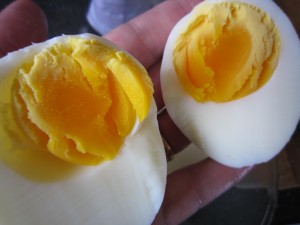
Boil them for four minutes then immediately tip away the boiling water and start filling the pan with cold water because otherwise you get that horrid black ring round the eggs and that terrible sulpherous smell.

I like the eggs to look like this – mainly cooked but with just a hint of soft yolk.

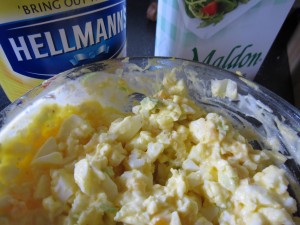
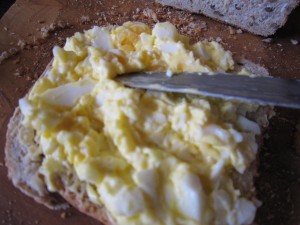
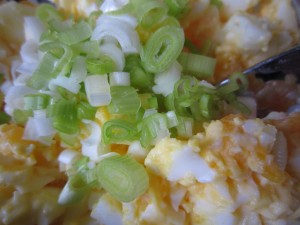
The eggs were  chopped then two slender spring onions are also chopped and added. I wish we still had some chives left but with Autumn rapidly approaching they are all gone now.

A tablespoon of Hellmann’s Mayonnaise and a pinch of salt go in next (Hellmann’s switched their production to free range eggs so that’s good, otherwise I would have had to make my own, which I have to say is really easy…. but this was easier!)

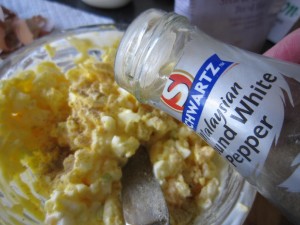
White pepper enhances the egg mayonnaise mix really well,  so a shake or two was added to taste.

And that was it for the afternoon. I was going to get up early the next morning and make the sandwiches. The egg mix went into a lidded box in the fridge and the bread was put to one side.

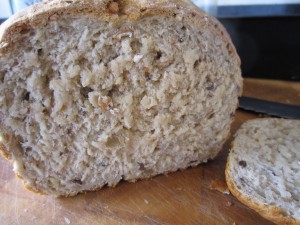
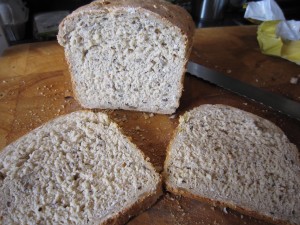
Next morning, at around 5.30 am, I got up to sort things out. The bread cut well and is ideal for sandwiches. It was a good even texture and the seeds and grains made it slightly dense, which is a good thing for a sandwich. You need the bread to hold together and not collapse, spilling your filling everywhere. Especially when the person about to eat it is in a business suit… This might have happened on another occasion.  not this time, though. That bread looked like a winner in the samdwich stakes.

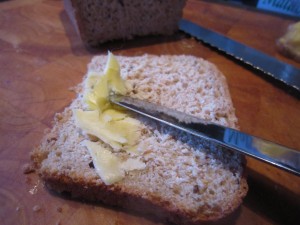
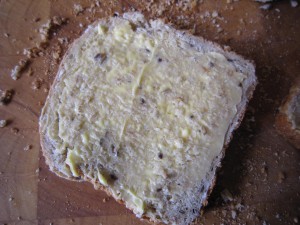
It’s important to spread the bread with butter as this makes a waterproof layer and stops the filling seeping through. And butter is important because, well, it just is. I believe in butter and I do not believe that some weird kind of vegetable fat with emulsifiers added to it could possible make anyone believe it wasn’t butter.

Butter is cream shaken up until it turns to butter. A pinch of salt can be added but that’s all. No chemicals, no E numbers. Nothing but creamy milk and salt. Healthy, that is, I’m sure of it. Anyway, we don’t have any margarine or spread or whatever it is called. Butter it is and that’s an end to it.

Delicious. And I always make sure I spread to the edges. I hate it when you get a sandwich and there’s just a tiny dot of the filling in the middle.

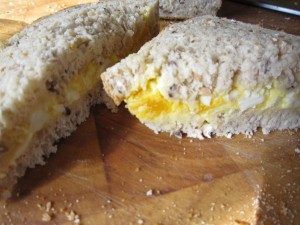
Sliced in two so it’s easy to eat

And wrapped in a sandwich bag so he can throw it away afterwards.

So, the Bear left for some other country and I went back to bed, happy knowing that he would have something to eat without having to buy an overpriced, low quality sandwich.

Was it worth it? Yes, it was.

Making the bread took quarter of an hour mixing and kneading. The bag of flour cost less than £1 and there’s still a well over a quarter left. What I used made a 2lb loaf so there’s plenty left for sandwiches for me for work. I suppose the two slices I cut for him would work out at maybe 15 or 20p. The eggs cost £1.65 for a half dozen, but what I used on his sandwich was probably less than one egg so there’s another 28p. Maybe adding in 10p for the other ingredients and you have a perfect additive free sandwich for 58p or thereabouts. Even if you add in 20p for using the oven it is still incredibly cheap when you consider that in an airport the average cost of a sandwich is £2.80. And if you wanted decent bread and free range eggs? That would be another £1 or so added onto it.

For all of you who are wary of making bread (and you know who you are) this was a simple, quick and very tasty loaf. It saves an incredible amount of money for what is really very little work.

Go on – get baking!

Salt and Pepper Pork Tenderloin

I had a fancy for something tasty. Actually, what I really had a fancy for was our local takeaway’s Salt and Pepper Squid, which is probably the most delicious salt and pepper squid anywhere. And I should know – just ask the Bear. Wherever we go if I see it on the menu, I ask for it.

I’ve eaten it in Perth, Brisbane, Sydney and Hobart in Australia; in Honolulu and on Kauai in Hawaii; in Florence, Barcelona, Dublin, Copenhagen, and Lisbon. I’ve eaten it in smart restaurants in the UK and in cheap ones, but somehow, nothing beats our local takeaway. They cook everything in an open kitchen and the food is spankingly fresh.

The batter round the squid is light and lacy. The squid is never chewy and the salt and chillies are perfectly balanced. The only annoying thing is that whenever I order it, people who HAVEN’T ordered it (because they don’t like squid… or chillies… or whatever else..) suddenly decide they want to try and it and then they take mine!

Anyway, despite wanting it so much that my fingers itched to phone an order in, I decided to try and stick to our vague diet. No salt and pepper squid for us that night.

But the thought of salt and peppered something just stuck in my mind.

I’d worked out a salt and pepper seasoning that didn’t involve deep frying or batter and I’ve used it on prawns and steak. Because you almost dry fry whatever protein it is you are using,  the calorie count drops significantly.

There you go, then, I thought. Perfect justification to make something tasty for supper. I WAS going to have salt and pepper after all. And I could still say we were on a diet.

I like to make lots of salt and pepper seasoning because whatever I don’t use, I keep in an airtight jar ready for my next night of craving. I had some left but I needed to top up my supply.

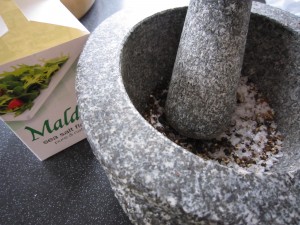
First of all, toast some salt in a large frying pan – yes, this sounds bizarre but it is essential. You will see the colour change slightly and it takes less than a minute. I used a couple of heaped tablespoons of crushed Maldon (I have to crush it in the pestle and mortar because the crystals are large and I need to end up with a smooth spice mix) Take the pan off the heat until you have the spice mix ready.

See those? They are Szechuan pink peppercorns. Not real pepper of course but they add that hint of authenticity.  They need to be pounded along with the same amount of black peppercorns.

I didn’t have any star anise but I did have some Chinese 5 Spice Powder so a good dessertspoon or so of that was added to the mix

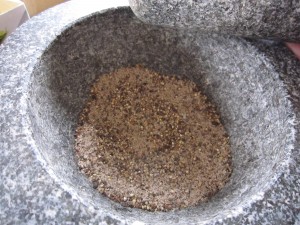
You end up with a fine mix.

Add that to the salt in the frying pan and toast again – beware of the aromatic fumes though, they can be a bit strong. Just a minute or so is all it needs, so stir it round so it toast evenly and leave it to cool. Once it is cool, put it in your jar and wipe the pan out.

And that’s it.

On to the next step – the meat.

Tonight I was going to use pork tenderloin, which is, amazingly, a very inexpensive cut of meat. Even more inexpensive if you, like I did, manage to call in at the supermarket on the way home and find it reduced for a quick sale.

Now the spice mix is cool, put some on a plate and roll it round, pressing down so it sticks to the outside of the meat.

Put your pan back on the heat with a scattering of oil in it (maybe a teaspoon or so… we ARE dieting you know!) and once it is hot pop in the tenderloin.

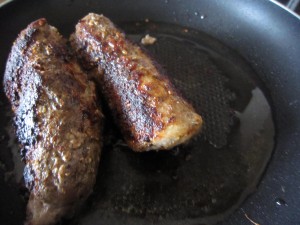
Roll the tenderloin  so the spice mix browns and crusts beautifully.

Once the crust looks good, turn the heat down and let the meat cook through for ten minutes or so.

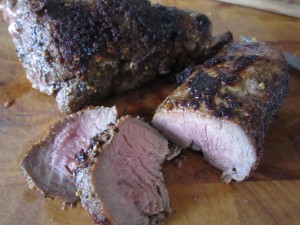
Let it rest for five minutes then slice it into medallions….. Delicious.

Healthy and tasty, oh so very tasty. Quick and easy and low in calories. pretty much of a perfect supper, eh?

You can serve it with anything you like – let it cool and serve it with salad leaves or add some vegetables. If you aren’t dieting serve it with rice… or potatoes, maybe. Well, we were dieting and potaoes were off limits. I wanted to eat it hot so I made broccoli to go with it.  And yes, the Bear was eating  with me, so I made broccoli a Bear would eat.

And when served with broccoli it becomes heaven on a plate!

Fantastic Focaccia

The weather over the past week had made us wonder if we could get home for Christmas. There were all these weather warnings telling us not to travel unless it was absolutely essential.

Essential? This is Christmas. Of course it is essential.

When I got up on Christmas Eve morning and looked out of the bedroom window there was thick, freezing fog and snow

We should be able to manage, we thought….. and after packing the car to the roof with food and general essentials (we were going back to my empty house… with its empty kitchen) we set off.

Christmas traffic wasn’t as bad as the motoring organisations and the police made out.

It was snowy and foggy but everyone else seemed to have paid attention to the warnings and stayed at home. It was probably the fastest time we had ever made it north

You really know you are getting somewhere when you see signs for Scotch Corner.

For a Northerner living in the Midlands (which seems like the Deep South to me) getting to Scotch Corner is the first part of the true north. It always makes me smile because I know I am nearly home.

We arrived back in the village to an empty kitchen… luckily I had packed boxes of food and essential ingredients.

I’d brought olive oil, garlic, eggs, flour, yeast, white truffle balsamic glaze, potatoes, carrots, broccoli, salt, tea bags, coffee, tinned tomatoes, chickpeas and chorizo.

A pork pie made by our butcher, some bacon, cream (single and double), butter, champagne, white, red and rose wine.

Vegetable juice, pomegranate juice, fig molasses, Marmite, Parma ham, leeks, cheeses and pickles. All essentials, as you can see.

I could make anything…. anything but a cup of tea. I’d forgotten  to bring the milk,  so I had to drive to the next village to buy some so we could make a cup of tea. And there was me thinking I had all the essentials covered…….

Thing is, I hadn’t really thought of what we would eat that night. I know we had some left over cold sausages that I had put in a plastic box but we really needed something more than that.

I decided that if I made some foccacia that would help the situation…..

Usual thing… 300g of strong bread flour

7 g of instant yeast, (that’s a teaspoon and a half, I suppose, if you aren’t using the sachets)

Maldon salt

150 ml of warm water

2 tablespoons of olive oil.

Now, I was in a kitchen that I had more or less stripped of equipment, so instead of leaving it to the Kitchen Aid to mix for me, I had to do it myself

Just goes to show how easy it is to make this. One large bowl, a wooden spoon and off you go.

It comes together quickly enough.

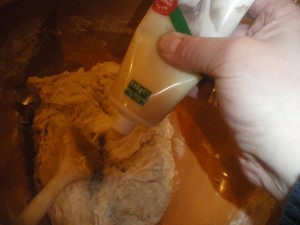
A quick squirt of garlic puree wouldn’t go amiss

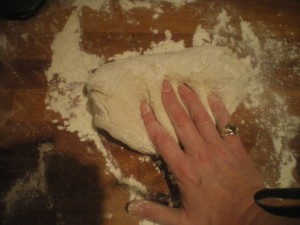
And then knead it…. dust a board with flour and stretch it, pull it, roll it and fold it.

You will feel it changing in texture… there’s sort of lumps and bumps in the dough at first and then it becomes smoother and silkier.

It’s still not perfect though and you have to let it relax. Only then do you get really good smooth dough.

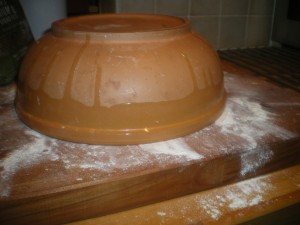
At this point you have to let it rest and rise. You need to stop it drying out so either cover it in cling film or, do as I do, and put the bowl over it. That keeps the dough moist and stops it forming a crusty outside which is certainly something you don’t want while it is loitering about

It will take maybe half an hour or so

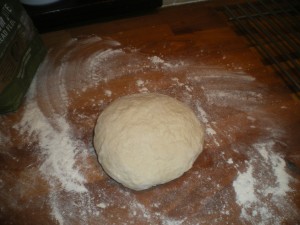
You can feel the difference as well as see it… it is resilient and springy… the lumps have disappeared and it is smooth and silky to touch.

Wipe down the bench and spread some oil on it and then put the dough down.. stretching it into shape with your fingers if you haven’t a rolling pin at hand.

You can see how wonderfully puffy it is becoming.

Heat the oven to 200 degrees C.

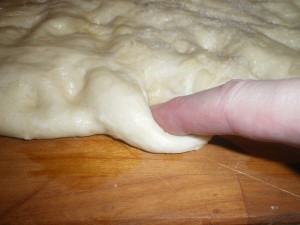
It needs to have fingers poked into it to get the dimpled foccacia look and some oil drizzled over it.

And this is when I had the idea…. add bacon!

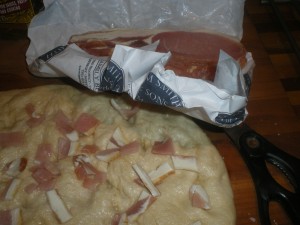
I snipped two rashers of bacon and scattered the bits over the dough.

Now that is a way to stretch your ingredients. A bacon sandwich would have used those two rashers for one sandwich. This makes it stretch over a lovely big bit of bread….

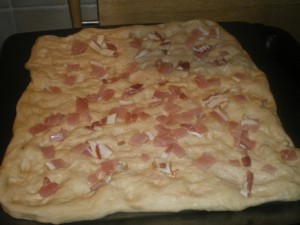
Then just put the whole thing onto a baking sheet – the oil in the dough will prevent it sticking, so don’t worry if you don’t have one of the incredibly useful silicone sheets

Stretch it out to fit and then just put it in the oven for 15 minutes or so…See? Minimal ingredients, minimal work and the shortest time in the oven.

Waiting those 15 minutes gave me enough time to have a quick wipe down of the benches and open a bottle of wine and pour us both a glass

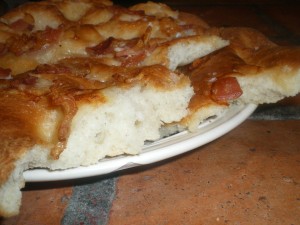
We sat there, eating garlicky bacon scattered bread, fresh from the oven and sipping a glass of wine.

It was Christmas Eve, the snow was whirling round outside and we had driven hundreds of miles to get back home. We sat on either side of the kitchen table and toasted each other.

Merry Christmas!

Macaroni Cheese

Well… it’s cold outside…. I wake up and go to make coffee

… it’s been snowing… and more snow is forecast. If this is the morning

What will the evening be like? I want to be snowed in.

I know I have enough food for an army and I can think of nothing better than being made to stay in. It wouldn’t be my fault, would it? Just imagine the bliss…. not going to work, just tucked up, nice and warm, looking down on the city below us. 

We have an enormous sofa and it would be so lovely to be sitting, curled up with the Bear, both of us clutching a lovely bowl of…. what?

I want something savoury and soothing… soft and warming….. comfort food at its finest. And then I thought of macaroni cheese. That would be perfect – pasta, all soft and oozing cheese sauce, the top crisped and brown… I dare say an Italian would look on this with horror but it is truly an English dish now.
“…we can establish the venerableness of the dish we call macaroni cheese from the following recipe which must have been introduced from Italy… into the court cookery of Richard II [1367-1400]. Macrows. Take and make a thin foil of dough, and carve it in pieces, and cast them on boiling water, and seeth it well. Take cheese, and grate it, and butter, cast beneath, and above as for losenges, and serve it forth.’ It was apparently not made in England during the next few hundred years, but it returned from Italy in the eighteenth century…when Elizabeth Raffald published a very good recipe entitled “To dress macaroni with Parmesan cheese.”
Food and Drink in Britain: From the Stone Age to the 19th Century, C. Anne Wilson (p. 252)”

So, macaroni… lots of it

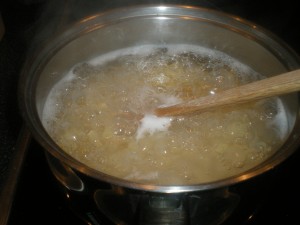
Into a pan of boiling salted water to bubble away until it is cooked. Now real Italian pasta meals are served al dente but this is macaroni cheese.. it is going to be baked after this… it is going to be soft and gorgeous.

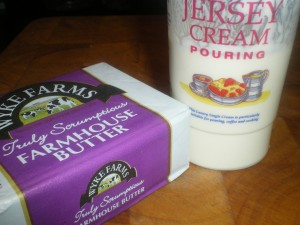
While that is cooking, get started on the cheese sauce… you need good butter, some cream

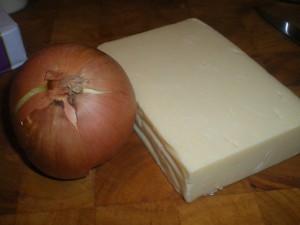
some onion and some cheese. I had a big slab of Farmhouse Cheddar just  asking to be used

Now, I always add onion. I like the contrast between the slight roughness of the pasta and the smoothness of the onion. It lightens it up just a fraction.

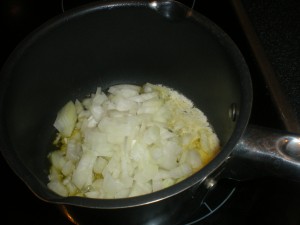
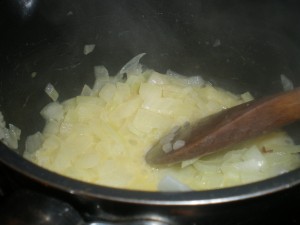
First thing is to chop the onion and gently saute it in butter until it is translucent

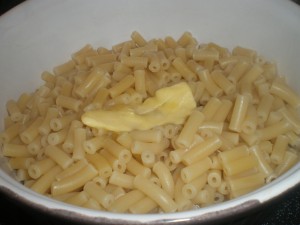
When the macaroni is cooked, drain it and put it into a lightly buttered dish with a knob of butter to melt over it

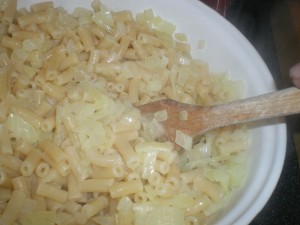
and then stir in those soft onions

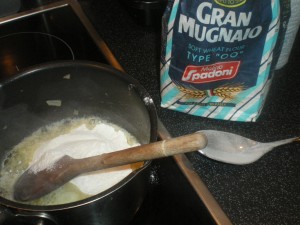
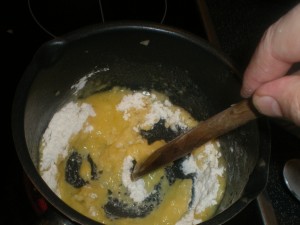
Now back to the sauce – melt two tablespoons of butter and stir in two tablespoons of flour.  Season it well with Maldon salt and fresh ground white pepper.

You need to cook the flour properly so stir it round until it all comes together then start stirring in a mixture of milk and cream

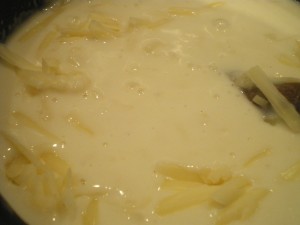
It becomes a smooth and silky, glossy looking sauce.. which is when you add the cheese

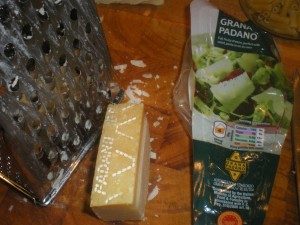
If you have some parmesan or Gran Padano then add that, too… it adds an extra hint of cheesy sharpness

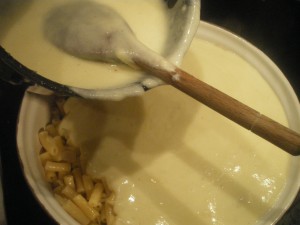
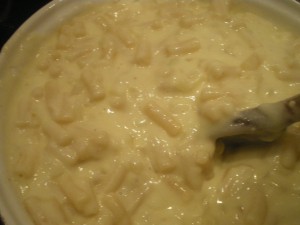
Stir it all round till the sauce becomes smooth again and then… well, then  you pour it over that glistening bowl of macaroni and stir it round so all the cheese sauce can seep into the macaoni, filling the little tubes…

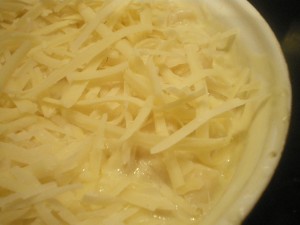
An extra grating of the two cheeses on the top makes a lovely, golden bubbling crust

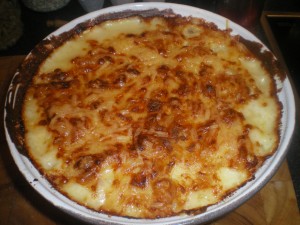
All that needs now is maybe 30 minutes or so in the oven at 175 degrees until the top is browned and you can smell that it is ready.

In that time, plump up the cushions on the sofa, pour a couple of glasses of wine… look out of the window and be glad you are warm inside…..

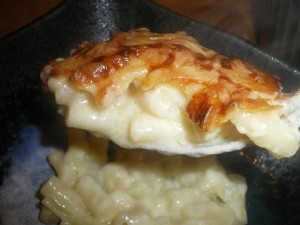
Look at it…….

Of course, a true romantic like myself likes to make sure the Bear feels loved. Well, with macaroni cheese, a tomato sauce heart, a glass of red wine and someone to cuddle with on the sofa, he definitely feels loved.

That was lovely…we were in our top floor apartment, with three walls of windows, watching  the snow whirling about all around outside,  while we were inside with the  best comfort food in the world.

What could be better than eating a bowl of that with the one you love?

So simple and so right for days like this.

Broccoli slaw

Those of you who know me, know I adore broccoli.

 Those of you who don’t know me yet will soon learn…

I REALLY love broccoli……. once when  I left a temping assignment, they bought me presents… chocolate and wine, a lovely card…. and a  head of broccoli! OK, so that was a joke but it reflected the fact that there were so many packed lunches of mine that involved broccoli.

I thought I had broccoli cracked… I’d make soup, or steamed with chilli, or Thai green curry, or eat it raw, broccoli puree, broccoli with lemon, broccoli hot.. broccoli cold…. anything really. I love broccoli. I thought I had worked my way through the entire broccoli cookbook.

And then I read The Weekend Carnivore and Sarah Jayne wrote about Broccoli Slaw…. she added apricots, which I would never do,  but even so.. broccoli? Something new to do with broccoli? Oh I was happy!

coffee vod, apple cake, 025

I often make coleslaw and we love it but this was different… using the broccoli stem instead of cabbage.

coffee vod, apple cake, 026

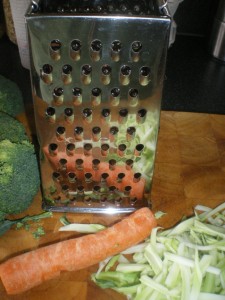
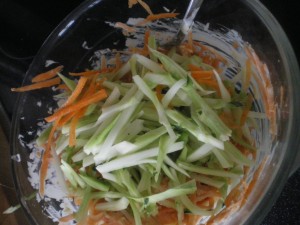
Simple enough… just slice the broccoli stem into slices across and then across again and again until you have pieces the size of matchsticks.

coffee vod, apple cake, 027

… and grate the carrot

coffee vod, apple cake, 028

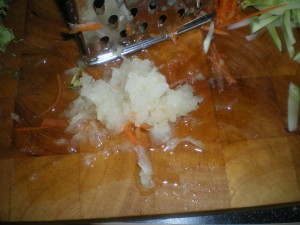
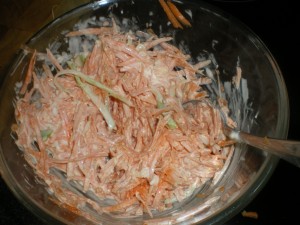
When you make cole slaw, you really have to add onion but I really don’t like lots of it. If I eat big bits of raw onion I get a headache… weird, eh? So what I have done to get round that is to use a microplane grater and grate some raw onion so it comes out rather like a puree….
coffee vod, apple cake, 029

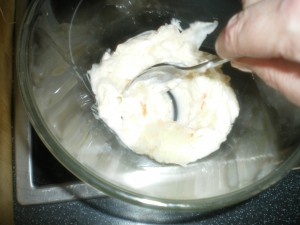
and what I do then is add it to some mayonnaise to give the taste of onion without too much harshness.

I love making my own mayonnaise because I can tweak it according to what I intend to eat it with… lemon, perhaps, or chilli. This time I just wanted plain mayonnaise so the clean crisp flavours of the carrots and broccoli could shine through.

coffee vod, apple cake, 030

Stir in all that lovely, sweet, grated carrot

coffee vod, apple cake, 031

Then add the broccoli and a sprinkling of lovely Maldon Salt and stir it round…..


This is gorgeous. Really gorgeous.

coffee vod, apple cake, 034

And when fed to Bears? Bears who swear they won’t eat broccoli? Well………. it was eaten. And enjoyed!

To think that some people  throw the stem out….

Best sandwich in the world

.. or so says the Bear. He likes this whenever he is at home and would probably eat it every day if he could. Of course, it is not a sandwich in the real sense of the word – there’s no top – and I am perhaps more partial, say, to egg mayonnaise. Or maybe crayfish and rocket… Still, each to his own and that is his choice.

It’s very simple – just three ingredients and a sprinkle of Maldon Salt

Bear's avvy and tomato 001

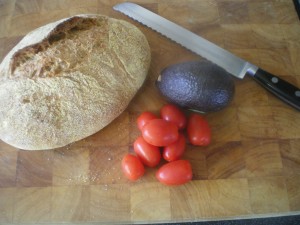
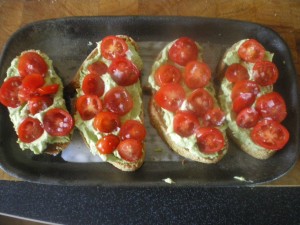
It’s best made with the delicious No Knead Bread, which makes spectacular toast, a Hass avaocado (they are the knobbly, dark green ones) and some small baby plum tomatoes, crisp, sweet and juicy.

Slice your bread

Bear's avvy and tomato 002

and lightly toast it

Bear's avvy and tomato 003

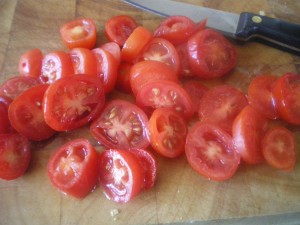
Slice those little tomatoes

Bear's avvy and tomato 005

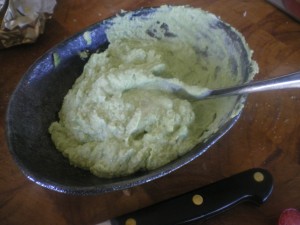
and then scoop out the avocado and mash it with a fork

Bear's avvy and tomato 006

Then start to put it all together….

Bear's avvy and tomato 007

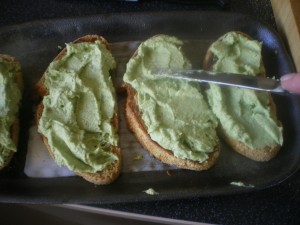
Spread the mushed up avvy thickly over the toast

Bear's avvy and tomato 008

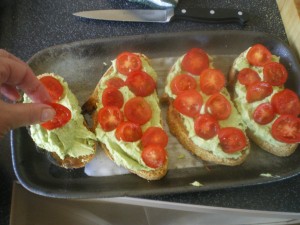
Then put the tomatoes on top of that

Bear's avvy and tomato 009

And sprinkle lightly with Maldon Salt…..

Bear's avvy and tomato 011

And there you have it. How to keep a Bear happy in one easy lunch.
Roasted pumpkin seeds

As it is getting towards Halloween you see pumpkins everywhere, in every farm shop and greengrocer.

I thought that I would make pumpkin soup this week and then the Bear had the brilliant idea of also making our own roasted pumpkin seeds to have as a snack. They are full of fibre, high in protein and anti oxidants so they are, actually, a health food… despite tasting absolutely delicious.

First of all, get your pumpkin!                               Beans and belly pork 036

Cut it open ……

Beans and belly pork 042


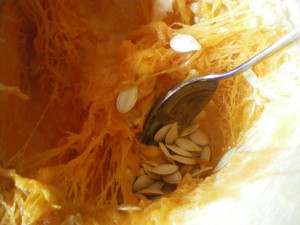
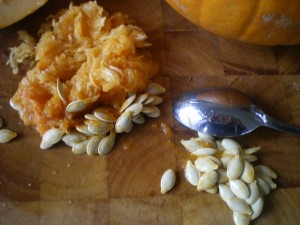
 and start scooping out those seeds! They are your bonus – you’re making soup with the flesh and what you would have discarded you are now going to make into tasty little bites. Put the oven on to preheat at about 150 degrees

Beans and belly pork 046


 You need to scrape the fibres off

Beans and belly pork 045

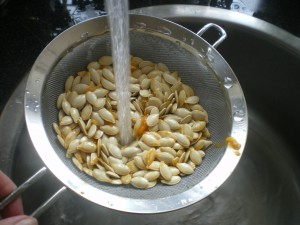
And then give them a good rinse under the tap because they are very slippery and the gloopy bits rinse away easily enough

Beans and belly pork 047

Roasted pumpkin seeds 014

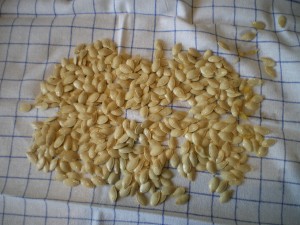
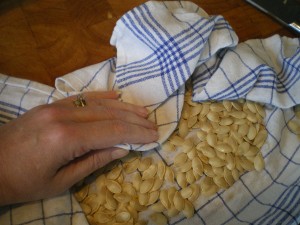
Put them on a clean tea towel and rub them dry… well, you won’t be able to do that but you can get a lot of moisture off them

Roasted pumpkin seeds 015

You need to think about how you want to flavour the seeds – I fancied spicy ones and looked to see what was in the cupboards that I could use. I regularly make chilli oil by popping chillies into a bottle and topping it up with grapeseed or sunflower oil. It’s not particularly hot but it just adds a hint of heat. Worcestershire sauce would be nice too and I also found some Jerk Seasoning which I thought would just fit the bill as a flavouring dust to help crisp things up

Roasted pumpkin seeds 018

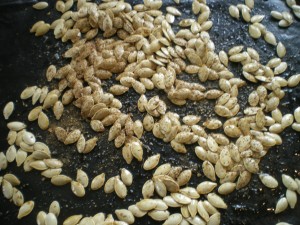
The oven should now be hot, so get a baking tray and put one of those silicon sheets on…. or cover it with tin foil, sprinkle that with the oil, pour on the pumpkin seeds, add a teaspoon or so of Worcestshire Sauce,  salt and then shake that Jerk Seasoning over the whole lot.

Roasted pumpkin seeds 020 Into the oven with it and that’s where it will stay for the next 15 – 30 minutes.
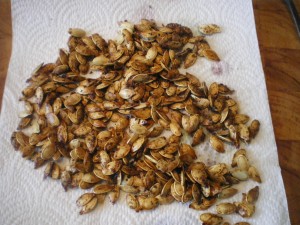

You need to keep checking though and stirring them round because they can burn easily but you’ll see them turn a lovely toasty colour. Put them onto some kitchen towel to absorb any extra oil

Roasted pumpkin seeds 029 

Let them cool  and then serve those crunchy morsels up. If you served them with a glass of wine, I reckon you’d be hitting every health button there was!

Roasted pumpkin seeds 031

There you have it – tasty snacks from the stuff you would otherwise throw away. I think we deserve medals for being so creative and cost concious. Cheers!