Remembrance of Things Past… madeleines for an anniversary tea.

One year ago today I started this blog. I can’t believe how many things I have cooked since then. One good thing about writing about what I cook is that I have been forced to cook new things. I know how easy it is to rely on the same old favourites all the time. I have been inspired by reading all the blogs my new friends have written or have pointed me to. I have made things I had just previously read about and discovered that things are never as tricky as they might seem. All it ever takes is a bit of time to read things through so you understand the process and love and determination in your heart. My main inspiration is the Bear – I just want to make good things for him… and after all, this blog is named after him.

When I look back at all the posts I’m amazed that anyone read them or that they continue to read them.

I had to celebrate a full year of blogging and all the friends I have made because of it. I’d love to be able to celebrate with you all here.. maybe laughing and talking about the past year over cups of tea and cakes….

And that made me think of Marcel Proust. And madeleines. Proust talks of eating a madeleine with a cup of tea and being transported back to earlier times….

She sent out for one of those short, plump little cakes called petites madeleines, which look as though they had been moulded in the fluted scallop of a pilgrim’s shell. And soon, mechanically, weary after a dull day with the prospect of a depressing morrow, I raised to my lips a spoonful of the tea in which I had soaked a morsel of the cake. No sooner had the warm liquid, and the crumbs with it, touched my palate than a shudder ran through my whole body, and I stopped, intent upon the extraordinary changes that were taking place…at once the vicissitudes of life had become indifferent to me, its disasters innocuous, its brevity illusory…”

— Remembrance of Things Past, Volume 1: Swann’s Way.

What better cakes to bake for a wet Sunday afternoon when I want to look back on the last year?

The rain was lashing against the windows and all over Britain people were staring at the dismal weather and deciding to stay inside. We were going to do the same but I was going to make tea time special to celebrate this special day.

To make madeleines you need a madeleine tin. These have a wonderful scalloped base that are essential for the perfect madeleine. You won’t regret buying one (if you need any encouragement, that is) If you are looking at kinds to buy, avoid the silicone ones – the metal heats better and is  much easier to handle than a wobbly, rubbery tray.

You also need good instructions and the best I have found (after intensive searches) is from David Leibovitz  on “Living the sweet life in Paris”

First of all melt, then let cool, 120g unsalted butter.

You will use most of it in the cake batter but just lightly brush the madeleine tins with a quick wipe of melted butter.

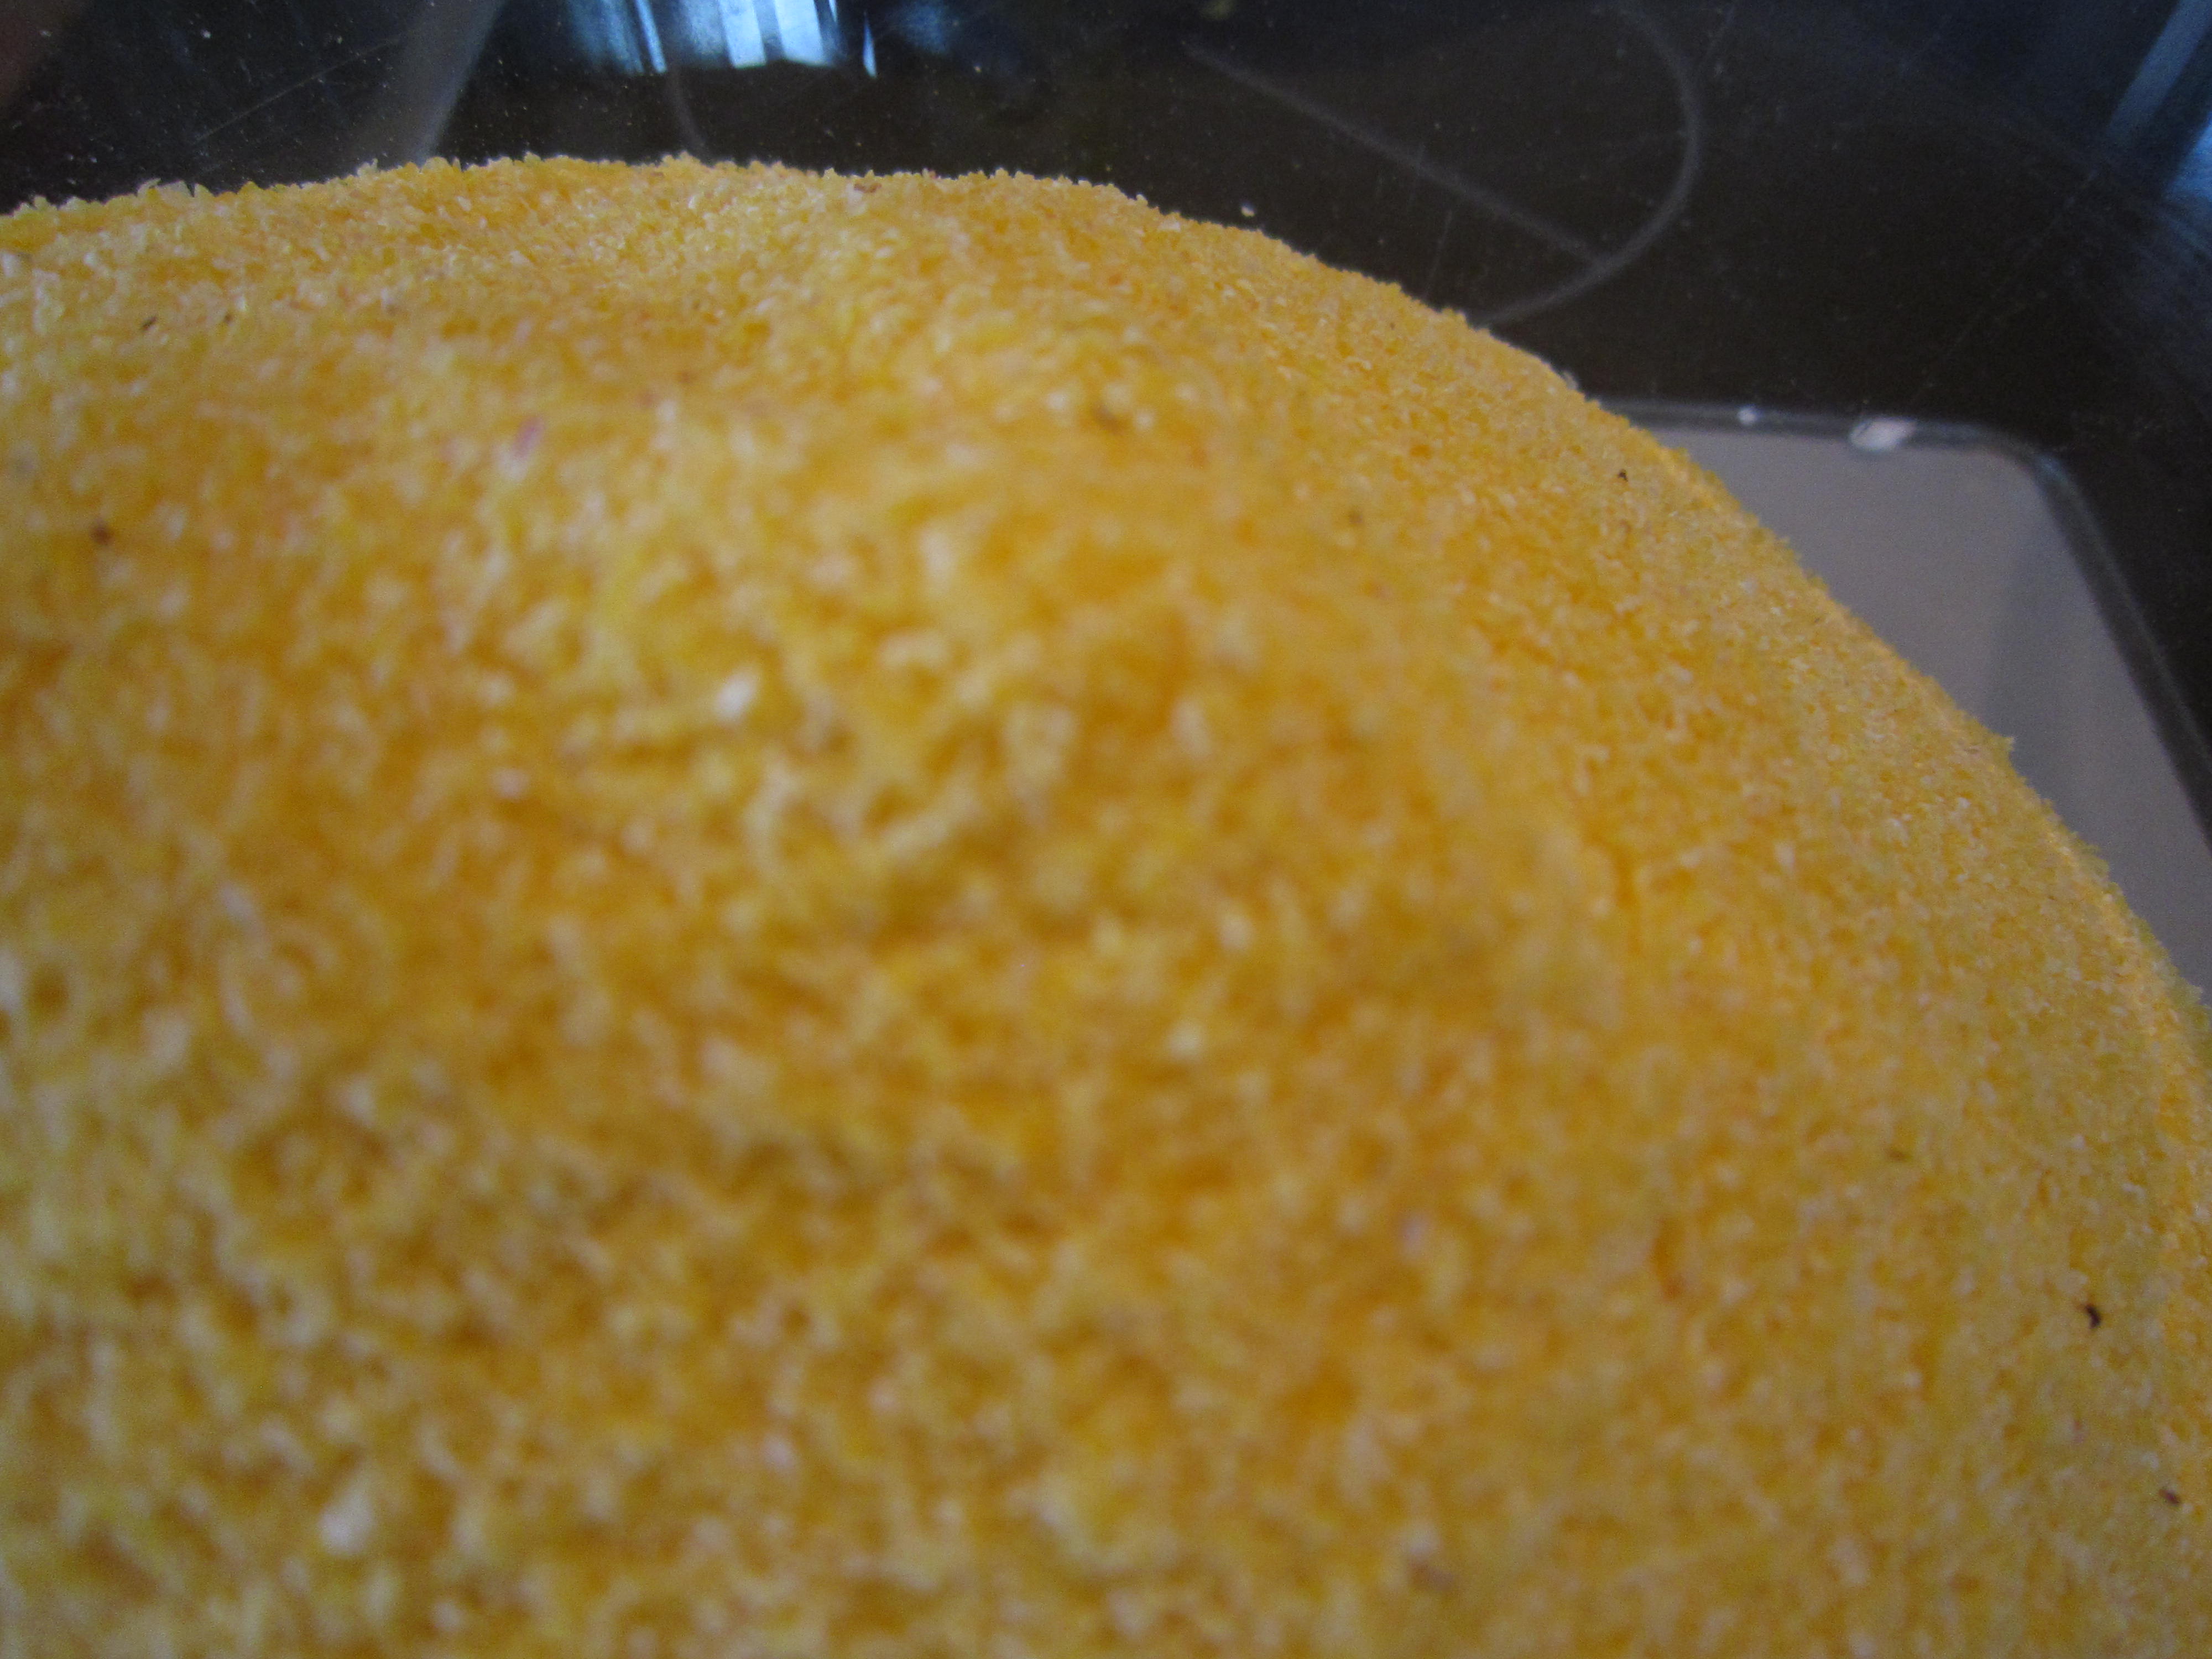
Sprinkle the buttered tins with flour

Then upend the tin over the sink and shake off the excess.

Put the tin in the freezer to chill down properly.

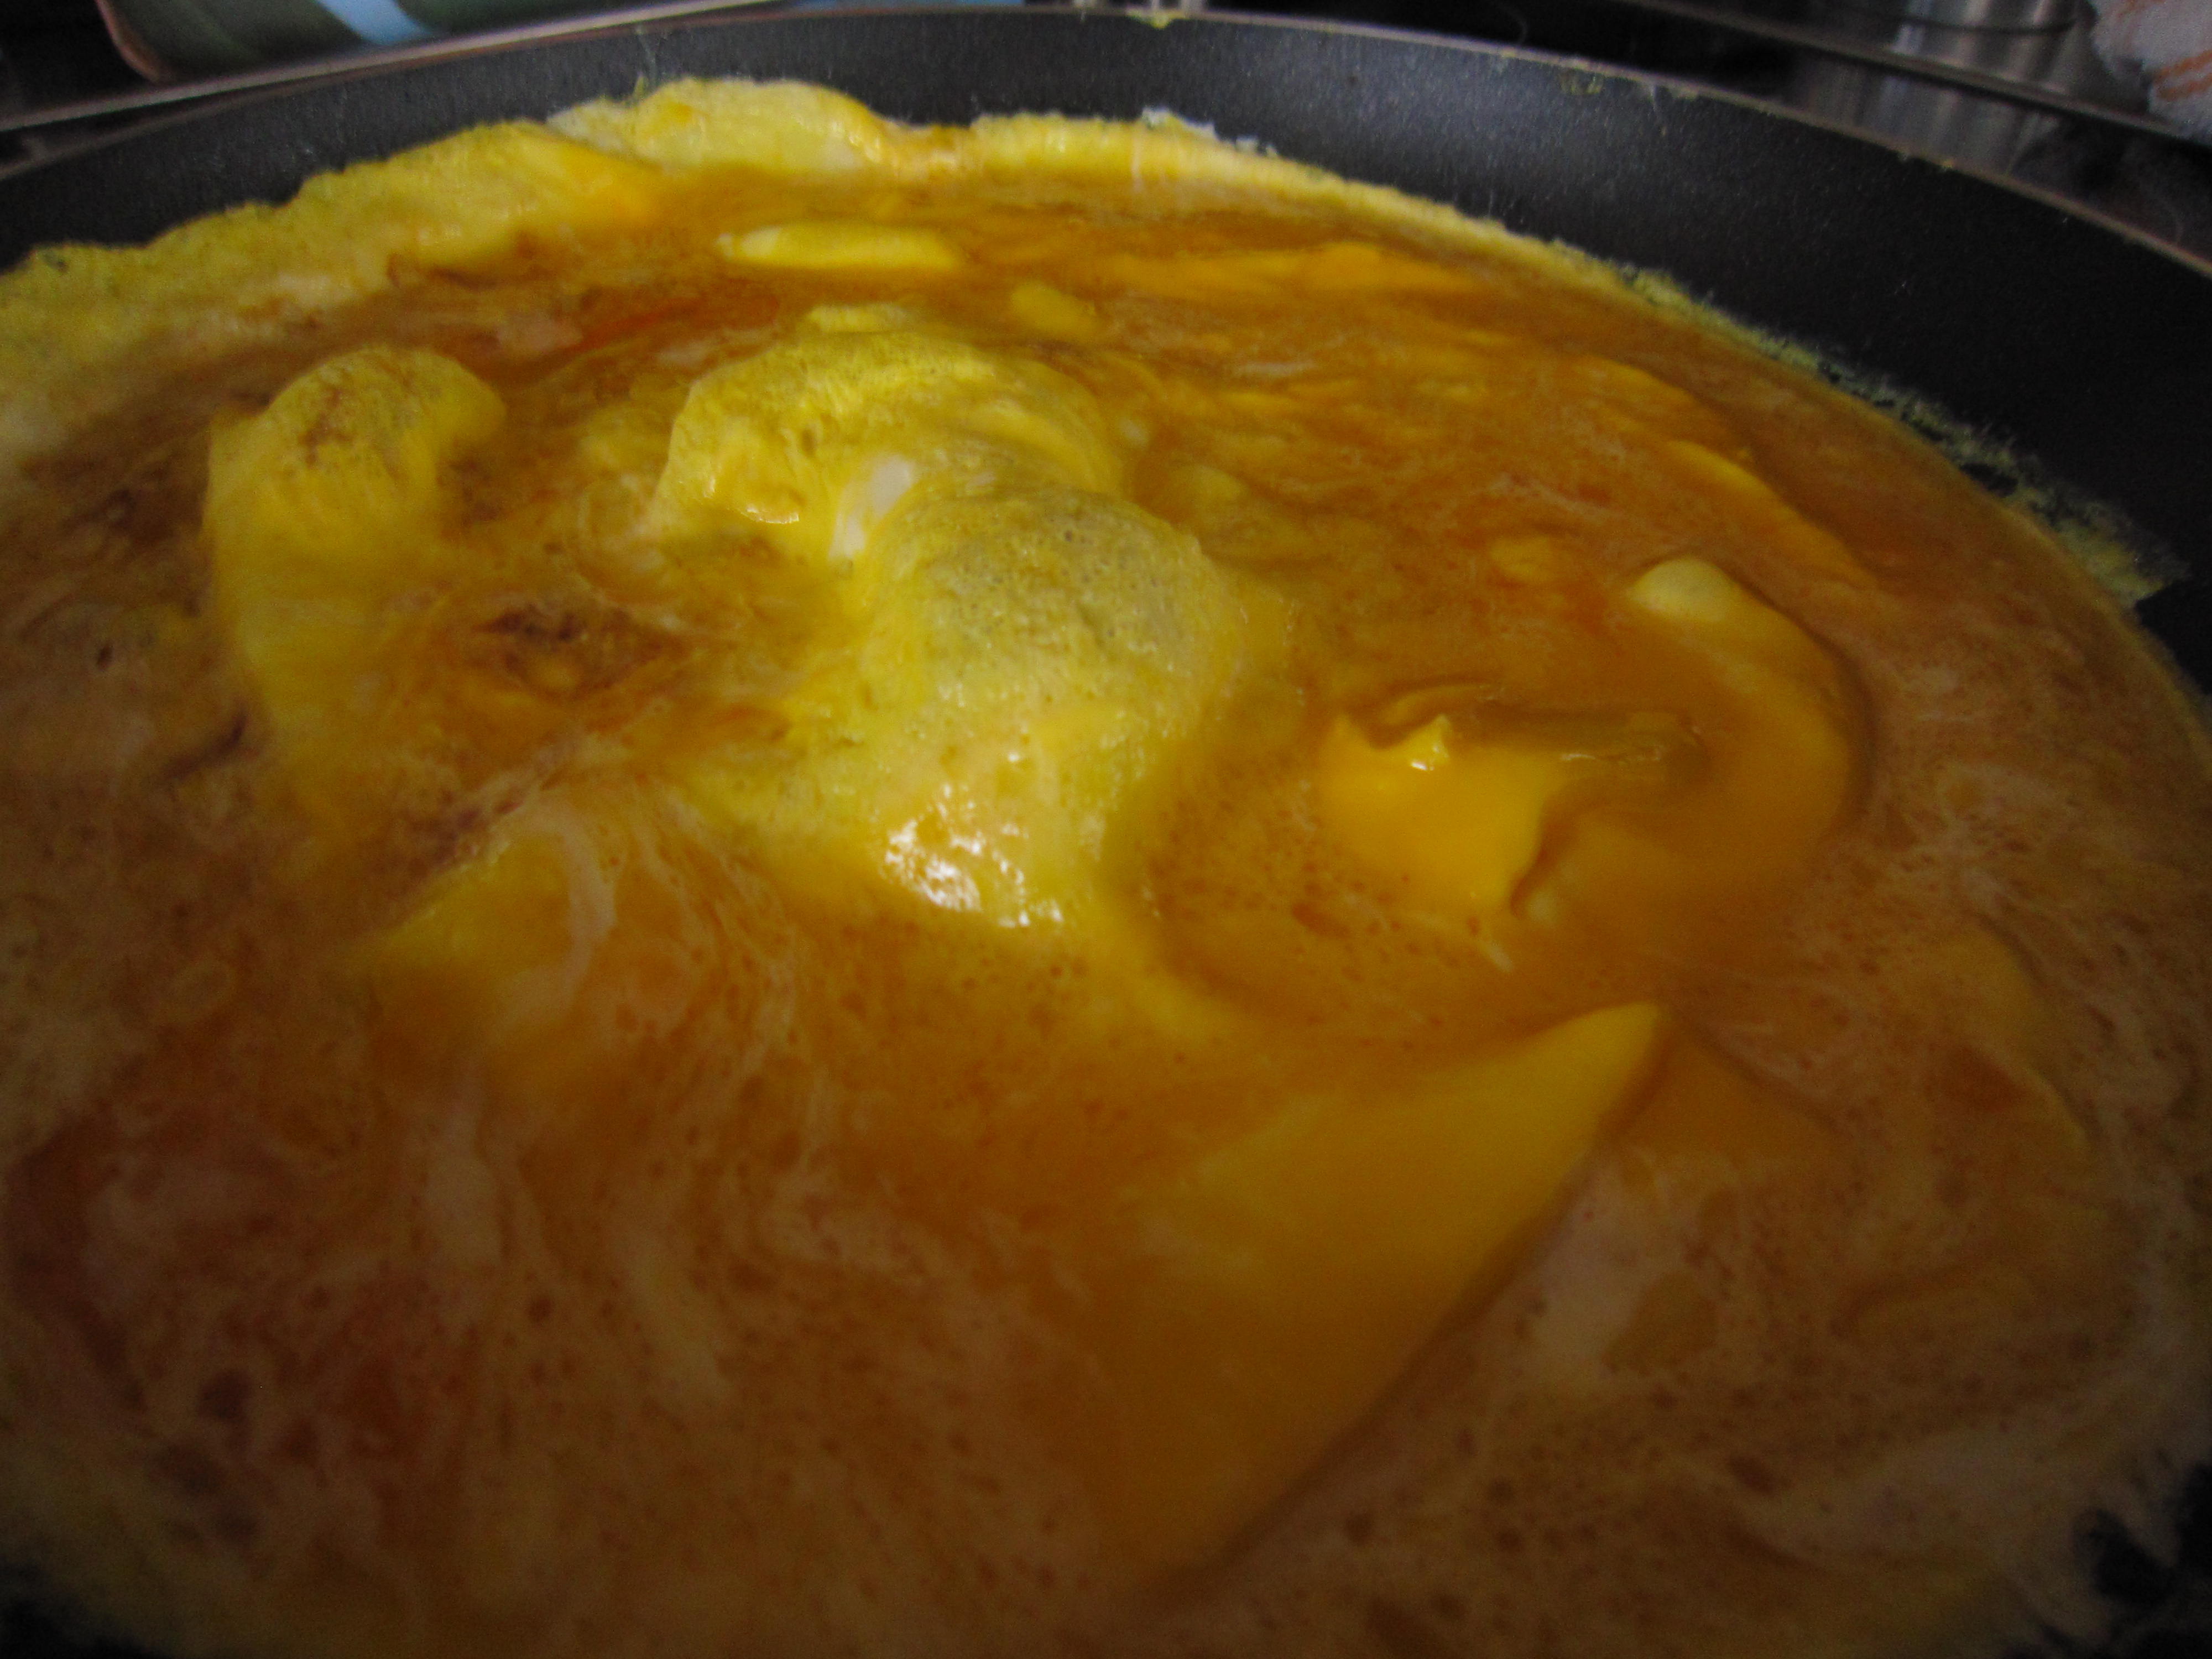
In the bowl of a mixer, put a pinch of salt, 130g of golden granulated sugar and three large eggs (that have been allowed to come to room temperature)

Whisk them together for five minutes until the mix becomes pale and thickens slightly.

Weigh out 175g of fine plain flour – I always use ’00’ (it’s available in most supermarkets now, in the baking aisle) and add 1 level teaspoon of baking powder. The baking powder makes them rise well, giving the traditional (and desired) “humpy” effect on the back of the finished madeleines.

Sieve the flour mix into the egg and sugar bow and fold it in carefully.

Zest a lemon and add it to the melted butter. Remember to scrub the lemon if it is a waxed one.

Once the flour is in, add a little of the melted butter and fold it in gently.


Gradually, add it all slowly and carefully. Don’t overwork it because all that will do is toughen the gluten. Just fold it in as lightly and smoothly as possible.

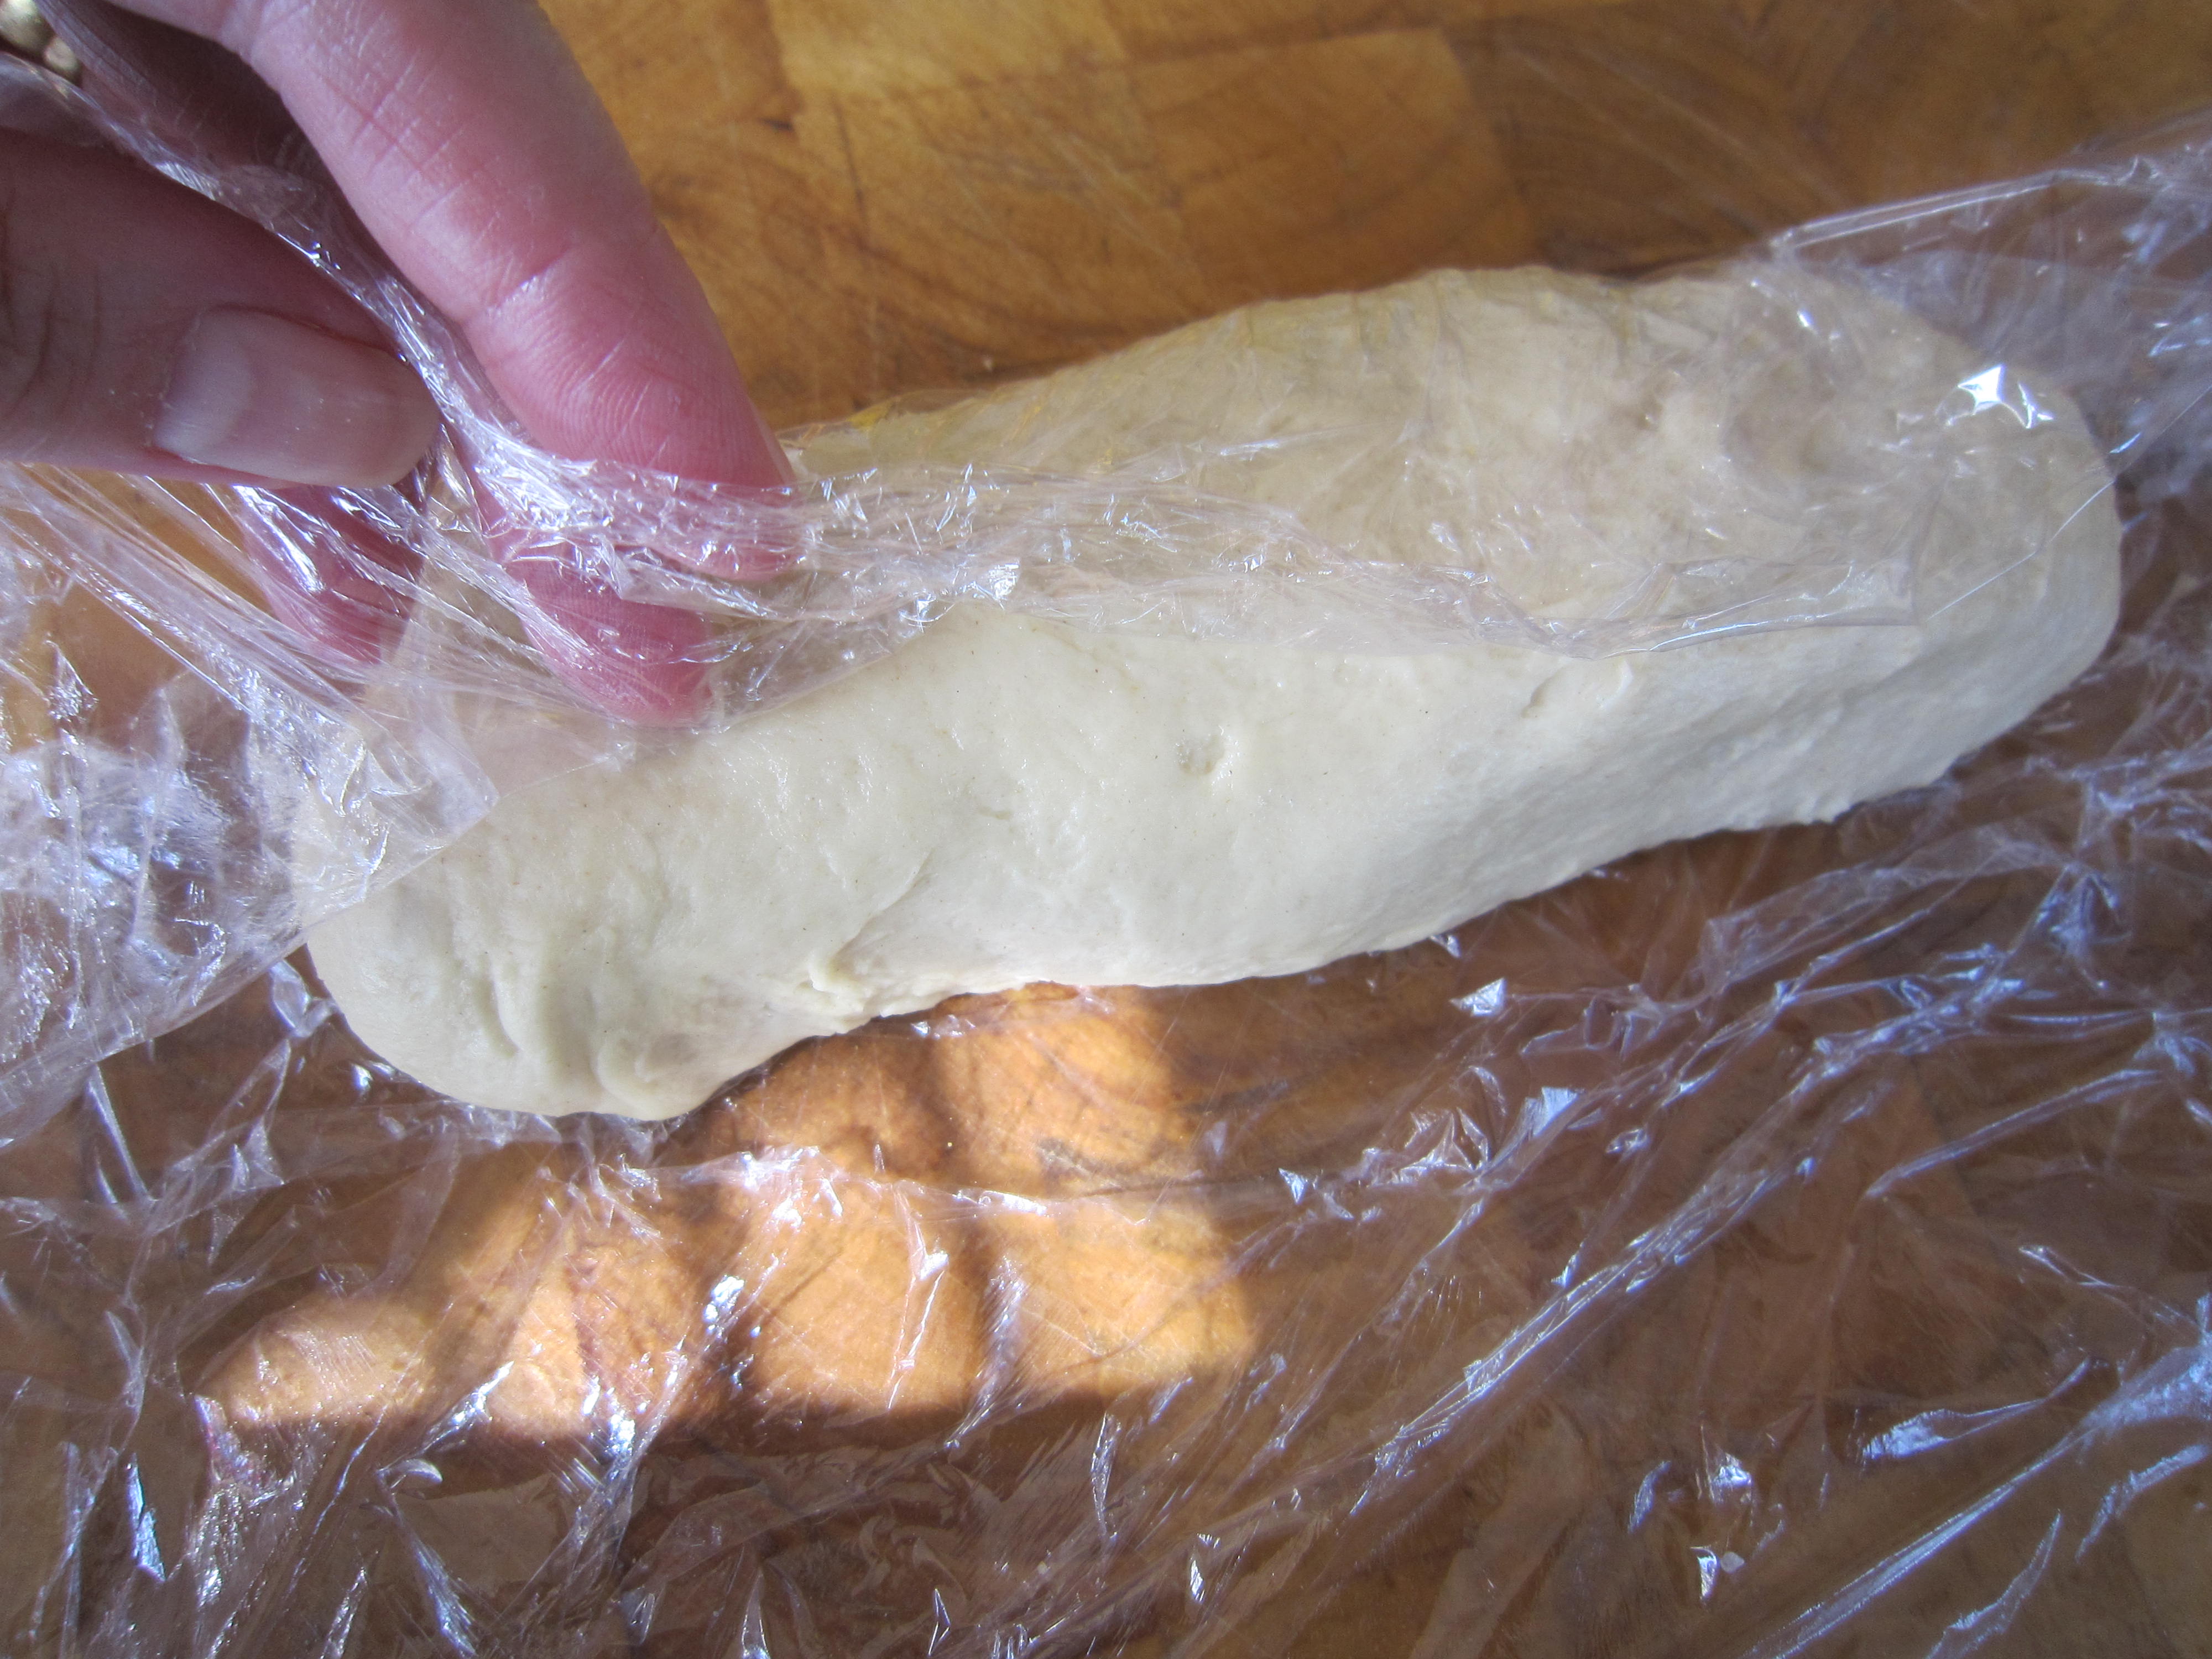
Pour your beautifully smooth and silky batter into a jug and put it in the fridge for at least an hour. You can make the madeleine batter up to 12 hours ahead, if that will suit you?  What a great thing that would be if you had people coming round!

When you are ready, heat the the oven to 220 degrees C/425 degrees F

Get your beautifully frozen tin from the freezer

… and spoon in a dollop of the madeleine mix

The madeleines will only take between 8 or 9 minutes, so while they are baking, make some  tea.

We love beautifully fragrant green tea and I think the pure, delicate taste would be perfect with the light, sweet cakes.

As the tea infuses the leaves unfurl.

At the same time,  the madeleines are ready.

Beautifully humped and golden.

They are tipped out onto a wire rack to cool slightly. The underside has the gorgeous scalloped markings of the perfect madeleine.

Golden, sweet, warm cakes. Light and delicious.

We ate them with our steaming cups of tea as we looked back over the past year. We used the random post picker button on the main website page (which you can also get to by clicking on the Bear in the top corner) and read about meals and treats and smiled as we did so.

The weather may have been awful but the madeleines were fabulous.

Happy Anniversary to the blog!

Cheese and Sweetcorn Scones

When I made the delicious Roasted Garlic and Marrow Soup, I wanted something to go alongside the soup to make it a substantial lunch as I knew we weren’t going to be eating until late that night. What better, I thought than a savoury scone? One still warm from the oven? Maybe a good cheese scone would be just the thing.

Those of us who are British will know what I mean by a  scone – it’s what American’s call biscuits. What they call cookies, we call biscuits. Confusing, eh?

(A scone is an essential part of a British tea and  as Wikipedia points out ” According to one academic study, two-thirds of the British population pronounce it /?sk?n/, rhyming with “con” and “John”, with the preference rising to 99% in the Scottish population. The rest pronounce it /?sko?n/, rhyming with “cone” and “Joan”. British dictionaries usually show the “con” form as the preferred pronunciation, while recognizing that the “cone” form also exists”. I say “skon”  and as my husband will tell you, I am invariably right……..)

When I walked to the local shops I saw that the greengrocer was selling corn on the cobs, locally grown.

I knew from experience that these were sweet and delicious so I bought a couple. I’d seen a recipe in Good Food for cheddar and sweetcorn scones  so I thought this was the ideal opportunity and recipe to try out. I got some really good Cheddar from the Farm Shop and came home, knowing that it wouldn’t take more than half an hour to get them made.

The first thing to do was to cut the sweetcorn kernels off the cob. The easiest way to do this is to stand the cob in a Pyrex jug or bowl and run the knife down so the kernels fall into the jug. If you don’t do this then the kernels scatter everywhere. I know this because I have done it. What that means is that you then waste time looking for the sweeping brush and clearing up the mess. Do it in a bowl or a jug, eh?

It’s quick and its easy.

The next thing is to cook the kernels quickly. I  put a knob of butter in the bowl and microwave them for a couple of minutes if I am serving the corn as a side dish, but as these were to go into scones I decided that a small amount of water would do just as well. Adding extra butter to the recipe would skew things. It will only take a couple of minutes and then you can drain them, ready for the next step.

Start by heating the oven to 220 degrees C/430 F.

Mix, in a large bowl, 350g self raising flour, 1 teaspoon of baking powder, ½ teaspoon sweet smoked paprika, 1 teaspoon of salt  and some thyme leaves.

The original recipe called for mustard powder too, but mustard is one of the Bear’s Big Hates so I tend to avoid it whenever possible.

50g of unsalted butter must then be rubbed through until the mixture looks like fine breadcrumbs.

Grate 175g of good strong Cheddar cheese and add most of that to the flour mix.

Add all of the cooked and drained sweetcorn and mix it all well, so there’s an even distribution of ingredients.

Add the juice of half a lemon to 175ml of semi skimmed milk.

My mother always used to save soured milk for scones when we were little… which makes me wonder, did milk go off more quickly years ago? I hardly ever have soured milk nowadays. maybe it is that fridges are better?

So, with no soured milk available, lemon juice does the job.

You can see that the milk looks almost lumpy… the lemon has acted on the milk, souring it and that’s the way to get perfect scones.

Mix it all together.

The dough will be sticky, but don’t despair and DON’T faff about with it. You need minimal interference for scones, otherwise the gluten in the flour toughens then and you end up with hefty, solid lumps, when you were wanting light and delicious morsels.

Sprinkle some flour on the board and knead the dough briefly so it comes together.

Make into 10 or 12 little balls by roughly rolling them.

Flour a baking tray or a silicone sheet on a baking tray and put the scones on.

Brush them with some milk, then scatter them with the rest of the cheese, some paprika nd any remaining thyme leaves.

Into the oven for 10 to 15 minutes until they are risen, golden and sound ready… that is, when you tap the bottom, they should sound hollow.

And just look at them!

Of course, we had to try one with some butter to see how they were……..

Before I served them with soup for lunch.

A perfectly light and deliciously tasty scone makes a great accompaniment to soup and now that the weather is changing I’m going to be making a lot more. Whyever wouldn’t I when in half an hour I can have beauties like these emerging from the oven?

Meatfree Monday – Seed and grain bread for egg mayonnaise sandwiches

The Bear was about to set off on his travels again and would be getting up at some ridiculous time in the morning so he could get to the airport. What that means is that he doesn’t really feel like eating too early in the morning and would rather have something to eat at a more normal time.

What THAT means is that he is loitering around an airport and picking at stuff. Now I’m sure that what is served at outlets or in the Business Lounge will meet with all Food Health guidelines… it just doesn’t meet with mine. Obviously, food produced on an industrial scale, for sale at some point in the future is going to be packed with preservatives or dodgy fats that we don’t want and would never have in freshly made food. He knows not to risk my wrath by buying a plastic wrapped muffin or going to a fast food outlet for a burger and he does try to get something looking vaguely healthy but the fact remains, he has to eat at some point while he’s travelling. He could try looking a sandwiches but, even there, there are problems.

A simple egg sandwich, for example, will be made with bread that has preservatives, the eggs will probably not be free range (as I’m sure they would be plastering that fact all over their packaging), they are likely to be using margarine instead of butter and goodness knows just when they boiled the eggs.

So I decided to make sure he could have something to eat that he could carry easily, would taste nice and be good for him.

His favourite sandwich is an egg mayonnaise one so I decided to do that.

First I needed to make good bread and as he is particularly fond of seeded or granary loaves, I decided that would be just the thing to bake.

I got a packet of Allinson’s Seed and Grain Bread Flour, which is white flour with wheat and barley flakes, kibbled rye, sunflower seeds, millet and linseed. Healthy, tasty, nutritious and perfect to make into a lovely sandwich.

There was a recipe on the back that looked good and I thought I would follow that as I had never used that flour blend before. It looked quick enough, too.

First thing was to preheat the oven to 230 degrees C/450 degrees F, whilst measuring out 650g/1lb 7 oz of the flour, 10 g/2 tsp of salt, 5g/1 tsp sugar and a 7g sachet of yeast.

That was mixed together first to get an even distribution of all the dry ingredients, then 15g/ ½ tsp of soft butter or 15 ml/1 tbsp of vegetable oil was rubbed through.

400ml/ 14 fl oz of warm water was added and mix to make a soft dough.

The recipe says to knead it for ten minutes on a floured surface – I did it in the mixer with a dough hook and added extra flour to get it to come together.

Well I did give it a knead myself…just to show willing and besides I like to feel the dough and by feeling you can judge when it is properly ready.

Look at how the dough looks now… smooth and bouncy. If you’ve ever patted a baby’s bottom.. well that’s what it should feel like!

It had to be put in a greased tin (they suggested two 1lb loaf tins but as I wanted it for sandwiches I put it in a long 2lb tin

and covered it with a tea towel for 30 minutes until it doubled in size.

Into the hot oven it went for half an hour or so

Perfect. When I knocked the bottom it sounded hollow which means it had cooked properly.

It looked and smelled delicious. We might have shared the end crust with some butter on…. just for checking purposes you understand.

The next thing was the filling. I always use free-range eggs and buy these from our local farm shop so I know exactly where they come from and just how fresh they are.

Boil them for four minutes then immediately tip away the boiling water and start filling the pan with cold water because otherwise you get that horrid black ring round the eggs and that terrible sulpherous smell.

I like the eggs to look like this – mainly cooked but with just a hint of soft yolk.

The eggs were  chopped then two slender spring onions are also chopped and added. I wish we still had some chives left but with Autumn rapidly approaching they are all gone now.

A tablespoon of Hellmann’s Mayonnaise and a pinch of salt go in next (Hellmann’s switched their production to free range eggs so that’s good, otherwise I would have had to make my own, which I have to say is really easy…. but this was easier!)

White pepper enhances the egg mayonnaise mix really well,  so a shake or two was added to taste.

And that was it for the afternoon. I was going to get up early the next morning and make the sandwiches. The egg mix went into a lidded box in the fridge and the bread was put to one side.

Next morning, at around 5.30 am, I got up to sort things out. The bread cut well and is ideal for sandwiches. It was a good even texture and the seeds and grains made it slightly dense, which is a good thing for a sandwich. You need the bread to hold together and not collapse, spilling your filling everywhere. Especially when the person about to eat it is in a business suit… This might have happened on another occasion.  not this time, though. That bread looked like a winner in the samdwich stakes.

It’s important to spread the bread with butter as this makes a waterproof layer and stops the filling seeping through. And butter is important because, well, it just is. I believe in butter and I do not believe that some weird kind of vegetable fat with emulsifiers added to it could possible make anyone believe it wasn’t butter.

Butter is cream shaken up until it turns to butter. A pinch of salt can be added but that’s all. No chemicals, no E numbers. Nothing but creamy milk and salt. Healthy, that is, I’m sure of it. Anyway, we don’t have any margarine or spread or whatever it is called. Butter it is and that’s an end to it.

Delicious. And I always make sure I spread to the edges. I hate it when you get a sandwich and there’s just a tiny dot of the filling in the middle.

Sliced in two so it’s easy to eat

And wrapped in a sandwich bag so he can throw it away afterwards.

So, the Bear left for some other country and I went back to bed, happy knowing that he would have something to eat without having to buy an overpriced, low quality sandwich.

Was it worth it? Yes, it was.

Making the bread took quarter of an hour mixing and kneading. The bag of flour cost less than £1 and there’s still a well over a quarter left. What I used made a 2lb loaf so there’s plenty left for sandwiches for me for work. I suppose the two slices I cut for him would work out at maybe 15 or 20p. The eggs cost £1.65 for a half dozen, but what I used on his sandwich was probably less than one egg so there’s another 28p. Maybe adding in 10p for the other ingredients and you have a perfect additive free sandwich for 58p or thereabouts. Even if you add in 20p for using the oven it is still incredibly cheap when you consider that in an airport the average cost of a sandwich is £2.80. And if you wanted decent bread and free range eggs? That would be another £1 or so added onto it.

For all of you who are wary of making bread (and you know who you are) this was a simple, quick and very tasty loaf. It saves an incredible amount of money for what is really very little work.

Go on – get baking!

Meatfree Monday – Baguette baked with cheese, tomatoes and peppers

For me, there’s something so soothing about baking bread. I love getting out a big bag of flour, some yeast and some good salt and knowing you can turn it into something delicious. Those ingredients, by themselves, could never be a meal (unlike quite a lot of things we cook with) but together, in some almost alchemical way, become something nearly essential to our day to day life. We talk of “breaking bread together” to refer to eating together. Bread in the Bible is called “The Staff of Life”  and means it is a staple, or a necessary food. We talk of  “Our daily bread”  both in prayer and conversation. It doesn’t matter if you aren’t religious in any way, it’s just the Bible tends to be the oldest, most widely accessible book in the world and phrases and proverbs from there crop up in our everyday language without the majority of us even noticing, or realising where they come from.

The fact that these terms have entered our language and are used daily point to the importance of bread for the majority of people. “Bread” and “dough”  are even used as slang terms for money.

Anyway, I love the action of making bread. I love the smell of it baking and I especially love cutting into a still warm loaf. I think I could get away with murder in our house as long as the Bear can have his fresh loaf. His favourite is the No-Knead Bread but sometimes I make soft white bread because, really, there’s nothing like it for a fried egg sandwich which is one of our favourite weekend breakfasts.

This  wasn’t planned as a breakfast , however. I wanted to make us something nice for lunch. Something light and tasty but also something that would brighten what was a rather vile day. There were thick clouds everywhere and violent rain storms. The Met Office were issuing storm and flood warnings. A typical British Summer, eh?

I had a fancy for a sandwich but a kind of baked and stuffed sandwich. Sort of like a calzone pizza but with lovely white bread. I wanted a light and fresh toasted sandwich – certainly not a heavy meaty one…and it had to be suitable for Meatfree Monday.

But first of all I had to make the bread.

That’s as easy as anything, really.

250g of strong white bread flour with a teaspoon each of dried yeast and salt are stirred together so you have all the dry ingredients evenly dispersed

50g of butter can then be rubbed through, rubbing the butter lumps with your fingers so they make a fine, almost granular in appearance, mix.  (Yes, the Bear took that photograph as my hands were messy)

5 fluid ounces of warm water need to be poured in and mixed through. The warm water helps the yeast become active, so don’t have it too hot as this will kill the yeast and too cold means it won’t start to work its yeasty magic and make the bread rise.

The dough will come together quickly and then you need to knead it. Either do it by hand (and it’s not a tough job as this is only a small quantity of dough, just enough for two people) or if you have a mixing machine with a dough hook, stick it in there for 5 minutes. If you are doing it by hand, take ten minutes and think of it as a meditative exercise… I stretch the dough away from me and pull it back again and again. The texture of the dough changes from an uneven, lumpy mass into a smooth and almost silky ball of dough that bounces back when you poke it. It’s a marvellous way of calming down or settling your mind.

Once the dough looks right – and you will be able to tell the difference from when you started out – make it into the shape you want and leave it to rest, lying in either a greased loaf tin, covered with a damp tea towel to stop it drying out or, as I have done, lying on some lightly  oiled cling film and loosely wrapped. I wanted a baguette shape so I rolled it between my hands for a free form shape.

That needed to rise quietly by itself until it had doubled in size, which, in normal temperatures, takes about an hour or maybe an hour and a half. In the depths of winter it can take longer and you might have to find a warm place so the dough can rise.

Once it had grown into the size it should be – i.e. a baguette big enough for two – I pulled it apart and started putting the filling in.

Sun dried tomatoes went first.

Slices of lovely, tangy Tallegio cheese on top of that. I chose Tallegio because it melts well and tastes divine. You choose whatever you think is the nicest.

And remember those roasted red peppers I made?  I thought they would add an extra layer of flavour, so the last of them were laid on top.

Then it was simply a matter of making sure the oven was heated to 230 degrees C/45o degrees F and the edges of the dough pinched back together

A few slashes across the top to let it expand and then it went iinto the oven for half an hour or so.

You’ll be able to smell it when it’s ready – that gorgeous baking bread smell fills the apartment and the Bear starts to look around, sniffing, realising his lunch is nearly ready.

The bread has risen nicely and browned gently… some of the cheese has started to ooze out….

And cut into? It’s not doughy at all but a lovely, well risen soft white baguette with a hot and savoury tomatoey, cheesey and smokey peppered middle!

A success, if I say so myself.

The Bear thought so too and, really, that’s what counts for me.

Try it… put whatever filling you like in – the heat of the oven will heat the filling as it bakes the bread. It really is worth it… delicious baguette stuffed with your favourite things. Just what you need to brighten a wet and windy August day!

Meatfree Monday – Baked Butternut Squash Gnocchi

The weather had changed. It was blustery and rainy (and can you believe that this morning the weather forecast included the possibility of hail? Hail?? In August?) I wanted something that would make us feel happy. We needed comfort food… but not too comforting. It was still warm so I needed something that didn’t generate too much heat. Something that I could have with salad. I wanted to have it on Meat free Monday so it needed to be vegetarian. And then, I thought of something I had first made a couple of years ago.
Baked butternut squash gnocchi… it was a comfort food, so that was good… it is great served with salad, so that, too, is good and best of all, it is only 280 calories per serving. And no meat… so perfect for Meat free Monday.
I could have delicious comfort food and still stay on a diet!

When I see recipes that provide, per serving, less than 400 calories, I save them in a folder called 400 and Under so that I can make a delicious supper that leaves room for manoeuvre with side dishes or even a glass of wine.
This recipe first featured in “delicious.” in September 2008, by the equally delicious Jean-Christophe Novelli. Just as well that I copied it out and saved it because I can’t find it online now. Anyway, doing it like that means I can print it out and take it with me when I shop for the ingredients and then work with it at the kitchen bench.
Also, it means I can then insert it, in its entirety, at the end of this post, something that some of you have been asking for.
Anyway, I did this on my return home from work… supper was delayed slightly as I had to roast the squash first, but not by much. This can be done easily as a weekday meal but if you were feeling efficient, the best way would be to roast the squash the day before while you were cooking something else.
No worries though… it was no problem to peel and dice a butternut squash
I put it onto a silicone sheet and drizzled it with oil, garlic puree and sprigs of thyme. Jean-Christophe says to take the leaves off the sprigs of thyme but that is so fiddly because the stems are soft… if you pull off as many as possible, that’s good and any that are left on the sprigs… well, don’t worry about it. Once everything roasts in the oven, the leaves fall off and the stems are hard and bare – you just remove them from the dish at the end! (See, Jean-Christophe is a chef and he does it properly. Me? I am someone who cooks when she gets in, tired from work. I find shortcuts. I have to.)
The covered roasting pan went into the oven at 180 degrees C/160 degrees if it is a fan assisted oven… and for those of you who use Fahrenheit, that is 356 degrees. 45 minutes was enough to soften the gorgeous squash.
I picked off the stems of thyme and then whizzed the squash to a smooth puree.
While the squash was roasting, I grated 40 g or thereabouts of Parmesan cheese
And added it to 9og of polenta (that’s grits to those of you in America!) , stirring it round to make an even mix before I added the (still hot) butternut squash puree and 65g of  butter.
The heat started to melt the butter…you could tell this was going to be delicious.
In another bowl I mixed three lovely eggs with 125ml of double cream and then added that to the polenta/squash mix.
I lined a baking tin with a silicone sheet and poured in the mix….
Back into the oven, covered with tin foil to stop it burning,  for thirty minutes
When it emerged, all golden and flecked with thyme leaves. It feels firmish, if you press it… firmish but not solid. This is the joy of this gnocchi…it uses no flour so it is suitable for those on who are coeliac or who are on gluten free diets (I shall make this for my dear friend Angela if she ever returns from America)  and it has no potato in in it so it is light and fresh.
Let it cool enough so you can handle it – while you are waiting, cut slices of Tallegio cheese (and if you can’t find this, get some other cheese that would melt well)
I didn’t bother with a cookie cutter, as suggested, I just cut the gnocchi into squares and laid slices of Tallegio on top.
And then put it under the grill to melt the cheese…
Then serve with a light green salad…
Perfect.
The texture of the gnocchi is light and delicious – you can tell it is polenta rather than potato or flour. The taste of the cheeses blended together is rich and satisfying and even better, you can eat it cold. Perfect to put in a packed lunch and take it to work. Immensely satisfying and just right for a blustery day…
And now – here’s the recipe, exactly as it was in delicious.
Baked Butternut Squash Gnocchi
Serves 4 as a main course, 8 as a starter
280 calories, 21.3g fat, 8.1g protein, 14.4 carbs, 3g sugar, 0.4g salt
INGREDIENTS
500g – about half of a large butternut squash – peeled, deseeded and cubed
3 garlic cloves
2 sprigs of fresh thyme, leaves picked off
95g  semolina or polenta
40g grated Parmesan or Gran padano
65g butter, softened
3 medium free range eggs
125ml double cream
Tallegio or other melting cheese to serve.
Preheat oven to 180C/fan 160C. Place squash, garlic and thyme in a roasting tin, cover with foil and roast for 45 minutes. Leave the oven on.
Transfer to a food processor and whizz until smooth. Spoon into a bowl and add semolina/polenta, Parmesan and butter. Whisk eggs and cream together and add to the mix. Season.
Spread in an 18cmx24cm roasting tin, lined with baking parchment or silicone sheet and cover with foil. Bake for 30 minutes.
Cool slightly in the tin then cut into rounds using a cookie cutter – or squares if you don’t have a cutter. Preheat the grill to high, while you put the gnocchi on the grill, covered with slices of Taleggio. When melted, serve with a green salad.

Jean-Christophe Novelli, French Horn. Published in “delicious. magazine” September 2008

Try it… it’s another Meat free Monday success!
(Oh, and in case you are wondering why I haven’t got spaces between paragraphs and decent formatting – well, so am I!
WordPress seems to be refusing to do what I want and no matter how many times I change everything – it just goes back to cramming everything together. If anyone has any idea on how to fix it, let me know!)

Maggie’s Lemon Drizzle Cake … an homage to my aunt

As some of you know, my aunt passed away a few weeks ago. What you might not know is just how much of an influence she was on my life.

When I started this blog, I told you how I had spent a lot of my life not cooking. I ate, obviously, but I got other people to cook for me. I didn’t need to cook as I lived on my own and anyway, I was always travelling. I ate in great restaurants and had a marvellous time.

I come from a family that always celebrate things with a family meal. Every occasion was marked with a get together. My mother and my aunt used to swap occasions… Christmas Day, one of them would cook, Boxing Day, the other would do it. Whoever did New Year wouldn’t do Easter. Everybody’s birthdays were a reason to come together as a family and eat.

My aunt was a great cook and always made the most superb cakes. Her Christmas pudding really couldn’t be beaten and, since I started cooking,  I always used to ask for some to take home with me so I could use it in Christmas Pudding Icecream. She always believed that a person should be able to cook and, more to the point, be able to cook well.

She was so pleased when I started cooking and asking her how things were done. I used to ring her from my car as I drove the thousands of miles I used to do on motorways in my other job. She would tell me how I was supposed to make things and patiently go through the shopping I would need to get in order to make whatever it was she was helping me with. I would stop in some far away town, get my ingredients and carry on driving home. Then, when I got there, I’d ring her again and check I had everything right in my head.

She was the one who taught me how to cook ham properly….. she taught all of us.  My brother adapted her recipe and came up with Gingery. Which is, in our eyes at least, possibly the world’s most delicious roast ham. Her daughter, my cousin, has been baking for years and is the maker of the world’s most delicious chocolate cakes which pleases her sons and her nephew no end. My aunt was never happier than helping people learn – she was a teacher all of her life. She even taught my postman when he was a little boy and whenever I saw him he would always send his best wishes and tell me that my aunt and uncle were the best teachers in that school.

Anyway, while my cousin and I were sorting things out at my aunt’s house, she dragged me to a bookcase and said she had found this….

………An ancient copy of Mrs Beeton’s Book of Household Management.

My cousin said she wanted me to have it, tattered though it was, because it was something my aunt had had for years. It’s falling apart, as you can see and the covers are hanging off. I wish I’d asked my aunt about the book … who it belonged to before her and what she had learnt from it….anyway, I have it now and it is on my cookery bookshelves. You never know, it might get picked on the next round of Cookery Lotto!  How proud she would have been to think that I was even contemplating cooking something from it.

The very first cake she taught me to make was her simple and delicious Lemon Drizzle cake. I found the recipe in my cook book, scrawled on a piece of paper. She will have dictated that to me as I, no doubt, sat in the car at some motorway services, parked up in the rain.

I think she chose that as it is the simplest cake in the world to make and if she was going to entice me into the world of baking, she would need to make sure that I could manage. I think she was reckoning on a small cake, emerging triumphantly from the oven, would be the first in a line of cakes.

And, I suppose, in a way, it was. I decided, this weekend, to bake the Lemon Drizzle cake because it reminded me of her.

The ingredient list was simple and concise – 4 oz each of soft butter, caster sugar, self raising flour and a couple of large eggs. How hard could that be? And some lemons for the lovely drizzle to be poured over the top.

My note did say to cream the butter and sugar together and I’m certain she meant doing it with a wooden spoon… but you see the Kitchen Aid mixer? She bought me that as my wedding present. I have to use it, then, don’t I? I think she realised by the time I eventually got married that I was turning into a cook and a Kitchen Aid was going to be far more use to me in my married life than some standard wedding present of crystal or maybe bed linen. It was an incredibly generous gift, from an incredibly generous aunt.

A couple of the brilliantly golden-yolked free range eggs turn the mix into a vibrant yellow. Finely grate some lemon zest in there – you will be using the lemons later. Just remember to make sure you used unwaxed lemons and if you don’t, give the lemons a good scrubbing first.

That 4 oz of flour (she told me to sieve it) was folded in and then everything put into a lined loaf tin.

Those silcone paper tin liners are an absolute godsend. No more snipping about with pieces of greaseproof paper or baking parchment… the hours they must save across the world!

And into the oven for about 30-40 minutes at 140-150 degrees.

Now to make the lemon drizzle…

That too, is simple…. Just the juice of one and a half lemons and some icing sugar – a good 2 ounces.

(I know that whenever you see chefs on the TV they squeeze lemons in their hands but I always use that glass lemon juicer. I don’t think you need to get your fingers covered in juice and besides, the pips will always drop in whatever it is you are making. Anyway, you get far more juice out of the lemon or the lime with one of them than you do by just squeezing. Maybe my hands aren’t strong enough? )

Heat it gently in a pan until the icing sugar dissolves.

Then let it cool.

At the end of the cooking time, take the cake out and peel back the paper to let it cool for ten minutes or so.

Once that’s done, take a fork and prick over the surface of the cake

This will let the lemon sugar syrup sink in when you gently drizzle it over the surface.

And there you have it.

The simplest cake in the world… but also one of the most delicious.

Golden cake with a lovely, sweetly sharp lemon drizzle. The first cake I made and one that will always remind me of my darling aunt.

Thanks for everything, Maggie.

Broccoli a Bear will eat

As you know, I wage a constant battle to get the Bear to eat what I want him to eat. All in the interest of health, you know, it’s not just me wanting to assert dominance over my poor, beleagured husband. It makes things easier as well, if you both eat the same things. I am having some success – he is now eating prawns and has started to eat broccoli.

Yes, I know, not everybody loves broccoli and for some the slightly bitter tang puts them off, but my reasoning is that if the Bear can eat raw broccoli with a dip as a crudite, or broccoli and stilton soup, or even the deliciously tasty Broccoli and Stilton Pastryless Pie then he can eat it as a vegetable.

And not complain.

Finally, it seems, I may have cracked it.

I’d made the salt and pepper pork tenderloin for supper and knew we needed something with it. He’d started with a crisp salad of leaves, red and yellow peppers and tomatoes so I reckoned that if he didn’t eat what was served with the pork, that wasn’t going to harm him.

Anyway, I love broccoli.

I had gone to our local farm shop and come back with two gloriously green and hard heads of broccoli. We have been on a high protein and low carb diet and butter (thank God) is allowed. I had a feeling that I could make something delicious – well, delicious for me – and if he was hungry enough then he would eat it.

So, I chopped the florets off and sliced the stalks into smaller chunks.

Broccoli stems take longer to cook than the florets so they need to go in a pan first with some butter and a sprinkle of salt. Put it on a medium heat so you don’t burn things.

Give them a couple of minutes to soften slightly before you add the florets.

Toss them round in the butter – you want them to soften and cook but not turn to mush.

It still looks green and delicious and it is holding its shape but now there’s a softness about it.

Sooooo… all well and good but I have to get the Bear to eat it.

I need to up the protein level as well so a great big spoonful of Philadelphia cream cheese goes in and melts over the broccoli.

It is now on a low heat, stir it round and let it cover everywhere.

A spoonful of double cream helps loosen things and makes a delicious sauce.

With salt and pepper added to bring everything together, the creamy, faintly coolly-cheese (you know how cream cheese has that sort of taste) sauce the broccoli feels slightly tamed.

Take the broccoli out and reduce the creamy sauce so it thickens, adding a knob of butter – this makes it taste even more rich and delicious. Just the thing to add to that steaming green goodness.

The bitterness has disappeared and you have a savoury, tasty pile of broccoli, just ready to serve to an unsuspecting Bear.

So I did. There was his pork just asking for something to sit along side it… there was that sauce just begging to be poured over everything. I served it up.

After all, he’d already had a lovely big crisp salad… if he didn’t like the broccoli it wouldn’t be so bad.

It was delicious. Utterly, absolutely, totally gorgeous. I had justified giving myself the larger portion because, after all, he doesn’t like broccoli.

“Did you like it?” I asked.

“Yes…. I just wish there was more broccoli…. ”

Drat. There was more and I had my greedy little eyes on that but in the interests of converting the Bear to a love of broccoli, I just had to do it. This was unprecedented in our lives together – my Bear actually asking for broccoli. He got the lot.

Now, once I have got him to eat it like this I can start to cut back on the cream and Philly – not too much, you understand – and it becomes even healthier.

Maybe I won’t though. Maybe it is just delicious as it is.

Oh, and you know what? He’s asked for, and eaten, broccoli cooked like this several times since. So maybe if you have children who find broccoli just too bitter, try it like this. You never know… one day you might hear the magical words “I just wish there was more broccoli”

Omelette Arnold Bennett

Although we live in a large city, it is a city surrounded by farmland. There are amazing local food producers and farm shops everywhere.

Our closest farm shop, Spring Lane,  is less than a mile from our apartment and I go there every weekend to buy eggs, cheeses, vegetables and meat. There’s a bakery there, too, and sometimes… just sometimes, I buy fresh cream cakes.

But the best things of all, in my eyes, are their fantastic eggs.

Free range, with fantastic golden, almost orange yolks… and oh,  the size of them….

I’d gone there as usual and picked up a dozen extra large eggs and got my fresh vegetables and came back. I had a fancy for an omelette.

Specifically, Omelette Arnold Bennett, the beautiful, open omelette with smoked haddock and a creamy cheese sauce.

(Whenever Arnold Bennett stayed at the Savoy Hotel, he ordered this and loved it so much that wherever else he travelled  he asked for it. Eventually, the Savoy Hotel named it after him and it has stayed on the menu ever since)

I always buy the extra large eggs at Spring Lane and this time, being in a hurry, I grabbed my dozen eggs,  some fresh vegetables and cream, then  set off home again.

I hadn’t checked the eggs because I have never before found a broken one in one of their boxes (they are so careful with all of their produce) so I hadn’t looked inside the box. Anyway, there I was, standing at the bench, about to prepare for the omelette when I noticed that the lid wasn’t down properly on the box.

I opened the box to see this rather surprising sight

Look at the size of that!

That wasn’t just an extra large egg… that was an extra, extra large egg.

In the UK there are regulations about egg sizes. Each egg size, from pullet to small, to medium, to large and then to extra large has a weight range.

 An extra large egg  must be 75g and above.

That beauty weighed 114g.

All I could think was that the hen who was involved in that production was probably just as surprised as I was.

Onto the omelette then – I also had some smoked haddock

(actually, I prefer undyed smoked haddock, but needs must and all that. I wanted that omelette and I wanted it that day so I was prepared to accept the dyed fish)

And some cheese – both Emmental and Gruyere.

And I always have pots of cream in the fridge.

Now there are plenty of recipes available to tell you how to make Omelette Arnold Bennett and some of them are very involved indeed – telling you to make flour based cheese sauces, making you use lots of pans and it is all very labour intensive. What I do would get me thrown out of the Savoy kitchens but, you know, it works for me.

So… here goes… the quick and easy way to make an Almost Arnold Bennett Omelette …

Poach the haddock gently in some milk. You don’t want to boil it fiercely, just sort of bubble along softly for a few short minutes.

While that’s doing, break 4 eggs into a bowl and whisk them gently with a fork and add a good spoonful of cream.

Grate huge handfuls of lovely cheese and add it to another bowl where you have put some more of the thick cream. You want more cheese than cream and the cream needs to be thick.

What you need is a thick and delicious mixture of cheese and cream.

By now, the haddock will be ready, so, carefully, take it out of the pan and flake it.

(Remember to take the skin off before you flake the fish – imagine how difficult it would be to peel the skin off after tearing it to pieces!)

Put the grill on high and get your best omelette pan out and start heating it on the hob with a knob of butter

Pour the eggy, creamy mix into the pan and swirl it round, pulling the softly cooking bits to the middle and letting the runny bits spread out so it cooks gently.

I like to pop it under the grill at this stage so it puffs up slightly in a sort of souffle-ish fashion.

Just a bit though, you don’t want it too cooked because it goes back under the grill later.

Scatter the flaked fish over the omelette and then pour over the cheese and cream mix and then pop it straight back under the grill.

You need a minute or so so the cheese browns on the top

And there it is…..

Fluffy omelette with smokey fish, covered in a creamy cheese sauce…. all you need, perhaps to go with it is a salad

That’s it. Sit down and fork up that gloriously tasty omelette.

Oh, and say a quiet thank you to the hen who valiantly produced such wonderful eggs!

Cheesy Polenta

At the end of a long and tiring week, when it gets to Friday night, I really don’t have the energy to go gallivanting around town. I must be getting old, I suppose, or maybe it is that I really like my home… my sofas, the peace and quiet, the comfort…

I want to come home, sit down and pour a glass of wine, safe in the knowledge my alarm is NOT going to go off at 5.50 am.

And of course, any glass of wine that I pour will be much better than some extraordinarily priced glass bought in a bar, so the pleasure of that  is heightened as I sit there, relaxing. Of course, it is better when the Bear is at home because then we can sit together and talk about the week… but it is pretty darn good when it is just me!

I don’t just sit and drink wine though, I need to eat, too. I need something nice and easy… I need something that will restore me after a full week’s work …. the best option?  Something savoury and delicious… it could, occasionally, be a takeaway from our local Chinese, but tonight I fancy something  carb laden and heavy on the cheese.

Cheesy polenta, in fact!

I’ve been thinking of perfecting more gluten-free dishes – my brother is badly affected (though not coeliac) and one of my dearest friends was diagnosed relatively late in life (in her thirties!) as coeliac. As I adore both of them there’s every chance that they will come and stay, so I need to be up to the mark should they arrive. The fact that A, my friend, recently moved to the USA, means she is less likely to turn up on the doorstep  but you never know.

So, tonight is not just about sheer self-indulgence – it is about making sure I can make something for my darling brother and my dear friend. The fact that sheer indulgence and a full tummy are the results… well, that is just a bonus!

First, look through the fridge for any cheese that you have – I have some parmesan that could do with being used, some cheddar that needs some surgery (just cut off the mouldy bits, that’s fine) and a lovely bit of Italian Tallegio (all soft and rich and creamy)

Get  your polenta out, and a large pan.

I always have polenta in the house because apart from using it in a polenta recipe (obviously) it is also brilliant for using to dust the outside of the fabulous No-Knead Bread 

When you make polenta to eat, you will need one measure of polenta and four measures of liquid.

I’m just using a mug here – that’s going to make one big, gorgeous portion of polenta for me tonight… some for breakfast (don’t grimace like that, it doesn’t suit you!)  and enough to make a huge polenta flan. All of that will be revealed in posts to come. If you just want to make enough cheesy polenta for, say, four people, you will only need half a mug. (And, therefore, 2 mugs of liquid.)

Pour it into a large pan (this will need a large pan) and then add 4 cups of liquid… I am using half milk, half water. You can use plain water… but I am going all out for luscious comfort tonight.

Stir it round so it mixes smoothly and start heating it.

Polenta is rather lovely to make… I  stand there, quite calmly, stirring. It is almost a meditative experience.

Do be careful though – it is so thick that when it gets up to the boil it has a nasty habit of spitting violently at you, if you aren’t stirring it.

Grate your odds and ends of cheese. I dare say an Italian person might have ideas about what sort of cheese, but I am being very economical and using up all the bits and bobs in the fridge. There’s that cheddar I told you about and some parmesan…. you are looking for a huge mound of cheesy goodness.

By now, the polenta will have thickened beautifully and be glugging away – when you lift the spoon and drag it, it will leave trails behind it.

Now add handfuls of cheese

Stir it in… all of it

.. and watch it melt into the polenta.. becoming part of the polenta….

And, as I believe I may as well be hung for a sheep as a lamb, I drop in a chunk of butter and watch that melt into swirls…

Remember I said I had some Tallegio? It’s a beautifully soft cheese with a rind

I don’t want to stir that in but I do want it in there… so what I do is cut a slice

and after putting some hot and steaming polenta into a bowl… lay the slice on top and then cover it with more polenta.

Imagine that – a beautiful, creamy, extra cheesy surprise, melting secretly in your bowl….

Now, polenta by itself is a delicious supper, but I happen to have some roast pork with crackling left over… so a slice of that on the top will be perfect. Those that don’t eat meat will still be ecstatic at a bowl of polenta

Well!

And that Tallegio? Look how it has melted perfectly.

All you have to do now is return to the sofa, bowl in hand, and tuck in.

Friday nights, eh? Who needs to be rocketing about town, spending lots of money when you can be at home eating polenta?

Spiced red cabbage

… glossily red and purpled, subtly spiced and aromatic red cabbage……I love it.noodle prawns, red cabbage, lamb, celeriac 021

It is perfect with fattier meats like pork or lamb as the sharpness of the red wine vinegar that is in there cuts through the richness. Apple sweetens it and the onion gives it savour.

Adding aromatic spices gives it a depth of flavour

noodle prawns, red cabbage, lamb, celeriac 023

You’ll need nutmeg, cloves and garlic.

First of all, you need to start cutting the cabbage. Cut out the hard core with a sharp knife – it is hard and white and solid… which is not what you want in amongst your lovely bits of shredded red cabbage

noodle prawns, red cabbage, lamb, celeriac 024

Then slice the rest into thin strips. You’ll also need to slice the onion.

noodle prawns, red cabbage, lamb, celeriac 025

Rub a bit of butter round an oven proof dish and put half of the cabbage in and add the onion

noodle prawns, red cabbage, lamb, celeriac 026

Next, peel and chop the apple

noodle prawns, red cabbage, lamb, celeriac 027

and scatter that on top of the cabbage and onion

noodle prawns, red cabbage, lamb, celeriac 028

… and then grate a light covering of nutmeg over the top

noodle prawns, red cabbage, lamb, celeriac 029

Now shake cinnamon over it. I love the smell of cinnamon – it’s perfect at this time of year.

Cloves go wonderfully well with all of this. You can buy ground cloves but it is much better just to grind them yourself and anyway, why would you want to buy an extra bottle of something that will take up space in your cupboard? Put a few cloves into a pestle and grind it. A word of warning though, my brother adores this red cabbage and once rang me up so I could tell him what to do. Well, put on the spot as I was, I rattled off a list of ingredients and, as normal, wasn’t much good at remembering exact quantities. That’s why I show you by taking a picture….anyway, my brother was merrily sprinkling the cloves… sprinkling and sprinkling…….. made it all taste like a dentist’s mouthwash, he said. So, be careful. It will maybe amount to less than a teaspoonsful.

noodle prawns, red cabbage, lamb, celeriac 030

A light dusting is all you need.. you are building up  layers of  aromatic spices.  Sprinkle some sugar over the top and then.. the secret ingredient. Martini Rosso. Obviously not so secret now………

noodle prawns, red cabbage, lamb, celeriac 034

I first did it, not with Martini Rosso, but with Dubonnet… I thought the herby red spirit would blend well with the vegetables and the spices. I also had a bottle that I hadn’t drunk and I thought I could start to use it up. Once the Dubonnet had gone I moved on to Martini… and that, I think is even better. Pour some over


noodle prawns, red cabbage, lamb, celeriac 039

then pour some red wine vinegar in as well. This sharpens everything up and keeps the colour a deep purply red.

Put some little knobs of butter over the top and sprinkle more sugar

noodle prawns, red cabbage, lamb, celeriac 035

Then put the rest of the red cabbage over the top

noodle prawns, red cabbage, lamb, celeriac 036

Cover it with foil and put it in the middle of the oven at about 160 degrees C. This is going to take maybe two hours or so, so if you are going to cook something else, that’s fine. If the oven needs to be on higher, just move it down to the bottom of the oven and make sure the foil top is on so it doesn’t burn or all the moisture evaporate

noodle prawns, red cabbage, lamb, celeriac 058

After about an hour or so, look at it… give it a stir. It looks pretty awful till you stir it and see the gorgeous deep colour underneathRack of lamb, finished celeriac and red cabbage 005

What I should have done, of course, was to take it out of the oven dish and make it look attractive. But I didn’t.


Tasted great though… you’ll just have to trust me that it looks better than that!