Broccoli a Bear will eat

As you know, I wage a constant battle to get the Bear to eat what I want him to eat. All in the interest of health, you know, it’s not just me wanting to assert dominance over my poor, beleagured husband. It makes things easier as well, if you both eat the same things. I am having some success – he is now eating prawns and has started to eat broccoli.

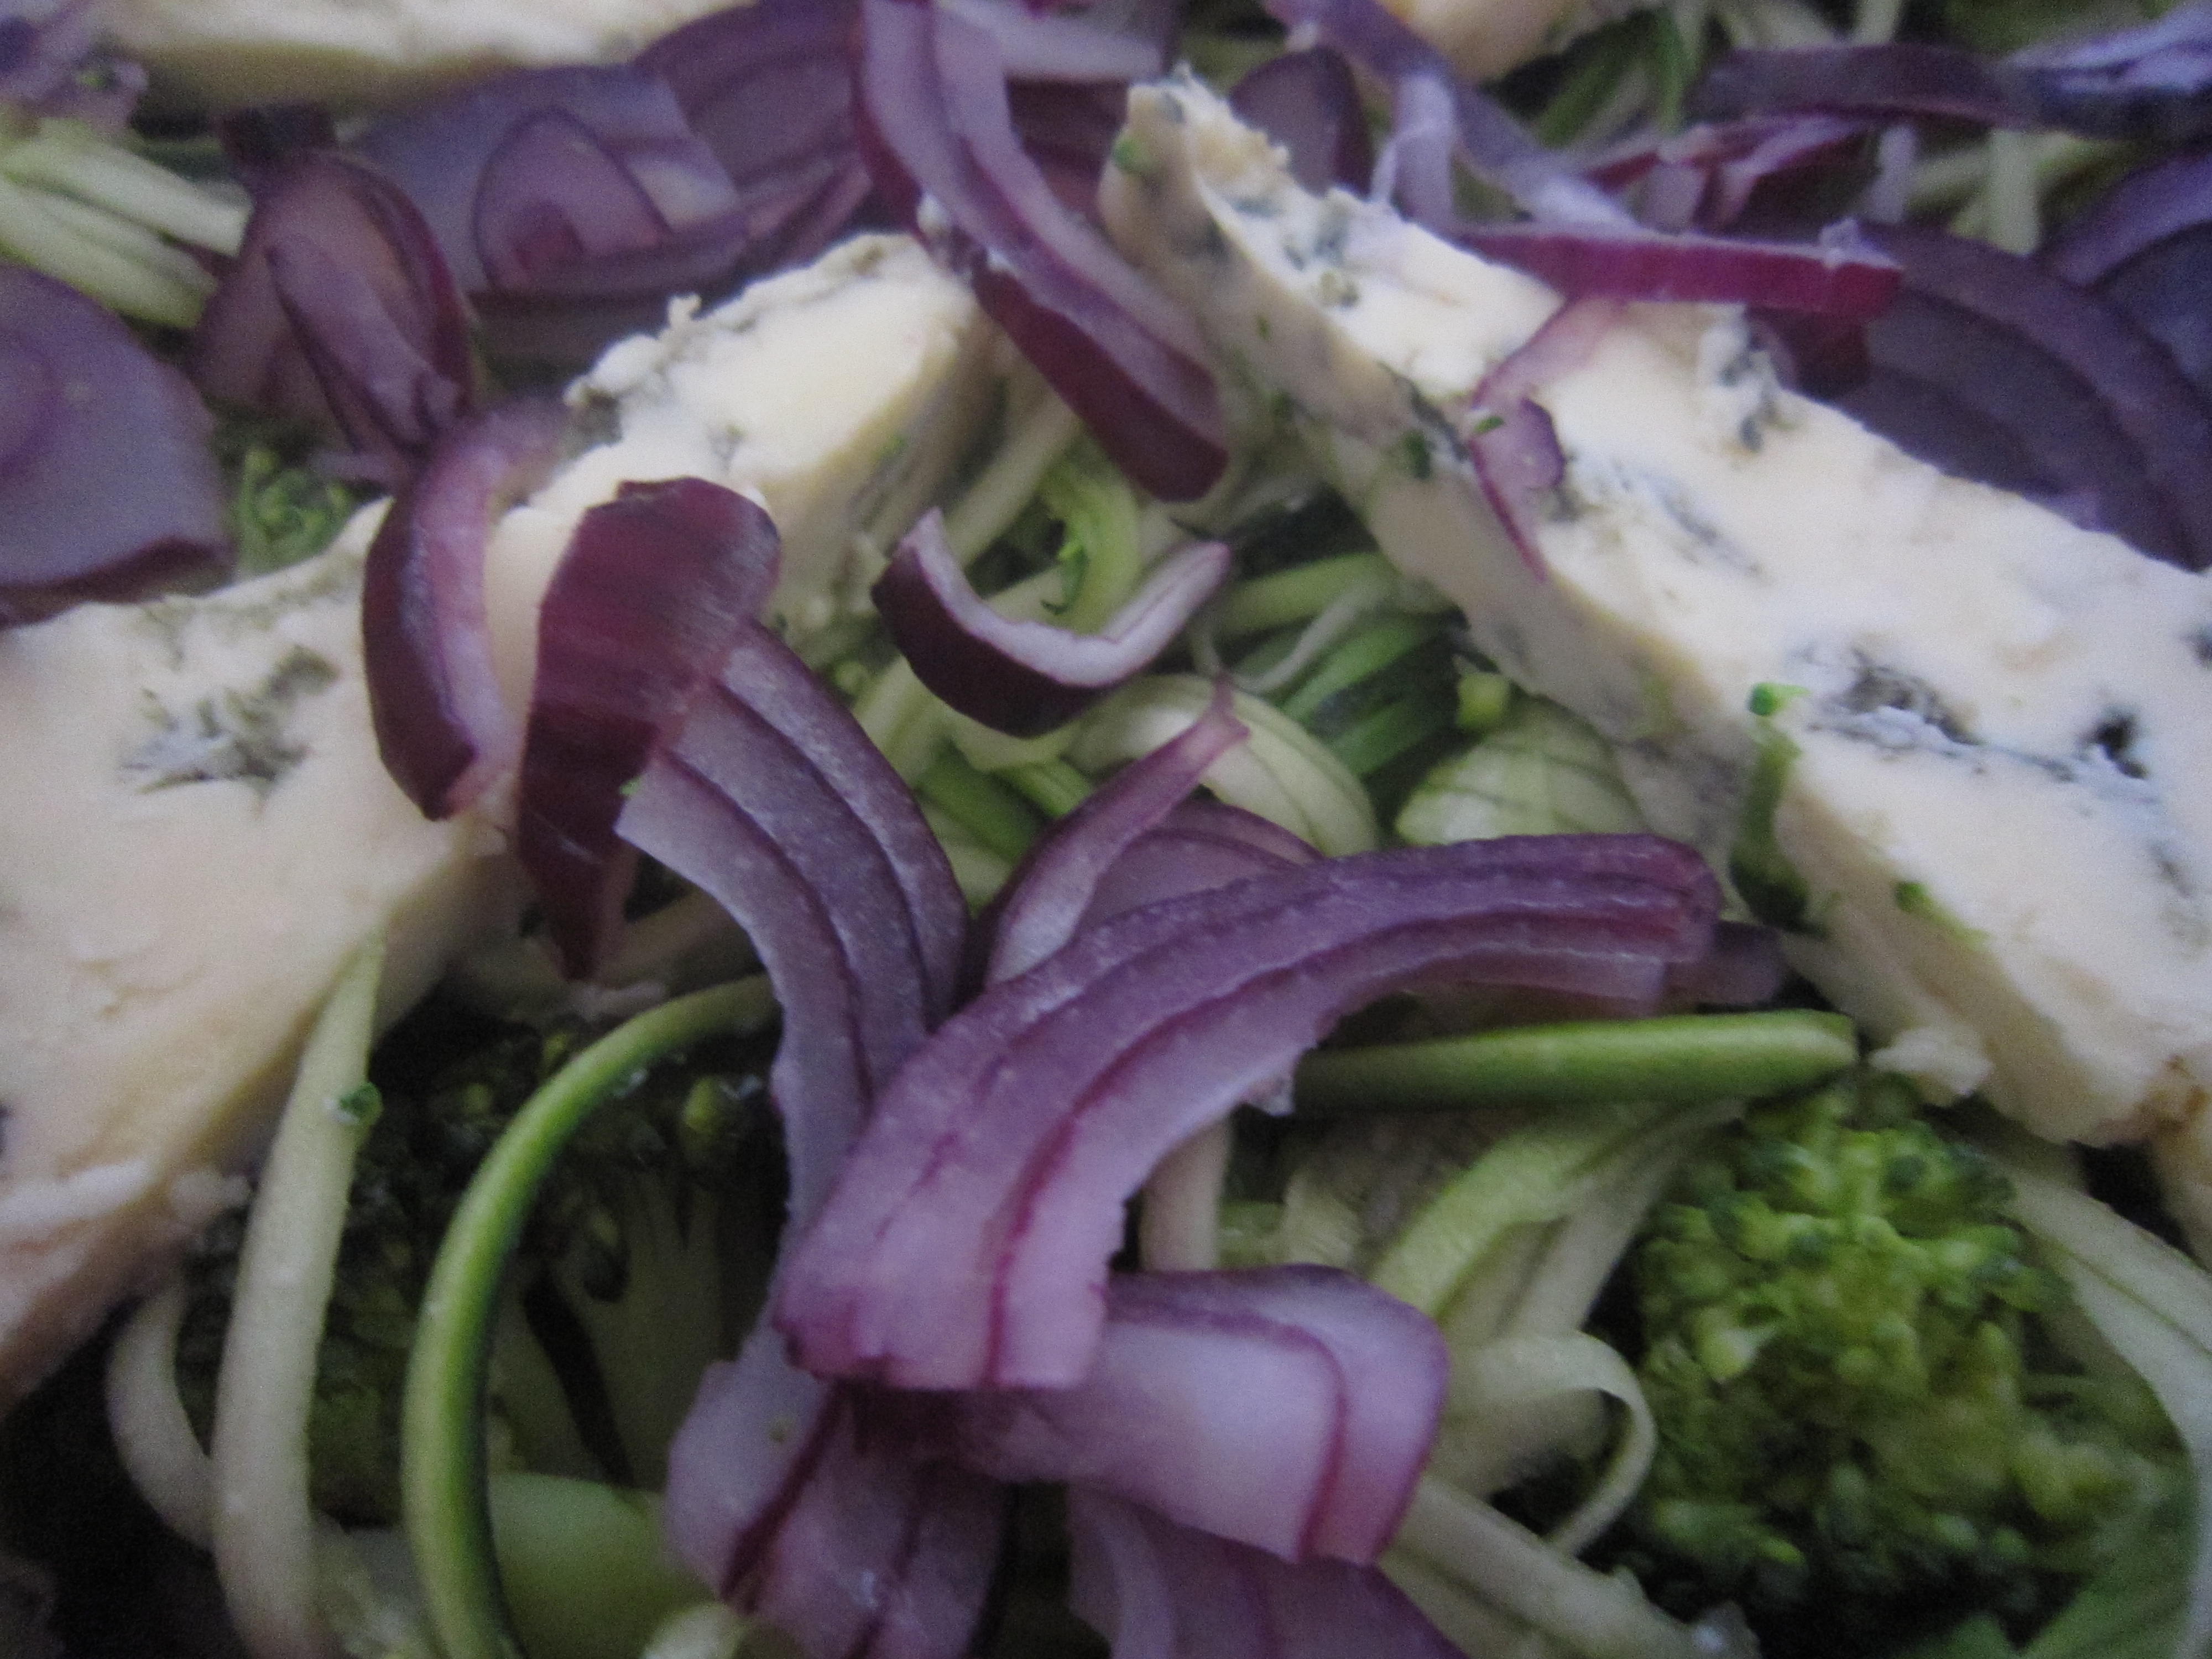
Yes, I know, not everybody loves broccoli and for some the slightly bitter tang puts them off, but my reasoning is that if the Bear can eat raw broccoli with a dip as a crudite, or broccoli and stilton soup, or even the deliciously tasty Broccoli and Stilton Pastryless Pie then he can eat it as a vegetable.

And not complain.

Finally, it seems, I may have cracked it.

I’d made the salt and pepper pork tenderloin for supper and knew we needed something with it. He’d started with a crisp salad of leaves, red and yellow peppers and tomatoes so I reckoned that if he didn’t eat what was served with the pork, that wasn’t going to harm him.

Anyway, I love broccoli.

I had gone to our local farm shop and come back with two gloriously green and hard heads of broccoli. We have been on a high protein and low carb diet and butter (thank God) is allowed. I had a feeling that I could make something delicious – well, delicious for me – and if he was hungry enough then he would eat it.

So, I chopped the florets off and sliced the stalks into smaller chunks.

Broccoli stems take longer to cook than the florets so they need to go in a pan first with some butter and a sprinkle of salt. Put it on a medium heat so you don’t burn things.

Give them a couple of minutes to soften slightly before you add the florets.

Toss them round in the butter – you want them to soften and cook but not turn to mush.

It still looks green and delicious and it is holding its shape but now there’s a softness about it.

Sooooo… all well and good but I have to get the Bear to eat it.

I need to up the protein level as well so a great big spoonful of Philadelphia cream cheese goes in and melts over the broccoli.

It is now on a low heat, stir it round and let it cover everywhere.

A spoonful of double cream helps loosen things and makes a delicious sauce.

With salt and pepper added to bring everything together, the creamy, faintly coolly-cheese (you know how cream cheese has that sort of taste) sauce the broccoli feels slightly tamed.

Take the broccoli out and reduce the creamy sauce so it thickens, adding a knob of butter – this makes it taste even more rich and delicious. Just the thing to add to that steaming green goodness.

The bitterness has disappeared and you have a savoury, tasty pile of broccoli, just ready to serve to an unsuspecting Bear.

So I did. There was his pork just asking for something to sit along side it… there was that sauce just begging to be poured over everything. I served it up.

After all, he’d already had a lovely big crisp salad… if he didn’t like the broccoli it wouldn’t be so bad.

It was delicious. Utterly, absolutely, totally gorgeous. I had justified giving myself the larger portion because, after all, he doesn’t like broccoli.

“Did you like it?” I asked.

“Yes…. I just wish there was more broccoli…. ”

Drat. There was more and I had my greedy little eyes on that but in the interests of converting the Bear to a love of broccoli, I just had to do it. This was unprecedented in our lives together – my Bear actually asking for broccoli. He got the lot.

Now, once I have got him to eat it like this I can start to cut back on the cream and Philly – not too much, you understand – and it becomes even healthier.

Maybe I won’t though. Maybe it is just delicious as it is.

Oh, and you know what? He’s asked for, and eaten, broccoli cooked like this several times since. So maybe if you have children who find broccoli just too bitter, try it like this. You never know… one day you might hear the magical words “I just wish there was more broccoli”

Salt and Pepper Pork Tenderloin

I had a fancy for something tasty. Actually, what I really had a fancy for was our local takeaway’s Salt and Pepper Squid, which is probably the most delicious salt and pepper squid anywhere. And I should know – just ask the Bear. Wherever we go if I see it on the menu, I ask for it.

I’ve eaten it in Perth, Brisbane, Sydney and Hobart in Australia; in Honolulu and on Kauai in Hawaii; in Florence, Barcelona, Dublin, Copenhagen, and Lisbon. I’ve eaten it in smart restaurants in the UK and in cheap ones, but somehow, nothing beats our local takeaway. They cook everything in an open kitchen and the food is spankingly fresh.

The batter round the squid is light and lacy. The squid is never chewy and the salt and chillies are perfectly balanced. The only annoying thing is that whenever I order it, people who HAVEN’T ordered it (because they don’t like squid… or chillies… or whatever else..) suddenly decide they want to try and it and then they take mine!

Anyway, despite wanting it so much that my fingers itched to phone an order in, I decided to try and stick to our vague diet. No salt and pepper squid for us that night.

But the thought of salt and peppered something just stuck in my mind.

I’d worked out a salt and pepper seasoning that didn’t involve deep frying or batter and I’ve used it on prawns and steak. Because you almost dry fry whatever protein it is you are using,  the calorie count drops significantly.

There you go, then, I thought. Perfect justification to make something tasty for supper. I WAS going to have salt and pepper after all. And I could still say we were on a diet.

I like to make lots of salt and pepper seasoning because whatever I don’t use, I keep in an airtight jar ready for my next night of craving. I had some left but I needed to top up my supply.

First of all, toast some salt in a large frying pan – yes, this sounds bizarre but it is essential. You will see the colour change slightly and it takes less than a minute. I used a couple of heaped tablespoons of crushed Maldon (I have to crush it in the pestle and mortar because the crystals are large and I need to end up with a smooth spice mix) Take the pan off the heat until you have the spice mix ready.

See those? They are Szechuan pink peppercorns. Not real pepper of course but they add that hint of authenticity.  They need to be pounded along with the same amount of black peppercorns.

I didn’t have any star anise but I did have some Chinese 5 Spice Powder so a good dessertspoon or so of that was added to the mix

You end up with a fine mix.

Add that to the salt in the frying pan and toast again – beware of the aromatic fumes though, they can be a bit strong. Just a minute or so is all it needs, so stir it round so it toast evenly and leave it to cool. Once it is cool, put it in your jar and wipe the pan out.

And that’s it.

On to the next step – the meat.

Tonight I was going to use pork tenderloin, which is, amazingly, a very inexpensive cut of meat. Even more inexpensive if you, like I did, manage to call in at the supermarket on the way home and find it reduced for a quick sale.

Now the spice mix is cool, put some on a plate and roll it round, pressing down so it sticks to the outside of the meat.

Put your pan back on the heat with a scattering of oil in it (maybe a teaspoon or so… we ARE dieting you know!) and once it is hot pop in the tenderloin.

Roll the tenderloin  so the spice mix browns and crusts beautifully.

Once the crust looks good, turn the heat down and let the meat cook through for ten minutes or so.

Let it rest for five minutes then slice it into medallions….. Delicious.

Healthy and tasty, oh so very tasty. Quick and easy and low in calories. pretty much of a perfect supper, eh?

You can serve it with anything you like – let it cool and serve it with salad leaves or add some vegetables. If you aren’t dieting serve it with rice… or potatoes, maybe. Well, we were dieting and potaoes were off limits. I wanted to eat it hot so I made broccoli to go with it.  And yes, the Bear was eating  with me, so I made broccoli a Bear would eat.

And when served with broccoli it becomes heaven on a plate!

Broccoli and Stilton Pastryless Pie

At long last the days are becoming brighter and the weather seems to be improving. Today at work I had the windows open as it was getting rather hot, sitting behind glass with the sun shining in. It’s time, I think, to start freshening up food…. making it lighter and more summery.

Time, in fact, to make something like a pastryless pie.

I often make this because it is perfect with a light, dressed green salad for supper and also because it is absolutely ideal to take to work for an easy packed lunch.

A pastryless pie is, in effect, a quiche without pastry. The quiche filling is baked inside strips of ham. What that means is that if you are baking it to share with friends then anyone with a wheat intolerance or coeliac disease doesn’t have to miss out.

If you are trying to cut carbs from your diet, well, it isn’t exactly Atkins because there’s plenty of vegetables in there but it does, at least, avoid pastry.

So then… what do you need?

I had some broccoli in the fridge and that, along with a lovely piece of Stilton cheese would make a lovely pie.

I had half a dozen free range eggs, a small pot of cream, a packet of sliced Serrano ham, 200g of Emmental cheese (which I love for its sweet nuttiness) a courgette, a handful of cherry tomatoes and few baby salad potatoes.

For those of you who don’t have access to Stilton or Serrano ham or, in fact, anything else I have listed, just remember I am putting those ingredients in because that’s what’s in my fridge.

As long as you have eggs, cream, some ham (some kind of air dried ham, sliced thinly) some cheese and some vegetables you can make this.

Now, because you are making what is really a quiche filling, it is going to be runny. And you don’t have a pastry shell to pour it into. I told you we were wrapping some air dried ham around it but that isn’t going to stop the filling from running out, so this is what to do

You can buy silicone paper cake liners from most places now – one of these popped inside a springform cake tin makes the ideal liner to keep all your lovely ingredients from seeping out when you bake it.

Open your packet of ham and drape the slices round the edge.

You don’t need to completely cover the sides and you don’t need to cover the base. What you are doing is making what will turn out to be a lovely, savoury, lightly crisped ham edging. It helps keep it in one piece when you cut it.

The bottom of the pie will be lined with a layer of steamed and sliced potatoes – it makes for a firmer base. Either slice them and steam them now, or use left  over cold salad potatoes. Because I am using broccoli, I steam that at the same time.

See? Just a thin layer of little slices of potato.

Followed by a lovely layer of broccoli florets

I found a courgette in the fridge and if you use a julienne cutter, you get a glorious tangle of shredded courgette. When this cooks it disappears into the gorgeousness of the creamy, cheesey, eggy filling so even for avowed courgette haters… this would slip right on past them. Another vegetable chalked up!

Scatter those shreds over the broccoli layer

And as it is a broccoli and Stilton pie, now is the time to slice that piece of Stilton you saw earlier.  You could crumble it if you want to, and scatter it across but I thought how pretty and symmetrical it looked to arrange it in thin slivers.

I had half of a red onion left over from something else I’d made so I thought that, sliced finely so that it would cook through while the pie was baking, it would add an extra hint of savouriness.

 That was scattered on top of the cheese.

That’s the vegetables taken care of, the next thing is the delicious cheesey, eggy mix.

6 beautifully golden fresh free range eggs need breaking into a bowl and whisking round with a fork.

A small (150 ml) pot of cream gets poured in and whisked around again.

And pour it in……

Give the springform tin a gentle shake from side to side to make sure the eggy mix falls down around those lovely vegetable layers.

I had some sliced Emmental to use up as well, so that was shredded and scattered over the top.

Little cherry tomatoes (there were only 4 or 5 left) were quartered and added to the top layer before the ends of the ham were folded over.

You can see when you do this that the egg and cream mixture seeps between the slices of ham and then you realise just what an excellent idea it was to use the paper liners…

Into the oven with it at 160 or so degrees C for approximately 30 -40 minutes.

You can tell when it is done when the top looks golden and if you give it a gentle side to side shake the pie quivers just a little bit… and if you press it with your finger it feels soft but firm…

The only thing to do now is to free it from the springform tin, peel back the paper liner and slide it onto a serving plate

The hardest part is waiting for it to cool slightly so you can slice into it….

With a green salad it truly is the perfect lunch or supper.

Tasty, easy to make, easy to take for lunch… cunningly packed full of vegetables in the midst of that delicious filling… just the thing for the summer months!

Baked polenta pie

Remember the polenta? How I said I had an idea for it? Because I’d made a big pan full of it?

Well I also had some broccoli…. and this was Saturday. The Bear was still away and, therefore, unable to kick up a fuss about me making something with broccoli in again. You can just hear the sigh in his words…. “oh not again…”

I’m sure I read somewhere that if you eat something you dislike ten times then you will learn to like it. Perhaps he is just a very slow learner? I don’t know. I keep feeding him broccoli. It has to have been more than ten times now, surely?

Admittedly he has stopped clenching his mouth shut and turning his head away in disgust as I try and make him eat it, but he just WON’T give in gracefully. Still, he wasn’t there and I could do what I liked!

When I made the polenta, I poured the majority of it into in silicone paper cake liner, in a springform tin

(Whoever invented these deserves a medal… the hours they have saved people cutting and snipping at baking parchment

I needed it to set… which it did, overnight.

All I had to do was prepare some broccoli…

I only used the florets this time – the stalks can be used elsewhere  (I’m fancying Broccoli Slaw later this week) – and put them in to steam, with some chilli oil. A quick way of doing this is to rinse the broccoli, shake off most of the water and put it in a bowl. I drizzle it with chilli oil and then cover the bowl and put in in the microwave for a minute or so on high. This is just enough to soften it and give it a gentle chilli bite.

While that is going on, I slice the polenta “cake” in two with the bread knife

And then (actually, this bit was quite tricky, but I did manage) get the base back in the tin (I put extra tin foil in because I thought the etxra fillings might run out…..)

I laid the bright green semi cooked pieces of broccoli on the base

Just because you can… and because you know it is going to make this taste more delicious than anything else….. add a few bits of Tallegio cheese.

I had some roasted peppers in a jar, leftover from when I made pork and pepper goulash, so I layered them between the broccoli florets

And then added tomato – I thought some quartered little Pomodorinos (tiny little plum tomatoes) would lighten up what is , essentially, a large wodge of polenta and cheese.

Flip the top over and on to… it might crack or break but don’t worry… it will all come together in the heat of the oven

And bake it at 175 degrees for maybe half an hour

Just look at it!

Doesn’t that make you feel like smiling? That gorgeous colour? The smell of delicious melted cheese and vegetables?

Absolutely perfect with some green leaves.

Major plus points – it is gluten free, quick and easy to make, and doesn’t cost a lot at all.

In my eyes, though? Best of all? It’s got broccoli in it!

Broccoli Bliss

Sometimes, the way to brighten a dull day is to imagine a treat. Something to look forward to when you get in from work. Something that probably you can only get away with when your significant other is away.

Well, the Bear is away…and that means I can indulge myself. I can go wild and he won’t look at me with a slightly anxious expression, worried that I will force him into joining me in my chosen delights.

It’s not drink…. or illicit substances… or even some strange practice… it’s…..

Broccoli.

Beautiful, bold brassica.. the bright green and slightly bitter broccoli. I love it.

And when I can, I come home to a huge bowlful of it. One of my favourite ways to eat it is with a pseudo-Thai green curry sort of sauce, except it is not a sauce, it is a fragrant and sweetly spiced cooking liquid.

It’s quick to make and incredibly low calorie and oh-so-good for you.

I always have the ingredients for the Thai green curry sort of sauce in my cupboards because you never know when you may be able to get away with making broccoli, just broccoli, for supper. They also come in handy for when I want to make Thai Green Curry soup.

Onion, ginger and garlic. Some coriander.

Some green Thai curry paste

Thai basil, if you can get it

and kaffir lime leaves.

You will also need coconut milk – either a tin of it, or coconut milk powder that you can make up – and some stock granules.

Start by chopping some onion into  decent sized pieces and start to saute them in a large pan.

Chop your broccoli  stem into pieces and separate the florets.

Add the stem to the pan with half a cup, say, or water so it doesn’t burn and and a quarter inch of peeled and finely chopped ginger, and a clove of garlic, also finely chopped.

Add a heaped teaspoon of Thai green curry paste, the same of kaffir lime leaves and Thai basil. Stir it round and smell that gorgeous, aromatic spicy steam billowing up.

Let the stem and the onion soften slightly then add the florets.

Give them all a stir and let them steam for a couple of minutes

Mix three heaped dessertspoonsful of coconut milk powder (or a can of reduced fat coconut milk) and add a teaspoonful of vegetable stock granules, mixing it round well

Pour that delicious mix over the broccoli and let it steam through for another couple of minutes….

And then?

Dish it up, my darlings!

A beautiful bowl of broccoli… think of it as thai green broccoli soup… without much soup.

Packed full of goodness…. and that, well, that is one of my secret delights.

Broccoli slaw

Those of you who know me, know I adore broccoli.

 Those of you who don’t know me yet will soon learn…

I REALLY love broccoli……. once when  I left a temping assignment, they bought me presents… chocolate and wine, a lovely card…. and a  head of broccoli! OK, so that was a joke but it reflected the fact that there were so many packed lunches of mine that involved broccoli.

I thought I had broccoli cracked… I’d make soup, or steamed with chilli, or Thai green curry, or eat it raw, broccoli puree, broccoli with lemon, broccoli hot.. broccoli cold…. anything really. I love broccoli. I thought I had worked my way through the entire broccoli cookbook.

And then I read The Weekend Carnivore and Sarah Jayne wrote about Broccoli Slaw…. she added apricots, which I would never do,  but even so.. broccoli? Something new to do with broccoli? Oh I was happy!

coffee vod, apple cake, 025

I often make coleslaw and we love it but this was different… using the broccoli stem instead of cabbage.

coffee vod, apple cake, 026

Simple enough… just slice the broccoli stem into slices across and then across again and again until you have pieces the size of matchsticks.

coffee vod, apple cake, 027

… and grate the carrot

coffee vod, apple cake, 028

When you make cole slaw, you really have to add onion but I really don’t like lots of it. If I eat big bits of raw onion I get a headache… weird, eh? So what I have done to get round that is to use a microplane grater and grate some raw onion so it comes out rather like a puree….

coffee vod, apple cake, 029

and what I do then is add it to some mayonnaise to give the taste of onion without too much harshness.

I love making my own mayonnaise because I can tweak it according to what I intend to eat it with… lemon, perhaps, or chilli. This time I just wanted plain mayonnaise so the clean crisp flavours of the carrots and broccoli could shine through.

coffee vod, apple cake, 030

Stir in all that lovely, sweet, grated carrot

coffee vod, apple cake, 031

Then add the broccoli and a sprinkling of lovely Maldon Salt and stir it round…..


This is gorgeous. Really gorgeous.

coffee vod, apple cake, 034

And when fed to Bears? Bears who swear they won’t eat broccoli? Well………. it was eaten. And enjoyed!

To think that some people  throw the stem out….

Bonfire Night

Yesterday was  Guy Fawkes, or Bonfire Night and, for us in the UK, we gather round bonfires, watching fireworks and eating sausages, commemorating the failed attempt to blow up the Houses of Parliament and the resulting punishment given to Guy himself. It’s also a special day for us as it is our wedding anniversary. And yes, we’ve heard all the jokes about there being fireworks on our wedding night 😉

From our dining table we can look down onto the city below us and see all the fireworks – a fantastic sight and, as a plus point,  it also saves us standing around outside. We don’t like to ignore tradition completely though, so we thought that we would at least have the sausages as part of our anniversary meal. Sausages and our favourite sparkling wine – the one we had at our wedding. Because it was cold we thought that red wine would be better than champagne – more warming, even though it was chilled. I’m sure you know what I mean. We’d wanted sparkling drinks to go with the fireworks going on outside and  chose Hardy’s Crest Sparkling Shiraz

I had to do more, though, than cook sausages and serve some wine and I decided that one of my favourite wintery standby recipes would be perfect – roasted, spiced winter vegetables. I have a recipe that I must have copied down from somewhere – it is written in a very old diary from 1977… not that I first did it then, just that I used the diary…it was already old when I found it….Old and empty, which is why I decided to use it for scribbling down recipes.

Bonfire Night Part 1 001

Goodness knows when I wrote that, though, but it must have been at least 17 years ago.

Bonfire Night Part 1 002

I have no idea where I got it from, so I can’t give due credit. Anyway, it has evolved, almost beyond recognition since then and I think the tweaks I made have improved it. Well, it has improved it to MY taste, anyway. Still, in order to make it  I needed vegetables, so set off to the greengrocer to see what I could get.

It’s great to be able to go to a traditional greengrocer

Fruit and veg 3

All the fruit and vegetables are piled up so you can see what you are buying and choose just what you want

Fruit and veg

Fruit and veg 2

I came back with lovely, knobbly Anya potatoes, sweet baby Chantenay carrots, sweet onions, broccoli, baby tomatoes, a sweet potato, a couple of parsnips, some baby corn, some garlic and some ginger. I also bought a packet of Merchant Gourmet roasted chestnuts, which must be one of the best things ever – the time that saves in roasting and peeling, well, I wouldn’t be so keen on chestnuts if I had to do it all myself… and as for the sausages? I chose Toulouse sausages – they are  small French sausages made of coarsely diced pork and bacon flavored with wine, garlic and unlike other sausages tend to have more meat and less of the normal breadcrumb filler.

Bonfire Night Part 1 003

The aim is to have the perfect mix of roasted vegetables. I love the soft sweetness of the sweet potato, with a bursting little tomato, a tasty, slightly charred bite of broccoli with the gorgeous chestnut…. lovely little garlicy roasted potatoes and mushrooms…. it really is delicious. It can easily stand alone as a vegetarian meal but with the addition of sausages…..oh it is just perfect!

And best of all it is simple! Start by putting the oven on high – about 230 degrees (210 if it is a fan oven) so that when the vegetables are ready they go into a hot oven and get just a hint of charring. It really deepens the flavour.

Then, prepare your vegetables. Start with the root vegetables –  peel and roughly cube the sweet potato. Chop the Anya potatoes (or any other potato) into roughly the same size pieces. Same for the parsnip. The onion needs to be cut into manageable pieces.  Obviously they are going to take longer than the other vegetables.

Bonfire Night Part 1 009

Scatter them into a large roasting tin and drizzle oil over them to give them a good, but light and even coating

Then prepare your spice mix. You need ground coriander, ground cinnamon and some cardomom pods.

Bonfire Night Part 1 008

Crush the cardamom pods and take out the seeds inside (I hate it when you leave the pods in and then you chew on the inedible outer casing…it’s a sort of medicinal taste. Not good when you are aiming for a comforting supper) Give them a grinding in the  mortar with your pestle

Bonfire Night Part 1 011

The cases split open and inside are the aromatic black seeds.

Bonfire Night Part 1 012

You need to separate them from the husks.. either through your fingers

Bonfire Night Part 1 013

Or in a large draining spoon so the seeds fall down.

Bonfire Night Part 1 014

Then crush the seeds to a powder. You’ll need a teaspoon or so

Bonfire Night Part 1 015

Scatter the spices and ground seeds lightly over the vegetables (maybe a large teaspoon of each) and add some grated ginger and chopped garlic. Sprinkle some salt over the top and drizzle with some more oil.

Bonfire Night Part 1 016

Into the hot oven for ten minutes or so till you can see it starting to brown….

Bonfire Night Part 2 004

Turn the oven down to about 175  degrees (less if it is a fan oven) and before you cover with foil, scatter in the softer vegetables, the baby tomatoes, broccoli florets, quartered mushrooms, the baby corn,  and the packet of chestnuts.

Bonfire Night Part 2 007

Bonfire Night Part 2 009

That will take another hour or so. Just check how things go as it steams in its own juices under its tin foil cover.

Now, I suppose, you had better set the table

Bonfire Night Part 2 012

Once I did that, we really entered into the spirit of Bonfire Night… Fireworks? Hah! We had a sparkler each. No expense spared for our anniversary dinner……..

Bonfire Night Part 2 022
Back to the cooking. Is everything softening well?

Take the foil off and stir things round….. dot the top with small nuggets of butter and then let it cook, uncovered for the last half hour or so.

Bonfire Night Part 2 023

That is, I can assure you, the most lovely aromatic mix of roast vegetables you’ll have had in a long time.

The only other thing to do is cook the sausages

 Bonfire Night Part 2 036

Make sure they are beautifully browned

Pour some wine… the bubbles are just so right for Bonfire Night. A glass or two of lovely rich sparkling shiraz is just the thing for sausages and veg…. and just the thing to celebrate with!

Bonfire Night Part 2 027


And… serve!

Bonfire Night Part 2 028

 The roasted vegetables are beautifully soft with just the right hint of charring. The spices are perfect and smell is just gorgeous. Look at how beautiful it all looks.

But Bonfire Night isn’t Bonfire Night without some fireworks… and we needed to celebrate…..

 Bonfire Night Part 2 034

And the result?

Bonfire Night Part 2 040

Clean plates. Always a marker of how successful a meal has been.

And I did, in the end, manage to get a photograph of  the fireworks going off below us

Bonfire Night Part 2 042


  Bonfire Night Part 2 044

So… a simple meal of roasted vegetables and sausages – perfect for Bonfire Night and even more perfect to celebrate an anniversary…

Cheers everyone!

Cracking crackling

What can you get for £3.50 these days that will feed everyone? Not an awful lot unless you are prepared to put just a little bit of effort in… and when I say a little bit of effort that’s all I mean. That and planning to start things maybe 5 or so hours ahead. When  I went North, one of the things I did was go to the  butcher’s and I got a lovely piece of rolled belly pork.

Bear's breakfast, slow roast pork 015

Belly pork… with crackling…. that has to be good. And the effort involved?

Bear's breakfast, slow roast pork 016

Pat it dry… and then rub salt in the scored skin. The butcher will do that for you to save you having to run amok with a sharp knife – and let’s face it, he will have sharper knives than you will. Then, put the oven on as high as it can go and get it really hot. Only when you are sure that the oven is heated properly, put the pork in and let that meat sizzle! What you are doing is making a start on the world’s most delicious crackling!

Bear's breakfast, slow roast pork 021

See? Half an hour or so and it has started to brown and crisp. There’s your  effort… you turned the oven on and kept an eye on the time. Now you can turn the oven down to 120 degrees or so and just leave it to cook slowly for the next 5 or so hours.

You can do what you like for a while then although, I suppose, you do need to think of vegetables to go with it. Not too much work there, either……I decided that shallots and apple would be just the thing to go with the pork – the shallots would be lovely, cooked slowly till they were soft and savoury and some apples (scrumped from my aunt’s tree) added to it to sharpen things up a bit and offset the richness of the pork… and maybe some roast potatoes just to make it all come together?

Bear's breakfast, slow roast pork 017

       I’d also bought some broccoli that I thought might come in handy … well, I do so love it and if I slide some on the Bear’s plate, he will make a vague attempt to eat it … and I was thinking that maybe steamed and with a sprinkle of oil and lemon juice on? Hmmm? See that WOULD be nice, wouldn’t it?   

We have rosemary and sage growing in pots on the balcony so I went and got a few snippets, stripped the leaves from the stems and chopped it roughly

Bear's breakfast, slow roast pork 022

 Then I peeled the shallots and the apples, sprinkled them with some salt, oil and the herbs… oh and a red onion peeled and quartered (well, it was just sitting there, asking to be included)

Bear's breakfast, slow roast pork 023                                                                                                     … put some foil over the top and put that in the oven as well. Long slow cooking alongside the meat would make the shallots cook down to a lovely soft sweetness……

The potatoes were put in round the meat about two hours before we were ready to eat (remember this is a low oven you have the meat on so they will need a bit longer to cook) … I’d normally steam them and peel them and then roast them in hot fat but all this carry on with my poor old arm meant that I was taking short cuts. They could get in there alongside that meat and cook alongside it.  And cook they did…….

Bear's breakfast, slow roast pork 026

The broccoli….steamed for 4 minutes then sprinkled with oil and lemon juice…. salt and pepper…

Bear's breakfast, slow roast pork 028

And now things were coming together.

The pork had been in for 5, maybe 6, hours… it had had that scorchingly hot start that makes all the difference to the crackling and then it had the rest of the time, cooking gently, the fat slowly basting the meat until it was soft and tender.

Bear's breakfast, slow roast pork 031

Get that out and let it rest while you turn the heat up on the vegetables in the oven to get them beautifully coloured

Bear's breakfast, slow roast pork 027

Then… slice your meat

Bear's breakfast, slow roast pork 029

The crackling… oh my word… the crackling………..

So there you have it. Minimal work,  just a little bit of preparation – again, for less than a fiver you have a meal that would serve 4 easily and even leave some meat over for sandwiches the next day. Or, if you were any kind of a friend, you would make sandwiches for your friends who were drooling over this……and had had to listen to you crunching on the crackling.

So… get cracking for the best crackling ever! The meat’s not bad either 😉

Pastryless Pie!

Pastryless pie 002
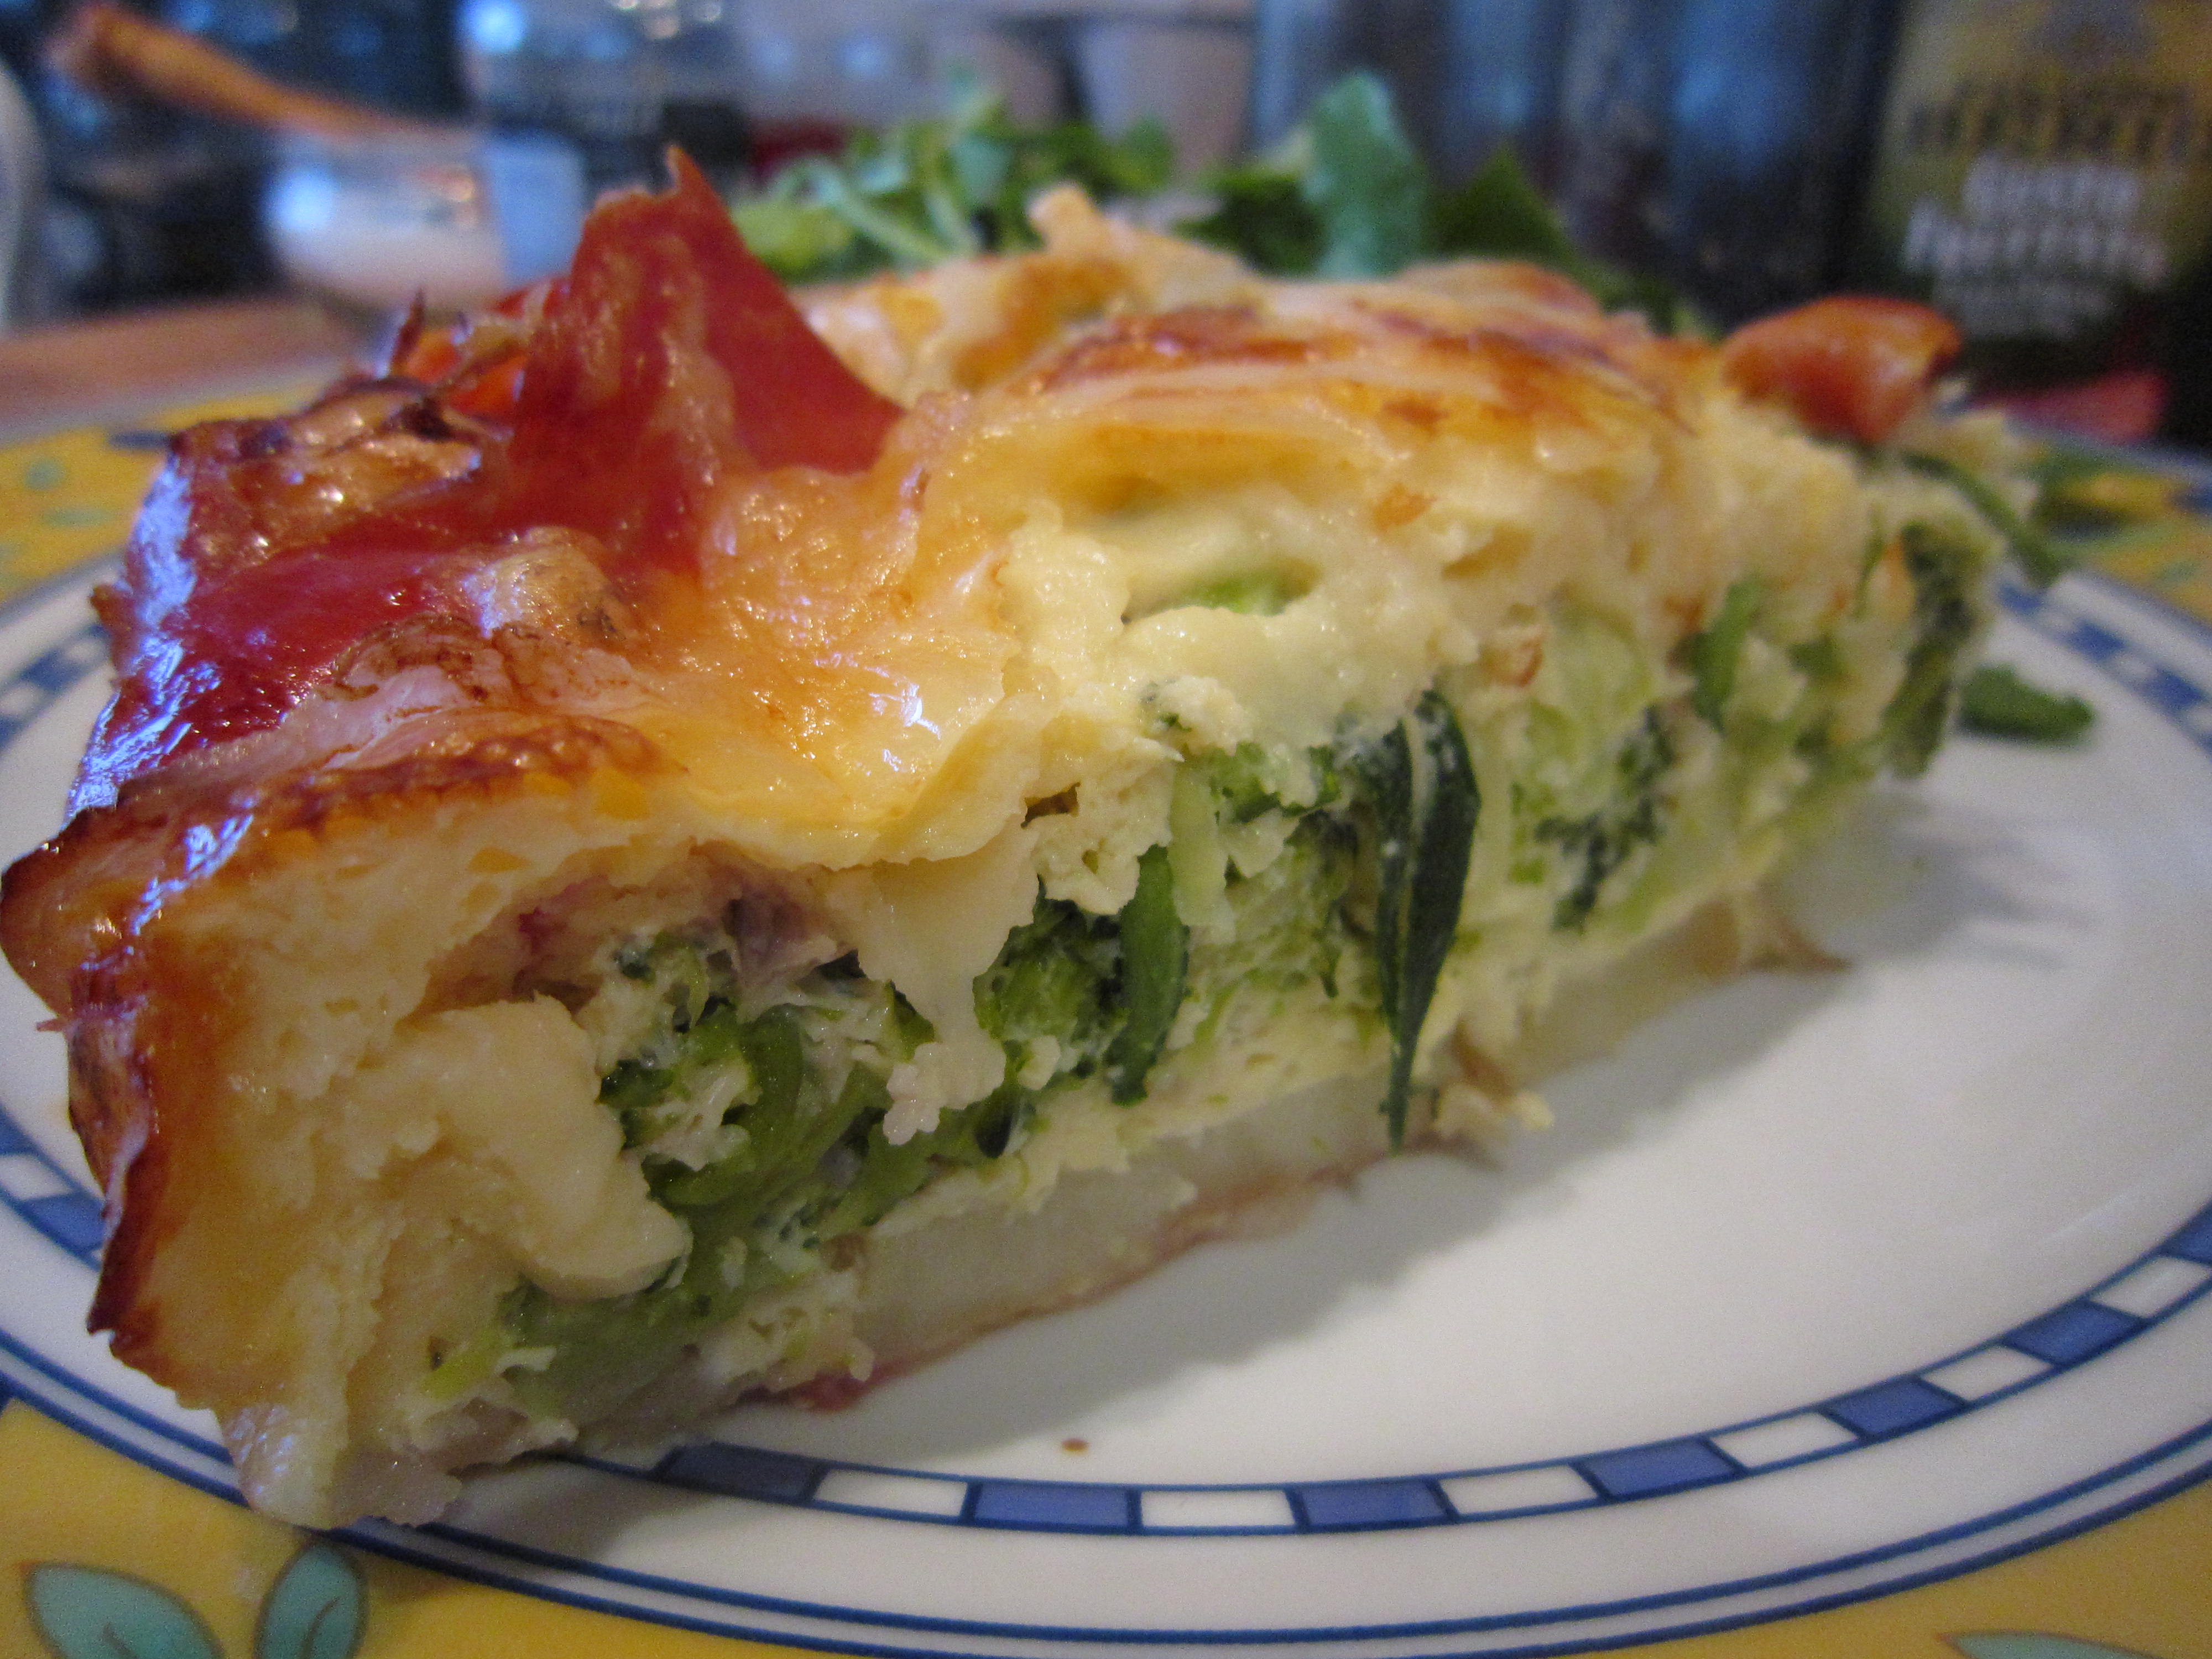
Sometimes, even in the best planned kitchens, there are leftovers. Sometimes, the best planned kitchens ENSURE there are leftovers! I knew I had to drive North, leaving the Bear to fend for himself and though he is perfectly capable, he has a very busy week and might just have trotted off to buy a sandwich. What he needed, I thought, was a Pastryless Pie – he could cut slices and take it in with some salad leaves. Far better for him than a shop bought sandwich. And he gets some greens into his diet.

I suppose the Pastryless Pie is really a kind of frittata, a sort of mutant child of a Spanish omelette and a vegetable quiche. Without the pastry, obviously. Now before you shudder and dismiss it….. Look at it… a beautiful, softly quivering slice of gorgeousness! 

And really, not much work at all. No tricky pastry to deal with, so no trauma with blind baking and red hot ceramic baking beans bouncing round the kitchen when you try and take them out of the pie crust and manage to drop the corner of the baking parchment… no comedy style lurching around as you stand on a baking bean and it rolls around underfoot…… oh sorry, I was letting a personal trauma affect me there.

So back to the pie. The ingredients vary but the constants HAVE to be eggs and cream or milk and some cheese. Because there isn’t any pastry, you can imagine that putting the quiche like filling in without a liner would make things very messy. You can buy cake tin liners which are one of the greatest things ever. I got these at Lakeland but I assume they are available everywhere

Liners 001Liners 002

You also need a tin to put it in. I use a springform tin (That’s one where there is a clip that you fasten and it tightens the sides round the base. It makes everything very easy to get out as the pie or cake remains on the base and the sides lift off.)

Anyway.. onwards…..

Pastryless Pie

Ingredients
Ingredients

First of all, select some ingredients.

6 eggs

140 ml pot of cream

100g  cheddar

100g Emmental

Packet of Parma ham, or proscuitto – maybe 6 or 8 slices

Cold boiled potatoes – just a few

A small courgette (ooh those hidden vegetables…muahahaaahahaaaa!)

Some steamed broccoli

Sweetcorn if you like it (although it is in the picture, it didn’t actually make it into the pie because when I peeled the husk back and cut the kernels off, they looked all pale and unripe)

Sweet potato – I had some spicy roasted cubes left, so they went in.

Leeks – not the two of them – when I started chopping I actually only used half of one.

Little tomatoes

Now before you say that you don’t like this or that,  just carry on reading then go and look in your fridge. Maybe there is something there you like better?

Pop the liner into the tin andCooking 038 then carefully peel apart your slices

 of proscuitto or Parma ham. Drape it round the sides and leave a bit hanging over the top. You don’t have to completely cover the outside.

Then prepare the rest of your vegetables – slice the potatoes (not too thin) and break up the broccoli florets into small pieces. I shred a courgette as it sort of disappears into the filling, which is handy, seeing as some people object to them. As I say, what the eye can’t see, the mouth can’t whine about .

In a bowl, whisk the eggs and the cream together with a bit of salt for seasoning. Grate the cheddar into it – it goes all lumpy, but that’s a good thing. When it bakes it all comes together wonderfully.

I bought Emmental presliced, for no other reason than when I went to get somethat was all there was. Turned out to be a good idea actually – I took it out of the packet and just sliced it.  See the picture? From the top left – shredded courgettes, left over cubed spicy roasted sweet potato, sliced Emmental, cold boiled sliced potatoes, finely chopped leeks, sliced tomatoes and the broccoli. Now you start to put it together. Put the oven on to pre heat at 160 degrees

Cooking 040

Cooking 041

 Potatoes on the bottom so there is a bit of a base to the whole thing. Then the broccoli and the sweet potato in a rather fetching pattern – think of the slicing of it… oh, so pretty!

Cooking 042

 Cooking 043

 Scatter in the leeks and courgette – look at the lovely greenness!

Cooking 044

Now pour in your lumpy eggy, creamy (or milky), cheesy liquid, giving the pie a gentle shake so it settles evenly through all the vegetables. Scatter the sliced Emmental over it and the little tomatoes, which you have cut into quarters.

Cooking 045

See the ends of the ham? Flip them over, just like this. Then put it in the oven.

Turn around and walk away for maybe 30 – 40 minutes. Have a quick look after 30 minutes… it is browning nicely? Does it need to be turned? I have a terrible oven that cooks unevenly so I have to keep turning things so they get an even colour.

When it is looking evenly browned, using oven gloves (no burned fingers please!) gently shake the tin – it should be firmish. Give it a prod, if you like – it shouldn’t be rock solid, it should have a nice, gentle give to it. Does it smell nice?  Does it look a bit like this?

Pastryless pie 001

Let me tell you, that smells gorgeous.  There’s a bit of a delicate wobble to it but there are no evil runny bits.

Pastryless pie 003

It’s quite pretty, really. And even people, (I shan’t name names as he may be reading this) who have to be dragged kicking and screaming towards broccoli, (The Bear’s only flaw) manage to scoff this.

So, you see how easy it is? A bit of chopping. A bit of layering. A bit of mixing and that’s it.

It slices well and is good to eat the day you make it or to take to work or school in a packed lunch. You can put in vegetables that you have left over from other meals and, presumably, they would be vegetables that you would like seeing as you cooked them anyway. How very moneysaving! How very tasty.