Baked lemon cheesecake with blueberries

When I was growing up, I remember the excitement when Marks and Spencer introduced the baked cheesecake into their ready made food section. This was the 70’s, you know, and British food was hardly at its finest.

We’d had cheesecakes before of course, just not the baked ones. We’d had those  strange pre-frozen cheesecakes where the middle seemed to be made of some kind of whipped creamy nonsense and laden with luridly coloured strawberries….well, we’d had them when our mothers had got them for a dinner party and, if we were lucky, the following day there may have been a slice or two left over to be sneaked before (or even instead of, if Ma didn’t catch us) breakfast. Food like that was far too good to be specifically given to children. Maybe we’d had some at a friend’s birthday party where the mother was trying to outdo every other mother and you know, they were pretty fancy for the 70’s but they weren’t the be all and end all of desserts. They were OK.  Real cheesecakes? They weren’t available. Or at least if they were they never made their way to the North. Maybe it was something lucky young Londoners had.

I’d read in stories that Americans had cheesecake and they loved it but as far as I was concerned, as far as I knew, cheesecake… well it came out of a frozen packet and it was nice, but not brilliant.

Anyway… one day my friend F got a slice and let me taste it. I couldn’t believe the rich, dense filling. No lurid strawberries, just a lemony hint. I couldn’t believe how deep it was. A solid wedge.

I loved it. I loved the way it stuck, almost, to the roof of my mouth in its glorious clagginess… the way the flavour seemed to be so luxurious. Now I understood why people loved cheesecake.

Of course we still didn’t make it (there was no internet to look up recipes in those far off days) and sometimes we were lucky when we ordered cheesecake in a restaurant… and sometimes we weren’t. Sometimes we got real baked cheesecake and usually, I suppose, we got the defrosted thin one from the packet.

I don’t know when I first made a real baked cheesecake but it wasn’t so many years ago. I do know that I realised just how simple it was and how much I had been missing out on. This really was the stuff of that amazing childhood memory – that delicious, thick, sumptuous and dense filling. So very different to the thin whipped and set filling that appeared so often elsewhere.

I suppose it is because of that that I think of cheesecake as a special treat. It has to be a special treat, really, because if I made that just for the Bear and I we would end up eating it all and let’s face it, we are fat enough.

Anyway, the one I was going to make was for a special occasion – we had friends coming for dinner and we wanted to have a good time. There may have been an element of hoping (just like back in the 70’s) that it wouldn’t all get eaten and then I could maybe have some for breakfast……

I’d  used a recipe from Good Food before and it had turned out very well  and would be worth doing again. All I needed were some digestive biscuits; 100g of butter; 250g of mascarpone, (that’s one tub); 600g of soft cheese, (that would be two tubs of Philadelphia); 4 eggs, ( but you won’t need two of the whites. Save them for something else… or maybe have an egg white omelette the following day to make up for any indulgence. Maybe not, eh? Maybe make meringues instead!);  3 or 4 lemons and some caster sugar and some plain flour.

Once it was baked, a small pot  soured cream and some lemon curd and fruit were to go on top. Simple. But oh so delicious.

So, I needed my springform tin and to make sure there were no leaks I got out a preshaped baking paper liner.

I decided that Hobnobs would make a lovely crumbly, rich base… because I love them.

And as I needed 225g – which came to 16 Hobnobs in case you are interested (or can’t find the scales to weigh them) then that also meant, I thought, that  there would be a few Hobnobs left over to have with a cup of coffee. Always thinking, that’s me.

Making the base is the simplest thing ever – and with such crumbly biscuits it is so easy to give them a bash with the end of a rolling pin to crumble them.

100g of melted butter (heat it gently and carefully in the microwave) was poured in and stirred round until the butter was absorbed. Pour the buttery, crumby mix into the lined springform tin and press down.

Using a spoon round the edges means you get a good firm base and then put it in the fridge for the butter to set firm again and the base to chill.

Heat the oven to 160°C (fan assisted)/320°F.

Then start to get everything else ready. This is so easy.

Zest all of the the lemons, add the two whole eggs and the two egg yolks, the pot of  mascarpone, the two tubs of Philadelphia cream cheese and  the juice of two of the lemons to a mixing bowl.

And then add 175g of caster sugar and 4 tablespoons of plain flour

And start whizzing it together.

The colour changes  as it becomes smooth and delicious.

Now, take the chilled crumb base out of the fridge and spoon in the lucious filling.

If you give it a gentle side-to-side shake the mixture settles and the top smooths slightly… though this will also happen in the oven.

Put it carefully into the oven for thirty five to forty minutes and when you check it, give it a little shake…. it won’t (or it shouldn’t) slosh, it will just have a gentle wobble to it.

Turn the oven off and leave it to cool completely in there.

That was handy for me because I had to get things ready. There were floors to wash, a table to lay, cushions to be plumped, surfaces to polish…. and a mad rush to get me looking half way presentable before the guests came.

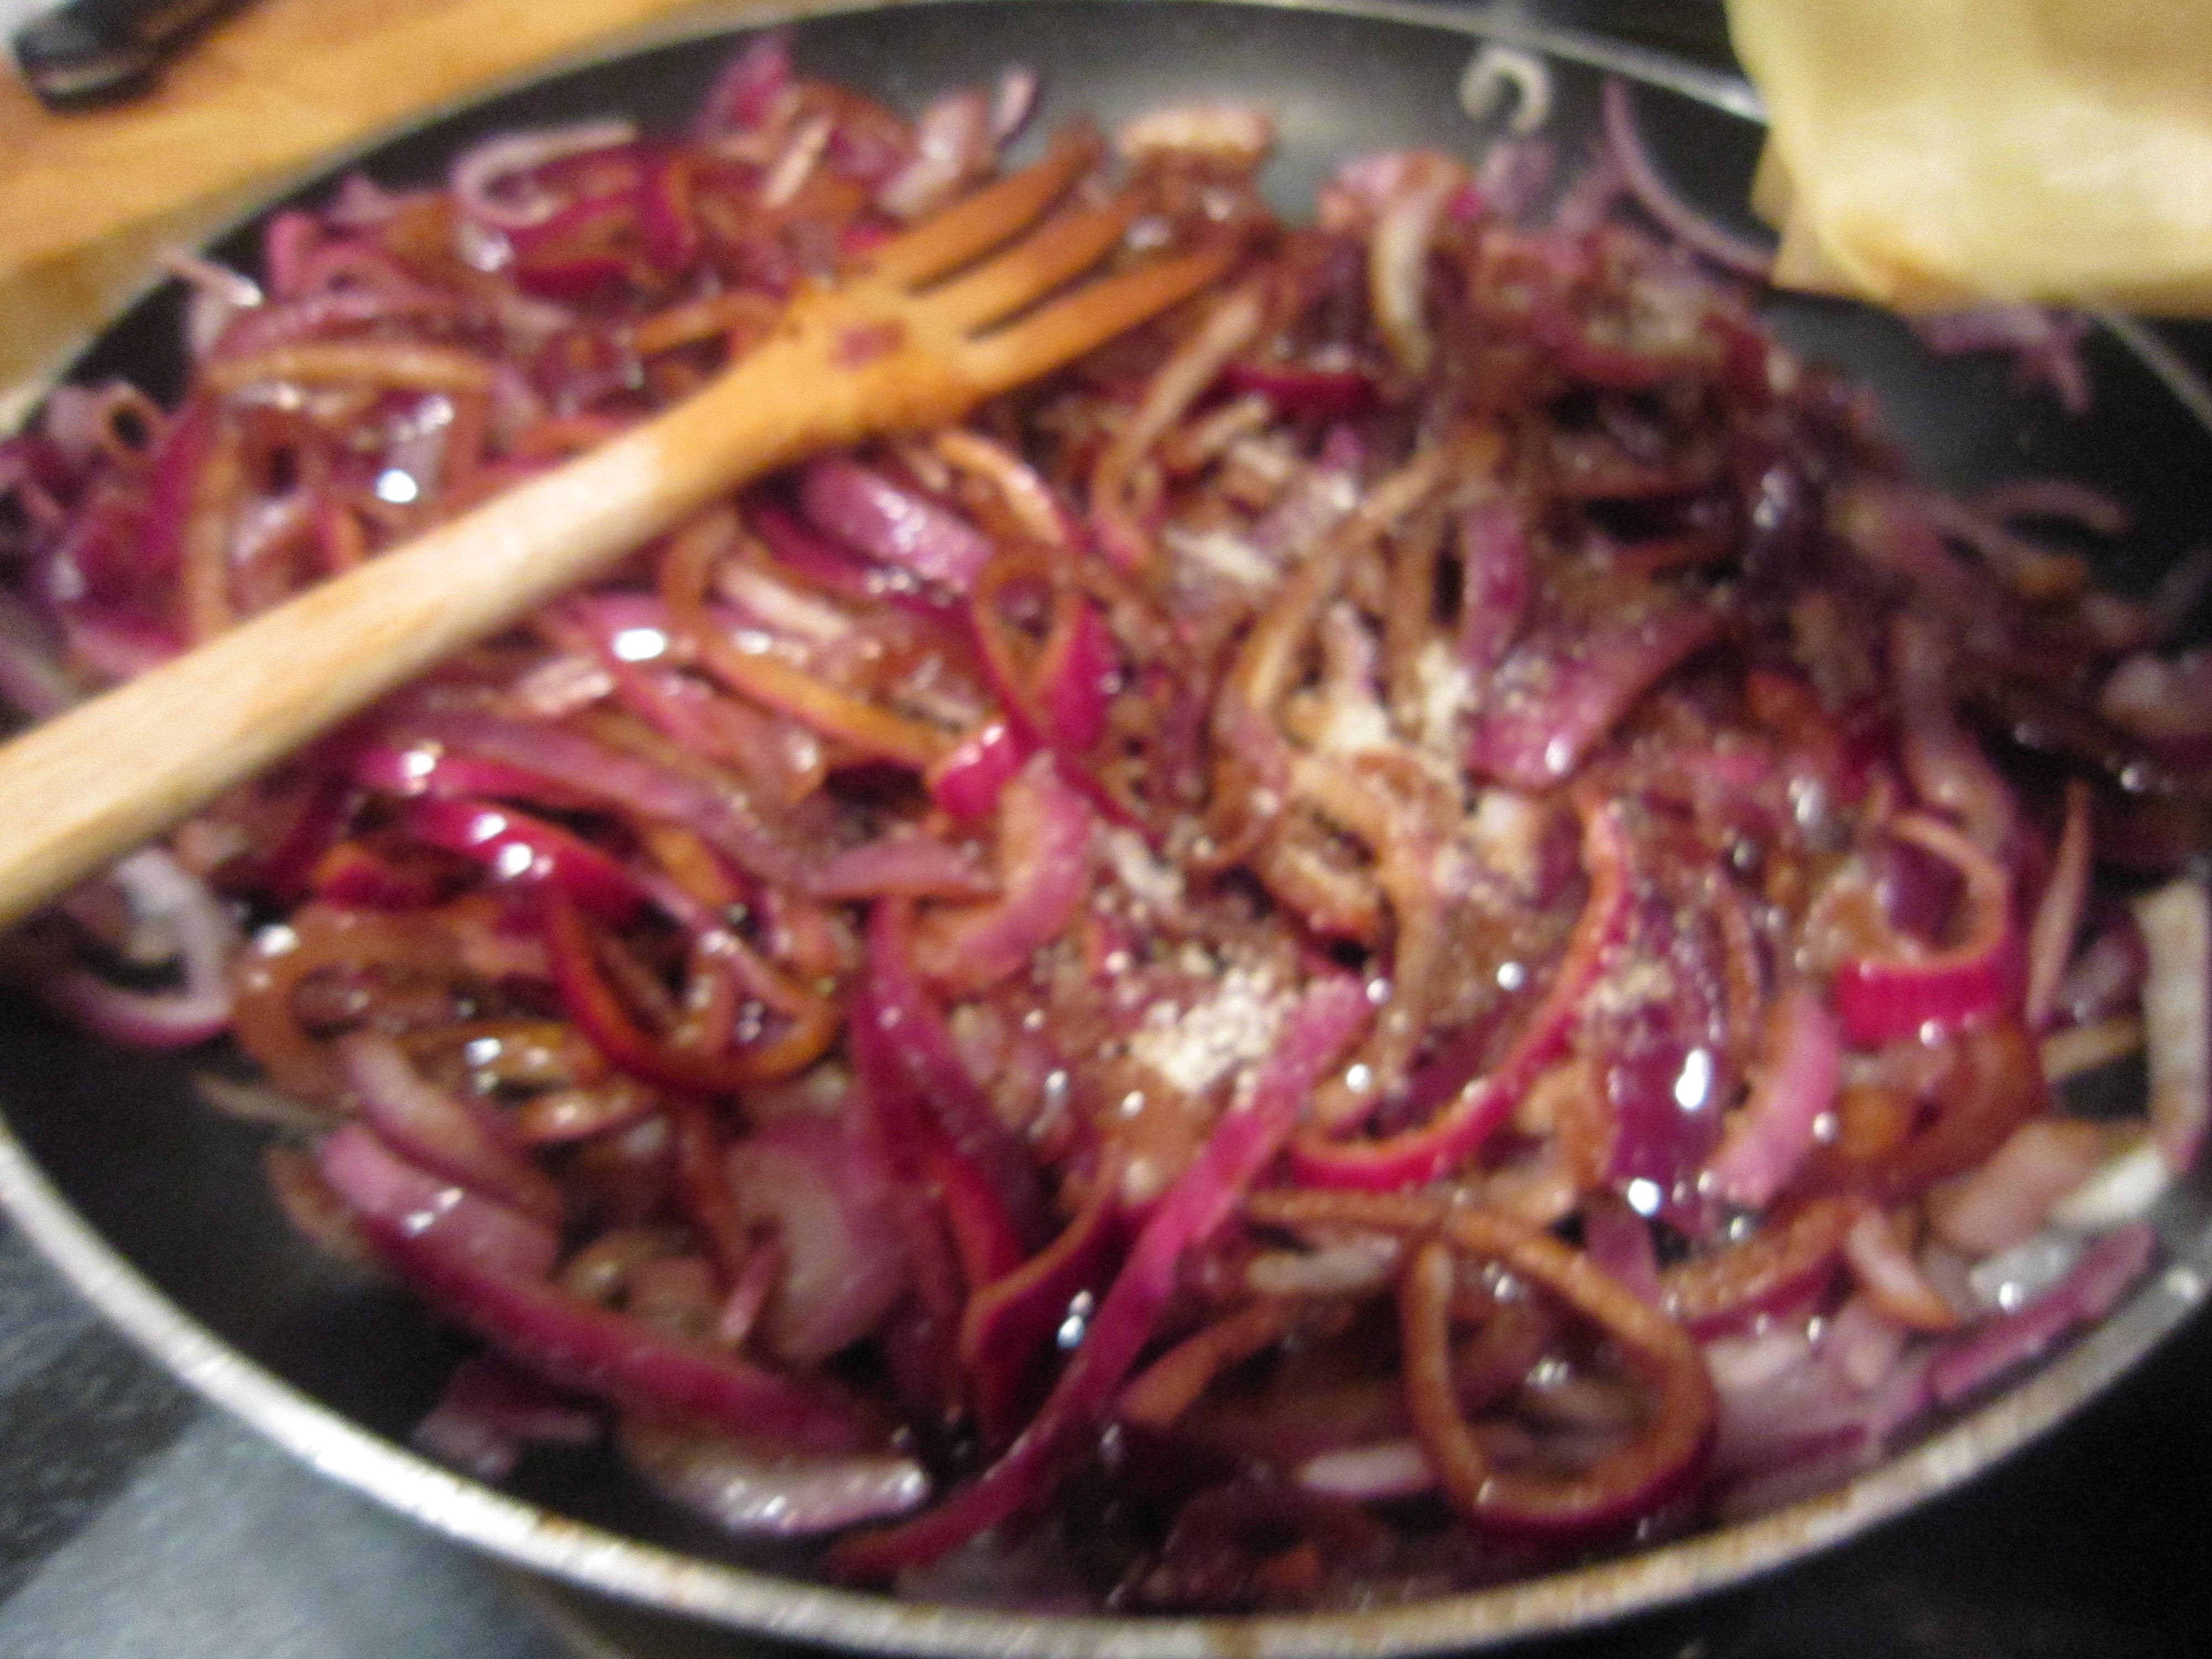
Now, you may have read about the mushroom pate with caramelised red onions, and the squash and goat’s cheese lasagne and the singing. This cheesecake was the final part of the meal and I was going to put the topping on just before serving it.

And, as I am sure you will agree, if you are eating you will probably have been drinking….not to excess, you understand, but enough to laugh happily.

Enough to laugh happily and cover the top of the cool cheesecake with some lemon curd and then spoon the soured cream over the top and, still, laughing happily, make attractive patterns with a fork on it before realising that photographs should have been taken.

Oh well.

Imagine it instead… the top of a baked cheesecake, looking pale and beautiful has a few spoons of  good quality lemon curd spread over it. I used lemon curd I made but any good brand will do.

Then the soured cream was poured over the top of that… and then I got artistic.

Right, we are caught up with ourselves and the pictures now.

In the freezer I had some frozen blueberries so I grabbed a handful and dotted them over the top.

(Look, you can see the lovely lemon curd poking through the swirled sour cream!)

The blueberries defrost quickly when you put them on top of the cake and the beautiful juices run down through the tracks of the fork in the soured cream.

Oh… it was delicious.

The beautiful baked cheescake filling had the perfect mouth-sticking texture that dissolved into lovely creamy lemon-ness.

The soured cream and the blueberries were the ideal match to the rich smooth sweetness.

I say again, ohhhh it was delicious.

And the next morning, while I stood, waiting for the kettle to boil, looking out of the window at the early Sunday morning city below us, I might (just as I did back in the 1970’s)  have cut myself the tiniest sliver of cheesecake to eat as a pre-breakfast, post dinner party treat.

Except this was far better than any 70’s cheesecake. This was a perfect baked cheesecake.

Squash and goat’s cheese lasagne

Sometimes, when you plan things, they don’t turn out exactly as you envisaged.  Sometimes that’s a bad thing and sometimes it’s absolutely marvellous. Let me tell you about a marvellous thing.

We’d been planning to have J and R round for dinner because both of them got wonderful new jobs within a couple of days of each other and that deserved a celebration. Juggling the diaries so that everyone could make it took ages but eventually we settled on a Saturday night that would work for us all.

In the meantime, separate to all of this, the Bear had invited Anthony, founder and CEO of Kaggle, which is a platform for data prediction, to give a talk at the University and, as is the way of things, we got talking at work. You know how you know there are people you can get along with? Well, Anth was like that so, when we heard he was staying in Nottingham for the weekend to explore, we immediately invited him to come to dinner too. He’d fit in well round our table and we knew he would add to the general good humour and laughs that we were expecting.

As J is a vegetarian, I’d been thinking of things to make that would be suitable. I decided that a starter of mushroom pâté with  melba toast and caramelised red onions would start us off well but I also needed to find  something delicious for the main course. I wanted tasty yet relaxed… this was going to be a fun evening and we weren’t looking at being formal at all.

I’d spotted something that looked interesting (more than interesting, actually, positively delicious if truth be told)  on Rhi’s Foodie WorldSquash, Roasted Garlic and Goat’s Cheese Lasagne. Now lasagne is one of our favourite things and here was a recipe that would be perfect for a vegetarian main course. Rhi said it was so lovely that she would cook it again and again, which is pretty much of a guarantee of deliciousness because every food blogger is always trying to cook something different all the time.

It ticked several boxes for me – delicious, vegetarian and it was something that could be made in advance, which is always a bonus. In our apartment, the upper floor (which is our kitchen, living room and dining area)  is open plan and stretches the entire width of the building. That’s a great space for entertaining  but it also means the kitchen area is on view to any guests. There’s no hiding the pots and pans by shutting doors and I like to have everything cleared away and as much ready (or hiding, cooking in the oven) as possible.

I could have a leisurely morning, preparing everything, then clean the kitchen and set the table, then put the lasagne in before they arrive. That would be perfect. What was even more perfect was that I had everything I needed… two lovely butternut squash, garlic, a roll of goat’s cheese, a couple of tins of plum tomatoes, and a box of lasagne sheets. This was surely a sign that I had to make the lasagne.

Now when I read Rhi’s description she peeled, then cubed her squash – I was in the mood for rattling along in the kitchen so I cut mine into wedges

I laid them in a roasting tin that I’d lined with a silicone sheet (oh, how I hate scouring tins. This way means I can roast things and the vegetable sugars from the carbohydrates don’t burn onto the bottom. I can just wipe the sheet clean. I do love to make my life as easy as possible)

I drizzled some chilli oil over the wedges and scattered through about 6 or 7 fat cloves of garlic, still in their skins. If you do this to garlic, you can squeeze the soft white middle out later.

Rhi had used sage but all I had growing on my windowsill was some thyme, so I scattered that over the top, with some Maldon salt to season it all.

And into the oven it went at 180°C/350°F for three quarters of an hour or so while I got on with other stuff.

I needed the squash and the garlic to roast down softly and the squash sweeten and deepen in flavour as it softens.

And the other stuff was making a rich and delicious tomato sauce to layer the lasagne with. I had some tubes of Gourmet Garden fresh chopped herbs (surely a life saver for us when our windowsill herb pots are dying off. A life savour, perhaps?)

I gently cooked a red onion (well, I still had some left from when I made caramelised red onions) and then added the tomatoes to cook down.

A good squeeze of the basil would make a truly gorgeous tomato sauce.

By now the squash had roasted to a delicious softness.

And just look how it had roasted. The colour of the squash had deepened and the smell was mouthwatering. The garlic was soft inside its papery skin and just ready to squeeze into the tomato sauce.

I squeezed all of the cloves into the sauce and stirred it round.

Roasting garlic takes away any harshness, leaving a sweet and aromatic garlic flavour.

(Now I know that picture makes the garlic look orangey  and incredibly bulbous but there’s a reason for that….and that is, if you ever try to squeeze an oiled and roasted clove of garlic, one handed, while trying to take a picture over a steaming pot of tomato sauce, your lens is likely to steam up, your fingers slip and the angle of the shot changes. That pile of garlic was well below the clove and had already got splashed by one of those molten lava-like bubbles. Take it from me, what emerged from the clove was soft and glisteningly white.)

Stir it all in anyway and let the roasted garlic infuse that sauce.

Now I had to scoop out that delicious squash….

It was so soft I could spoon it out from the skin.

I love that colour. So bright and cheerful. I’d paint the walls that colour if I could get away with it, but the Bear is more of a magnolia man.

And then? Then just spoon it into the tomato sauce and stir it round.

It thickens it and gives it a lovely texture. In a strange way, the squash seems to lighten it.

The next thing to do is to make the bechamel.

The proportions for a good bechamel are, first of all, equal amounts of fat and flour must be cooked together as a roux. I do it by tablespoons, rather than weight because that’s quicker.

A couple of tablespoons of each, stirred together, over a gentle heat until it becomes a beautiful golden paste as the flour cooks.

Then, a pint of milk and cream – I got my jug and put in half a pint of cream and topped it up with milk, stirring it round to mix it. It might look lumpy at first but it soon smooths out to make a silky sauce.

(I didn’t say I was doing a diet version, did I? This is a celebratory meal for friends, so I’m making the sauce taste even more rich and delicious) Once it has thickened to a rich and savoury white sauce, you can start to think about putting everything together.

And now the best bit – layering the lasagne.

Start by putting down a layer of lasagne sheets to cover the bottom of a large dish. There’s no need to soak them, generally, the moisture from the sauce will soften them as everything bakes.

Then put your first layer of the rich and soft tomato, squash and garlic sauce.

Bechamel next, poured gently over the tomatoey layer.

Then more lasagne sheets (and look how I have snapped them to fit!) and more tomato sauce spread over that.

I had a beautifully fresh and crumbly goat’s cheese log… about 100g or so. It needed to be sliced into deliciously, almost sticky, rounds.

And a thick layer was spread over the tomato sauce.

And so it went on with another layer of lasagne, more sauce and the last of the bechamel, finishing with a lovely grating of Grana Padano cheese to add a spikier, cheesier topping. I could have used parmesan, but the Grana Padano was at hand.  Doesn’t that look lovely? You just know that this is going to turn out beautifully.

And once I was at that stage, I could set the kitchen to rights and leave the lasagne, ready for cooking later.

All that remained was to set the table and put the lasagne in when the guests arrived.

Half an hour or so, maybe forty minutes, at 190°C/ 375°F produced the most glorious lasagne… beautifully layered, fragrant and savoury. Don’t worry if you need it to be delayed – just cover it so it doesn’t burn and turn the heat down. This is a very forgiving dish.

And served with green salad and plenty of red wine, it really was lovely.

The squash really lightened the lasagne in a strange way and there was certainly no feeling of lacking anything by not using meat. It was savoury and delicious. As for the guests? We all laughed as we ate and drank. Everyone cleared their plates… it was a success.

Remember how I said that somethings don’t turn out as you planned? That happened this  night. I certainly didn’t plan that we’d be singing at the table, between mouthfuls.

A is Australian and somehow the conversation veered round to Rolf Harris (the world’s greatest living Australian) …. who, Anth said, he wasn’t really aware of.

Not aware of Rolf? He’s a hero to us all and has been part of all of our growing up and adult years, so we all chipped in with great enthusiasm to tell him about the painting, the pets and the singing. And then, as these things happen, nothing else would do until we had propped up a laptop, brought up Youtube .

Poor A. He sat there in stunned amazement as we all sang, word perfect and in tune to “Two Little Boys” I defy anyone not to have a tear in their eye when Rolf sings that. Although maybe that could have been the wine we drank……..

So, thank you, Rhi. A fantastic recipe that was exceptionally delicious and helped turn an evening into a fantastic occasion.

Singing, eh? Who would have thought a lasagne would have made you sing? But it does… Australian guests or not, this was so lovely you will want to burst into song.

A cheeky little number….. Beef Cheeks.

Whenever I go home to the North I always call in at my favourite butcher’s, George Bolam at Sedgefield. It’s from here that I have got the more unusual cuts, like plate of beef or lamb henry, where I get the best belly pork, either in strips or rolled, to make the perfect joint with crackling. I get my favourite beef skirt from there, too – the tastiest and tenderest (if cooked quickly) steak imaginable. He makes his own haggis and black pudding and has the widest variety of sausages imaginable.  He has a bakery there too, a deli, a fish counter and an amazing selection of fresh fruit and vegetables.

Everything I get from George’s is absolutely fresh, generally local and incredibly good value and that is, I suppose, why all of us should support our local butchers rather than just buy meat from supermarkets.

On my last trip home, I called in to stock up on meat to bring back to the city and saw, for the first time on his shelves, cheeks of beef.

These are, as you would imagine, the cheeks of the cows. The price was incredible – 717g of meat for £3.14? I had to buy it and try it.

So, that was frozen and put into the freezer until I had time to think of what to do with it and the time to cook it.

And then I got ill. I could barely move and any cooking that needed me to be alert and available to do things was out of the question. To be fair, I didn’t want to eat either so for days I lived on hot drinks and an occasional slice of toast.

Then one day I realised I had to have more than that – the Bear needed feeding, for one thing. And then I remembered the beef cheeks in the freezer.

Now, a cheek of a cow would get a lot of exercise, I would have thought. All that chewing of the cud must give those cheek muscles a good work out. Cows seem to chew none stop. So a well muscled piece of meat would need long and slow cooking. And the best thing about long and slow cooking is that it requires minimal preparation, even less attention and the opportunity for a nap while it cooks.

The end result is always something succulent and tasty, perfect for anybody…. even an invalid.

That settled it. I summoned up the strength to go to the kitchen and took out the cheeks to defrost. I would cook them the next day.

The next morning, I unwrapped them and looked at them properly. They were much larger than I thought they were going to be.

What a size they were….I have normal human sized hands, you know, it’s not as if I am a miniature person. Each cheek was bigger than my outstretched hand.

That was going to feed four, at least.

As with so many delicious things, the simplest way is often the best way and with slow cooked food that seems to be particularly true.

I dusted them with flour…..

… and then browned them quickly in a splash of oil, in the bottom of a hot casserole.

I poured in some stock, made from granules and hot water and then thought I could perhaps boost the flavour even more……As we seemed to be stockpiling port, I decided to add a good amount of it to make the gravy even more delicious. I don’t know when we were going to get around to drink it all, so it seems a good choice to use it in cooking now and again.

Don’t worry if you haven’t got port, or don’t want to use it. Use all stock instead, or maybe add in some wine, or sherry… it’s your choice. You do need to add something to make the gravy with, so add enough liquid of whatever you fancy to just cover the meat.

I chopped in some carrots and parsnips and put the covered casserole into the oven at 160° C/320 °F for three hours.

The smell was amazing.

As the oven was on anyway, I scrubbed some potatoes, jabbed them with a knife so they wouldn’t burst, rubbed them with oil to make the skin crispy and put them in the oven to bake alongside the cheeks, then I went back to bed.

When I next roused myself, I went upstairs to a beautifully warm kitchen, filled with wonderfully rich and aromatic smells and opened the oven.

The potatoes were perfect and the beef cheeks looked good. More than good, actually.

I got a spoon to stir the vegetables and gravy round and moved a cheek… the spoon went through it.

Remember how big those cheeks were? Well they were still in one piece, it’s not as if it was all in bits and easy to scoop up. People say, when they are talking about tender meat, that you can cut it with a spoon but this was the first time ever that I really could do that.

The spoon sank through the silky soft meat and there, on the bowl of the spoon, was the most delicious looking piece of meat.

And the taste? It was beyond delicious. It was rich and soft, succulent and tasty.

Probably the best beef stew I had ever eaten. In fact, calling it a beef stew seems to be a bit of an insult.

The vegetables had kept their shape in the long, low and slow cooking and were perfectly tender. The funny thing is, I’m not that fond of cooked carrots, especially cooked carrots in what is, to all intents and purposes, a simple stew but these were gorgeous. They still tasted carroty but they also had a deep rich layer of taste from the gravy.  I loved them.

But it was the meat that was the star of the show and now, thinking back as I write this, I long for beef cheeks again. So much so that I’ve just ‘phoned my mother and asked her to go and get me some more and freeze them ready for me to collect on my next trip.

Those two cheeks made enough to feed four or five healthy appetites….and for those weakened by the dreadful colds and flu, well that boosted my appetite and for the first time in days I enjoyed my food.

Simple, so very simple and it cost so little.

If you see beef cheeks, buy them immediately. If you don’t see them, start picketing the butcher to get some for you. You won’t regret it… although you may regret the fact you spend days yearning for beef cheeks when there are none available.

Mushroom pâté

Here we are in January again. The excitement of Christmas and the New Year celebrations are over and we are all back to work. This time last year I was rather happy at finding a Le Creuset cast iron terrine dish at less than half price. The Bear, of course, was asking if I really needed a terrine dish and, if I had one,  would I use it enough to justify even the half price… well, the answer is yes.

I have made bread in it… I made a ham hock terrine, I’ve made numerous chicken liver parfaits in…and now I decided I needed to make a mushroom pâté in it.

I needed mushroom pâté because I had a wonderful loaf of No Knead Bread on the go (ready to be baked the following day) and I had the soft, sweetly savoury and delicious caramelised red onions that would be perfect with the bread and the pâté…. and I also had a large bag of chestnut and shitake mushrooms. 

There’s something so rich and tasty about both chestnut  and shitake mushrooms. They’re almost meaty in their texture and the flavour is deep and earthy.

Shitake always seem so substantial for a mushroom – you know how some mushrooms seem to disappear when you cook them, becoming small and almost translucent and frail? Shitake don’t. They are firm and lovely and the flavour  is perfect for making a pâté with.

I’d been out when I spotted the mushrooms, piles of them, looking gorgeous. I really had no plan at the time to make pâté but it all seemed to come together.

If you see mushrooms in the peak of perfection you really should buy them and think of what to do with them while you walk home with your bag of goodies. When I picked the mushrooms, I just put handfuls into bags – when I weighed them at home (yes, the shop did that but I wasn’t paying attention and the only reason I weighed them again was so I could tell you) there were roughly 25og of chestnut mushroom and half that of shitake and together they cost me £2.40.

I knew I had everything else I would need at home – 250g of butter and the remnants of a pot of cream, maybe 125ml or so.

All a pâté is (and what the literal meaning is) is a paste of something. You need the main ingredient and something to stick it all together. Butter and cream are the logical choices as they melt into whatever you are using then chill down, making a beautiful, spreadable paste.

Back in the kitchen, I chopped them roughly and started to sweat them down with a knob of butter and a pinch of salt.

Thyme added to mushrooms

I had some soft thyme growing in a pot on the windowsill so I tore off the baby fine shoots and added them. If you are using thyme that is growing outside then you must strip the leaves off – an outside hardened plant has very tough stems. When it is as soft and tender as this is, it isn’t a problem.

A couple of finely chopped garlic cloves added at the same time  will cook down well making an aromatic  layer of flavour. It won’t be overpowering because it will cook long and slowly so the pungency of the garlic softens beautifully.

I knew I had a box of dried wild mushrooms and I decided to add some of them to the mix. I put a handful into a pyrex jug and added boiling water to hydrate them. If you haven’t got any don’t worry… but the funny thing is, people always tend to have a box in the back of the larder. Maybe it is because we all think we will make risottos with them… then go and buy the fresh mushrooms anyway.

By now the fresh mushrooms were softening nicely. Keep them on a gentle heat and keep stirring them every so often.

You want them to be cooked and to have concentrated their flavour. If you are in the mood for it, you can add a splash or so of cognac just to add in yet another layer of flavour. It doesn’t matter if you don’t want to, it’s just an option. This is such an easy thing to make that you just change and adapt until it pleases you.

The dried wild mushrooms will have plumped up beautifully by this stage so you can squeeze out the excess water and add them to the mix so they can cook through and absorb the buttery, mushroomy juices.

If you are planning on doing something else with mushrooms the rehydrating water could be used as a stock, but really, there’s not that much there and with dried mushrooms you have to be wary of any little bits of sand or grit that might have been in there. For once, much though I try and make sure there’s no waste in my kitchen, I didn’t see the benefit in saving the water.

An extra knob of butter won’t go amiss….

Look at how they all mix together – that’s not the clearest picture but I kept getting the lens steamed up, so that’s the picture that was taken.

Now then, it’s time to make the pâté.

Put the mushrooms into a processor or, if you are like me and find it just as fast to use a hand blender, put them into a jug with maybe 50g of butter. It’s the butter and cream that hold this together and when it has been chilled in the fridge you end up with a beautifully smooth pâté.

Don’t be afraid of the amount of butter because the amount of pâté you eat in a serving is not that much.

Start whizzing it smooth.

Keep going till you have whizzed all the mushrooms smooth and with each whizzing you have added more butter. Of course if you had bothered to get to the back of the cupboard where the food processor is, you could have done it all in one go….. I didn’t. So I had to keep whizzing in a jug and putting the smooth blend in a bowl.

Look at it…. rich and smooth….

Stir in the cream and make sure it is all blended properly.

You should check the taste of it to see if it is well seasoned – you might need to add in some salt. I put in a pinch or so and stirred it all round.

Then, all you have to do is spoon the thick and rich blend into the terrine dish.

A silicone scraper makes an excellent flexible smoother.

Look how beautifully smooth it is…..

And all you have to do now is to chill it.

The mushrooms were cooked in the pan and the butter and cream were blended in, now the butter needs to set again so the pâté becomes firm and you can slice it.

Put the terrine into the fridge and leave it to set and chill. I usually leave it overnight, unless, of course, I can’t wait.

The next day, I sliced some No Knead bread thinly and baked it for ten minutes in a moderate oven. Not enough to toast it but just enough to to dry it out. This was going to be my Melba toast that I would serve with the pâté and the rest of the caramelised onions that had been waiting patiently in a jar in the fridge.

This was going to be a lovely light meal….

And it was.

It was rich and smooth and made the perfect starter when some friends came round for supper.

It keeps well in the fridge and you can, if necessary, freeze it, if you wrap it tightly in cling film. That’s good news because, as ever, I had made far too much.

I cut it into portions, and wrapped it well. One word of advice though… do remember to label it!

So, two bags of mushrooms, a block of butter and some cream and you end up with possibly the best mushroom pâté you have ever tasted. What more do you need, except a glass of wine and company to share it with?

A New Year, a new start

Happy, if belated, New Year to you all.

I have been missing for some time now, but I do have some valid excuses.

First of all, as some of you know, I work full time in a university and before Christmas we were extremely busy. I really was working flat out.  I did cook (and what a lot I have to tell you about later) but preparing and photographing, then eating and clearing up took more time than I anticipated and I didn’t get round to actually writing about it.

Then I got bronchitis and two weeks of my life disappeared in a coughing, spluttering haze. A month later and I am still coughing.

Not only that….but there was snow. Lots of snow.

There were days where the only light seemed to be that reflected from the snow. I’d get up and look out of my bedroom window and see that the snow hadn’t melted at all.  Temperatures were regularly -9 or -10° C  overnight and first thing in the morning.

The lake outside my window at work was frozen.

The poor swans would walk across the ice to the only bit that wasn’t frozen solid.

They’d even walk up to the Students’ Union shop in the hope people would feed them.

Anyway, dosed up with antibiotics and Day Nurse,  The Bear and I  headed home to the North for Christmas where I was sure that I’d have time to write up everything.

The thing was, the snow had fallen more heavily in the North and it had been colder. Eight and ten inches of snow had fallen on some nights. I’d heard that the weight of the snow had started to tear down the guttering…..

That was the sight that greeted me at the top of the stairs. Guttering hanging down.

The weight of the snow as it slipped on the roof, without melting, ripped the gutters off and they had either fallen to the ground or dangled, hopelessly across the windows.

Icicles were nearly the length of the windows.

In the kitchen, the pipe from the sink and dishwasher had frozen so we (actually, the Bear did it)  had to wash up in the bathroom handbasin.

The guttering coming down had torn down the telephone lines so the internet connection was lost…. it was all going downhill rapidly.

The bright spot was, of course, seeing my family again and, best of all, my brother and his wonderful wife making Christmas Dinner for us all.

We had a great day….

And there was even a gluten free Christmas pudding for my brother, that was so delicious we decided we never again wanted any other sort of Christmas pudding.  My sister in law is now the acclaimed Pudding Queen of the family.

So. There are my excuses – work, illness, snow, lack of internet and lack of time.

What am I going to do about it? Well, I shall start by getting on with the writing up of the best of the recipes I made over the past month or so and hope that you start to read them again.

Happy New Year!

Caramelised onions and a wedding anniversary.

I’m very fond of November as a month… I love the dark nights because it means when I get in that I put the lights on and the place seems to glow making it seem like a warm cocoon; I make lovely, comforting food that soothes us both, no matter how stressful a day we have had at work; it’s getting close to Christmas so the excitement is building… but it’s not close enough to terrify me because I haven’t done the shopping. But the best thing of all is that in November we have our wedding anniversary.

We got married on Guy Fawkes night and the week leading up to and the week afterwards the night skies are filled with fireworks. It’s like a city wide celebration, just for us. In 1605 a law was passed, The Observance of 5th November Act, that called for a public, annual thanksgiving that the treasonous plot failed.

I have to wonder that anyone would think we would need a law to make us celebrate anything, as the Great British public will have a party at the drop of a hat, but there you go. Not wishing to be law breakers, we all join in and enjoy ourselves. It seemed to us to be a great day to get married, too.

We got married, in the late afternoon,  at Lumley Castle , near Durham, in the far north of England,one of  the most beautiful and romantic places in the world to have your wedding. There were fireworks going off outside as the speeches were taking place and the whole place had a magical and special air. The castle staff did everything to make our day perfect… and it was. We laughed as we exchanged our wedding vows – so much that the cermony stopped for a while as the giggles took hold of us all – and we carried on laughing for the rest of the evening.

Most of our wedding photographs show people, giggling helplessly. That set the tone for our marriage, I think.

Anyway, here we are, a few years on, still laughing and still celebrating. Last year I made us roast vegetables for our anniversary supper and we sat and watched the fireworks going off below us. This year we decided to take a day’s holiday from work and really celebrate.

The night before our anniversary we went to  Restaurant Sat Bains. This was our fourth visit to Nottingham’s only Michelin restaurant and, as it always has been, it was spectacular. Sat is one of the UK’s finest chefs and one of the most approachable and welcoming. One time we went we took the Bear’s sister, who had come from Australia  for her birthday and Sat invited her (and, therefore us, because we weren’t going to be left behind) into the kitchens.

 Sat really achieved  national fame in “The Great British Menu” that was screened on TV. Fourteen of the UK’s top chefs competed to win a place cooking a course in what would be the best menu Britain could produce. Sat’s starter of slow cooked duck egg, peas and ham scored a perfect 10 from each of the judges. It really is special and we have had it a couple of times before but this night we thought we would have the  ten course tasting menu. It’s not as daunting as it sounds.. the ten courses are delicious bite sized, or mini portions that make you glad you are there.  Explore the link if you want to see the kind of menus on offer… our menu started with scallops, then salmon that was so delicious I could have eaten plates of it, then duck, mutton, a barley and snail dish, then leeks before moving to the transition course and desserts. You need someone better than me to tell you how lovely it was. It’s not enough that I just make whimpering, moaning noises of delight and say it was lovely.

Life can’t be all Michelin restaurants, though, so for our anniversary proper, we decided to stay in and cook for ourselves. The Bear decided he wanted to have sausages in buns for supper because… well, because that’s what you have on Bonfire Night!

I made the buns from so No Knead Bread dough that was ready to be baked

and instead of baking the dough in a cast iron pot as I normally do, I heated a baking stone in the oven and just shaped the dough and then baked them on there. Without the cast iron pot which sears the outside, you get a softer bun, which was what I wanted.

That was going to be delicious… but, it was our anniversary, so I decided I needed something to make the sausages in buns special. Caramelised onions would be just the thing, I thought. Rich and tasty, soft and savoury onions, stuffed into the buns with hot sausages… what could be better or more appropriate for Bonfire Night?

All you need to make this is time (maybe an hour), onions, balsamic vinegar (a spoonful or so), some sugar and some salt and pepper.

I had five red onions. That was going to make a lot of caramelised onion, I know, but whatever I didn’t use was going to be put in a jar and kept in the fridge for later. It won’t keep forever but it will certainly keep for a couple of weeks at least, so you may as well make extra.

I love the look of red onions.

They are so vibrantly pink and beautiful.

Slice your onions finely and add them to a large frying pan with a good amount of olive oil, warmed on a gentle heat.

You are not wanting to fry them to a crisp, just to soften them as they cook slowly.

red onion cooking slowly

Adding a spoonful of salt keeps them soft and enhances the flavour.

As the onions start to soften, the colour gentles and blends slightly. What you need to do now is add some extra flavour and add to the caramelisation process. Balsamnic vinegar works brilliantly here, or, as I used, a balsamic vinegar glaze or crema. What they have done is reduce the vinegar down to a thick, sweet and sticky glaze that can be used in dressing, on roasts, in salads or in general cooking. It is, I suppose, what you would end up with if you slowly cooked straight balsamic vinegar, so don’t worry if that’s all you have.

The aim is to add another layer of flavour.

A tablespoonful or so needs to be stirred through while the onions carry on cooking slowly.

A dessertspoonful of golden granulated sugar needs to be stirred through to help the caramelisation

And then, after maybe another quarter of an hour you have a rich, sticky, soft and tasty tangled pile of onion……

All I had to do was slice open the buns

Add a fat and juicy sausage

… and then start adding the onion…..

It was delicious.

The night before, Michelin starred restaurant… that night, champagne, sausages and fireworks.

Pretty simple. Pretty delicious.

At the end of the night, we had had a lovely time and I still had enough caramelised onion to put into a jar and keep in the fridge. It’s perfect to serve with sausages, or pate, or cheese. Make some yourself and see how easy it is. It’s enough to make a simple supper special. We thought so, anyway.

Lovely lamb shanks, tagine style and the Bear’s shopping expedition

I’m a lucky old thing, I know, and meeting the Bear was the best thing that has happened in my entire happy and lucky life. He’s funny and sweet, very clever and tolerant and (and this is a good bit indeed) very helpful about the house.

I had a lot to do and, while I normally do the shopping because I like to choose what I’m going to cook with, I was running out of time to get everything done. The Bear had some spare time and offered to help….

What could go wrong? I had all the meat and vegetables (so there was no problem with choosing the best examples) and all I needed were things for the house and a few food or drink items for the cupboards. It wouldn’t matter whether I picked them up or he did, they’d be the same….

So armed with a specific (very specific) shopping list the Bear set off and I got on with other stuff. We met later in the kitchen and I started to unpack the bags… cleaning stuff? Check. Dishwasher salt and rinse aid? Check. Kitchen rolls? Check. Butter, milk, cheese? Check. Tea and coffee? Check. Wine? Check, check and more check. (We were having friends round) Cordials? No check.

I had wanted a specific kind of cordial – Grape and Melon. They didn’t have any apparently (and there’s no point Googling or asking about other stockists because they have stopped making it now. Shame on you, Robinson’s!) and the Bear had remembered not to deviate from the list and get another flavour. All well and good. We did have other cordials anyway so it didn’t really matter.

I carried on emptying the bags…. and found, in the bottom of one of them, three cartons of prune juice!

Prune juice? Whatever had possessed him to buy prune juice? I don’t like prune juice and I don’t need prune juice. I certainly didn’t need three litres of it.

He started to explain. Quite frankly the reasoning behind it was flawed. They didn’t have the clear and delicate tasting cordial I wanted so when he saw “Buy 3 for the price of 2”  next to the prune juice he thought he would use his initiative and grab us a bargain….

The prune juice went into the larder and there it stayed as a reminder that sometimes initiative is a terrible thing.

I can’t bear waste though and eventually, months later, decided I would have to do something with it. I’d gone into the larder to get a new box of salt out and spotted the prune juice still loitering on the shelf. I was going to be cooking lamb shanks that day and it struck me that if I were to do lamb shanks in, say, a Moroccan tagine style then I might have used prunes in there. What if, I thought, I was to cook the shanks IN the prune juice, instead of adding them as whole fruit, replacing just a simple stock and so making a rich and tasty gravy?

I had two lamb shanks that I was going to cook slowly while we were off doing other things.  I would have used the slow cooker but the two of them were too big for the pot and I decided that I’d just use a casserole instead. As long as you make sure you have enough liquid in there and keep the temperature low then it is safe to leave for a while.

It’s also lovely to come back to a home that smells of deliciously cooking food……

I love lamb shanks for many reasons. Firstly because they don’t cost much at all and secondly,if you leave them to cook slowly and gently they will turn into the most deliciously melting pieces of meat, far tastier and more tender than most expensive cuts and thirdly because I don’t have to do much at all to make it a perfect warming and mouthwatering meal.

Five minutes preparation and then you can walk off and leave them to glug quietly away for as long as you like. A perfect way to cook something while you are out at work or off out shopping at the weekend.

First of all, brown the outsides of the shanks. All it takes is a few minutes in a frying pan with a drop of oil to crisp and brown the skin. Yes, they are going to be cooked for hours and will cook all the way through but if you brown the outside you get a better depth of flavour and they also LOOK better. It’s all very well being delicious… it’s nice to appeal to the eye as well, though.

While the lamb is browning, quickly chop some onion and garlic.

I had the remnants of some tagine paste that I could use to bring in a hint of Moroccan flavouring and some lovely Rose Harissa that would liven things up a bit. I wasn’t making an authentic tagine but I wanted a definite nod in the direction of Morocco. You can get tagine flavourings in most supermarkets now so choose whtever you fancy.

I put a spoonful of each into my casserole dish and stirred it through the chopped onion and garlic.

Carrots were roughly scraped clean and sliced and the browned lamb shanks were put in the pot on top of the vegetables.

I poured a pint of prune juice into a jug – just look at the colour of it! Now while this could never replace a light and fresh tasting cordial as a drink I could see this was going to make a deliciously thick and tasty gravy. With the harissa and tagine paste to spice it it, I had high hopes of this turning out to be a success.

Mixed with some stock granules to add a salty, savoury taste, it was poured over the meat and vegetables.

And then, because I love it and I knew it would be good, a couple of teaspoons of cinnamon powder were put in.

And that was it. The lid was put on and the casserole was put into a slow oven (165 degrees C/350 degrees F) and I went off to do what I needed to do. If I’d used the slow cooker I would have set it on Auto – which means it gets a high start then it turns down to a very low heat. The cast iron casserole would do just as well on a steady low temperature for hours.

After about three or four hours I came back and looked at the shanks…. they smelled delicious anyway.

Rich and dark from the prune juice, steaming and the meat was falling from the bone.

Chopped coriander would give just the right fresh herby taste

Couscous takes maybe three minutes to make – simply measure it out (the packet will tell you the proportions) and add boiling water so the grains fluff up.

You can add herbs and spices to flavour it if you are having plainer food but the gravy from the lamb would be flavourful enough, I thought.

The meat just fell apart…. the prune juice gravy was rich, savoury and spicy with a mellow sweetness. It all soaked into the couscous making each mouthful delicious. Who would have thought mis-judged initiative could produce such a lovely result? Inexpensive cuts of meat, unwanted cartons of juice and a few hours in an oven produced a meal that I would have been proud to serve to guests.

We enjoyed every mouthful.

So, while I can’t advocate the drinking of prune juice…. I can suggest you cook with it. You might just be as pleased as we were with it.

Cauliflower and apple soup

Now that autumn is here we are starting to see the arrival of our glorious winter vegetables. As the seasons change, our food does too – we no longer want cooling salads or light and fresh meals, we need something to fill us and warm us against the chill winds and the leaves fall and the skies turn a constant grey.

When I walked up to the local shops I saw beautiful white cauliflowers, grown in local fields, stacked in the greengrocer’s barrow outside his shop. How could I resist them?

There was a time, you know, when I did resist them. When they appeared in school dinners… overboiled, smelling slightly and looking rather grey. If your teacher forced you to eat them you’d get a mouthful of hot water and the grey and tasteless, soft but weirdly sort of granular vegetable mush would dissolve in your mouth and slide down your throat. I was a picky child and I could be very stubborn. There was many a school lunchtime when I would sit there, with my jaws clamped shut, refusing to eat, while my teachers tried to make me.

Now, obviously, this isn’t a picture of me at a school dinner table (even the Grim North isn’t cold enough to make me wear an anorak indoors) but this is pretty typical of my sideways, scowling look when faced with something I didn’t want to do. I could be very determined. Cauliflower? No. And I mean no. Make me? I don’t think so. I mean no. I meant no for years.

Years and years went by until I finally discovered, as with so many things, that it is not the food itself that is the problem, it’s just the way you cook it.  Cauli can be good….. I discovered the joys of Cauliflower Puree and realised that if you cooked it carefully and didn’t overload the poor vegetable with water, you would end up with a beautifully rich and almost earthy tasting, interestingly textured dish that really was gorgeous to eat.

Anyway, I’m over it now. I like cauliflower. I like it raw and I like it cooked and after I saw all of those crisp cauli’s I decided I’d like it, this week, in a soup.

I bought a couple of cauliflowers and then, because apples are in season as well, I got a couple of  Bramley apples and a Braeburn.

I had an idea.

I would make a rich cauliflower soup but I’d add a Bramley apple to cook with it and add a sharp sweetness to the soup and as an extra apple boost, I’d caramelise an eating apple with chillies to go on the top. Bramleys are cooking apples and are generally too sharp to eat raw but when cooked they almost dissolve into a delicious mushy smoothness. That’s perfect when you are adding them to something like this soup or you’re making a sauce.

The Braeburn I got to go with it is an eating apple – sharp, crunchy, juicy and sweet. If you cook that it keeps it’s shape. If you can’t get a Braeburn, find something else that is like that.

So, to make soup, start like you always do with soup – peeling and chopping onions and then softening them in a knob of butter with a pinch of salt. The salt will keep the onions white and stop them from burning. You want them to be soft and almost translucent, so start them on a medium heat.

While they are gently cooking, cut up the cauliflowers, separating the florets. The hard stem, chopped into small pieces,  can go in first with the onions as this will cook faster than the lacy florets.

When a cauli is fresh, the florets are crisp and hard and a beautiful creamy white.

Add them to the pan with a couple of pints of water and some good stock cubes.

The next thing is to peel, core and segment the Bramleys. They will take less time to cook so you can do this while the florets soften.

Add the pieces of apple to the cauliflower and let everything cook, still on a medium heat.

It won’t take long, so while that’s glugging away, start on the Braeburn. This is going to be turned into a deliciously sweet, sharp and spicy apple dressing to be served with the soup…

Peel your sweet, juicy, sharp and crunchy eating apple. Core it and cut into pieces.

I cut into segments and then cut those bits in half.

Then, in a non-stick pan, heat a couple of tablespoons of butter and a couple of tablespoons of golden granulated sugar over a medium heat. As this melts and dissolves into an almost caramelised buttery deliciousness, add some chopped chilli.

My chilli harvest this year has been an utter disaster, so tubes of prepared chopped chillies, which can be kept in the fridge, have been a marvellous help.  An inch squeezed out – which would, I suppose, be about a teaspoonful – needs to be stirred into the sweetened butter.

Next, add the segmented bits of the Braeburn and stir it all round so the pieces are covered and let it cook gently. The apple will keep it’s shape even though it is cooked.

By now, the cauliflower will have cooked and when you poke at it with a knife, it is tender. If you were to just have this as the soup it would taste rather thin. The thing to do next is to add richness…

But richness can mean adding extra calories when you might be wanting to cut back. Why not save some calories but still get a rich and creamy taste?

This is where I add skimmed milk powder. If you were to start the cooking off with milk (skimmed or not) you would have to be very careful because there is every chance that the milk would catch and burn on the bottom of the pan. Starting the cooking off with water and stock means that the vegetables can cook with scorching but if you later then add milk to enrich it, you end up with too much liquid to the vegetables.

So, I use Marvel skimmed milk powder. No added fat (and no added liquid) but if you add a good scoop of it you get a lovely, creamy taste. 4 heaped tablespoons are the equivalent to a pint of milk.

Stir it round… yes, it will be lumpy but that doesn’t matter because you are going to blend it all into a smooth and creamy soup.

I use a stick blender because it is quick and easy.

Once it is smooth, add a good shaking of ground white pepper. I say white, because it does have a different taste to black pepper and it also looks better. You  are making a beautifully pale and creamy soup….check the seasoning and and add a pinch more salt if you need to. The big thing is checking that the soup tastes good to you.

By now the Braeburn has softened. It still has its shape but it has turned a lovely golden colour. If you happen to taste it, the sauce is not too hot from the chillies and not too sweet from the sugar. There’s just emough salt from the butter to make it almost savoury. It just tastes divine.

A scoop of natural, thick Greek yoghurt can go in the middle…. the sharpness of the yoghurt is perfect against the smoothness of the cauliflower…..

And on top of that… a spoonful of the chillied and caramelised apples.

That was, as the Bear will tell you, absolutely delicious.

Minimal calories for a most delicious fresh and tasty soup. You can cut back further on the calorie count by not doing the chillied and caramelised apples but there’s a limit you know. Why not enjoy yourself?

Now if they’d served this at school there would have been a race to the tables to sit down and scoff….

Honey and thyme roasted parsnips and apple butter roast potatoes

When I made the delicious roast pork and crackling, I didn’t just eat the pork by itself (although I could have done…. could have done quite easily, actually), I did, in fact,  behave like a civilised person and served it with vegetables.  

I really like to make the most of what we have and I always believe that adding something as simple as a few fresh herbs or spices or other flavourings, moves the finished dish up from the level of plain boiled vegetables (and how uninspiring that sounds) to something really delicious and which, if necessary can be eaten alone and still make the diner feel happy. It’s a policy that has served me well, as the Bear has been known to present me with extra people for dinner at short notice.

That’s not a bad thing as I love cooking and I always have more than enough for extras….at home we set an extra place for the Unexpected Guest…just in case. If they do arrive then they won’t feel like they are causing a problem. If they don’t, well, at least we were ready for them.

The only problem that can arise is that the extra guest might turn out to be vegetarian or (as happened on one fraught evening, less than an hour before a meaty, buttery, cheesey, creamy extravaganza of a dinner was served) a vegan. If the meal is based around a meat dish then the side dishes and vegetables should be delicious enough that it is no hardship to make a meal just from them.

As a family we have always been strong on side dishes. We had a cousin of my father’s who would come to stay at Christmas or other family occasions and she would take great delight in counting the amount of separate dishes we had produced. That, of course, is because she lived through the war years when food was scarce and then later she lived alone. You never really make as much effort when you are cooking for one and a big selection of side dishes highlights the fact that first of all there’s plenty to eat and share and secondly,  it is a celebration.

I remember there was one famous occasion when Cousin Joan was almost beside herself  as she counted that there were over twenty separate dishes. OK, I admit several of them were potato dishes – roast potatoes, new potatoes boiled with mint, creamed potatoes and mini baked potatoes but even so, it was a triumph! My mother and aunt had excelled themselves. Everyone of us could choose something they particularly liked. Not one person felt left out and everyone felt full…..

So, as you see, I have a lot to live up to. This day, though, I wasn’t going for twenty or more vegetable and side dishes… just two. I was going to roast parsnips in honey and thyme and make roast potatoes with apple butter. Sweetly savoury vegetable dishes that would be perfect with the roast pork… or just by themselves!

The two can be cooked together, so read through this  because I will tell you about each, separately.

Honey and Thyme Roasted Parsnips

I had been shopping for vegetables and spotted some small parsnips labelled “Heritage variety parsnips”. They looked small and dainty and were, the greengrocer assured me, sweet and delicious. There was no other indication of what variety they were but it took it on trust and bought some.

I prefer my parsnips boiled then whizzed to a puree with some cream and horseradish but these were too small and dainty to do that to. Besides, the Bear adores roasted parsnips and as I was roasting pork anyway, it made life a lot easier to roast them alongside the joint.

They were topped and tailed, scrubbed and then rubbed in some garlic and oil. This is where using a tube of smooth garlic puree works well – it’s easy to get a smooth blend of oil and garlic so everything is coated consistently.

Parsnips with honey

Squeezing some honey over those baby roots will really work with the garlic and, when cooked, add a rich and tasty glaze.

Don’t go mad… just a drizzle over them will do.

Sprinkle some thyme over the parsnips as they cook – the stems will dry and the leaves fall off so don’t worry about trying to just get leaves, which is what everyone tells you to do. All you have to do then is pick out the by now hard and dried stems and the leaves stay behind. Cut the hardier stems from lower down on the thyme bush and just put them on top. (You will need the baby soft tender ends of the newest growth later) As they cook they will add another lovely layer of flavour.

The parsnips can go in the oven about half an hour, forty minutes before you take the meat out.  The temperature will be relatively low because of the meat so you won’t burn them.

 Then, when everything is ready  you can sprinkle some of the soft and tender baby thyme leaves over the parsnips.

They were delicious – parsnip is sweet and earthy by itself, the honey and thyme brightened that and the garlicky oil baste at the start brought everything together into a lovely sweet and savoury dish.

Apple Butter Roast Potatoes

I also had some baby potatoes and rather than just have them as steamed or boiled, I thought I might as well use the heat of the oven and roast them as well. Cost saving and efficient, as I’m sure you will agree.

Remember at the end of August we went foraging for apples in that abandoned orchard? I’d made lots of apple butter and used them in cakes and crumbles. I still had some left and they were really in need of being used up.

Pork and apple is a heavenly mix but rather than making an apple sauce, I thought I would roast them with the potatoes.

I didn’t peel them because I wasn’t going to peel the potatoes… I just cored and segmented them.

I cut the baby potatoes in half so they were roughly the size of the apple bits and sprinkled some thyme and oil over everything.

Using the same herb in the cooking process ties the dishes together well and makes them fit coherently. You don’t want them to taste overpoweringly of thyme – this just adds a hint, more of an echo really so they don’t clash with the parsnips.

Into the oven they go, alongside the parsnips so they can roast gently with the meat.

A spoonful or so of apple butter, towards the end of the cooking melts over the potatoes and adds a lovely appley, cinnamon, clove tasting glaze. Do this in the last ten minutes or so, after the potatoes have started to turn golden.

The apple has roasted to a soft, sweet mouthful and the potatoes have that delicious roasted taste, glazed over with the spiced apple butter.

Perfect to serve with roast meat.

Both of those dishes took just a few minutes to prepare and then they were left to do their thing in the oven. Much easier in my eyes than boiling or steaming. Much tastier too.

If a vegetarian had arrived that night – or even a vegan – they could have had , at least potatoes and parsnips and not felt too badly done by.

Cousin Joan would have approved though I am sure she would have wondered why I couldn’t have served at least another four or five dishes to accompany them……

Slow roast shoulder of pork with perfect crackling

The weather is getting worse and, while it is lovely to live in an apartment where three of the walls are windows, it does get gloomy when you are surrounded by rain spattered glass and grey clouds. When that happens, the only thing to do is put the lights on and make everything look cosy and then curl up, knowing that something meaty and tasty is in the oven….. just relaxing while the smell of roasting meat fills the room. It’s a smell that has always reassured me that things are happy and well in the family.

 A smell that was a constant in my childhood and it means home and happiness with loved ones. My wonderful brother and I are very similar in many ways. One of our favourite things is the crispy, fatty bits on a roast joint… all juicy and packed with flavour.

Not everyone likes this of course….The Bear has many good points and I am always glad I married him, but one of his finest points is that he doesn’t like crackling or the fat on a roast. That, of course, is good for me as it means that I don’t have to share. My brother used the same criteria when he got married – my sister in law is absolutely fabulous and we all love her dearly (he made a brilliant choice, marrying her) but again, she hates that sort of thing. Perfect. There’s nothing finer in our eyes that a gorgeous piece of crackling and the two of us have been known to stand in the kitchen at home dividing up the crisp and tasty skin….

Anyway, while I was shopping I’d spotted this marvellous piece of pork. Outdoor reared and free range meant that it was guaranteed to be tasty. The rain was bouncing off the pavements outside and I just knew that roast pork would be the perfect  antidote to the gloomy rain blues.

Pork shoulder is a great cut because it isn’t expensive but, as with most things, treated with care and respect you can produce the most delicious meals. Time is what shoulder needs, time and heat and salt. That’s all.

This was a lovely piece of pork shoulder with a good layer of skin around it, which is just what you need to get perfect crackling.

Pork shoulder needs slow cooking and it will turn into the softest, tenderest piece of meat ever. The rind will crisp up (if you slice at it) into delicious strips of hard, crunchy and tasty crackling.

But the rind is tough and to get through it you need a very sharp knife. Butchers will slice the rind for you and, in fact, most joints come with the skin cut already but I like to get a lot of narrowly spaced slashes so I start by sharpening my favourite filleting knife.

I’ve never yet managed to use a sharpening steel so I use the Chantry knife sharpener which is one of my better kitchen equipment buys. All you have to do is run the knife through the middle a few times and the blade is perfectly sharp, which is something I have never achieved using a steel.

While you are doing all of this, get the oven preheated to 230 degrees C/450 degrees F

There were some slashes in the rind already but I sliced between them, so each strip of rind was about 1 cm wide, if that. Be careful, if you are slashing not to slice into the meat itself – just cut the rind and the fat below.

The next thing is to get some kitchen roll and dry off the rind before rubbing it over with a smear of oil and then some salt.

What you have done is wiped off the water and added some oil to help start the crisping process and salt to drive out extra moisture and add flavour.

I like to use Maldon sea salt as the crystals are large and easy to pack into the slices of rind. Maldon has a great taste as well. When the pork comes out of the oven the rind will have crisped and almost bubbled up with flecks of salt crystals embedded into it to make the crackling taste divine.

By now the oven will be bouncingly hot so get the pork into a roasting tray and put it into the oven for twenty to thirty minutes.

This is a very hot oven and what it does is sear the rind and start making the crackling. If the oven isn’t hot then the rind won’t ever get crispy.

After the first burst of heat you will see, when you peek inside, that the slices are separating and the rind is starting to cook. You just know, when it looks like this after half an hour that it will have the perfect crackling when it is finished!

You can turn the oven down now to a moderate 170 degrees C/340 degrees F and just leave the joint to cook slowly for a two and a half hours……

There now.

Golden, bubbled and crisp. Studded with salt crystals promising that every mouthful will be deliciosuly savoury.

When you get it out of the oven if you rap on the top of the crackling it makes a hollow sound.

The meat is dark and caramelised from the fat dripping over it as it roasts.

The fat layer has almost disappeared in the long slow cook, making the meat juicy and the crackling crisp.

The crackling strips snap easily into bite sized bits…. perfect for nibbling at while you slice the pork……

A wet grey afternoon can be ignored because you are inside, in the warmth with a marvellous meal, just ready to share with your loved ones.

That is Heaven… that is my guilty pleasure and that is one more reason to appreciate the Bear not liking everything I adore!