Shortbread

Sometimes… when I have a  few minutes, I loiter around the web, looking at things I might want to buy. I’d spotted that lovely madeleine tin on Amazon and I could justify buying that because I’d never made madeleines before and I was absolutely sure you’d all want me to make them… and I was right, wasn’t I?

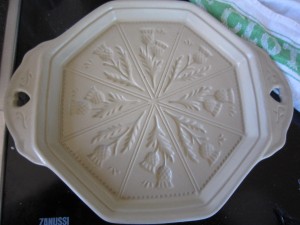
Anyway, on my idle perusal of other things I hadn’t got (yet) and possibly wanted to get, I spotted a shortbread mold.  A beautiful stone mold with thistles and segments.

I love shortbread. I love its buttery, crumbly, sweet but not too sweet, sandy- textured biscuitness.

A good slice of shortbread with a cup of tea can make the whole world seem better.

It was obvious, then, I had to buy the shortbread mold.

What happens if anyone drops in and I don’t have anything nice for them to have with a cup of tea? What happens if there’s a crisis and I have to offer comfort, tea and shortbread to get them through it? I can’t take risks like that with my friends’ happiness.

Well, that’s what I told the Bear when he found me smuggling in another package from Amazon.

So, I set to.  The oven was switched on to 150 degrees C/300 degrees F

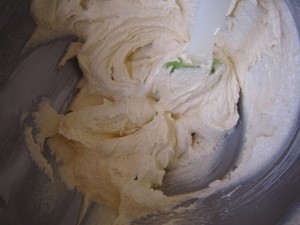
250g of unsalted butter and 125g of golden caster sugar were creamed together.

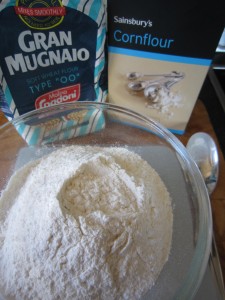
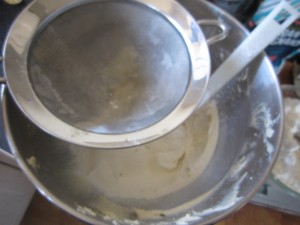
250g of good, fine plain flour and 125g of cornflour were sieved in and stirred lightly together.

If you had fine polenta (cornmeal) or semolina that would be a lovely thing to add, giving it a lovely crumbly texture. I didn’t have any so I stuck with cornflour.

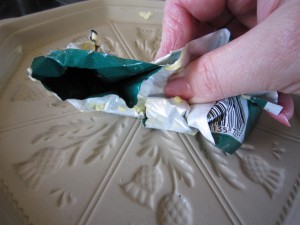
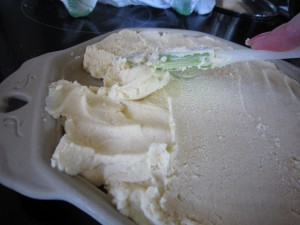
I used the butter wrapper to wipe out the stone mold and get a thin layer of butter into all the crevices. (I’m thinking that one of those sprays of cooking oil might be good here)

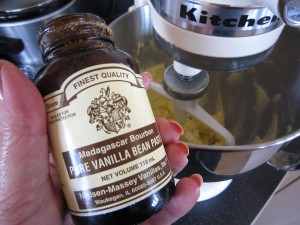
Because I love it and because I wanted it, (what better reason do I need?) I added a quarter teaspoon of vanilla bean paste to the butter and sugar.

The flour I had chosen was a good ’00’ (extra fine) so it will be smooth but just to make sure, I sieved in the flour and cornflour mix.

Sometimes, you know, I do like to faff about in the kitchen and sieving isn’t essential it just panders to my inner domestic goddess…

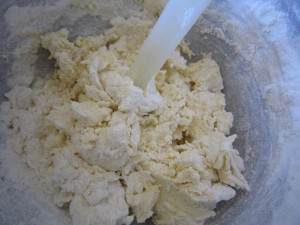
Bring the mix together but don’t go at it too heavily – overworking the flour will make the shortbread tough and that would never do.

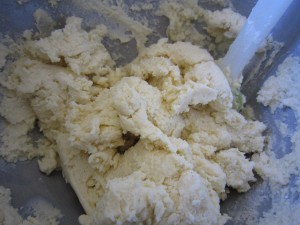
See? It looks almost sandy. That’s what you are after.

Now, just pack it into the mold and press it down firmly.

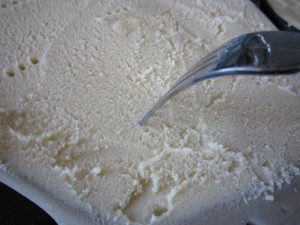
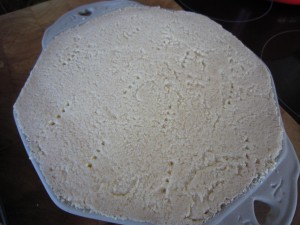
Once it is flat, prick the shortbread with a fork before putting it in the oven for about 50 minutes.

It will cook to a delicate golden colour.

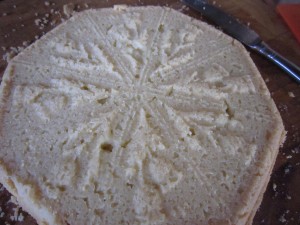
Look! Out of the mold you could see the thistle pattern.

Next time I do it, I shall pack it down harder to make the pattern more defined but, as it was the first time I used that mold, I didn’t mind…. it all tastes the same anyway.

Lovely. And I could eat it happily… there was no crisis (but how comforting that shortbread would have been if there had been one) there was just a cup of tea and the rest of the afternoon to enjoy it all.

It was crumbly, buttery, sweet enough but not too sugary… it was shortbread. Plain and simple shortbread.

Perfect.

Roasted pumpkin seeds

Sometimes we all need a little treat.

I don’t tend to buy crisps, crackers or olives  to nibble at with a glass of wine unless we have guests. I don’t know why… maybe I think we don’t deserve it or maybe it is that we are fat enough and having extras isn’t a necessity. Perhaps I think it is a needless extravagance?

But you know what? We do deserve to have something every now and again. After all, the person I like best in the world would be sharing them with me and I’m happy enough to put stuff out for people I don’t love half as much.

So, what follows is the ideal compromise. It’s healthy, it’s tasty and it doesn’t cost very much at all.

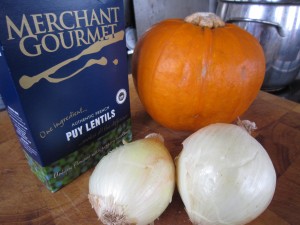
I’d bought a small pumpkin to make some Puy Lentil and Pumpkin Soup and I’d had to scoop out all of those plump seeds. What better than to use something that others might just throw out?

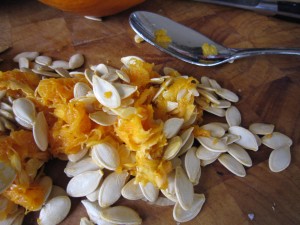
They are all embedded in the fibrous middle but they are easy enough to remove if you gouge at it all with a spoon.

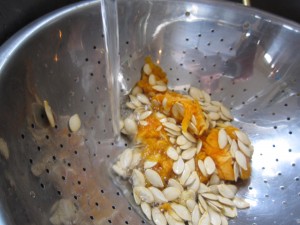
If you put them in a colander and run water over them it’s quite easy to pull the orange fibres off, leaving just the seeds behind. They will feel very slippery so give them a good rub in fresh water.

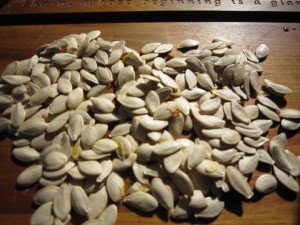
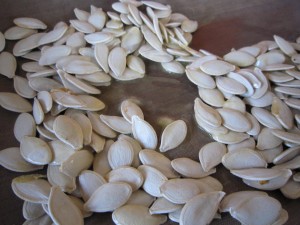
Once they are clean, spread them, out on a board and leave them to dry off.

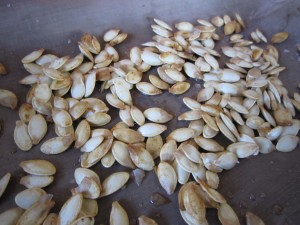
This time I wanted plain and simple butter and salt roasted pumpkin seeds (I often make them and flavour them with things like chilli powder or spices ) but there’s something rather delicious about the plainness of the roasted seeds… plain, certainly but tasting deliciously of butter and salt!

Get a flat baking tray and put a knob of butter and some salt on it (I always use a silicone sheet because it is so easy to clean and doesn’t tear if you scrape at it. If you haven’t got any, it doesn’t matter – use tin foil or be prepared to clean the baking tray)

Put the tray in a pre heated oven at 200 degrees C/390 degrees F and get the butter melted and hot.

Toss the pumpkin seeds in the melted and salted butter and put them back in the oven for ten minutes or so.

After ten minutes, give them a shake… they should be browning nicely.

Put them back in if they need a few minutes more – this will depend on how much moisture was left in the seeds.

Once they have cooled… put them in a bowl and share with your best friend.

A glass or two of wine makes this the perfect pre-dinner snack – healthy, tasty and all it took was a knob of butter, ten minutes and some otherwise thrown away seeds!

Meatfree Monday – Puy Lentil and Pumpkin Soup

At this time of year, the shops start to fill with pumpkins. Halloween is not far off and millions of pumpkins will be bought to make into Jack O’Lanterns.

You can’t just buy a pumpkin and carve it… you have to DO something with it. Last year I made Pumpkin Soup, flavoured with smoked sweet paprika and drizzled with Chilli Oil

I separated the seeds from the fibrous middle and roasted them with jerk seasoning to make a tasty roasted pumpkin seed snack

This time, though, I wanted to make a soup that would be a meal in itself.

I had a small pumpkin that would be ideal for soup. I also had a craving for something with a bit of spice because I had a cold that was dragging on. I needed a burst of heat in that soup to burn through the fogginess that an autumn cold makes you feel.

I remembered a soup I had seen in the Australian Gourmet Traveller for Green Lentil Soup with Pumpkin and Harissa that would be perfect. My little sister lives in Australia and sends me (if I’m not there to buy a copy) the Gourmet Traveller Annual Cookbook as my Christmas present… the fact it costs way more in postage to send than it costs to buy is neither here nor there – it truly is the magazine I most look forward to getting.

It looked a fabulous recipe. I knew that adding my favourite Puy lentils would add heft to the soup and jazzing it up with Moroccan spices would enliven the whole bowlful.

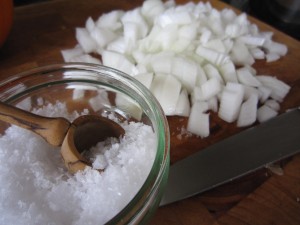
I chopped two sweet white onions, then put them in a pan to soften with a teaspoon of Maldon Sea Salt.

While they were cooking I halved the small pumpkin I had and scooped out the seeds.

Don’t throw the seeds away, because you can roast them later for a lovely, healthy snack.

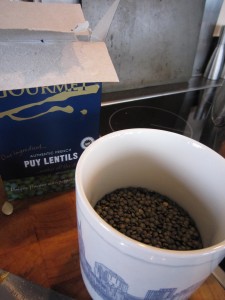
I roughly measured half a mug of Puy lentils – now, this is one of my Starbucks City Mugs that roughly hold 20 fl.oz, so the equivalent measurement will be 10 fl oz if you use a Pyrex jug… or, about a full normal coffee mug size. Me? I like coffee so I have a very big mug!

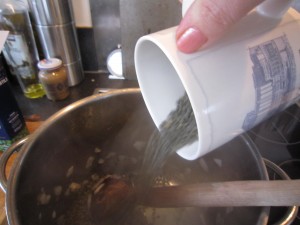
Once the onion has softened and looks translucent, add the lentils and then pour in a mug and a half of water (that’s roughly a pint and a half) and let the onion and lentil mix slowly cook.

Add in a vegetable stock cube for flavour.

While that is gently cooking, start preparing the pumpkin.

The rind of the pumpkin in very hard and I have found that the best way to peel it is to cut the pumpkin into segments and then slice off the rind.

By the time you have it all segmented, the lentils will have started to soften and the colour will have leached out into the water and stock.

Now add in the segmented pumpkin

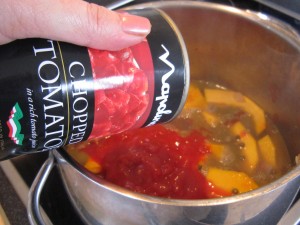
And then add a tin of chopped plum tomatoes.

Stir it all round and let it simmer gently.

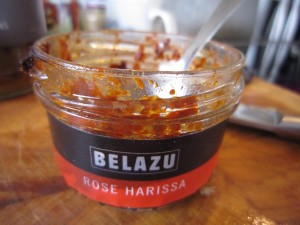
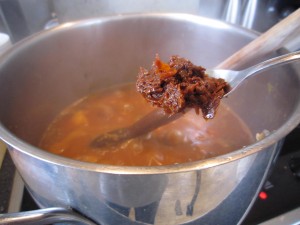
I wanted a bit of heat in the soup and a Moroccan feel so Rose Harissa paste was the obvious choice. You can buy Harissa paste in most supermarkets now – this one has rose petals in it and a deep and complex flavour. It is essentially a chilli paste so add it according to your preference. A teaspoon full will not make it too hot – if you want more heat (and I do) add another.

Stir it in so it blends with the lentils, pumpkin and tomatoes.

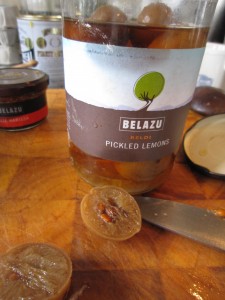
I also have some Belazu Pickled Lemons which will add a marvellously sharp-sour element to the rich and earthy soup.

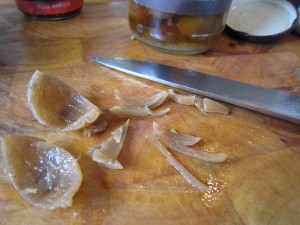
A quick scoop out of the middle of the lemon and the rind is ready for slicing then adding to the soup. I used two small lemons.

And then stir it all round… the pumpkin should have softened, the lentils will be tender and the flavours will have come together to make a deep, rich, spicy soup with sharp overtones

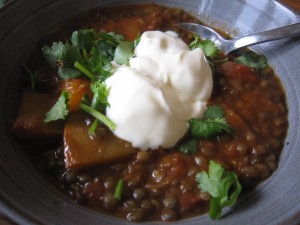
Serve it in a bowl with a spoonful of natural thick yoghurt and a sprinkling of coriander.

And there it was. Steaming perfection in a bowl.

Meatfree and delicious.

Hot Toddy for a cold

There’s a reason for me being so quiet over the past few days… I have had a cold that has made me feel dreadful.

A rattling cough, a pounding head and aches all over made me feel so bad that I actually came home from work.

I knew what I had to do, of course.

The best cure for a cold is to go to bed, clutching a hot toddy and try and sleep.

So, first of all, a spoonful of lovely honey in a mug

The juice of half a lemon and a slice of lemon go in next, topped up with hot (but not boiling) water

Then stir it round to make a hot, sweetly-sharp mix

Then, to help those poor, tired muscles relax and the pounding head to ease…. find a bottle of whiskey.

This is Redbreast, a gorgeous Irish pot still whiskey (there’s a difference, you know – Scotch whisky is classed by some as the only true whisky and it is spelled without the ‘e’. Irish whiskey has the extra ‘e’ and gets an extra distillation. Three as opposed to Scotch’s two) It doesn’t matter what you use – that was just at the front of the drinks cupboard.

Just a drop or so adds a deep, soothing, rounded flavour to the hot honey and lemon… and with a couple of cold cure capsules is the ideal medicine for a rotten cold.

The next step is the most important – get off to bed and curl up while you sip your hot toddy. Cocooned in a duvet and propped up on pillows, the delicious hot toddy soothes and relaxes….

Sleep really is the best medicine, you know.

After a couple of hours of sleep I felt so much better.

Just remember that, next time you have a dreadful cold!

Cheese and Sweetcorn Scones

When I made the delicious Roasted Garlic and Marrow Soup, I wanted something to go alongside the soup to make it a substantial lunch as I knew we weren’t going to be eating until late that night. What better, I thought than a savoury scone? One still warm from the oven? Maybe a good cheese scone would be just the thing.

Those of us who are British will know what I mean by a  scone – it’s what American’s call biscuits. What they call cookies, we call biscuits. Confusing, eh?

(A scone is an essential part of a British tea and  as Wikipedia points out ” According to one academic study, two-thirds of the British population pronounce it /?sk?n/, rhyming with “con” and “John”, with the preference rising to 99% in the Scottish population. The rest pronounce it /?sko?n/, rhyming with “cone” and “Joan”. British dictionaries usually show the “con” form as the preferred pronunciation, while recognizing that the “cone” form also exists”. I say “skon”  and as my husband will tell you, I am invariably right……..)

When I walked to the local shops I saw that the greengrocer was selling corn on the cobs, locally grown.

I knew from experience that these were sweet and delicious so I bought a couple. I’d seen a recipe in Good Food for cheddar and sweetcorn scones  so I thought this was the ideal opportunity and recipe to try out. I got some really good Cheddar from the Farm Shop and came home, knowing that it wouldn’t take more than half an hour to get them made.

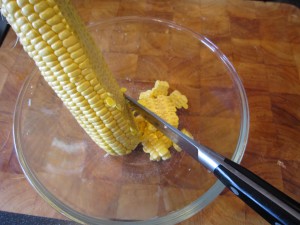
The first thing to do was to cut the sweetcorn kernels off the cob. The easiest way to do this is to stand the cob in a Pyrex jug or bowl and run the knife down so the kernels fall into the jug. If you don’t do this then the kernels scatter everywhere. I know this because I have done it. What that means is that you then waste time looking for the sweeping brush and clearing up the mess. Do it in a bowl or a jug, eh?

It’s quick and its easy.

The next thing is to cook the kernels quickly. I  put a knob of butter in the bowl and microwave them for a couple of minutes if I am serving the corn as a side dish, but as these were to go into scones I decided that a small amount of water would do just as well. Adding extra butter to the recipe would skew things. It will only take a couple of minutes and then you can drain them, ready for the next step.

Start by heating the oven to 220 degrees C/430 F.

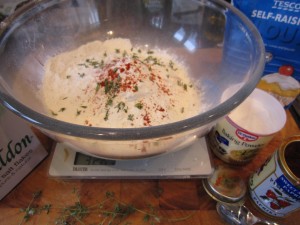
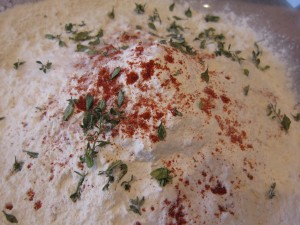
Mix, in a large bowl, 350g self raising flour, 1 teaspoon of baking powder, ½ teaspoon sweet smoked paprika, 1 teaspoon of salt  and some thyme leaves.

The original recipe called for mustard powder too, but mustard is one of the Bear’s Big Hates so I tend to avoid it whenever possible.

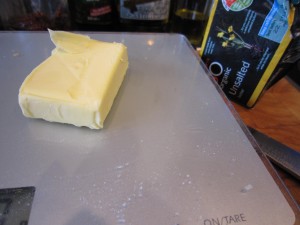
50g of unsalted butter must then be rubbed through until the mixture looks like fine breadcrumbs.

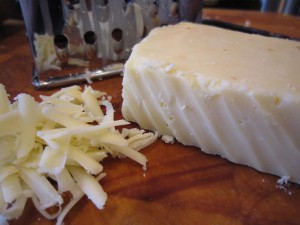
Grate 175g of good strong Cheddar cheese and add most of that to the flour mix.

Add all of the cooked and drained sweetcorn and mix it all well, so there’s an even distribution of ingredients.

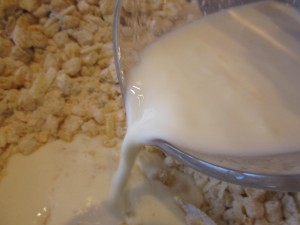
Add the juice of half a lemon to 175ml of semi skimmed milk.

My mother always used to save soured milk for scones when we were little… which makes me wonder, did milk go off more quickly years ago? I hardly ever have soured milk nowadays. maybe it is that fridges are better?

So, with no soured milk available, lemon juice does the job.

You can see that the milk looks almost lumpy… the lemon has acted on the milk, souring it and that’s the way to get perfect scones.

Mix it all together.

The dough will be sticky, but don’t despair and DON’T faff about with it. You need minimal interference for scones, otherwise the gluten in the flour toughens then and you end up with hefty, solid lumps, when you were wanting light and delicious morsels.

Sprinkle some flour on the board and knead the dough briefly so it comes together.

Make into 10 or 12 little balls by roughly rolling them.

Flour a baking tray or a silicone sheet on a baking tray and put the scones on.

Brush them with some milk, then scatter them with the rest of the cheese, some paprika nd any remaining thyme leaves.

Into the oven for 10 to 15 minutes until they are risen, golden and sound ready… that is, when you tap the bottom, they should sound hollow.

And just look at them!

Of course, we had to try one with some butter to see how they were……..

Before I served them with soup for lunch.

A perfectly light and deliciously tasty scone makes a great accompaniment to soup and now that the weather is changing I’m going to be making a lot more. Whyever wouldn’t I when in half an hour I can have beauties like these emerging from the oven?

Meatfree Monday – Seed and grain bread for egg mayonnaise sandwiches

The Bear was about to set off on his travels again and would be getting up at some ridiculous time in the morning so he could get to the airport. What that means is that he doesn’t really feel like eating too early in the morning and would rather have something to eat at a more normal time.

What THAT means is that he is loitering around an airport and picking at stuff. Now I’m sure that what is served at outlets or in the Business Lounge will meet with all Food Health guidelines… it just doesn’t meet with mine. Obviously, food produced on an industrial scale, for sale at some point in the future is going to be packed with preservatives or dodgy fats that we don’t want and would never have in freshly made food. He knows not to risk my wrath by buying a plastic wrapped muffin or going to a fast food outlet for a burger and he does try to get something looking vaguely healthy but the fact remains, he has to eat at some point while he’s travelling. He could try looking a sandwiches but, even there, there are problems.

A simple egg sandwich, for example, will be made with bread that has preservatives, the eggs will probably not be free range (as I’m sure they would be plastering that fact all over their packaging), they are likely to be using margarine instead of butter and goodness knows just when they boiled the eggs.

So I decided to make sure he could have something to eat that he could carry easily, would taste nice and be good for him.

His favourite sandwich is an egg mayonnaise one so I decided to do that.

First I needed to make good bread and as he is particularly fond of seeded or granary loaves, I decided that would be just the thing to bake.
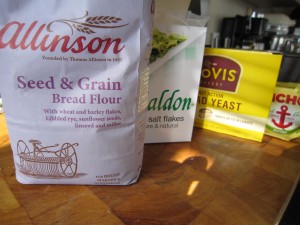
I got a packet of Allinson’s Seed and Grain Bread Flour, which is white flour with wheat and barley flakes, kibbled rye, sunflower seeds, millet and linseed. Healthy, tasty, nutritious and perfect to make into a lovely sandwich.
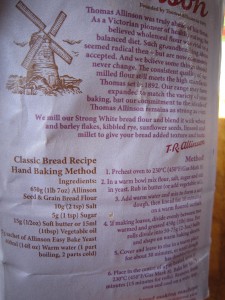
There was a recipe on the back that looked good and I thought I would follow that as I had never used that flour blend before. It looked quick enough, too.
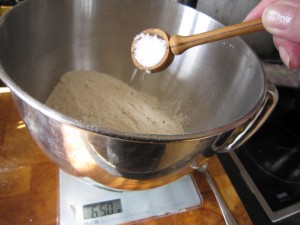
First thing was to preheat the oven to 230 degrees C/450 degrees F, whilst measuring out 650g/1lb 7 oz of the flour, 10 g/2 tsp of salt, 5g/1 tsp sugar and a 7g sachet of yeast.

That was mixed together first to get an even distribution of all the dry ingredients, then 15g/ ½ tsp of soft butter or 15 ml/1 tbsp of vegetable oil was rubbed through.
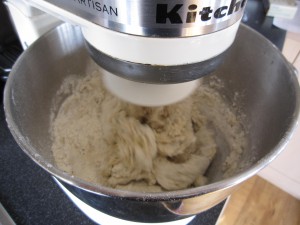
400ml/ 14 fl oz of warm water was added and mix to make a soft dough.

The recipe says to knead it for ten minutes on a floured surface – I did it in the mixer with a dough hook and added extra flour to get it to come together.

Well I did give it a knead myself…just to show willing and besides I like to feel the dough and by feeling you can judge when it is properly ready.
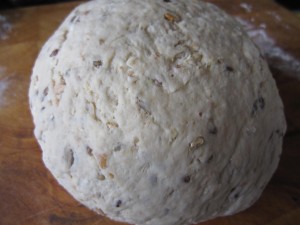
Look at how the dough looks now… smooth and bouncy. If you’ve ever patted a baby’s bottom.. well that’s what it should feel like!
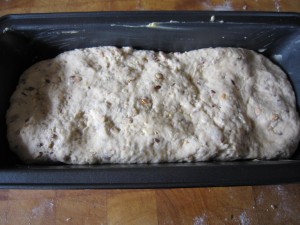
It had to be put in a greased tin (they suggested two 1lb loaf tins but as I wanted it for sandwiches I put it in a long 2lb tin
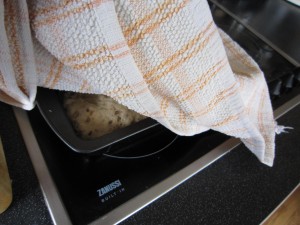
and covered it with a tea towel for 30 minutes until it doubled in size.
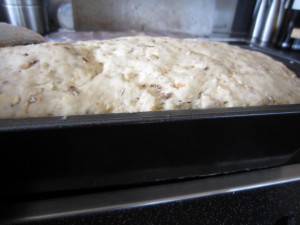
Into the hot oven it went for half an hour or so
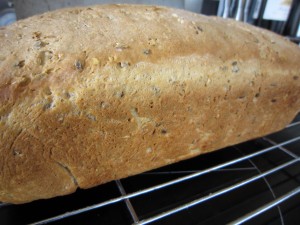
Perfect. When I knocked the bottom it sounded hollow which means it had cooked properly.
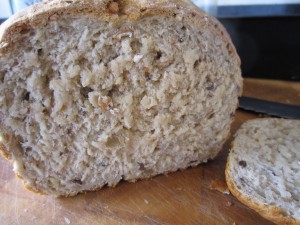
It looked and smelled delicious. We might have shared the end crust with some butter on…. just for checking purposes you understand.
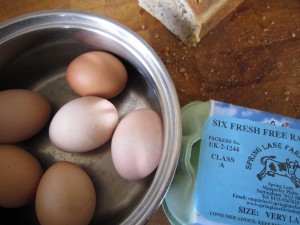
The next thing was the filling. I always use free-range eggs and buy these from our local farm shop so I know exactly where they come from and just how fresh they are.
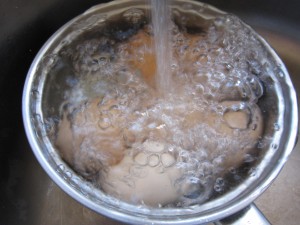
Boil them for four minutes then immediately tip away the boiling water and start filling the pan with cold water because otherwise you get that horrid black ring round the eggs and that terrible sulpherous smell.

I like the eggs to look like this – mainly cooked but with just a hint of soft yolk.

The eggs were  chopped then two slender spring onions are also chopped and added. I wish we still had some chives left but with Autumn rapidly approaching they are all gone now.
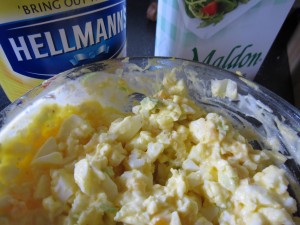
A tablespoon of Hellmann’s Mayonnaise and a pinch of salt go in next (Hellmann’s switched their production to free range eggs so that’s good, otherwise I would have had to make my own, which I have to say is really easy…. but this was easier!)
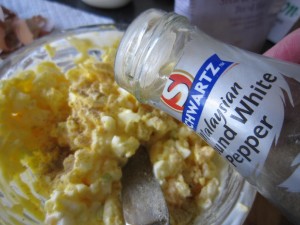
White pepper enhances the egg mayonnaise mix really well,  so a shake or two was added to taste.

And that was it for the afternoon. I was going to get up early the next morning and make the sandwiches. The egg mix went into a lidded box in the fridge and the bread was put to one side.
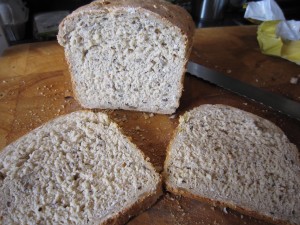
Next morning, at around 5.30 am, I got up to sort things out. The bread cut well and is ideal for sandwiches. It was a good even texture and the seeds and grains made it slightly dense, which is a good thing for a sandwich. You need the bread to hold together and not collapse, spilling your filling everywhere. Especially when the person about to eat it is in a business suit… This might have happened on another occasion.  not this time, though. That bread looked like a winner in the samdwich stakes.
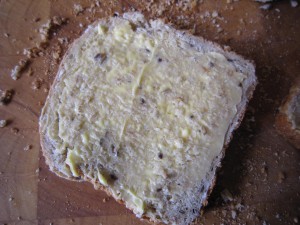
It’s important to spread the bread with butter as this makes a waterproof layer and stops the filling seeping through. And butter is important because, well, it just is. I believe in butter and I do not believe that some weird kind of vegetable fat with emulsifiers added to it could possible make anyone believe it wasn’t butter.

Butter is cream shaken up until it turns to butter. A pinch of salt can be added but that’s all. No chemicals, no E numbers. Nothing but creamy milk and salt. Healthy, that is, I’m sure of it. Anyway, we don’t have any margarine or spread or whatever it is called. Butter it is and that’s an end to it.
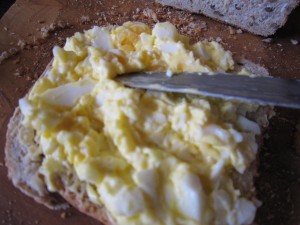
Delicious. And I always make sure I spread to the edges. I hate it when you get a sandwich and there’s just a tiny dot of the filling in the middle.
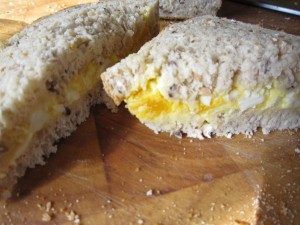
Sliced in two so it’s easy to eat
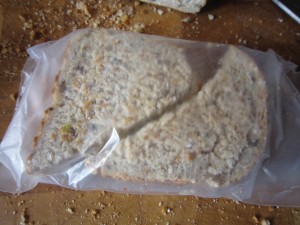
And wrapped in a sandwich bag so he can throw it away afterwards.

So, the Bear left for some other country and I went back to bed, happy knowing that he would have something to eat without having to buy an overpriced, low quality sandwich.

Was it worth it? Yes, it was.

Making the bread took quarter of an hour mixing and kneading. The bag of flour cost less than £1 and there’s still a well over a quarter left. What I used made a 2lb loaf so there’s plenty left for sandwiches for me for work. I suppose the two slices I cut for him would work out at maybe 15 or 20p. The eggs cost £1.65 for a half dozen, but what I used on his sandwich was probably less than one egg so there’s another 28p. Maybe adding in 10p for the other ingredients and you have a perfect additive free sandwich for 58p or thereabouts. Even if you add in 20p for using the oven it is still incredibly cheap when you consider that in an airport the average cost of a sandwich is £2.80. And if you wanted decent bread and free range eggs? That would be another £1 or so added onto it.

For all of you who are wary of making bread (and you know who you are) this was a simple, quick and very tasty loaf. It saves an incredible amount of money for what is really very little work.

Go on – get baking!

Pork with saffron cream and mushrooms

I do like a bit of a challenge. Nothing too strenuous, you understand and nothing too difficult.

I like to call in at a supermarket on the way home from work and see what is in the reduced-for-a-quick-sale-as-it-has-to-be-used-today section. It means I am approaching cooking the evening meal with no preconceptions. I start with what’s there and then decide what I am going to cook and what else I need. See what I mean? It’s a bit of a challenge at the end of the working day, but it’s a fun one. And I end up with a surprise while I save money.

When I called in one night, I found lovely pork steaks from outdoor farmed, happy, well-looked after pigs (though I do wonder how on earth you could keep a pig indoors?) Still, this was premium pork and it was half price.

There were also some baby button mushrooms.

That would do I thought. I could make something from that. As I drove back home I was thinking about what else I had in the kitchen….. and remembered that friends of ours had brought home some lovely saffron from their holidays. Pork and saffron…. pork in a cream and saffron sauce… with mushrooms. Bet that would be good, I thought.

Within five minutes of getting into the apartment I had chopped some onion and started to soften it, while I cubed the pork.

A few stamens of saffron were put into a ramekin

And some hot water added to release the flavour and glorious colour.

Little mushrooms were sliced while the pork cooked through and then were added to the pan.

The saffron was added… actually it looked far more golden that this, but hey… I’m not a photographer so I have no idea why it DOESN’T look more golden. Just use your imagination.

Then just over a quarter of a pot of cream was poured in to make the sauce….. I always seem to have cream in the house. Cream and butter – if you have them then you can always make even the meanest of ingredients taste delicious.

While I’d been doing that I put some basmati rice on to cook. That only takes a few minutes to cook and if you measuer the rice to water ratio correctly (just a bit over one and a half times the water to the rice) you can cook it through without having to drain it. A tea towel on the top once the pan is off the oven absorbs any extra moisture and leaves you with tender, fragrant, perfectly separated rice grains.


And there you have it. In less than twenty minutes I had supper ready.

The pork was tender and the mushrooms cooked through… the saffron cream added a lovely savoury hit and the rice mopped up the sauce.

Can’t do better than that, I think. It was quick, easy, tasty, inexpensive and best of all… it was a surprise.

I might just pop into a store on the way home tonight to see what other surprises I can get!

Meatfree Monday – the simplest supper ever – spaghetti with tomato, anchovy, chilli and cream.

I needed to make supper but there was only me to cook for as the Bear had gone out to eat at an incredibly smart restaurant (work, you know… ) and I just couldn’t be bothered to shop. Sometimes, you know, the thought of going food shopping at the end of a working day just defeats me. It’s not that I’m not organised, it’s that while our apartment is beautiful, it doesn’t have a large fridge so it’s not as if I can do a big shop and get everything I need for the week. I have to do little and often.  

I thought first of all that  would just have cheese and crackers but when I got in, I discovered I didn’t even have any cheese, never mind crackers. I would have to see what there was…..

I did find some tomatoes that the Bear had brought back from his Dad’s greenhouse and a head of garlic. The tomatoes were going a bit wrinkly but at least that meant they had ripened.

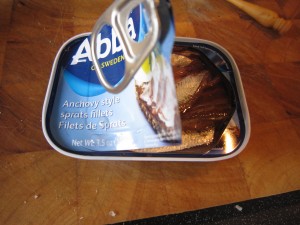
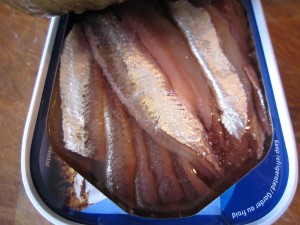
I’d previously opened a tin of anchovy style sprats (the famous Ikea sweet sprats (essential for Jannson’s temptation, possibly the world’s most succulently decadent comfort food) and had some left over

They had to be used up

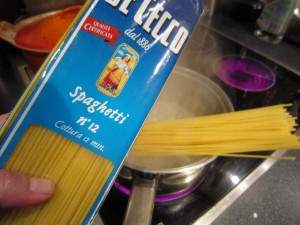
And I had some spaghetti.

I had enough for a feast! I set the water to boil and then added the spaghetti.

While the water was heating I chopped the tomatoes and chopped in a dried chilli

Quickly fried them together

Stirred in the remaining anchovies

And then realised that there was the remnants of a pot of cream waiting to be used… would it work?

I often eat chilli, tomato and anchovy over spaghetti, but tonight I felt I needed something a little richer, a little bit more comforting. Cream would help, surely?

I stirred it in……it tasted delicious. Probably beyond delicious. It was a gorgeous mix of sweetness, heat and salt, all softened by the addition of cream which made it into a lovely smoothly rich sauce.

Tossed over the spaghetti it was just what I needed. It was rich and satisfying and, unbelievably, made from scraps.

And all it took was maybe 15 minutes.

Do you know, that was better than anything I could have ordered from that fancy restaurant.

Another Meatfree Monday success!

Beans and Egg on Toast – the Bear’s favourite homecoming meal.

The Bear travels a lot.

All over the world. And wherever he travels  he eats. He has a great time sampling different foods and styles of cooking but whenever he gets back from his travels he always asks for one thing in particular. I would and could cook him anything at all, no matter how involved or time consuming, because I am so pleased that he is home again….. and all he ever wants is his favourite.

I think it happens to us all when you have been away from home for too long. All you want is something that is inextricably tied to memories of home, something that can only be made at home… you’d never be able to get a restaurant to make it for you. They could try but they’d never get it right. Restaurants are fine… they are great in some cases but eating out every night? After a while you need something simple. Once when I had been travelling round the south of India for weeks, eating the most delicious food and learning to make dal, I was preparing to come home and all I could think about was my mother’s cooking.  In an internet cafe in Bangalore (this was only a few years ago but BlackBerry’s weren’t on the market yet) I emailed work and asked the lovely Lolly to phone my Mum and tell her I was on my way back and to please make fish pie for my homecoming! And when I eventually got back, there it was, delicious and perfect and exactly what I needed after so long away.

Homecoming food should be comfort food. It should make you feel surrounded with love. It shouldn’t be – it can’t be – challenging, it has to be familiar.

So that’s what he gets.

And what is it? It’s beans on toast with a fried egg. But, like the advert says, it’s not just ANY beans on toast with a fried egg… it’s the Bear’s Beans on toast with a fried egg!

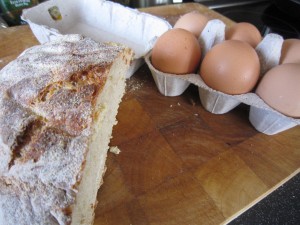
There are specific ingredients, though, that make this special. It wouldn’t be the same if I used supermarket bread, no matter what premium range it came from. It wouldn’t be the same if I used any old beans and just plonked them on the toast. And it certainly wouldn’t be the same if I used ordinary eggs and just fried them any old way.

The bread has to be made by me and it has to be No-Knead Bread because that not only tastes good but it has the perfect texture. It doesn’t dissolve when you pour the beans over it. Go and follow that link for a step by step look at making it. I have to start it the day before I need it but that’s good, when I start the bread I know my Bear will be home soon.

Those eggs? They are the gorgeous free range eggs from our local farm shop. Free range makes such a difference and the quality of their eggs reflects this. They are large with golden yolks and taste simply delicious.

And the beans? Well, they just HAVE to be Heinz.

So far so good.

And now to start it. The thing about beans is that they can – even the best of them – be a bit watery. We don’t like that. We like them heated gently and slowly till they become rich and thick.

….. and with a knob of butter added to them to make them taste even better.

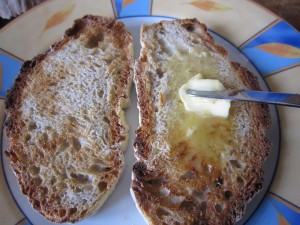
The bread has to be cut thick, but not too thick and toasted

…..before being spread with salted Normandy butter

…. and piled high with beans. See how thick they are? How tasty they are too…..

The eggs are cooked in oil with some chilli oil poured in (ohhhh… how good that makes the eggs taste. Just a bit of a bite to them!)

And then you put the eggs on top.

It really is delicious. The yolk spills out and mixes with the beans and the toast mops up all the delicious dribbles.

It still needs just one extra thing though for the ultimate, homecoming comfort food….Heinz tomato sauce……

And that’s why you can’t get that in a restaurant. 

There are so many specifics and the biggest of them all is that the cook has to make a tomato sauce heart over the top.

Perfect homecoming food that says welcome back and come on in, you’ve been missed.

Meatfree Monday – citrus, thyme and garlic potatoes, or dinner from scraps.

We didn’t have much in the apartment – I’d been getting to work early and getting back late and the thought of stopping to buy food was just too much. Crawl through rush-hour traffic and pull off the main road, then fight through shoppers and then try and get back to the main road? No thanks.

I knew there were a few potatoes left and I could do something with them….

I had some polenta pie left so that would go with them.

I needed to liven them up a bit so as I drove back I worked through what else we had in the apartment… or what else we had growing outside the apartment.

There was a lovely, healthy bush of thyme, just outside the french doors. I could use that…..

And in the freezer there was a bag of quartered lemons and limes. Whenever I have lemons and limes left over, rather than letting them dry out and go to waste, I quarter them and freeze them. That way I have a marvellous ice cube for a G&T or other drink. But if I used them for the potatoes… well… they would go perfectly with thyme.

So I had a plan.

The potatoes were washed and  cubed and the oven put on at 180 degrees C/160 degrees C, fan assisted/350 degrees F.

I put the cubed potato in a bowl with some water and salt – minimal water – and microwaved them for 5 minutes. You could parboil them but this was faster and I was tired, hungry and didn’t want to wash any pans.

In a lined baking tray, I mixed crushed garlic with oil and salt

and grabbed a handful of thyme and lemon and lime pieces.

The potato cubes were thrown into the baking tin with the thyme and the frozen lemon and lime and everything was tossed in the garlicky oil.

Into the oven for twenty to thirty minutes while I went to get changed out of my work clothes and into something more comfortable.

The thyme leaves fall off the stem so all you have to do is pick out the stems and Bob’s your uncle.

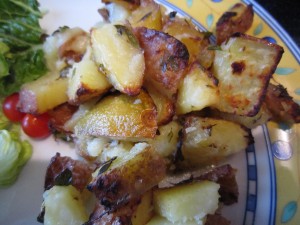
The potatoes had that lovely, almost sweet, savoury taste, crunchy on the edges and deliciously soft in the middle. The lemon and lime had cooked slowly from frozen solid to soft, almost caramenlised roastedness, which gave everything a lovely sharpness and the garlic and thyme worked wonderfully. With a few salad leaves from the box on the balcony and a couple of tiny tomatoes and the remnants of the polenta pie, I had a marvellous meal in less than 40 minutes.

Now, look at that photograph more carefully…. guess who didn’t spot that lime quarter nestling amongst her potatoes?

What have I learned from this?

That a delicious meal can be made from scraps, that freezing lemons and limes are not just for gin…. and that wearing your glasses when dishing up is a good idea.