Home thoughts from abroad…… Whisky toffee almond tart

Sometimes, you know, my thoughts go back to the UK and I think of my family and friends there that I miss so much. Right now, they tell me, the weather is icy, frost lines the branches of trees and the grass has turned to thick white, iced strands. I miss the beauty of an English winter, even if I don’t miss the aching pain of frozen feet. Nor do I miss having to chip ice from the inside of my windscreen, as I had to do last winter when the temperatures were regularly -5° to -9° C.

I do have other problems here….  I get out of my air conditioned car and my specs steam up; here, my hair is permanently limp in the humid heat. Minor, I know, but constant. That’s the thing about the Tropics. We have no seasons, no changes… sunrise and sunset are at much the same time every day, twelve hours apart and the weather is pretty constant. Sometimes it rains a bit more than other times but, generally, one day is much like any other.


When you are inside, with air conditioning however, the weather can look very different… I looked out at this, dark and stormy skies and the promise of a thunderstorm and rain later. It looked like November in the UK. Yet I knew that once I was outside on the balcony it would feel hot and humid. It’s quite disconcerting at times.

It did make me think of cold days in the UK and I remembered the last meal I cooked for friends in Nottingham before we left for Malaysia. It was a fabulous night where we laughed till we cried, we ate till we were fit to burst, we drank cocktails and wine and then moved on to whisky and we even danced across the floor in the early hours of the morning…. we finally said our goodnights at about 4am.

Maybe it was all the drinking. I blame one of the puddings for that as I am sure we wouldn’t have had the whisky if we hadn’t had a tot to go with the Whisky Toffee Almond Tart….

I’d seen the recipe in Delicious a couple of years or so ago (maybe even more) and I’d saved it, wanting to cook it for a special occasion. Us leaving the country seemed pretty special to me and besides, one of our lovely guests is Scottish and he loves whisky… and even more to the point, we were moving somewhere we couldn’t take our whisky anyway! Waste not, want not, I thought.

All I had to do (and it was a pretty simple recipe – always a plus point when you are cooking lots of things)  was make some pastry. 200g of plain flour, with 100g of chilled and chopped unsalted butter needed to be rubbed through (or, easier still, whizzed on pulse in a processor) until everything comes together into fine crumbs.

Add about four tablespoons of cold water and mix it together so it comes into a ball, then roll it out into a circle


I’m pretty useless at rolling evenly as you can see, so if you are the same, don’t worry, it works even if you have to piece bits together when you put it into a 23cm/9 inch fluted flan tin.


Don’t handle it too much and leave the edges hanging over. You can trim them off later so it is all neat and anyway, pastry shrinks when it cooks, so you get a better fit.

Prick the bottom with a fork so that when it cooks the steam can escape and you have a flat bottom to it and just put it in the fridge to chill right down for 30 minutes.

After you have wiped up the mess you will have made after dusting the board to roll the pastry on, you have plenty of time to get the rest done. Put the oven on to heat at 200°C/fan 180°C/390°F.

You can put the pastry shell into the oven, lined with baking paper and baking beans to weigh it down, for fifteen minutes. After that, take the paper and beans off and put it back in to bake until golden… but no more than five minutes. Take it out and let it cool.


Now for the good stuff…. you’ll need 300g flaked almonds, a 284ml carton of double cream, 225g granulated sugar and some single malt whisky. You don’t need much, so before the whisky lover in your family shrieks at the thought of cooking with fine whisky, assure them it is for the best of reasons and anyway, you only need 4 tablespoons….


Put the almonds into a pan and add the sugar


Add the cream….


Stirring it all round


And mix it together. It’s looking good so far……


Ancnoc whisky


And then, select your whisky…. I chose anCnoc,  a smooth and almost sweet Speyside single malt.


Measure 4 tablespoons of the good stuff, pour it in and then just stir it all round and add a pinch of salt to round out the flavours…


… and then heat it all through, gently, until the sugar dissolves and it thickens slightly. This will take about twenty minutes and you will see it turn a beautifully pale golden colour. Take it off the heat and put to one side.

Turn the oven down to 180°C/fan 160°C/355°F.


Pour the filling into the pastry shell


… and then smooth it out. (Yes, the mixture DOES taste delicious) and then bake it for another ten minutes or so until it looks golden. Don’t overdo it and don’t worry if it looks like it hasn’t set. It does that as it cools.


After you have put it on a tray to cool slightly, drizzle it with just a little more whisky so it sinks in as the filling cools and firms up.

Let everything cool completely before you trim off the edges to make it look neat and put on a cake stand, ready for serving.


And then, of course, you are ready to serve it with a wee dram to go alongside it at the end of the meal..


Slice it…..


… and serve it with a dollop of really good, thick cream.


It really was lovely.


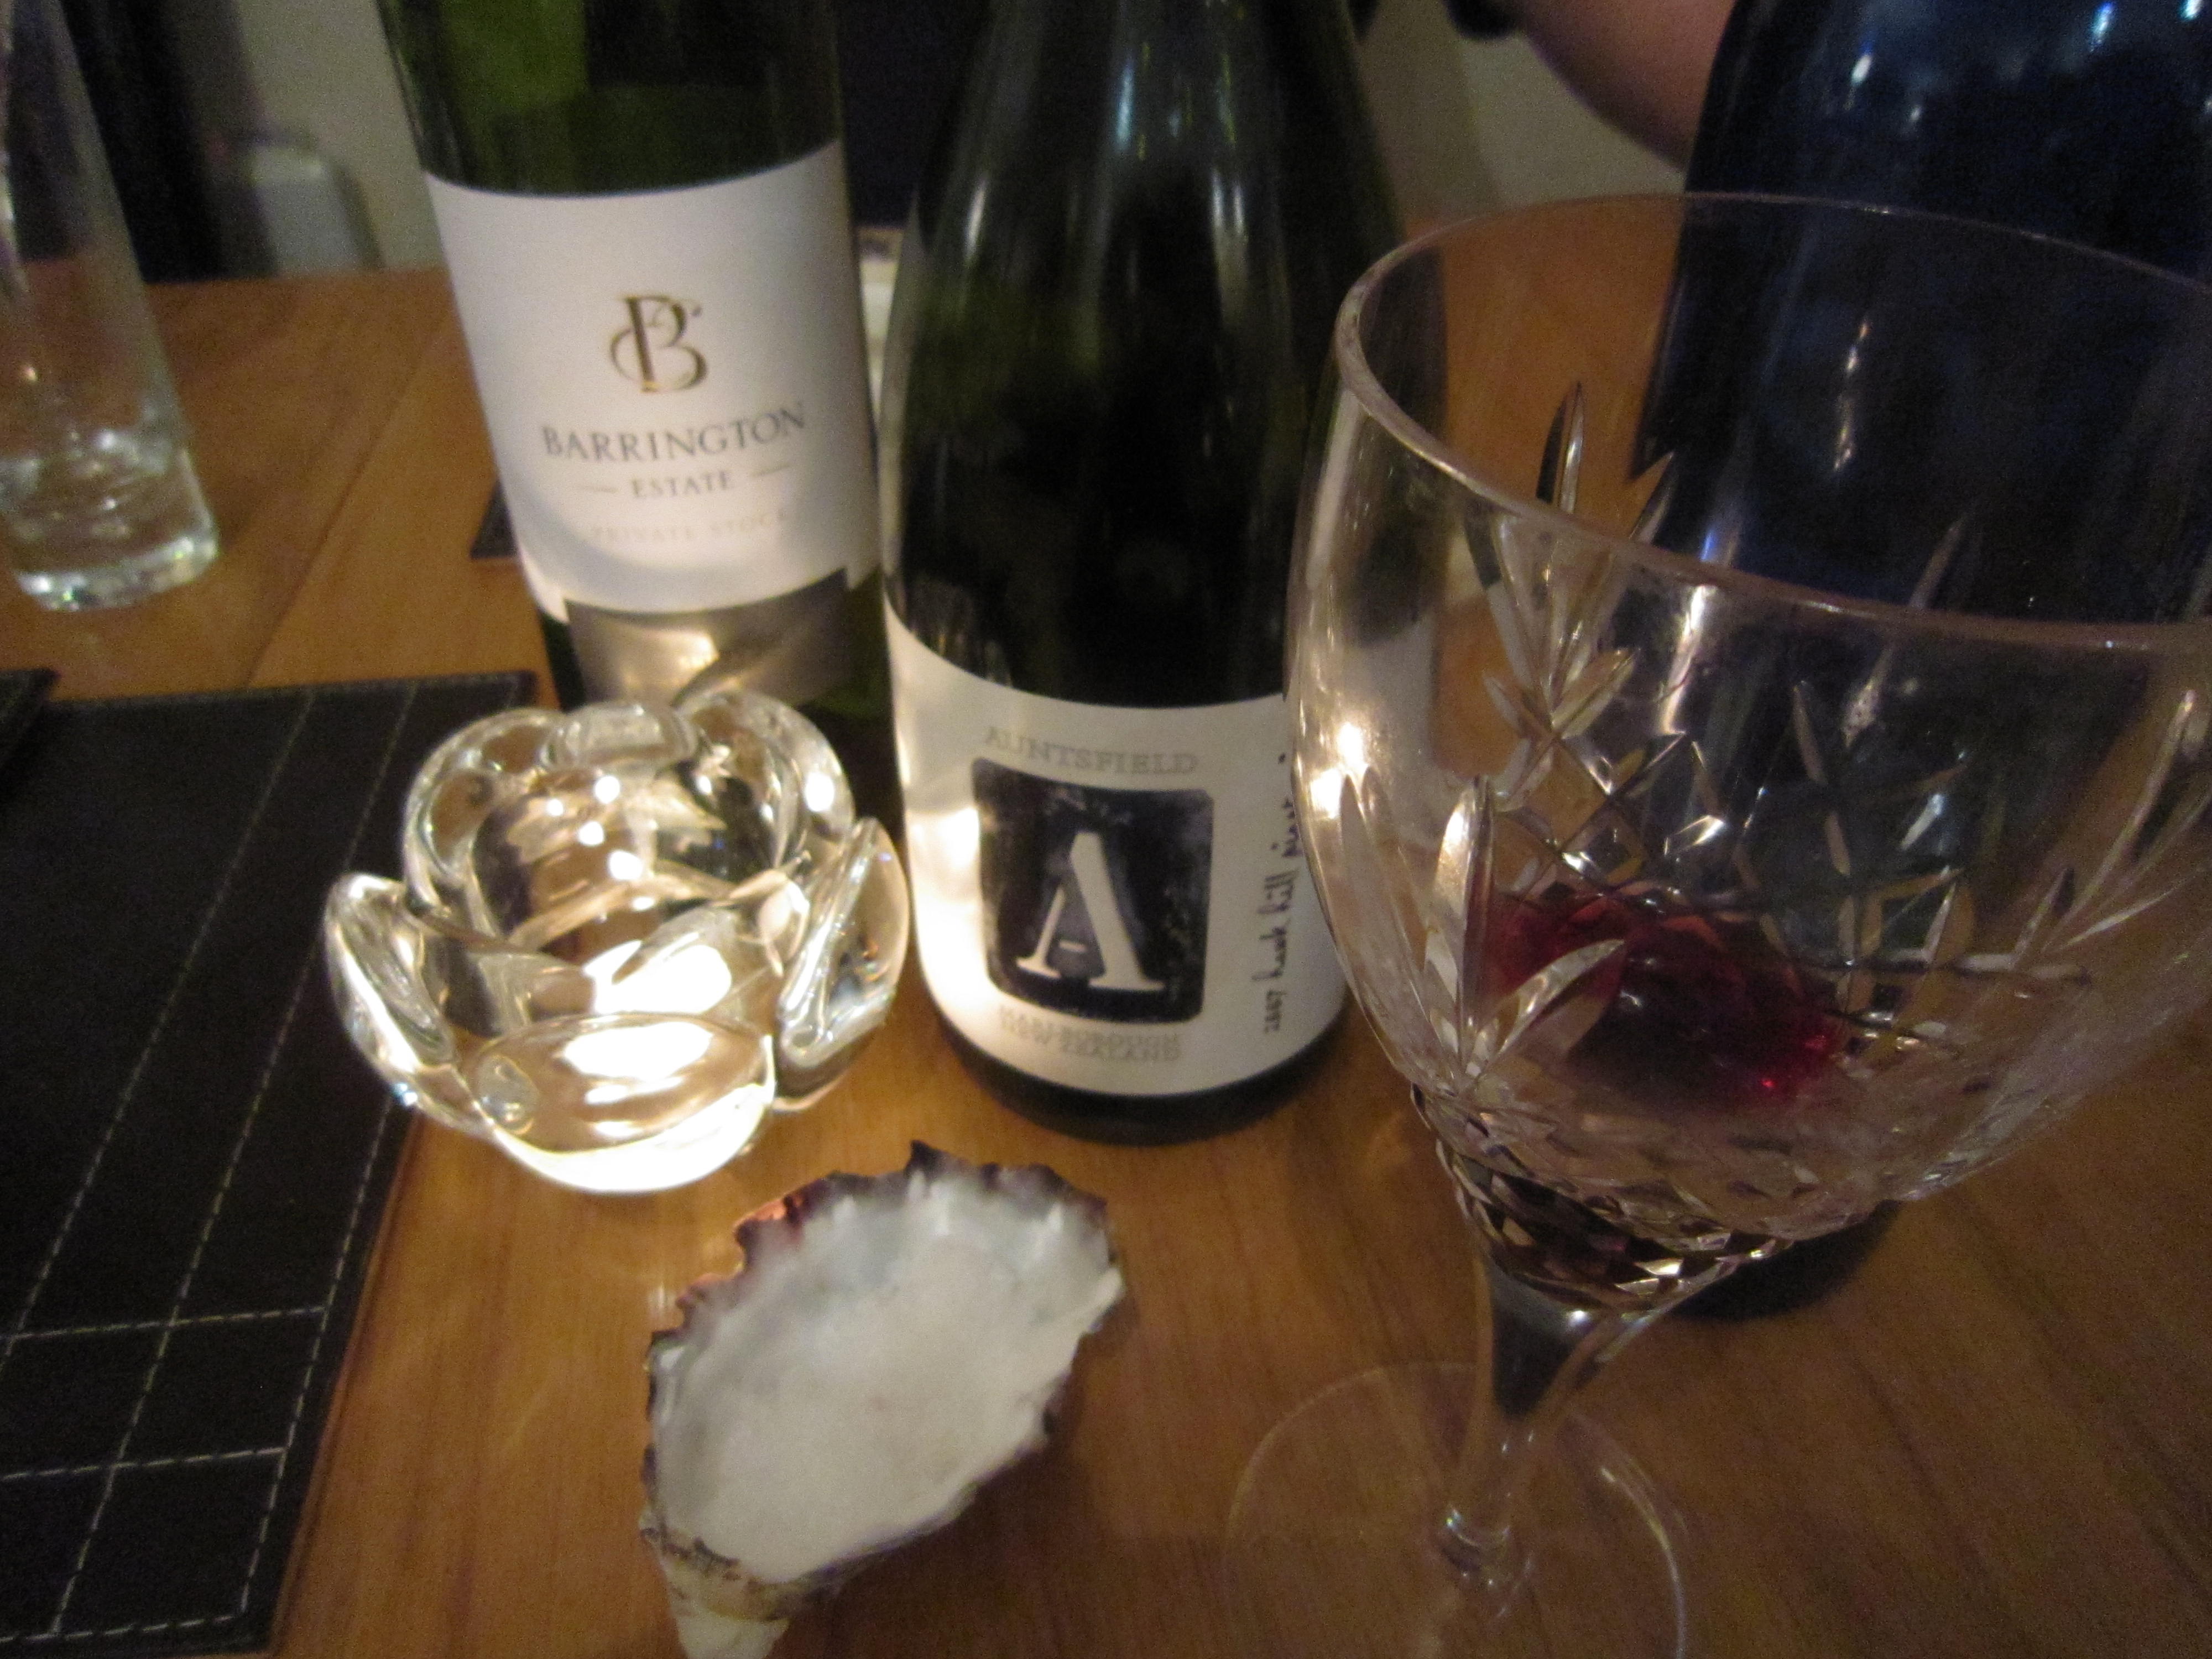
Was it a success? Well, that picture was taken after we’d had the whisky toffee and almond tart, at the end of the meal. I think the blurring of the shot says it all.

I can’t blame the tart for that, I suppose, but it certainly was a fine ending to a lovely meal with our friends.

A fitting goodbye to those we were leaving behind us and an excellent start to the laughing and dancing that followed.

Maybe you could make this? Not necessarily because you are leaving the country… but how about as a dessert for a Burns’ Night supper? Then the whisky is justified… not only justified but essential.

Mulberry and Honey Polenta Cake

It’s been some time since I managed to sit down and tell you about something delicious… but as you know, I have rather a lot on. I’ve been so busy trying to sort out our move to Malaysia.

I swear, I thought I was a relatively organised and tidy person… but going through all the paperwork I have to sort out before we go, it appears I have been slowly, but surely, turning into one of those women you see on television programmes where their hoarding has got out of hand. I must have just filed every single bill and statement that I ever received and do I need them? No, I don’t.

Ballpoint pens…. who needs over a hundred half used ballpoint pens? I mean, hardly any of us write any more – we email, we text… but there they were…pen after pen in drawers  and on shelves, in handbags. And the paperclips? Where did they come from?  I am almost certain that I have never in my life bought a box of paperclips so they must have come with stuff I’d received and I kept them, thinking they’d come in useful at some point. There were rubber bands, half used Post-It pads and that peculiar dust and grit that seems to collect in any drawer that has Stuff in. I reckon we all have a drawer with Stuff in – it’s where we put things that don’t have a natural home anywhere else. That might explain why I also found two Swiss Army penknives, a small toffee hammer, a ball of string, my old cat’s vaccination record, a nail file, instructions from an old iPod shuffle, a broken travel alarm… oh the list went on.

And that was without starting on the clothes.

Twelve huge  bags of clothes on the first sort….. The Great North Air Ambulance were getting the lot.

After all, we are going to south east Asia for three years and the temperature there is roughly 28 degrees C all year round. I wasn’t going to need all the warm things I had to have so I could live without frostbite on the north east coast. I wouldn’t be working for a start, so all of my business suits were going.

I seem to have kept every pair of jeans I ever owned……

……..and I have finally come to the conclusion that I will never fit into those 24 inch Levi’s again. I looked at them and wondered how I ever did get into them…and why I thought that with a little cutting back I would get anywhere near them. Still, it shows my optimistic side, which is always a good thing.

It also seems that I won’t be getting anywhere near the 26 inch, the 28 inch and the 30 inch Levi’s….. there’s a pattern emerging, do you see? I have grown fatter, year by year. It’s been gradual and it has been over couple of decades… I always thought, though, that maybe one day I would regain my teenage litheness.

It wasn’t to be, of course.  Age does that to a person. As does eating delicious things.

Delicious things are one of the great joys of life and sharing something delicious with friends increases the general happiness quotient of any get together. What follows is one of the delicious things I can blame for the no-longer-fitting Levi’s.

The Bear and I had gone to our friends’ house for lunch so we could take a break from packing and sorting and all talk about our move to Malaysia. C&C had lived there for 18 months, some years ago and still go at least a couple of times a year, so they are an absolute mine of information. They were doing the main bit of lunch and I said I would do the pudding.

I wanted to do something different and I had something in mind.

Remember when I took it into my head to make Strawberry Surprise Marshmallows? I’d found some freeze dried strawberries at Healthy Supplies and realised that their sweet almost-crunchiness would be perfect hidden inside some home made marshmallow. Healthy Supplies really is a treasure trove because I also found freeze dried strawberry powder there that made the most delicious sweet coating to stop the marshmallows sticking together. There are things in their on line store that you’d never get in a supermarket – go and look, you’ll be amazed and delighted at what they have.

Brendan from Healthy Supplies had liked what I’d written about his freeze dried fruit and asked if there was anything I’d like to have a go with and after looking through the list, I spotted mulberries.  How could I resist that? Something I’d read about but never tried… AND they were called Pearls of Samarkand! With a name like that, they just called out to me…

There are two kinds of mulberrries, black and white.  Aren’t they strange? Knobbly and bulbous – but what really matters is the taste of them. The white ones taste almost honeyed – they are sweet and musky – and the black ones are sharper and fruity and after nibbling a couple I’d started to get an idea…

I’d made a polenta and honey cake before and I liked it but I thought there was room for improvement. Polenta in a cake gives it a wonderful dense and grainy texture; adding honey to the cake and serving it with cream makes it into a wonderful dessert.

Because the white mulberries tasted like honey they would be marvellous with a honeyed cake and the black, sharper mulberries could go in the cake to add a deliciously fruity contrast.

So… to begin.

First of all, get the oven going to preheat – you will need it at 170 degrees C/325 degrees F. The cake takes only a few minutes to prepare so you need to have the oven on at the start.

330g of plain flour was mixed with 150g of fine polenta (cornmeal) and 2 tablespoons of baking powder and a teaspoon of salt.

I sliced up some good butter and melted it in a Pyrex jug in the microwave on a low setting

I was going to need 250 ml, so just pack it into the jug till you get the rough measure – anything extra you can use to grease the baking tin.

Mix the melted butter with 2 eggs, 180ml of runny honey and 435 ml of milk and pour it into the mixing bowl.

Then whizz it all round gently – don’t whip it to death, just make sure it is blended.

This is going to be a lovely deep and square cake, to be sliced easily at the table so I used a smallish baking/roasting tin (if you’re interested, it measured 13×9 inches) That was greased with the residue from the melted butter

You can see the graininess of the polenta – that will add fabulous texture.

Because I didn’t want all the fruit to sink to the bottom of the cake, I scattered most of the packet (saving a mainly white ones) on top of the mix. I dusted the fruit in flour to stop them sinking too quickly and then put the tin in the oven for half an hour.

While the cake was cooking, I needed to make the honey syrup that was going to be drizzled over the cake so in a pan I gently heated 125ml of Acacia honey

And because I wanted it to have a light and flowery hint about it (and because I had a bottle of it and I need to use it before we move) I added a good amount of English Provender Essence of Orange Blossom Flower water… maybe 4 tablespoons or so. Don’t worry if you haven’t got any – you can miss it out… or perhaps use orange juice instead?

Stir it all round, over a gentle heat until it comes to the boil and blends beautifully,  thickening slightly, making a rich and fragrant syrup.

Check whether the cake is done after 25 minutes or so. Does the skewer come out cleanly?

Now it is out, make sure you have the cake on a rack and you can wipe up any mess from this next step…. you are going to pour the honey and orange blossom syrup over the cake, covering it completely. It needs to cool before you serve it…..

That was the easy bit….we then had to get it from my kitchen to our friends’ house without making a mess.

Still, we got there and settled down for a marvellous time.

I’d brought along the rest of the mulberries and when we were ready for pudding I added them to a bowl of whipped cream…

The cake was firm and studded with mulberries. It wasn’t  too dense… there was a light crumbliness to it that you get when you use polenta.

And with a dollop of whipped cream and those honey flavoured white mulberries it was the perfect summery mouthful.

It was even worth eating knowing I would never get back into those jeans. Some things are worth more than being able to wear the jeans of my youth. I know when I was younger I’d never even eaten polenta, never mind had it in a cake and mulberries were the stuff of nursery rhymes. I like being older. I eat better for a start!

So. Mulberries? A definite yes. They were perfect in that honeyed cake. They were delicious to eat by themselves…. thanks Brendan! Keep on sourcing such delicious and original ingredients – I just wish I could have shared a slice of cake with you.

Baked lemon cheesecake with blueberries

When I was growing up, I remember the excitement when Marks and Spencer introduced the baked cheesecake into their ready made food section. This was the 70’s, you know, and British food was hardly at its finest.

We’d had cheesecakes before of course, just not the baked ones. We’d had those  strange pre-frozen cheesecakes where the middle seemed to be made of some kind of whipped creamy nonsense and laden with luridly coloured strawberries….well, we’d had them when our mothers had got them for a dinner party and, if we were lucky, the following day there may have been a slice or two left over to be sneaked before (or even instead of, if Ma didn’t catch us) breakfast. Food like that was far too good to be specifically given to children. Maybe we’d had some at a friend’s birthday party where the mother was trying to outdo every other mother and you know, they were pretty fancy for the 70’s but they weren’t the be all and end all of desserts. They were OK.  Real cheesecakes? They weren’t available. Or at least if they were they never made their way to the North. Maybe it was something lucky young Londoners had.

I’d read in stories that Americans had cheesecake and they loved it but as far as I was concerned, as far as I knew, cheesecake… well it came out of a frozen packet and it was nice, but not brilliant.

Anyway… one day my friend F got a slice and let me taste it. I couldn’t believe the rich, dense filling. No lurid strawberries, just a lemony hint. I couldn’t believe how deep it was. A solid wedge.

I loved it. I loved the way it stuck, almost, to the roof of my mouth in its glorious clagginess… the way the flavour seemed to be so luxurious. Now I understood why people loved cheesecake.

Of course we still didn’t make it (there was no internet to look up recipes in those far off days) and sometimes we were lucky when we ordered cheesecake in a restaurant… and sometimes we weren’t. Sometimes we got real baked cheesecake and usually, I suppose, we got the defrosted thin one from the packet.

I don’t know when I first made a real baked cheesecake but it wasn’t so many years ago. I do know that I realised just how simple it was and how much I had been missing out on. This really was the stuff of that amazing childhood memory – that delicious, thick, sumptuous and dense filling. So very different to the thin whipped and set filling that appeared so often elsewhere.

I suppose it is because of that that I think of cheesecake as a special treat. It has to be a special treat, really, because if I made that just for the Bear and I we would end up eating it all and let’s face it, we are fat enough.

Anyway, the one I was going to make was for a special occasion – we had friends coming for dinner and we wanted to have a good time. There may have been an element of hoping (just like back in the 70’s) that it wouldn’t all get eaten and then I could maybe have some for breakfast……

I’d  used a recipe from Good Food before and it had turned out very well  and would be worth doing again. All I needed were some digestive biscuits; 100g of butter; 250g of mascarpone, (that’s one tub); 600g of soft cheese, (that would be two tubs of Philadelphia); 4 eggs, ( but you won’t need two of the whites. Save them for something else… or maybe have an egg white omelette the following day to make up for any indulgence. Maybe not, eh? Maybe make meringues instead!);  3 or 4 lemons and some caster sugar and some plain flour.

Once it was baked, a small pot  soured cream and some lemon curd and fruit were to go on top. Simple. But oh so delicious.

So, I needed my springform tin and to make sure there were no leaks I got out a preshaped baking paper liner.

I decided that Hobnobs would make a lovely crumbly, rich base… because I love them.

And as I needed 225g – which came to 16 Hobnobs in case you are interested (or can’t find the scales to weigh them) then that also meant, I thought, that  there would be a few Hobnobs left over to have with a cup of coffee. Always thinking, that’s me.

Making the base is the simplest thing ever – and with such crumbly biscuits it is so easy to give them a bash with the end of a rolling pin to crumble them.

100g of melted butter (heat it gently and carefully in the microwave) was poured in and stirred round until the butter was absorbed. Pour the buttery, crumby mix into the lined springform tin and press down.

Using a spoon round the edges means you get a good firm base and then put it in the fridge for the butter to set firm again and the base to chill.

Heat the oven to 160°C (fan assisted)/320°F.

Then start to get everything else ready. This is so easy.

Zest all of the the lemons, add the two whole eggs and the two egg yolks, the pot of  mascarpone, the two tubs of Philadelphia cream cheese and  the juice of two of the lemons to a mixing bowl.

And then add 175g of caster sugar and 4 tablespoons of plain flour

And start whizzing it together.

The colour changes  as it becomes smooth and delicious.

Now, take the chilled crumb base out of the fridge and spoon in the lucious filling.

If you give it a gentle side-to-side shake the mixture settles and the top smooths slightly… though this will also happen in the oven.

Put it carefully into the oven for thirty five to forty minutes and when you check it, give it a little shake…. it won’t (or it shouldn’t) slosh, it will just have a gentle wobble to it.

Turn the oven off and leave it to cool completely in there.

That was handy for me because I had to get things ready. There were floors to wash, a table to lay, cushions to be plumped, surfaces to polish…. and a mad rush to get me looking half way presentable before the guests came.

Now, you may have read about the mushroom pate with caramelised red onions, and the squash and goat’s cheese lasagne and the singing. This cheesecake was the final part of the meal and I was going to put the topping on just before serving it.

And, as I am sure you will agree, if you are eating you will probably have been drinking….not to excess, you understand, but enough to laugh happily.

Enough to laugh happily and cover the top of the cool cheesecake with some lemon curd and then spoon the soured cream over the top and, still, laughing happily, make attractive patterns with a fork on it before realising that photographs should have been taken.

Oh well.

Imagine it instead… the top of a baked cheesecake, looking pale and beautiful has a few spoons of  good quality lemon curd spread over it. I used lemon curd I made but any good brand will do.

Then the soured cream was poured over the top of that… and then I got artistic.

Right, we are caught up with ourselves and the pictures now.

In the freezer I had some frozen blueberries so I grabbed a handful and dotted them over the top.

(Look, you can see the lovely lemon curd poking through the swirled sour cream!)

The blueberries defrost quickly when you put them on top of the cake and the beautiful juices run down through the tracks of the fork in the soured cream.

Oh… it was delicious.

The beautiful baked cheescake filling had the perfect mouth-sticking texture that dissolved into lovely creamy lemon-ness.

The soured cream and the blueberries were the ideal match to the rich smooth sweetness.

I say again, ohhhh it was delicious.

And the next morning, while I stood, waiting for the kettle to boil, looking out of the window at the early Sunday morning city below us, I might (just as I did back in the 1970’s)  have cut myself the tiniest sliver of cheesecake to eat as a pre-breakfast, post dinner party treat.

Except this was far better than any 70’s cheesecake. This was a perfect baked cheesecake.

Strawberry Surprise Marshmallows

Some time back, I was at work and I had a fancy for something sweet. That’s odd, for me as I generally tend to prefer savoury things.

All I could find was some Turkish Delight that a Turkish colleague had brought back from a visit home. Normally I don’t like Turkish Delight because it is too sweet and over scented for me but this was delicious – it was stuffed with pistachios and the contrast between the soft delight and the crunchy pistachio was unbelievable.  It really did make me a convert. Our friend, Ender, explained there is a world of difference between the mass produced cheap stuff we get over here and the high quality Turkish Delight produced in Turkey. People make it at home, he said, and that’s even better. All sorts of flavours are made, all sorts of additions to the delight.

It made me think about what I could do…..

I remember the excitement I felt when I first read about freeze dried food. It was what the astronauts ate, apparently, and it seemed so exciting. I was a child at this point, mind you, so it’s understandable. Fancy being able to eat something like that….. and then I found you could actually buy freeze dried fruit. I spotted freeze dried strawberries. I had to buy some. And when I saw the freeze dried strawberry powder as well, my mind really started ticking over.

Maybe I could make Turkish delight and use the strawberries instead of pistachios? Perhaps use the strawberry powder in cakes as a swirl? Or in meringues to make them all pretty and pink? Macaroons…whipped cream…oh the  ideas were just pouring out. But I didn’t do anything because I was too busy dealing with the huge apple harvest. I made cakes and apple butter and apple mash and apple crumble until, at last, even I was fed up of apples.

A month or so later, as I sat down at home one night, I started to read Good Food magazine and spotted a recipe for bramble stuffed marshmallows. Well, I thought, why not make marshmallows instead of Turkish delight and put the freeze dried strawberries in there?

It seemed meant to be. I was on trend!

I would have to do something with the strawberries because I had opened the packet….

It seemed pretty easy.

First of all, some cornflour and icing sugar needed to be mixed together as this would be the dusting that the mallow is poured upon. If you don’t do that it will stick.  Now, although I wanted something sweet, I didn’t want too sweet. If I used the strawberry powder that would have the same sort of effect and add a touch of sharpness, stopping everything becoming too sickly.

I made a 100g/ 4 oz mix of  cornflour and freeze dried strawberry powder, using slightly more strawberry powder. This was going to be the dusting that stops the mallow sticking together.

In order to get the bouncy texture of the mallow you need gelatine.

9 sheets were put in a pyrex jug with 150 ml of hot water. It softens and starts to dissolve quickly but it will probably need a mix with a fork to get a good, even distribution

I lined a baking tray with baking parchment and scattered a good layer of the strawberry and cornflour mix over it

One tablespoon of liquid glucose was added to 1 lb/450g of granulated sugar

200 ml of cold water was added and the pan was put over a medium heat to start the sugar dissolving.

Now, I have a sugar thermometerand I placed that in the pan too. Once the sugar was dissolved I turned the heat up to start to get the sugar solution boiling. I had to get it to 125 degrees.

if you haven’t got a thermometer, don’t worry, just time it, for a start. To get to the right temperature takes about 10 to 15 minutes of boiling. You can check how well it is doing after 10 or more minutes by dropping a little bit into cold water. If it sets into a soft ball you know you are at the right temperature.

The bubbles start to look different – thicker and perhaps more glossy.

While it is getting to that stage, start whisking the egg whites untill they become stiff and white. Once you have them at that stage there’s no harm in leaving them in the bowl, ready for the next bit.

And there you have it – I timed it – it was just over 13 minutes to get to this stage.

Now, carefully, in two stages, pour half the sugar syrup into the dissolved gelatine. Give it a little stir and then add the rest of the sugar solution.

While the whisk is going, start pouring in the gelatine sugar mix into the already whisked egg whites.

Add  a teaspoon of vanilla extract as the whisk goes on

And carry on whisking for ten minutes or so – you will see the mix become shiny and somewhat stiff.

Pour half of the mix onto the strawberry dusted baking parchment

Then put freeze dried strawberries all over the mallow

And start pouring the rest of the mallow over the strawberries

And then leave to set.

This will take a couple of hours at least. (I put mine in the fridge later on as I had been doing the washing and there was a lot of moisture in the air. A fridge is a very dry environment so that helped everything set. Bear that in mind if the weather is funny and humid)

The rest of the strawberry powder mix was poured onto another sheet of baking parchment

…and the cooled and set mallow was upended onto the powder

The bottom layer of paper was now on the top and was easy to pull away (the Bear did that bit as I needed to take pictures and it is a bit sticky….)

There it was.. white and bouncy mallow with a pink dusting and an occasional strawberry poking through

We cut it all into squares – there were over 60 pieces!

They were fabulous. The sharpness of the strawberry powder stopped them being too sweet and the surprising soft crunch of the freeze dried strawberry in the middle really enhanced the softness of the mallow.

The Bear and I ate a piece. Then another piece or two ….and we realised that, delicious though they were, we would have to stop.

I put the marshmallows in an airtight box, lined with baking parchment and decided to take the rest to work. After all, it had been thanks to Ender’s generosity with his Turkish Delight that started this whole experiment off.

They were eaten! And people who normally find marshmallows too sweet had some… and then had some more!

The only downside? Ender, who inspired the whole thing, wasn’t in the office that day!

Should you make this? Yes, I think you should. I know it involves boiling sugar but that’s fine. Just time things if you don’t have a thermometer and it really is rather easy.

And to make it easier for you – here’s the recipe.

Strawberry Surprise Marshmallows

30g cornflour; 70g freeze dried strawberry powder; 9 sheets of gelatine; 450 g /1lb granulated sugar; 1 tablespoon of liquid glucose; 2 large egg whites; 1 teaspoon vanilla extract; freeze dried strawberries.

* Mix the strawberry powder with the cornflour

* Dissolve the gelatine sheets in a pyrex jug with 150ml of hot water. You will need to stir it round

* Line a tin (I used my normal baking tray for flapjacks) with baking parchment and put down a layer with the pretty pink strawberry and cornflour mix. The gooey mallow mix will go on this so make sure the paper is covered

*Put the granulated sugar and the liquid glucose in a heavy bottomed pan  and add 200 ml of water. Stir over a medium heat untiol the sugar has dissolved completely  and boil until a sugar thermometer reads 125 degrees. This takes between ten and fifteen minutes. With no thermomemter, drop a little of the sugar mix into a glass of cold water after twelve minutes –  if it sets as a soft ball then it is ready.

*While the sugar is boiling, start whisking the egg whites until they are stiff

*When the sugar is at the right stage pour it carefully into the pyrex jug that has the dissolved gelatine.

*Keep on whisking the egg and add the gelatine and sugar syrup in a steady stream.

* Add the vanilla essence.

* Keep whisking until the mix is shiny and stiff.

*Pour half into the lined tray

* Add the freeze dried strawberries then pour the rest of the mallow mix over and leave it to cool for at least a couple of hours

* Put more baking parchment on the bench and scatter the rest of the cornflour/strawberry powder mix over and then turn the set marshmallow onto that. Take off the top layer of paper.

* Using a sharp knife, cut into squares.

Toffee and Apple Butter Crumble

When I was at school we studied the English Romantic poet, John Keats. To this day, I can still recite many of his odes and whenever my friend J and I get together, something will trigger something in our heads and we will burst into recitation – either sonnets from Shakespeare or poetry or even psalms and verses from the Bible. It must be hard wired into our brains now and it still makes us laugh that after all these decades, the words our teachers drummed into our heads when we were little schoolgirls, still remain. It seemed so hard at the time to learn everything and now it seems we can’t forget anything! Makes us pretty good at quizzes, of course, and a source of irritation to our husbands as they weren’t taught like us Grammar School girls and they roll their eyes when we go into our synchronised recitation mode at the least provocation or reminder. We can’t help it. It just happens automatically. We must have been terrified of our teachers.

 Keats, in his ode “To Autumn” called this the “season of mists and mellow fruitfulness”  and he was right. The apple trees are bending under the weight of the apples and this morning, the first of the real autumn mists filled the valley below us. What might have seemed boring and irrelevant to our teenaged minds is now appreciated and I found myself reciting the ode as I made coffee for breakfast and gazed out of the window.

Mists certainly… mellow fruitfulness? Yes. We still had such a lot of apples from our brief foraging trip and I needed to use them.

I was going to be cooking a meal that evening for a visitor from South Africa and another colleague. It wasn’t going to be a fancy dinner but it had to be good. I wanted to show what traditional British cooking was like and prove that it is delicious. What better for dessert, I thought, than Apple Crumble? Perfectly British and perfectly delicious.

Last time I made crumble, I made Toffee Apple Crumble and it was delicious – the addition of fudge made an ordinary apple crumble something special. This time, I thought, I would use fudge again but also add the Apple Butter I made at the weekend. That would add in another layer of appley lusciousness to the crumble…..

So, I got in from work and peeled some apples. Normally I use good sized apples and allow one per person. That normally works out about right.

These were my foraged apples – not quite so big as ones from a managed orchard, so I decided 6 would do. Also, I am rather greedy and I was hoping for leftovers the next day.

Peeled, cored and chopped, I put them in a large baking dish and sprinkled the juice of half a lemon over the bits to stop them getting too brown.

A sprinkling of golden granulated sugar over the top would balance things nicely and help make delicious juices (and I do mean, by the way, just a sprinkling. More sweetness will come from the fudge)

The fudge needed to be cut up too…

And the apple butter I made? Look how it has set… it can be cut into slices, just like real butter. Apple butter is just apples cooked slowly until their natural sugars caramelise, which is why it is a deep golden brown, and spices (cinnamon, ginger, nutmeg and cloves) stirred in and cooked with the apples.

I layered some slices over the apple, knowing that when everything baked, the apple butter would melt over the apple pieces and that lovely spiced apple mix would be perfect in the crumble.

Next, the fudge pieces were scattered over the top.

The crumble mix is simplicity itself – 300g of plain flour, 200g of sugar and 175g of butter.

Making the crumble topping is really easy – just rub the mix through your fingers until it resembles breadcrumbs. It doesn’t take long.

Then scatter the crumble mix over the prepared fruit and fudge.

Don’t pack it down, just shake the bowl from side to let the crumbs settle round the fruit, fudge and apple butter.

And then all you have to do is put it in the oven at 180 degrees C/350 degrees F for 40 minutes or so.

Oh, the smell of it as it cooked – there was the sweet buttery smell of the crumble itself and the sharpness of the apples and the spicy mix of cinnamon, nutmeg, cloves and ginger from the apple butter.

And what was it like?

It was lovely. So lovely I forgot to take a picture of it as it came out of the oven. I just dug into it and served it up.

Served with a great dollop of extra thick double cream.

It was eaten and seconds were requested. Our South African friend said she had not wanted to go home without trying a hot English pudding, so that was good. I suppose our traditional hot puddings are famous, and rightly so.

It was a perfect pudding, it really was. Toffee Apple Crumble was excellent but adding Apple Butter as well? That made it truly delicious.

And there are no leftovers.

Dulce de leche – Argentina’s iconic sweet spread.

Every country has some foods that are instantly recognised as being associated with it – for instance, in England  it is going to be roast beef and Yorkshire Puddings, or maybe fish and chips; Japan is probably  sushi. France? Maybe Foie gras or cheeses such as Camembert and Brie.

Argentina is famous for its meat, of course, and especially for the beef, but all Argentineans have a deep longing for sweetness….. because wherever you go in Argentina you will find dulce de leche (literally “sweet of milk”)  – the most delicious caramelised milk, made from sweetened condensed milk. Sweet, sticky, almost softly caramel toffeeish…

When you go to breakfast, there are little pots of it, waiting to be spread on toast… when you have a pastry or a biscuit, there’s usually dulce de leche involved somewhere, either as a filling or a flavouring. You can buy lovely large pots of artisan made Dulce de Leche or commercially produced packets. Whatever you get is guaranteed to taste delicious.

One of our dearest friends is from Argentina and he always looks wistful at the mention of dulce de leche when he is far away in cold, wet England.

The thing is, it’s not difficult to make… it is, however,  (usually) time consuming… and, in my eyes at least, just a bit scary.

The traditional way is to take a large quantity of milk and sugar and, after pouring it in a pan, slowly simmer it until it thickens as the water evaporates and it caramelises to a wonderful golden brown. Thing is, you have to stir it constantly – you can’t walk away and leave it.

Another way is to take a tin of sweetened condensed milk and boil it, unopened, in a pan for a couple of hours. You can’t walk away from that, either. If you let it boil dry the tin will explode and the kitchen (and any unwary inhabitants) will be covered in superheated caramel. If you avoid that fate then you have to take care to leave the tin to cool properly before you open it.

See what I mean about it being a bit scary? And if you went down the boiling tin route, how would you know that it had caramelised perfectly?

So, I was content to eat it but too afraid to try making it.

Until I found, whilst idling around various food blogs, (one of my favourite activities) an article by David Lebovitz telling me how to make it safely and quickly!

He says to make it in the oven in a bain marie and that it only takes one and a quarter hours…… what’s to lose, I thought? I just had to try it out.

I needed an oven proof dish and a tin of sweetened, condensed milk.

The oven needed to be preheated to 220 degrees C/200 degrees if fan assisted) 425 degrees F

I put the oven proof dish inside a large metal roasting dish and then poured in the milk.

A sprinkle of Maldon sea salt was stirred through.

I wrapped tin foil tightly over the dish and poured hot water into the roasting pan until it was half way up the sides of the dish with the condensed milk it.

And that was it.

Into the oven for an hour and a quarter, or thereabouts.

And no standing over it, terrified that it might boil dry and the tine explode… no standing for hours, stirring it slowly. Just as well because this was a Friday night after my first week back at work with jet lag and all I wanted to do was slump on the sofa.

I did check after about 40 minutes that it hadn’t boiled dry (it hadn’t) and I couldn’t resist having a peek at the colour…..

It was turning golden!

And, oh, the smell….. delicious, rich, sweet caramel aromas coming from the oven… Someone should make that smell into a scented candle or room perfume…

And then… just an hour and a quarter after putting it in the oven

It looked good.

But it was too hot to taste so I had to leave it to cool. David said to whisk it to get out lumps out but it was fine.

Oh my word.

Thick, delicious, spoonable delight. It was dulce de leche.

And I had such plans for it…..

But I needed a real assessment to be done – was it good enough? Did I have to go back to the traditional way of doing it?

As I said, we have a very dear friend from Argentina. It was his marvellous mother who organised all of our travels around the country (Thank you, P!) and he was with us for most of them. Who better, I thought, than N?

That was it – when I saw him, I marched up with a spoonful held out in front of me and demanded he tried it.

He liked it! Not only that he said it was delicious!

N’s fiancee, L, had made it the traditional way before now and both of them reckon that this way produces dulce de leche of comparable deliciousness with a minmum of effort.

So, there we have it – quick, safe and easy. Delicious and moreish. Rated by people who know what it should taste like… and by those just want to scoop it into their greedy mouths!