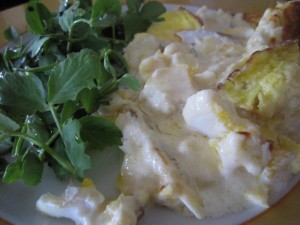
Potato Focaccia

One of the big loves of my life is reading. I can do without television quite easily but I could not manage if I couldn’t occupy myself with something to read. I have shelves groaning with books and magazines are stacked in piles… I have an  eReader so I can read when I can’t carry piles of books with me and when I can’t read, (because I’m driving, say) I listen to audio books. So maybe it’s not reading? Maybe it is that I don’t need the visual stimulus of pictures… I just need the words and my mind fills in the gaps.  So, maybe I should say one of the big loves of my life is writing.. that is, writing done by others.

It has to be good writing though, so that I stay interested. I will, honestly, read almost anything, from any genre, but as you’d imagine a big part of my reading involves food – cooking it, eating it, growing it, preparing it… telling stories about it.

I have shelf after shelf of cookery books. When I’m in the north, I love to sit in that chair, with a cup of green tea, steaming quietly beside me as I read recipes or books on food writing –  from Brillat-Savarin’s “The Physiology of Taste,  or transcendental gastronomy”  – he, who famously wrote, “tell me what you eat and I will tell you who you are” and described the first version of what became, in essence, the low-carb diet. Brillat-Savarin (1755-1826) believed that white flour and sugar made you fat and prescribed protein rich meals. If you haven’t read him yet and you’re curious you can read it for free online, thanks to the University of Adelaide or on Project Gutenberg, or, you can do as I did, and buy a copy.

I love reading modern cookery writing too and I have shelves of that in the apartment… that’s a picture of the shelves when I had only half unpacked and there’s 132 books there. The shelves are full now. Those shelves are half way up the stairs and I sit there, leaning against the wall, reading whatever takes my fancy.  Probably my favourite book of all time, MFK Fisher’s The Art of Eating, an anthology of all her works is on that bottom shelf  and I regularly take it out and start reading it again. There are  fascinating books that the Bear finds on his travels and brings back for me because he knows I will love them. He found Laurie Colwin’s Home Cooking when he was travelling through the USA and I know I wouldn’t have stumbled on that easily but it is now one of my dearly loved books. He also brought home the wonderful Ruth Reichl’s  Comfort me with Apples and that started me on a search through Amazon for more books like that.  The whole point of it is, I love to read something that makes me think, that captures my imagination and makes me explore just what it was they felt, what they tasted and what it meant to them.

When I’m not reading books, I’m looking on line and reading blogs and searching out great writers there, too. I was reading the fabulous Gin and Crumpets and something she wrote made me stop and think….it made my mouth water. Potato Focaccia, or as she says, a fancy chip butty. Who doesn’t like a chip butty? Well, apart from Brillat-Savarin and his purely protein meals, but he’s long gone, so it doesn’t matter…

A soft and savoury focaccia with potato…. perfect. Imagine how that tastes…

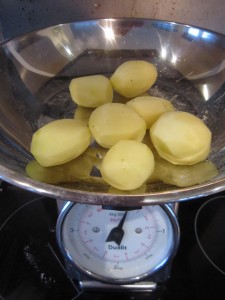
Gin and Crumpets had used, so I surmised from the photographs, smaller potatoes than I had and she’d left the skins on. I had a bag of my favourite Rooster potatoes  (excellent all rounders, good as either chips or mash or roast) so I washed and peeled 250g of them and cooked them in gently simmering water. You need them still to have some body about them as they are going to be cooked again on top of the focaccia, so don’t boil them to death.

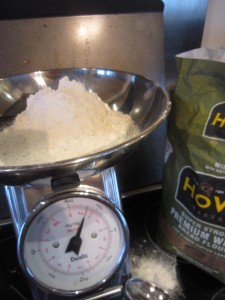
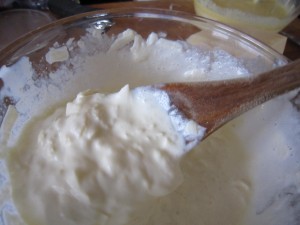
The next thing was to start on the focaccia so 350g of strong bread flour was mixed with one 7g sachet of fast action dried yeast, a teaspoon of caster sugar and two teaspoons of Maldon sea salt.

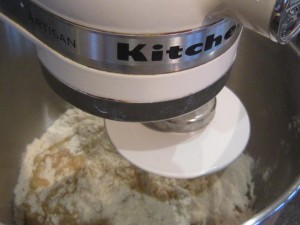
Four tablespoons of olive oil and roughly 150ml-200ml of lukewarm water need to be added to bring it together into a loose dough.

If you haven’t got a mixer with a dough hook, just use your hands.  Drop it onto a floured board and upend the bowl over it to stop it drying out. Let it rest for a few minutes.

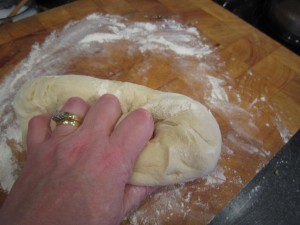
Then knead it… you’ll feel it change into a beautifully bouncy, smooth and silky dough.

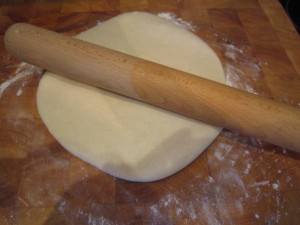
You need to roll it into a smooth oval

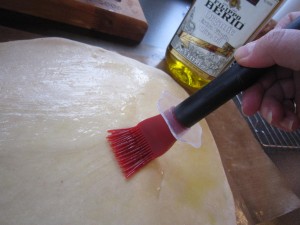
And then lie it on a silicone sheet, ontop of a baking sheet and brush yet more lovely olive oil over it.

Lay a loose piece of clingfilm over it and leave it to rise gently. That depends, of course, on how warm your room is but it shouldn’t take too long.

Start the oven pre-heating to 210°C or 410°F and check the potatoes.

They should be tender so drain them and leave them to cool and then have a quick wipe round while you are waiting…

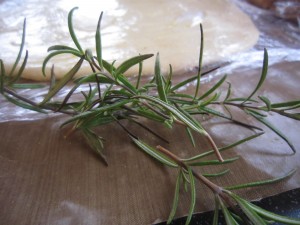
A sprig of rosemary would be good to add, so strip the leaves off the harder stems and chop them lightly.

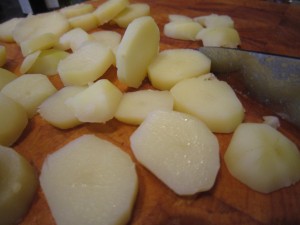
By now the potatoes are cool enough to slice without burning your fingers…

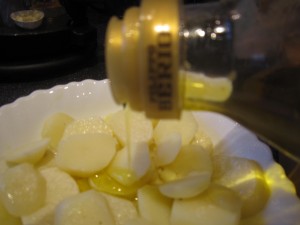
I drizzled the oil over the potato, in a bowl, so I got an even covering and each piece was glistening, then laid them on top of the puffy dough, sprinkling it all with the chopped rosemary and a sprinkle of salt…and into the oven it went.

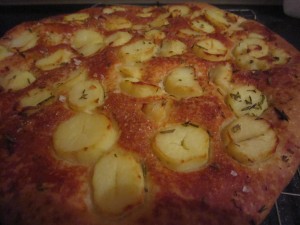
Just under half an hour later and this emerged… golden and glistening, smelling deliciously sweet and savoury – you know just what I mean…

The focaccia bread was light and aerated and the potato on top? It was heavenly… it really was like the best chip butty ever. The taste? The taste was sublime. The potatoes were soft with that sweetness that comes from being cooked properly and then baked, the salt and the rosemary made it savoury, the focaccia was warm and delicious. People looked at it, sniffed it and then tore at it…all of them saying how wonderful it was.

This is what you need to make for parties – it’s warm and delicious and it will to help soak up the alcohol and keep people happy and cheerful….

…this is what you need to make it when there’s just the two of you and a bottle of wine to share as you curl up on the sofa….

… and you need to make it when there’s just you, needing something to sustain you through upset or cheer you through gloom or give you a much deserved treat on a cold Saturday night.

This is heaven.  Really, it is.

Slow roast shoulder of pork with perfect crackling

The weather is getting worse and, while it is lovely to live in an apartment where three of the walls are windows, it does get gloomy when you are surrounded by rain spattered glass and grey clouds. When that happens, the only thing to do is put the lights on and make everything look cosy and then curl up, knowing that something meaty and tasty is in the oven….. just relaxing while the smell of roasting meat fills the room. It’s a smell that has always reassured me that things are happy and well in the family.

 A smell that was a constant in my childhood and it means home and happiness with loved ones. My wonderful brother and I are very similar in many ways. One of our favourite things is the crispy, fatty bits on a roast joint… all juicy and packed with flavour.

Not everyone likes this of course….The Bear has many good points and I am always glad I married him, but one of his finest points is that he doesn’t like crackling or the fat on a roast. That, of course, is good for me as it means that I don’t have to share. My brother used the same criteria when he got married – my sister in law is absolutely fabulous and we all love her dearly (he made a brilliant choice, marrying her) but again, she hates that sort of thing. Perfect. There’s nothing finer in our eyes that a gorgeous piece of crackling and the two of us have been known to stand in the kitchen at home dividing up the crisp and tasty skin….

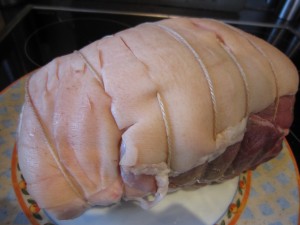
Anyway, while I was shopping I’d spotted this marvellous piece of pork. Outdoor reared and free range meant that it was guaranteed to be tasty. The rain was bouncing off the pavements outside and I just knew that roast pork would be the perfect  antidote to the gloomy rain blues.

Pork shoulder is a great cut because it isn’t expensive but, as with most things, treated with care and respect you can produce the most delicious meals. Time is what shoulder needs, time and heat and salt. That’s all.

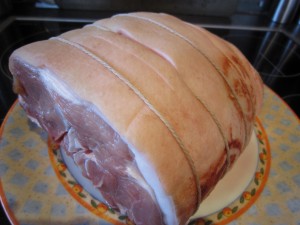
This was a lovely piece of pork shoulder with a good layer of skin around it, which is just what you need to get perfect crackling.

Pork shoulder needs slow cooking and it will turn into the softest, tenderest piece of meat ever. The rind will crisp up (if you slice at it) into delicious strips of hard, crunchy and tasty crackling.

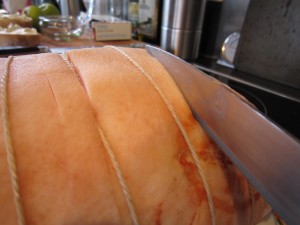
But the rind is tough and to get through it you need a very sharp knife. Butchers will slice the rind for you and, in fact, most joints come with the skin cut already but I like to get a lot of narrowly spaced slashes so I start by sharpening my favourite filleting knife.

I’ve never yet managed to use a sharpening steel so I use the Chantry knife sharpener which is one of my better kitchen equipment buys. All you have to do is run the knife through the middle a few times and the blade is perfectly sharp, which is something I have never achieved using a steel.

While you are doing all of this, get the oven preheated to 230 degrees C/450 degrees F

There were some slashes in the rind already but I sliced between them, so each strip of rind was about 1 cm wide, if that. Be careful, if you are slashing not to slice into the meat itself – just cut the rind and the fat below.

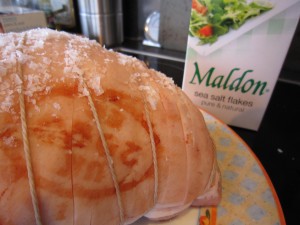
The next thing is to get some kitchen roll and dry off the rind before rubbing it over with a smear of oil and then some salt.

What you have done is wiped off the water and added some oil to help start the crisping process and salt to drive out extra moisture and add flavour.

I like to use Maldon sea salt as the crystals are large and easy to pack into the slices of rind. Maldon has a great taste as well. When the pork comes out of the oven the rind will have crisped and almost bubbled up with flecks of salt crystals embedded into it to make the crackling taste divine.

By now the oven will be bouncingly hot so get the pork into a roasting tray and put it into the oven for twenty to thirty minutes.

This is a very hot oven and what it does is sear the rind and start making the crackling. If the oven isn’t hot then the rind won’t ever get crispy.

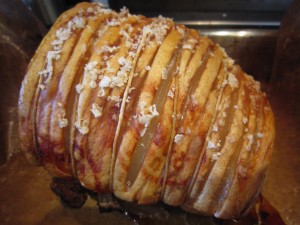
After the first burst of heat you will see, when you peek inside, that the slices are separating and the rind is starting to cook. You just know, when it looks like this after half an hour that it will have the perfect crackling when it is finished!

You can turn the oven down now to a moderate 170 degrees C/340 degrees F and just leave the joint to cook slowly for a two and a half hours……

There now.

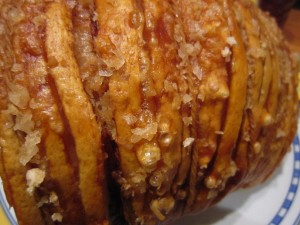
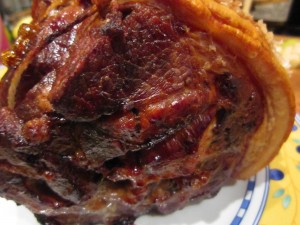
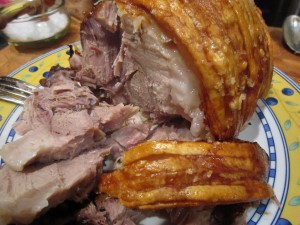
Golden, bubbled and crisp. Studded with salt crystals promising that every mouthful will be deliciosuly savoury.

When you get it out of the oven if you rap on the top of the crackling it makes a hollow sound.

The meat is dark and caramelised from the fat dripping over it as it roasts.

The fat layer has almost disappeared in the long slow cook, making the meat juicy and the crackling crisp.

The crackling strips snap easily into bite sized bits…. perfect for nibbling at while you slice the pork……

A wet grey afternoon can be ignored because you are inside, in the warmth with a marvellous meal, just ready to share with your loved ones.

That is Heaven… that is my guilty pleasure and that is one more reason to appreciate the Bear not liking everything I adore!

Roasted pumpkin seeds

Sometimes we all need a little treat.

I don’t tend to buy crisps, crackers or olives  to nibble at with a glass of wine unless we have guests. I don’t know why… maybe I think we don’t deserve it or maybe it is that we are fat enough and having extras isn’t a necessity. Perhaps I think it is a needless extravagance?

But you know what? We do deserve to have something every now and again. After all, the person I like best in the world would be sharing them with me and I’m happy enough to put stuff out for people I don’t love half as much.

So, what follows is the ideal compromise. It’s healthy, it’s tasty and it doesn’t cost very much at all.

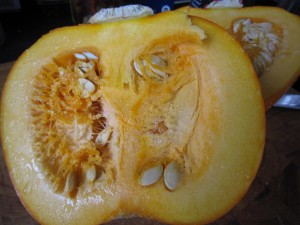
I’d bought a small pumpkin to make some Puy Lentil and Pumpkin Soup and I’d had to scoop out all of those plump seeds. What better than to use something that others might just throw out?

They are all embedded in the fibrous middle but they are easy enough to remove if you gouge at it all with a spoon.

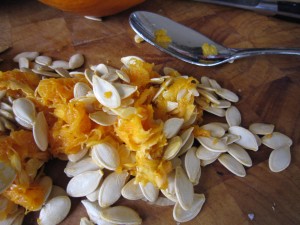
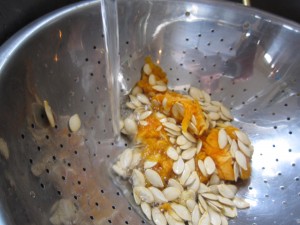
If you put them in a colander and run water over them it’s quite easy to pull the orange fibres off, leaving just the seeds behind. They will feel very slippery so give them a good rub in fresh water.

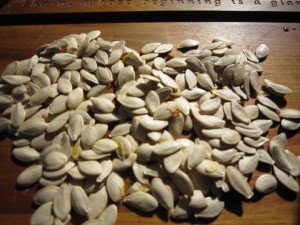
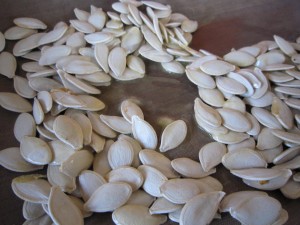
Once they are clean, spread them, out on a board and leave them to dry off.

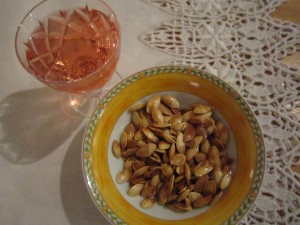
This time I wanted plain and simple butter and salt roasted pumpkin seeds (I often make them and flavour them with things like chilli powder or spices ) but there’s something rather delicious about the plainness of the roasted seeds… plain, certainly but tasting deliciously of butter and salt!

Get a flat baking tray and put a knob of butter and some salt on it (I always use a silicone sheet because it is so easy to clean and doesn’t tear if you scrape at it. If you haven’t got any, it doesn’t matter – use tin foil or be prepared to clean the baking tray)

Put the tray in a pre heated oven at 200 degrees C/390 degrees F and get the butter melted and hot.

Toss the pumpkin seeds in the melted and salted butter and put them back in the oven for ten minutes or so.

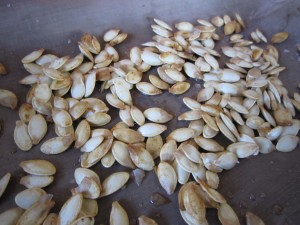
After ten minutes, give them a shake… they should be browning nicely.

Put them back in if they need a few minutes more – this will depend on how much moisture was left in the seeds.

Once they have cooled… put them in a bowl and share with your best friend.

A glass or two of wine makes this the perfect pre-dinner snack – healthy, tasty and all it took was a knob of butter, ten minutes and some otherwise thrown away seeds!

Strawberry Surprise Marshmallows

Some time back, I was at work and I had a fancy for something sweet. That’s odd, for me as I generally tend to prefer savoury things.

All I could find was some Turkish Delight that a Turkish colleague had brought back from a visit home. Normally I don’t like Turkish Delight because it is too sweet and over scented for me but this was delicious – it was stuffed with pistachios and the contrast between the soft delight and the crunchy pistachio was unbelievable.  It really did make me a convert. Our friend, Ender, explained there is a world of difference between the mass produced cheap stuff we get over here and the high quality Turkish Delight produced in Turkey. People make it at home, he said, and that’s even better. All sorts of flavours are made, all sorts of additions to the delight.

It made me think about what I could do…..

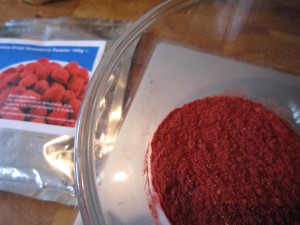
I remember the excitement I felt when I first read about freeze dried food. It was what the astronauts ate, apparently, and it seemed so exciting. I was a child at this point, mind you, so it’s understandable. Fancy being able to eat something like that….. and then I found you could actually buy freeze dried fruit. I spotted freeze dried strawberries. I had to buy some. And when I saw the freeze dried strawberry powder as well, my mind really started ticking over.

Maybe I could make Turkish delight and use the strawberries instead of pistachios? Perhaps use the strawberry powder in cakes as a swirl? Or in meringues to make them all pretty and pink? Macaroons…whipped cream…oh the  ideas were just pouring out. But I didn’t do anything because I was too busy dealing with the huge apple harvest. I made cakes and apple butter and apple mash and apple crumble until, at last, even I was fed up of apples.

A month or so later, as I sat down at home one night, I started to read Good Food magazine and spotted a recipe for bramble stuffed marshmallows. Well, I thought, why not make marshmallows instead of Turkish delight and put the freeze dried strawberries in there?

It seemed meant to be. I was on trend!

I would have to do something with the strawberries because I had opened the packet….

It seemed pretty easy.

First of all, some cornflour and icing sugar needed to be mixed together as this would be the dusting that the mallow is poured upon. If you don’t do that it will stick.  Now, although I wanted something sweet, I didn’t want too sweet. If I used the strawberry powder that would have the same sort of effect and add a touch of sharpness, stopping everything becoming too sickly.

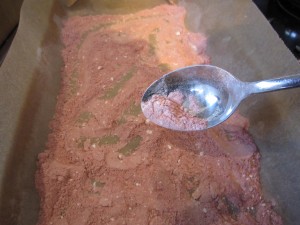
I made a 100g/ 4 oz mix of  cornflour and freeze dried strawberry powder, using slightly more strawberry powder. This was going to be the dusting that stops the mallow sticking together.

In order to get the bouncy texture of the mallow you need gelatine.

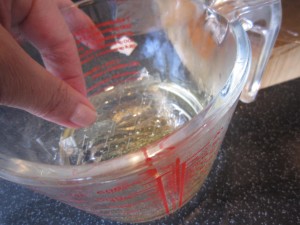
9 sheets were put in a pyrex jug with 150 ml of hot water. It softens and starts to dissolve quickly but it will probably need a mix with a fork to get a good, even distribution

I lined a baking tray with baking parchment and scattered a good layer of the strawberry and cornflour mix over it

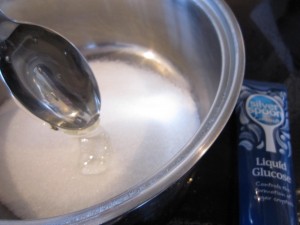
One tablespoon of liquid glucose was added to 1 lb/450g of granulated sugar

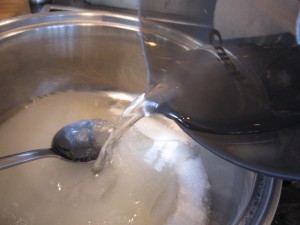
200 ml of cold water was added and the pan was put over a medium heat to start the sugar dissolving.

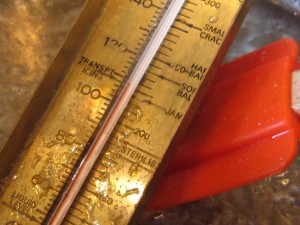
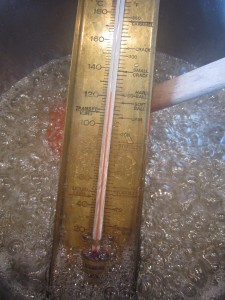
Now, I have a sugar thermometerand I placed that in the pan too. Once the sugar was dissolved I turned the heat up to start to get the sugar solution boiling. I had to get it to 125 degrees.

if you haven’t got a thermometer, don’t worry, just time it, for a start. To get to the right temperature takes about 10 to 15 minutes of boiling. You can check how well it is doing after 10 or more minutes by dropping a little bit into cold water. If it sets into a soft ball you know you are at the right temperature.

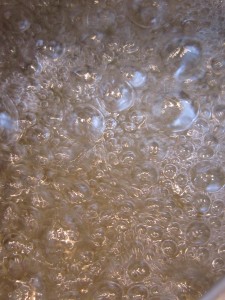
The bubbles start to look different – thicker and perhaps more glossy.

While it is getting to that stage, start whisking the egg whites untill they become stiff and white. Once you have them at that stage there’s no harm in leaving them in the bowl, ready for the next bit.

And there you have it – I timed it – it was just over 13 minutes to get to this stage.

Now, carefully, in two stages, pour half the sugar syrup into the dissolved gelatine. Give it a little stir and then add the rest of the sugar solution.

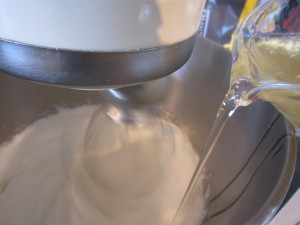
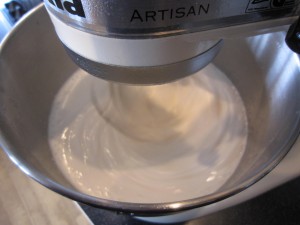
While the whisk is going, start pouring in the gelatine sugar mix into the already whisked egg whites.

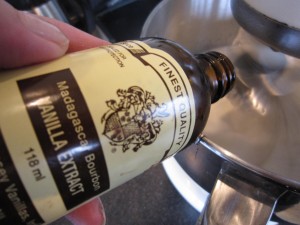
Add  a teaspoon of vanilla extract as the whisk goes on

And carry on whisking for ten minutes or so – you will see the mix become shiny and somewhat stiff.

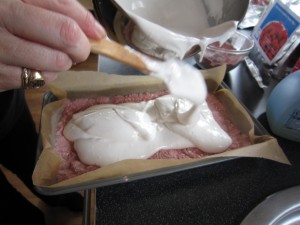
Pour half of the mix onto the strawberry dusted baking parchment

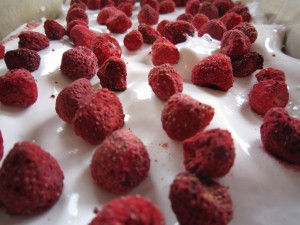
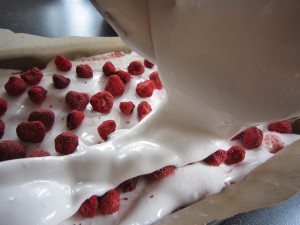
Then put freeze dried strawberries all over the mallow

And start pouring the rest of the mallow over the strawberries

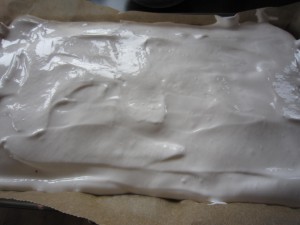
And then leave to set.

This will take a couple of hours at least. (I put mine in the fridge later on as I had been doing the washing and there was a lot of moisture in the air. A fridge is a very dry environment so that helped everything set. Bear that in mind if the weather is funny and humid)

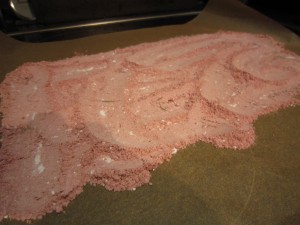
The rest of the strawberry powder mix was poured onto another sheet of baking parchment

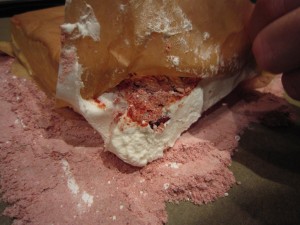
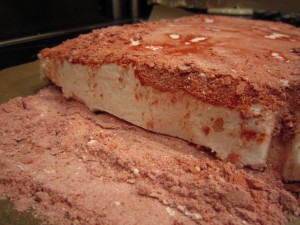
…and the cooled and set mallow was upended onto the powder

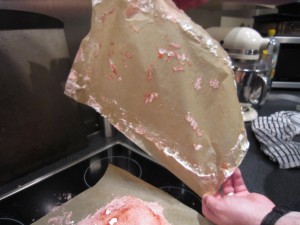
The bottom layer of paper was now on the top and was easy to pull away (the Bear did that bit as I needed to take pictures and it is a bit sticky….)

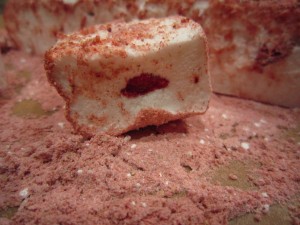
There it was.. white and bouncy mallow with a pink dusting and an occasional strawberry poking through

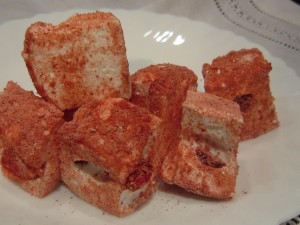
We cut it all into squares – there were over 60 pieces!

They were fabulous. The sharpness of the strawberry powder stopped them being too sweet and the surprising soft crunch of the freeze dried strawberry in the middle really enhanced the softness of the mallow.

The Bear and I ate a piece. Then another piece or two ….and we realised that, delicious though they were, we would have to stop.

I put the marshmallows in an airtight box, lined with baking parchment and decided to take the rest to work. After all, it had been thanks to Ender’s generosity with his Turkish Delight that started this whole experiment off.

They were eaten! And people who normally find marshmallows too sweet had some… and then had some more!

The only downside? Ender, who inspired the whole thing, wasn’t in the office that day!

Should you make this? Yes, I think you should. I know it involves boiling sugar but that’s fine. Just time things if you don’t have a thermometer and it really is rather easy.

And to make it easier for you – here’s the recipe.

Strawberry Surprise Marshmallows

30g cornflour; 70g freeze dried strawberry powder; 9 sheets of gelatine; 450 g /1lb granulated sugar; 1 tablespoon of liquid glucose; 2 large egg whites; 1 teaspoon vanilla extract; freeze dried strawberries.

* Mix the strawberry powder with the cornflour

* Dissolve the gelatine sheets in a pyrex jug with 150ml of hot water. You will need to stir it round

* Line a tin (I used my normal baking tray for flapjacks) with baking parchment and put down a layer with the pretty pink strawberry and cornflour mix. The gooey mallow mix will go on this so make sure the paper is covered

*Put the granulated sugar and the liquid glucose in a heavy bottomed pan  and add 200 ml of water. Stir over a medium heat untiol the sugar has dissolved completely  and boil until a sugar thermometer reads 125 degrees. This takes between ten and fifteen minutes. With no thermomemter, drop a little of the sugar mix into a glass of cold water after twelve minutes –  if it sets as a soft ball then it is ready.

*While the sugar is boiling, start whisking the egg whites until they are stiff

*When the sugar is at the right stage pour it carefully into the pyrex jug that has the dissolved gelatine.

*Keep on whisking the egg and add the gelatine and sugar syrup in a steady stream.

* Add the vanilla essence.

* Keep whisking until the mix is shiny and stiff.

*Pour half into the lined tray

* Add the freeze dried strawberries then pour the rest of the mallow mix over and leave it to cool for at least a couple of hours

* Put more baking parchment on the bench and scatter the rest of the cornflour/strawberry powder mix over and then turn the set marshmallow onto that. Take off the top layer of paper.

* Using a sharp knife, cut into squares.

Sweet Basil Biscuits

As you will have noticed from the previous post about my balcony garden in the sky, one of the things I love to do is grow my own basil – one of the most aromatic and useful herbs there are.

It saddens me when I see it in little pots in the supermarket. All you get are weedy, little, soft stems and a poor plant that is far too big for the pot. The seedlings are grown indoors in their thousands and, once bought and brought home, tend to die quickly in their thousands too. The best basil is grown from seed and allowed to get good and strong outside. I’m certain that the buffeting of the wind strengthens their stems. The sunshine concentrates their scent. Is there anything nicer than the scent of fresh basil? It’s enlivening.

OK, there’s a lot of the time when you simply CAN’T grow basil outside but when the opportunity is there – make the most of it. Failing that, of course, you must have a windowsill?

I like to grow the usual sweet basil, with its large soft leaves and the smaller leaved variety, Greek Basil. It’s not really Greek at all, but Italian, originating in Chile. An international basil with the most wonderfully strong scent. It grows tidily too, like a tight,  little ball. I keep promising myself that next year I will grow it in two, tall and elegant pots and put them on either side of the french doors to the balcony. Can you imagine the smell of that, wafting into the living room on a hot night? Scented topiary. Blissful.

I use my basil in traditional ways in tomato based sauces, scattered on top of  beautiful buffalo mozzarella with tomatoes as a delicious salad, in pesto for a simple pasta dish and in oil that I would make to drizzle over salads or cheese or bread later. Always it seemed in savoury ways. I’d never even thought of using it in something sweet.

And then, in last month’s Observer Food Magazine,  Nigel Slater wrote about going to the Royal Horticultural Society’s Chelsea Flower Show and meeting his friend, Jekka McVicar (she of the famous Jekka’s herbs). She handed him some basil biscuits…..

Basil biscuits?

Could this be a new use for some of the basil I was growing? I had to try.

And a biscuit, too…. well, it would be in the interests of research, obviously. You are allowed research on a diet, I’m sure of it. Obviously, me working in a University has caused me to develop serious academic concerns.

Besides, it was quick and easy. What more prompting did I need?

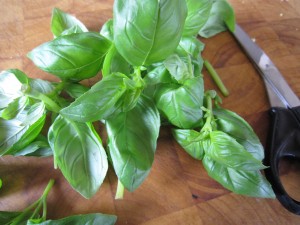
No more prompting but I did need 100g of butter, 50g of sugar, 50g of ground almonds, 100g of plain flour and a large bunch of basil leaves.

I like the symmetry of that recipe – easy to remember quantities and not many ingredients. Perfect!

The oven was switched on to 180 degrees C ( 160 degrees if you have a fan assisted oven) 350 degrees F.

It was a simple matter of creaming the butter and sugar together

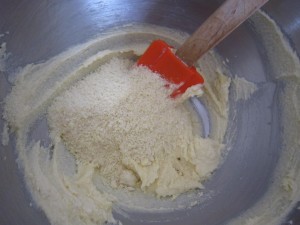
Then adding the ground almonds and then the flour.

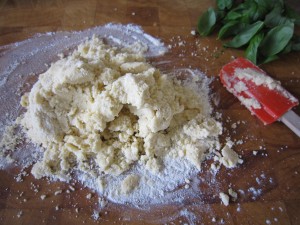
Pop that out onto a floured board and knead it into a dough.

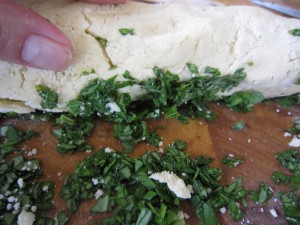
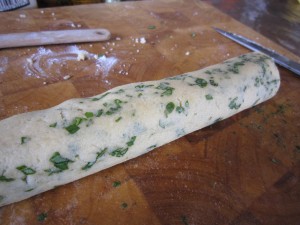
Then, chop your basil and start rolling the dough into it… the basil will  get right in there and the smell is magnificent.

See?

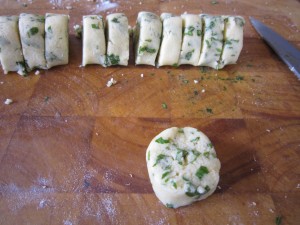
All you have to do now is slice the roll into biscuits! The recipe says 15 -20 biscuits from this amount of dough so use your judgement. I can never work out, with any speed, just how big 1cm is. It’s about the width of a little finger, if that’s any help? And yes, I did just measure it with a ruler to check.

(Comes of being a child of the crossover age when we switched from Imperial measurements to metric, I suppose, although I do think all of us Brits are like that. It doesn’t matter how long we have been metric, or how many regulations there are to stop shopkeepers selling us half a pound of butter when we should be asking for grams, or a pint of milk  instead of 0.5862 of a litre; we still, generally, think in pounds and ounces, pints and gallons, feet and inches.

Look at when a baby is born – we still coo with delight (and understand exactly) what a good 8lb baby will be like. Same goes for feet and inches. I am five feet three inches tall. I can understand that. 160 odd centimetres? Sounds like a giant! And my waist… well that used to be 24 inches – though with age and greed that has certainly increased. 24 inches? You know where you are with that. But 61 centimetres? Dear me.)

So, slice your biscuit dough into the appropriate size. Use whatever measurement you like. I am most fond of commonsense as a measurement.

Put them onto a baking tray – either grease it well or use, as I do, a silicone baking sheet so the cooked biscuits can slide off easily. (Saves on the washing up, too!)

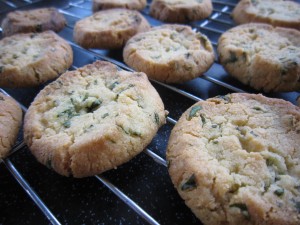
Into the oven for 15 – 20 minutes and then you get this….

Deliciously golden, green flecked biscuits… the smell is utterly gorgeous. The taste is subtle, sweet and delicious.  very definitely more-ish.

Whoever would have thought that putting basil into a biscuit could be so inspired? Jekka McVicar deserves a medal.

I took some in to work and they were devoured there too.

All I can say is, basil is not just for tomatoes but for biscuits too!

Meringue, dulce de leche and cream… what’s not to like?

After I’d made the dulce de leche, the important thing was , first of all to use it and secondly, use it sensibly to get as much joy as possible from eating it for as long as possible.

It would be so easy just to spoon it down…. but I resisted and set to, thinking about what to do with it all.

It just so happened that we were going to a barbecue with our friends and I had promised to make the desserts. An ideal opportunity to make something truly delicious…..I had once made a rather delicious meringue, cream and dulce de leche dessert when we had everyone round to out house. I’d bought the dulce de leche then, of course, I wouldn’t have dreamed of making my own.

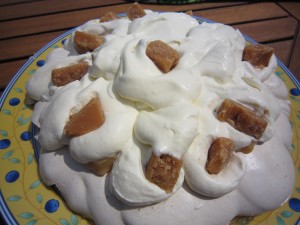
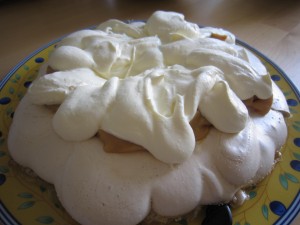
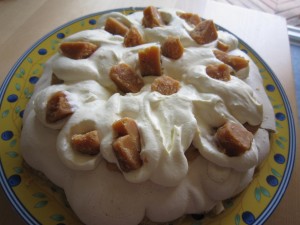
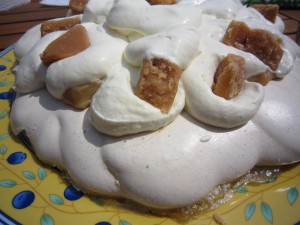
I’m sure there should be a name for this but I don’t know what it is… think Pavlova base, spoonfuls of dulce de leche, piles of whipped cream, studded with little nuggets of the best fudge you can get…. mouth watering yet?

It’s not a Pavlova, of course, because Pavlova has fruit as a sharp contrast to the sweet crunchy and chewy (yes, a good meringue should be like that!) base and the smoothness of the cream.

This was going to be sweetness personified, mellowed with the whipped cream. That was good though, because the people that were going to eat it have a distinct liking for sweet things. Anyway, it was a good day – we would be meeting with our friends, the weather was marvellous and a barbecue was planned. The fact that the World Cup was on that afternoon seemed to heighten the joy of some people….

So, first things first. I needed to make the meringue base.

Start by preheating the oven – 150 degrees C (130 if it is a fan oven) or 300 degrees F.

Make sure you have a good baking tray and line it with either baking parchment or a silicone liner. You will need something like that so you can peel the meringue off when it has cooked.

The important thing about making meringues is that you must – absolutely MUST – make sure there’s not a speck of fat in the egg whites. So when you are separating the eggs be careful, very careful. Make sure the bowl you will be using is spotlessly clean.

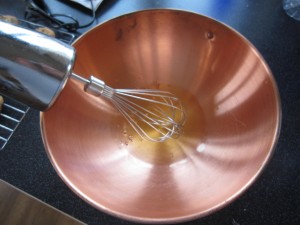
When I make meringue, I use my copper bowl.  My all round hero food-guru, Harold McGee told me to do so because it stabilises the egg whites and makes a better foam with less risk of it all collapsing. It’s not just a wild fancy to have yet more gorgeous kitchen equipment, you know… it does work.  You don’t have to have one but I bought that back in the days when I had a well-paid job and I  could indulge myself.

If you haven’t got one, don’t worry. A pinch of cream of tartar can do the job of stabilising just as well.

The important thing is that you whisk the whites well, no matter what bowl you are using.

Three egg whites in a spotlessly clean bowl can be whisked to meringue perfection in a few minutes. 

Before you start whisking, though, weigh out your sugar – you need 175g/6oz of caster sugar (which for those of you in Canada – Lorraine- or America, means super fine sugar.) When it is time to start adding the sugar, little by little, you want to have everything ready.

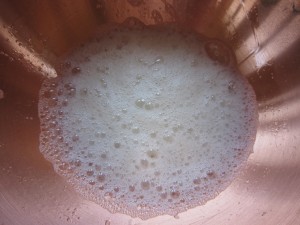
Whip until the egg whites have formed soft peaks and you can tip the bowl up without it all falling out. Only then do you start to add in the sugar, bit by bit.

You can see the whites becoming glossy

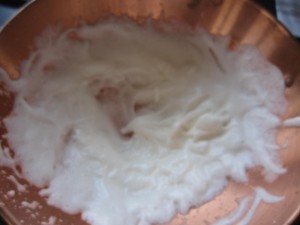
When everything has been whisked together and you have a mound of glossy, white fluffed up meringue mix, spoon it out onto the parchment or the silicone liner, making a circle as the base. Some people draw circles on the paper to make sure they get a proper circle but I never do. It’s a meringue for goodness sake… it is going to be pillowy and blowsy and laden with whipped cream. We aren’t talking architecturally precise. I like the organic look of it when it comes out – so very obviously not manufactured in an industrial complex.

Once you have the circle, you make a sort of blobbed wall around the edge with more spoonfuls of meringue. You are supposed to twirl each blob round with a cocktail stick to make little pointed swirls of meringue…. but….

And this is a big but.

Normally my meringues are fine. But normally I am not attempting to make then in a boiling hot kitchen on one of the hottest days of the year (31 degrees C) with lots of humidity.

Humidity is the killer of meringues. I waited until 8 at night in the hope the weather would break and the humidity lessen.. but it didn’t happen. I had to have the not-really pavlova ready for the next day. I had to get cracking.

Reasoning that it would be OK, if not as beautiful, I got on with it. Into the oven it went and the temperature was immediately turned down to 275 degrees F/140 degrees C/120 degrees fan assisted.

It was going to take an hour to cook and once that hour was up, the oven is switched off and the meringue left there overnight. That lets it dry out perfectly.

So, the next morning, I opened the oven to take out the base.

Ah. It was as I thought. As I knew really, when I first put it onto the baking sheet. Despite whisking and using my copper bowl that dratted hot and wet air had wreaked havoc. It was OK but it wasn’t billowing into crisp peaks of perfection.

 It wasn’t the most beautiful meringue I have ever made but, what the heck. It was going to be the most delicious meringue I’d ever made and that’s what counts.

The next day was brighter and hotter than ever. I carefully peeled off the silicone paper and put the meringue onto a plate so I could take it to J’s house.

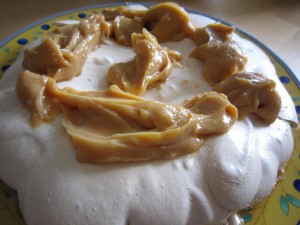
Once there, while he and N busied themselves with the barbecue, I spooned the delicious dulce lecheover the base of the meringue.

Just look at it….. thick and rich and caramelly

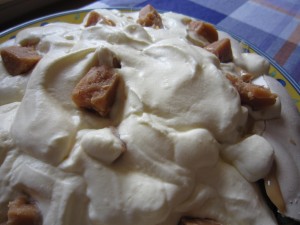
Next, great luscious spoonfuls of whipped cream

Then, pieces of delicious fudge scattered over the top….

And more whipped cream on that.

It was delicious. It was a triumph.

Which is more than you can say for the football.

England were out of the World Cup but the not-really pavlova was a winner. Not a scrap left. Depite it not being the most beautiful meringue base ever.

Don’t despair if your meringue isn’t perfect. Looks aren’t everything you know. Taste is.

Dulce de leche – Argentina’s iconic sweet spread.

Every country has some foods that are instantly recognised as being associated with it – for instance, in England  it is going to be roast beef and Yorkshire Puddings, or maybe fish and chips; Japan is probably  sushi. France? Maybe Foie gras or cheeses such as Camembert and Brie.

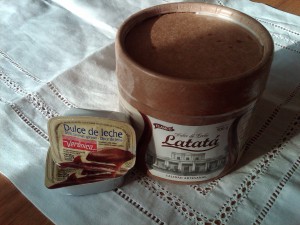
Argentina is famous for its meat, of course, and especially for the beef, but all Argentineans have a deep longing for sweetness….. because wherever you go in Argentina you will find dulce de leche (literally “sweet of milk”)  – the most delicious caramelised milk, made from sweetened condensed milk. Sweet, sticky, almost softly caramel toffeeish…

When you go to breakfast, there are little pots of it, waiting to be spread on toast… when you have a pastry or a biscuit, there’s usually dulce de leche involved somewhere, either as a filling or a flavouring. You can buy lovely large pots of artisan made Dulce de Leche or commercially produced packets. Whatever you get is guaranteed to taste delicious.

One of our dearest friends is from Argentina and he always looks wistful at the mention of dulce de leche when he is far away in cold, wet England.

The thing is, it’s not difficult to make… it is, however,  (usually) time consuming… and, in my eyes at least, just a bit scary.

The traditional way is to take a large quantity of milk and sugar and, after pouring it in a pan, slowly simmer it until it thickens as the water evaporates and it caramelises to a wonderful golden brown. Thing is, you have to stir it constantly – you can’t walk away and leave it.

Another way is to take a tin of sweetened condensed milk and boil it, unopened, in a pan for a couple of hours. You can’t walk away from that, either. If you let it boil dry the tin will explode and the kitchen (and any unwary inhabitants) will be covered in superheated caramel. If you avoid that fate then you have to take care to leave the tin to cool properly before you open it.

See what I mean about it being a bit scary? And if you went down the boiling tin route, how would you know that it had caramelised perfectly?

So, I was content to eat it but too afraid to try making it.

Until I found, whilst idling around various food blogs, (one of my favourite activities) an article by David Lebovitz telling me how to make it safely and quickly!

He says to make it in the oven in a bain marie and that it only takes one and a quarter hours…… what’s to lose, I thought? I just had to try it out.

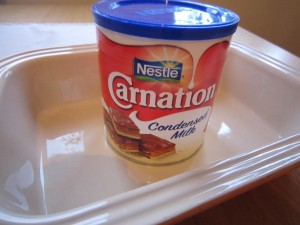
I needed an oven proof dish and a tin of sweetened, condensed milk.

The oven needed to be preheated to 220 degrees C/200 degrees if fan assisted) 425 degrees F

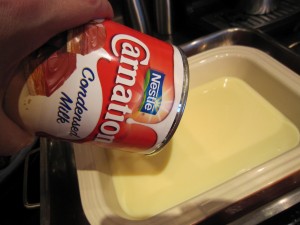
I put the oven proof dish inside a large metal roasting dish and then poured in the milk.

A sprinkle of Maldon sea salt was stirred through.

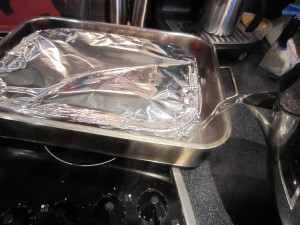
I wrapped tin foil tightly over the dish and poured hot water into the roasting pan until it was half way up the sides of the dish with the condensed milk it.

And that was it.

Into the oven for an hour and a quarter, or thereabouts.

And no standing over it, terrified that it might boil dry and the tine explode… no standing for hours, stirring it slowly. Just as well because this was a Friday night after my first week back at work with jet lag and all I wanted to do was slump on the sofa.

I did check after about 40 minutes that it hadn’t boiled dry (it hadn’t) and I couldn’t resist having a peek at the colour…..

It was turning golden!

And, oh, the smell….. delicious, rich, sweet caramel aromas coming from the oven… Someone should make that smell into a scented candle or room perfume…

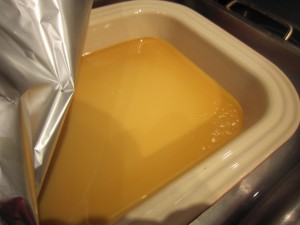
And then… just an hour and a quarter after putting it in the oven

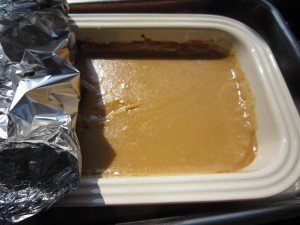
It looked good.

But it was too hot to taste so I had to leave it to cool. David said to whisk it to get out lumps out but it was fine.

Oh my word.

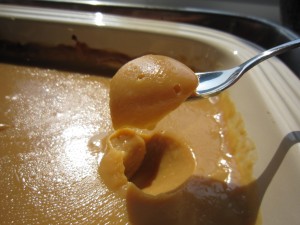
Thick, delicious, spoonable delight. It was dulce de leche.

And I had such plans for it…..

But I needed a real assessment to be done – was it good enough? Did I have to go back to the traditional way of doing it?

As I said, we have a very dear friend from Argentina. It was his marvellous mother who organised all of our travels around the country (Thank you, P!) and he was with us for most of them. Who better, I thought, than N?

That was it – when I saw him, I marched up with a spoonful held out in front of me and demanded he tried it.

He liked it! Not only that he said it was delicious!

N’s fiancee, L, had made it the traditional way before now and both of them reckon that this way produces dulce de leche of comparable deliciousness with a minmum of effort.

So, there we have it – quick, safe and easy. Delicious and moreish. Rated by people who know what it should taste like… and by those just want to scoop it into their greedy mouths!

Broccoli a Bear will eat

As you know, I wage a constant battle to get the Bear to eat what I want him to eat. All in the interest of health, you know, it’s not just me wanting to assert dominance over my poor, beleagured husband. It makes things easier as well, if you both eat the same things. I am having some success – he is now eating prawns and has started to eat broccoli.

Yes, I know, not everybody loves broccoli and for some the slightly bitter tang puts them off, but my reasoning is that if the Bear can eat raw broccoli with a dip as a crudite, or broccoli and stilton soup, or even the deliciously tasty Broccoli and Stilton Pastryless Pie then he can eat it as a vegetable.

And not complain.

Finally, it seems, I may have cracked it.

I’d made the salt and pepper pork tenderloin for supper and knew we needed something with it. He’d started with a crisp salad of leaves, red and yellow peppers and tomatoes so I reckoned that if he didn’t eat what was served with the pork, that wasn’t going to harm him.

Anyway, I love broccoli.

I had gone to our local farm shop and come back with two gloriously green and hard heads of broccoli. We have been on a high protein and low carb diet and butter (thank God) is allowed. I had a feeling that I could make something delicious – well, delicious for me – and if he was hungry enough then he would eat it.

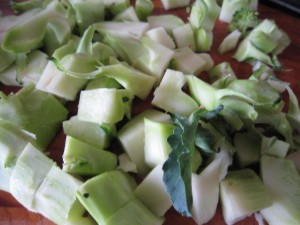
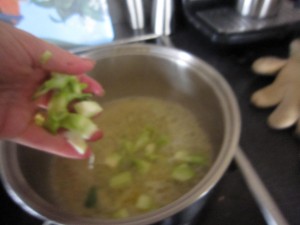
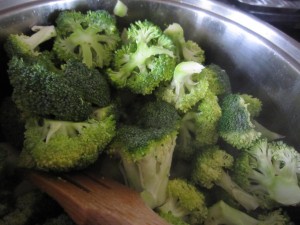
So, I chopped the florets off and sliced the stalks into smaller chunks.

Broccoli stems take longer to cook than the florets so they need to go in a pan first with some butter and a sprinkle of salt. Put it on a medium heat so you don’t burn things.

Give them a couple of minutes to soften slightly before you add the florets.

Toss them round in the butter – you want them to soften and cook but not turn to mush.

It still looks green and delicious and it is holding its shape but now there’s a softness about it.

Sooooo… all well and good but I have to get the Bear to eat it.

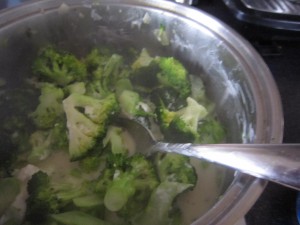
I need to up the protein level as well so a great big spoonful of Philadelphia cream cheese goes in and melts over the broccoli.

It is now on a low heat, stir it round and let it cover everywhere.

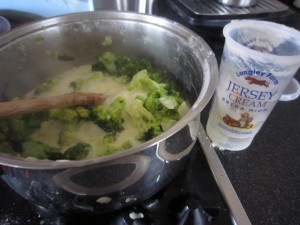
A spoonful of double cream helps loosen things and makes a delicious sauce.

With salt and pepper added to bring everything together, the creamy, faintly coolly-cheese (you know how cream cheese has that sort of taste) sauce the broccoli feels slightly tamed.

Take the broccoli out and reduce the creamy sauce so it thickens, adding a knob of butter – this makes it taste even more rich and delicious. Just the thing to add to that steaming green goodness.

The bitterness has disappeared and you have a savoury, tasty pile of broccoli, just ready to serve to an unsuspecting Bear.

So I did. There was his pork just asking for something to sit along side it… there was that sauce just begging to be poured over everything. I served it up.

After all, he’d already had a lovely big crisp salad… if he didn’t like the broccoli it wouldn’t be so bad.

It was delicious. Utterly, absolutely, totally gorgeous. I had justified giving myself the larger portion because, after all, he doesn’t like broccoli.

“Did you like it?” I asked.

“Yes…. I just wish there was more broccoli…. ”

Drat. There was more and I had my greedy little eyes on that but in the interests of converting the Bear to a love of broccoli, I just had to do it. This was unprecedented in our lives together – my Bear actually asking for broccoli. He got the lot.

Now, once I have got him to eat it like this I can start to cut back on the cream and Philly – not too much, you understand – and it becomes even healthier.

Maybe I won’t though. Maybe it is just delicious as it is.
Oh, and you know what? He’s asked for, and eaten, broccoli cooked like this several times since. So maybe if you have children who find broccoli just too bitter, try it like this. You never know… one day you might hear the magical words “I just wish there was more broccoli”
Omelette Arnold Bennett

Although we live in a large city, it is a city surrounded by farmland. There are amazing local food producers and farm shops everywhere.

Our closest farm shop, Spring Lane,  is less than a mile from our apartment and I go there every weekend to buy eggs, cheeses, vegetables and meat. There’s a bakery there, too, and sometimes… just sometimes, I buy fresh cream cakes.
But the best things of all, in my eyes, are their fantastic eggs.
Free range, with fantastic golden, almost orange yolks… and oh,  the size of them….

I’d gone there as usual and picked up a dozen extra large eggs and got my fresh vegetables and came back. I had a fancy for an omelette.

Specifically, Omelette Arnold Bennett, the beautiful, open omelette with smoked haddock and a creamy cheese sauce.

(Whenever Arnold Bennett stayed at the Savoy Hotel, he ordered this and loved it so much that wherever else he travelled  he asked for it. Eventually, the Savoy Hotel named it after him and it has stayed on the menu ever since)

I always buy the extra large eggs at Spring Lane and this time, being in a hurry, I grabbed my dozen eggs,  some fresh vegetables and cream, then  set off home again.

I hadn’t checked the eggs because I have never before found a broken one in one of their boxes (they are so careful with all of their produce) so I hadn’t looked inside the box. Anyway, there I was, standing at the bench, about to prepare for the omelette when I noticed that the lid wasn’t down properly on the box.

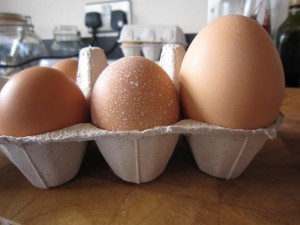
I opened the box to see this rather surprising sight

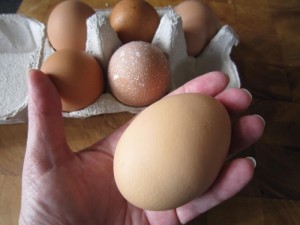
Look at the size of that!

That wasn’t just an extra large egg… that was an extra, extra large egg.

In the UK there are regulations about egg sizes. Each egg size, from pullet to small, to medium, to large and then to extra large has a weight range.

 An extra large egg  must be 75g and above.

That beauty weighed 114g.

All I could think was that the hen who was involved in that production was probably just as surprised as I was.

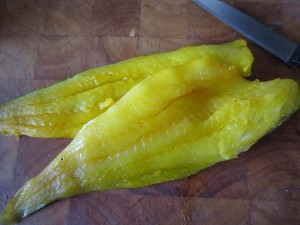
Onto the omelette then – I also had some smoked haddock

(actually, I prefer undyed smoked haddock, but needs must and all that. I wanted that omelette and I wanted it that day so I was prepared to accept the dyed fish)

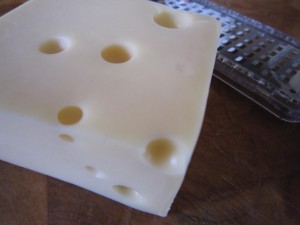
And some cheese – both Emmental and Gruyere.

And I always have pots of cream in the fridge.

Now there are plenty of recipes available to tell you how to make Omelette Arnold Bennett and some of them are very involved indeed – telling you to make flour based cheese sauces, making you use lots of pans and it is all very labour intensive. What I do would get me thrown out of the Savoy kitchens but, you know, it works for me.

So… here goes… the quick and easy way to make an Almost Arnold Bennett Omelette …

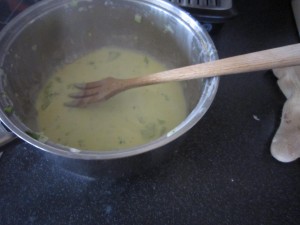
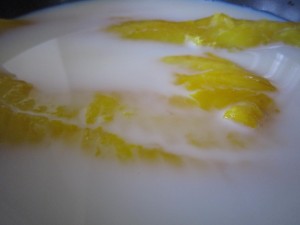
Poach the haddock gently in some milk. You don’t want to boil it fiercely, just sort of bubble along softly for a few short minutes.

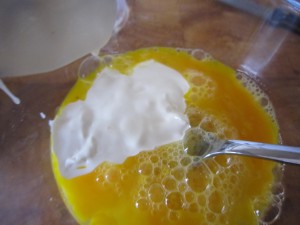
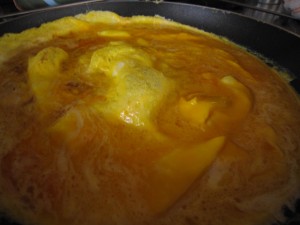
While that’s doing, break 4 eggs into a bowl and whisk them gently with a fork and add a good spoonful of cream.

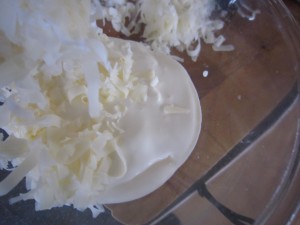
Grate huge handfuls of lovely cheese and add it to another bowl where you have put some more of the thick cream. You want more cheese than cream and the cream needs to be thick.

What you need is a thick and delicious mixture of cheese and cream.

By now, the haddock will be ready, so, carefully, take it out of the pan and flake it.

(Remember to take the skin off before you flake the fish – imagine how difficult it would be to peel the skin off after tearing it to pieces!)

Put the grill on high and get your best omelette pan out and start heating it on the hob with a knob of butter

Pour the eggy, creamy mix into the pan and swirl it round, pulling the softly cooking bits to the middle and letting the runny bits spread out so it cooks gently.

I like to pop it under the grill at this stage so it puffs up slightly in a sort of souffle-ish fashion.

Just a bit though, you don’t want it too cooked because it goes back under the grill later.

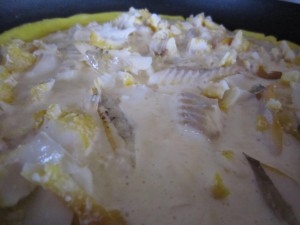
Scatter the flaked fish over the omelette and then pour over the cheese and cream mix and then pop it straight back under the grill.

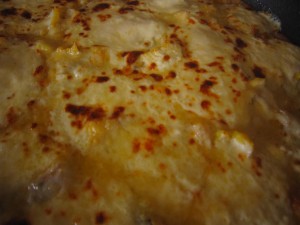
You need a minute or so so the cheese browns on the top

And there it is…..

Fluffy omelette with smokey fish, covered in a creamy cheese sauce…. all you need, perhaps to go with it is a salad

That’s it. Sit down and fork up that gloriously tasty omelette.

Oh, and say a quiet thank you to the hen who valiantly produced such wonderful eggs!

Gin

It’s Friday.

The end of another working week and I have been promising myself a treat for when I get in… when I get in and change from work clothes into my jeans and a jumper.

….. for when I go upstairs and  lounge on the sofa with my feet up.

I can picture it now. I can imagine the comfort of putting my tired feet up…. and I can see, in my mind’s eye

I have a bottle of my favourite gin, Tanqueray and some Fever Tree Tonic and a lemon that is just asking to be sliced….

I’d like to think I lived an elegant lifestyle with cocktails at 6… but the truth of the matter is, I will be sitting, not in an elegant cocktail dress, with a cigarette in a long, slender  holder, looking impossibly elegant and oh-so-well groomed, making light and amusing conversation, no, I will instead be wearing old and faded jeans, warm socks and a rather happily smug expression….

The glass will, however,  still have 1 measure of Tanqueray to 3 measures of tonic, over lots of ice and a slice of lemon.

The glass will still bead with condensation and the ice will still clink in that lovely way…

Cheers!

I deserve it…. and so, maybe do you.

Welcome to the weekend.