Whisky and Ginger Malt Loaf

One morning I was up early, drinking my coffee on the balcony and looking out at the city as dawn broke. For once the sky was clear and in the  far distance I could see as far as the Genting Highlands


When I looked closely I realised I could even see the Genting Highlands resort where we stayed briefly at Christmas

The thing that most amazed us while we were there was that when we opened the bedroom window, we were so high up that clouds came in and swirled around, making the room cold and damp. It was the only time in Malaysia that we ever wanted to wear something with long sleeves because we were chilly.

It was almost like being back in the UK with a chilling, damp and foggy atmosphere. As I sat there sipping my coffee, I must have started to think of  cool days in England because I suddenly thought of a malt loaf I used to bake all of the time there.  It had started off as an ordinary malt loaf but as with all recipes it had evolved over time, being tweaked here and there until it turned into something that I was proud of.


I have an old diary that I have written recipes down in and, as you can see, I have changed things and written my comments in so I could keep track of what was good and what should be done again.

Originally, as you can see, this was just a Bran Fruit Loaf and I suppose it must have been copied down from the back of an All-Bran cereal packet. It was simplicity itself – 1lb of sugar, 1lb of mixed fruit, 1lb of self raising flour, 1 pint of milk and 6 ounces of All-Bran. It made three 1lb malt loaves.  It was good enough to do again… but then I started changing it.

I took out the mixed fruit that was originally specified and added in, at first, just golden sultanas then swapped half the fruit for cherries and soaked them in kirsch because I though it would give the loaves a little bit of a bite. I changed the white sugar to golden granulated and when I was baking, sprinkled more sugar on top for a crispy, sweet crunch. It was good but it still needed something else and I didn’t know what it was.

One day I didn’t have any cherries and besides, I was rather tired of them. Too sweet, I thought. When I looked through the cupboards I found a jar of stem ginger in syrup and suddenly I was struck by an idea. A full pound of ginger would be overkill but if I made the pound of fruit up with the ginger and sultanas I might be onto something.

I liked to soak the sultanas in something to make them plump up – I’d tried tea (which worked well) but as I thought of the ginger,  I realised that whisky would work incredibly well. Whisky with ginger is a great pairing – it works well as a wonderfully warming drink and I knew it would make a beautifully flavoured malt loaf. Perfect with a cup of tea on a cold afternoon.

And so, what I (and a lot of my friends) think of  as the perfect malt loaf evolved.  It is moist, sweet and spicy, soft and succulent with a lovely crunchy top… absolutely just the right thing  for a cool afternoon.

Except it was a hot day in Kuala Lumpur and stem ginger in syrup is impossible to find here. I went to every supermarket I knew of, every gourmet store and expat shop and there wasn’t a jar to be found. I had to send begging messages to people coming out here and then one day I finally got my hands on stem ginger in syrup. I was going to bake the best malt loaf I knew of and it didn’t matter if it wasn’t a cool afternoon. Tea and cake work at any temperature.

First of all, get your ingredients together. This recipe is so old it still uses Imperial measurements but they are so easy to remember, so I stick with them. You’ll need a pint of milk, 1lb each of fruit, sugar and flour and 6 ounces of All Bran.

That translates as 170g of All_Bran which needs to soak in a bowl with 1 pint of milk. I like to do it ahead of time so the All-Bran softens and becomes a smooth mix.

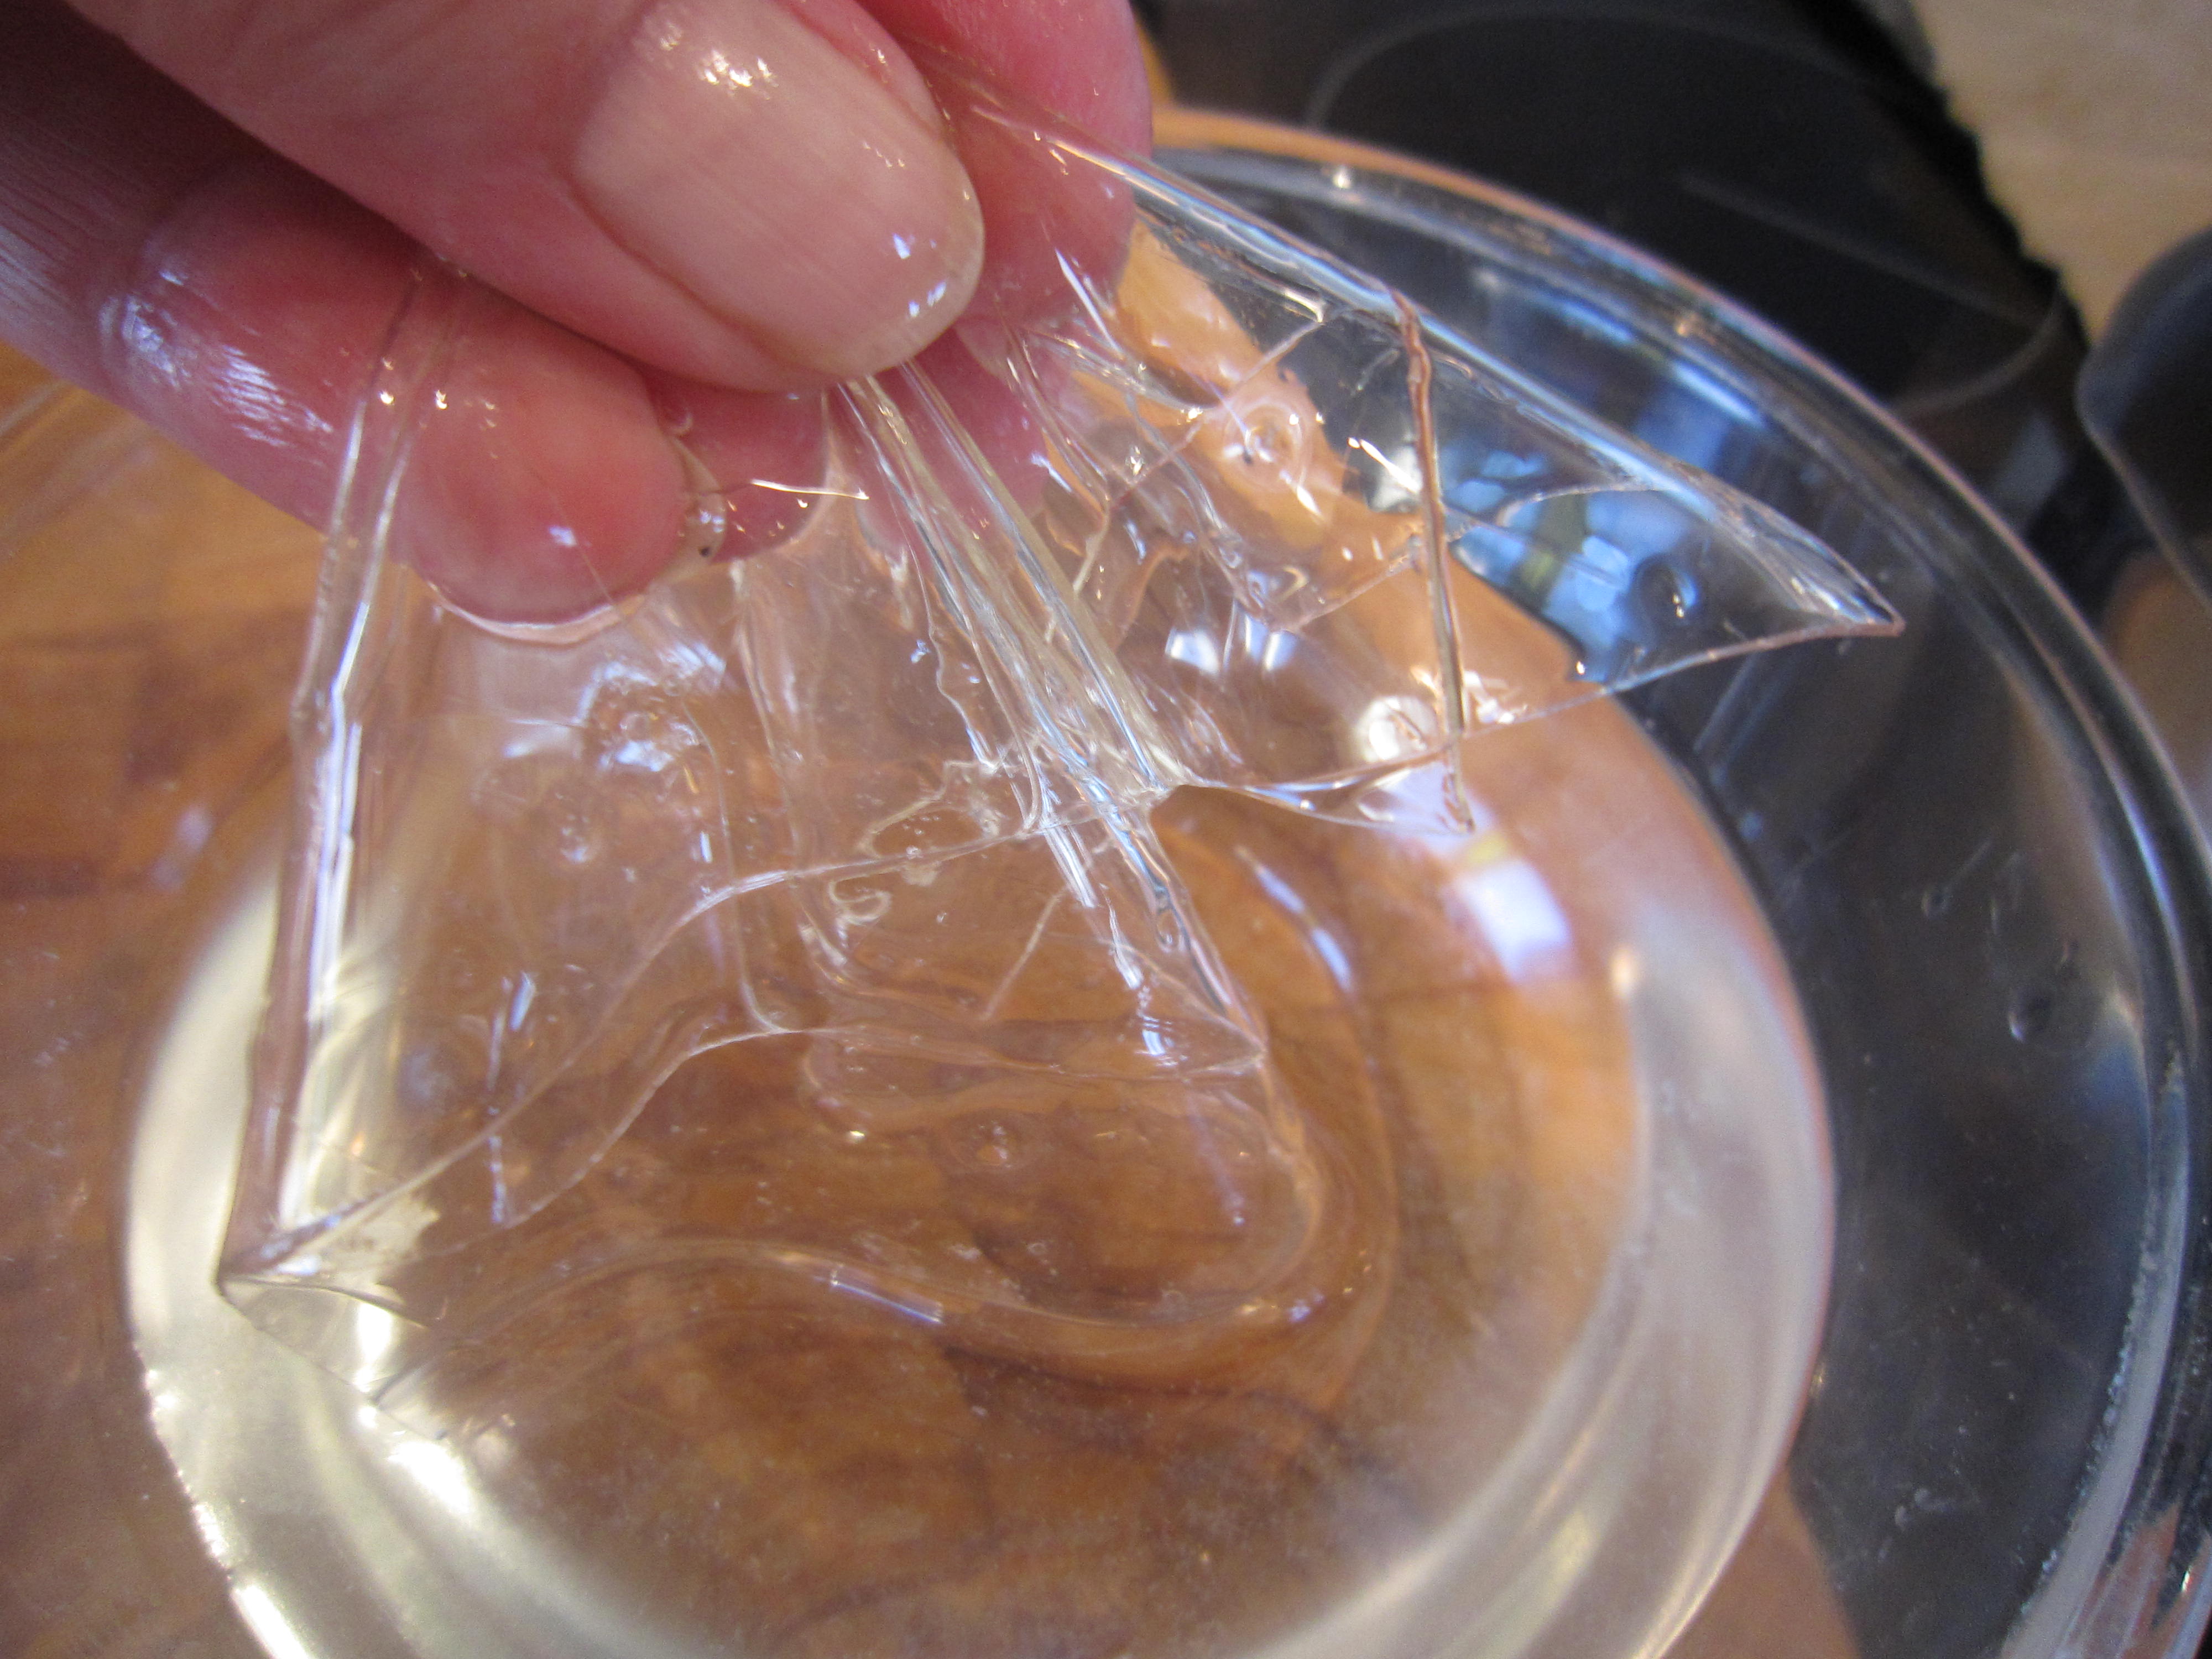
The precious stem ginger in syrup is drained and the syrup is included in the 1 lb of sugar. Yes, it makes a mess of your weighing scale dish but it adds to the flavour, so just do it.

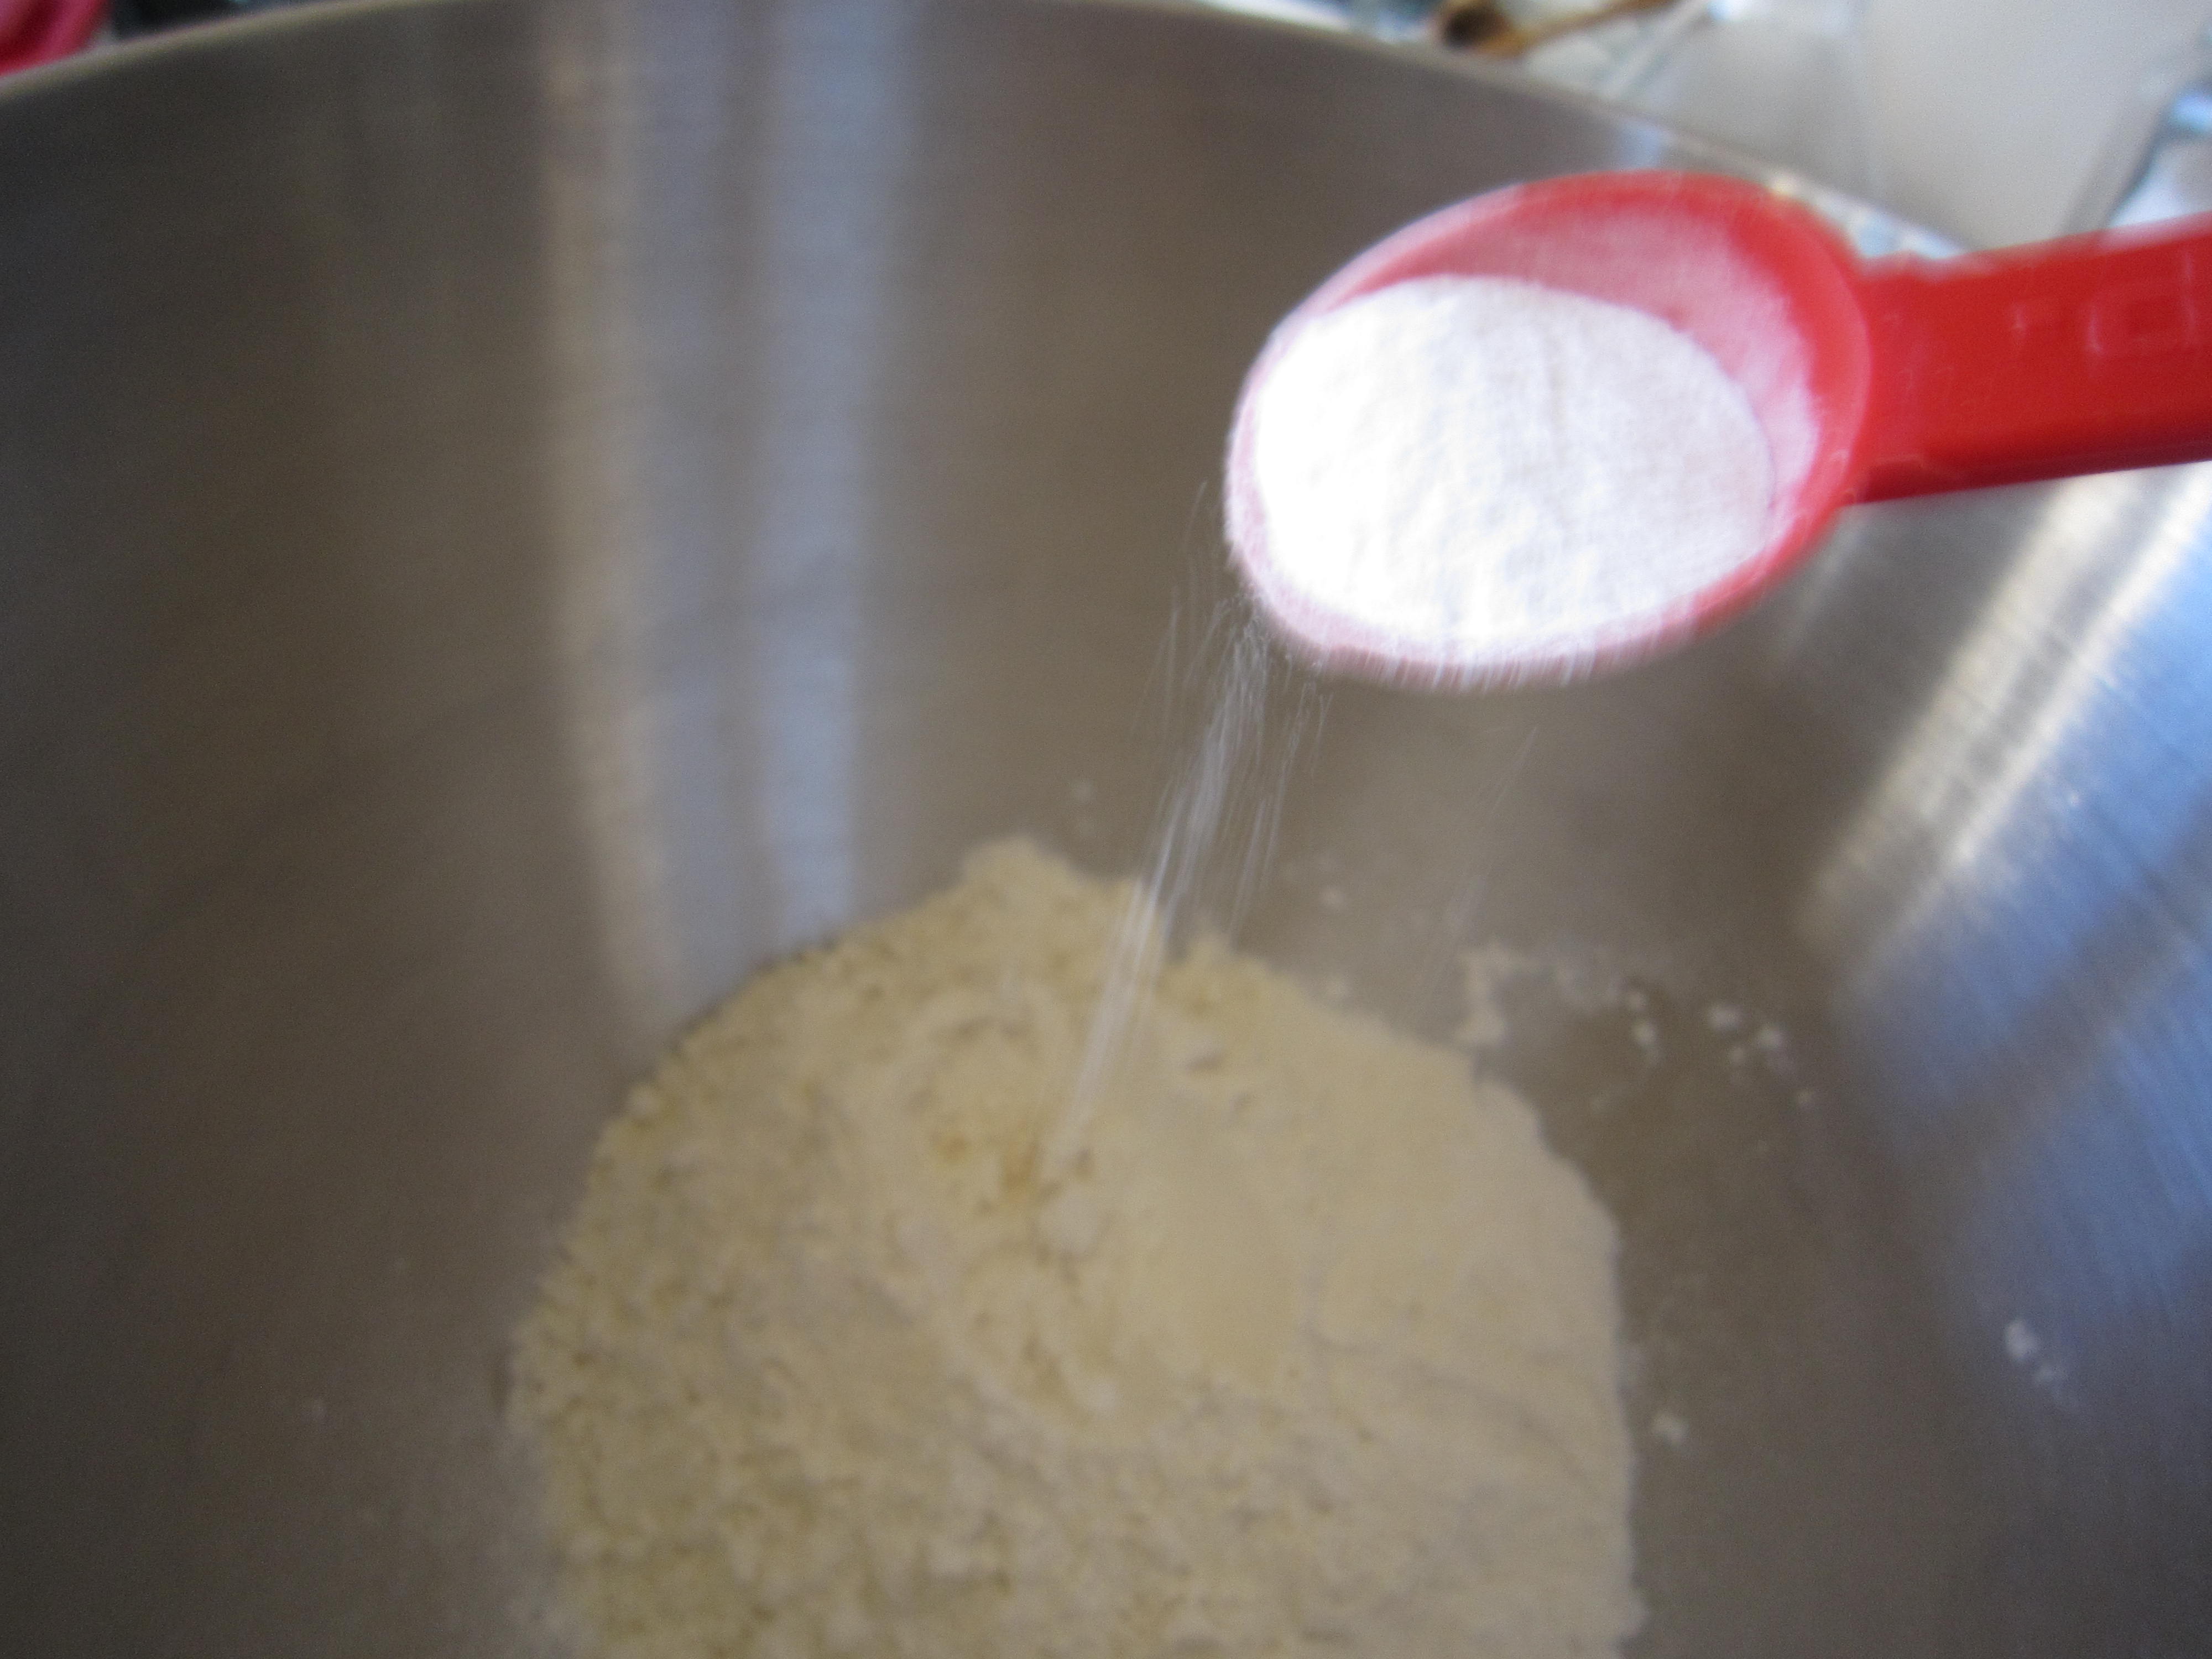
What I do is start pouring in some golden granulated sugar

Then I drain the ginger syrup into the weighing pan, then top up with more golden granulated sugar until I have a combined weight of 1lb (450g)  It makes less mess this way.


I soak 7 ounces (200g) of golden sultanas in some whisky so they all plump up. If you don’t want to use whisky then weak black tea will work well.

While they are plumping up, chop the stem ginger into small pieces much the same size as the sultanas and then add them to the soaked fruit.

Mix it round… it smells gorgeous.

The  All-Bran should be soft and smooth by now so stir in the fruit

And then stir in the sugar and syrup mix then fold in 1lb (450g) of self raising flour.

This is a sweet and sticky mix, so you should line your loaf tins – you can do it with baking parchment, cutting and folding in the traditional way, or you can do it as I do it, using pre-formed loaf tin liners. Whoever thought this up deserves a medal because it saves so much time and mess.

As I said, this makes three 1lb loaves and before you say you won’t want three malt loaves all at once, I’d like to tell you that actually three loaves is not enough. You’d be surprised how quickly they disappear and how many of your friends will want a loaf of their own. We have never yet had a situation where there’s been malt loaf left over and it is a lovely thing to give a friend a malt loaf….

Spoon the mix into the loaf tins and sprinkle the tops with golden granulated sugar before putting them into a preheated oven at 165° C /330°F for about an hour.

Check them when they start to look ready by sticking a skewer in – when it comes out clean and the top looks golden and slightly crunchy from the sugar, get them out and leave them to cool.

The smell that fills the kitchen is wonderful, all rich and sweet and spicy. It makes me wish you could get air fresheners that smell like that instead of insipid flowery scents but until they do, I just have to keep baking.

The look so lovely….

Cut yourself a slice when it cools… put the kettle on and make a pot of tea.

Some of us like it with butter and some don’t . Try it both ways.  Take a loaf to a friend and share it.

Have a cup of tea, a slice of malt loaf and enjoy it.

Evolution isn’t just restricted to living things, you know. In my kitchens, this recipe has changed and improved  over the years and really does illustrate the theory of survival of the fittest. (Ingredients, that is)


Home thoughts from abroad…… Whisky toffee almond tart

Sometimes, you know, my thoughts go back to the UK and I think of my family and friends there that I miss so much. Right now, they tell me, the weather is icy, frost lines the branches of trees and the grass has turned to thick white, iced strands. I miss the beauty of an English winter, even if I don’t miss the aching pain of frozen feet. Nor do I miss having to chip ice from the inside of my windscreen, as I had to do last winter when the temperatures were regularly -5° to -9° C.

I do have other problems here….  I get out of my air conditioned car and my specs steam up; here, my hair is permanently limp in the humid heat. Minor, I know, but constant. That’s the thing about the Tropics. We have no seasons, no changes… sunrise and sunset are at much the same time every day, twelve hours apart and the weather is pretty constant. Sometimes it rains a bit more than other times but, generally, one day is much like any other.


When you are inside, with air conditioning however, the weather can look very different… I looked out at this, dark and stormy skies and the promise of a thunderstorm and rain later. It looked like November in the UK. Yet I knew that once I was outside on the balcony it would feel hot and humid. It’s quite disconcerting at times.

It did make me think of cold days in the UK and I remembered the last meal I cooked for friends in Nottingham before we left for Malaysia. It was a fabulous night where we laughed till we cried, we ate till we were fit to burst, we drank cocktails and wine and then moved on to whisky and we even danced across the floor in the early hours of the morning…. we finally said our goodnights at about 4am.

Maybe it was all the drinking. I blame one of the puddings for that as I am sure we wouldn’t have had the whisky if we hadn’t had a tot to go with the Whisky Toffee Almond Tart….

I’d seen the recipe in Delicious a couple of years or so ago (maybe even more) and I’d saved it, wanting to cook it for a special occasion. Us leaving the country seemed pretty special to me and besides, one of our lovely guests is Scottish and he loves whisky… and even more to the point, we were moving somewhere we couldn’t take our whisky anyway! Waste not, want not, I thought.

All I had to do (and it was a pretty simple recipe – always a plus point when you are cooking lots of things)  was make some pastry. 200g of plain flour, with 100g of chilled and chopped unsalted butter needed to be rubbed through (or, easier still, whizzed on pulse in a processor) until everything comes together into fine crumbs.

Add about four tablespoons of cold water and mix it together so it comes into a ball, then roll it out into a circle


I’m pretty useless at rolling evenly as you can see, so if you are the same, don’t worry, it works even if you have to piece bits together when you put it into a 23cm/9 inch fluted flan tin.


Don’t handle it too much and leave the edges hanging over. You can trim them off later so it is all neat and anyway, pastry shrinks when it cooks, so you get a better fit.

Prick the bottom with a fork so that when it cooks the steam can escape and you have a flat bottom to it and just put it in the fridge to chill right down for 30 minutes.

After you have wiped up the mess you will have made after dusting the board to roll the pastry on, you have plenty of time to get the rest done. Put the oven on to heat at 200°C/fan 180°C/390°F.

You can put the pastry shell into the oven, lined with baking paper and baking beans to weigh it down, for fifteen minutes. After that, take the paper and beans off and put it back in to bake until golden… but no more than five minutes. Take it out and let it cool.


Now for the good stuff…. you’ll need 300g flaked almonds, a 284ml carton of double cream, 225g granulated sugar and some single malt whisky. You don’t need much, so before the whisky lover in your family shrieks at the thought of cooking with fine whisky, assure them it is for the best of reasons and anyway, you only need 4 tablespoons….


Put the almonds into a pan and add the sugar


Add the cream….


Stirring it all round


And mix it together. It’s looking good so far……


Ancnoc whisky


And then, select your whisky…. I chose anCnoc,  a smooth and almost sweet Speyside single malt.


Measure 4 tablespoons of the good stuff, pour it in and then just stir it all round and add a pinch of salt to round out the flavours…


… and then heat it all through, gently, until the sugar dissolves and it thickens slightly. This will take about twenty minutes and you will see it turn a beautifully pale golden colour. Take it off the heat and put to one side.

Turn the oven down to 180°C/fan 160°C/355°F.


Pour the filling into the pastry shell


… and then smooth it out. (Yes, the mixture DOES taste delicious) and then bake it for another ten minutes or so until it looks golden. Don’t overdo it and don’t worry if it looks like it hasn’t set. It does that as it cools.


After you have put it on a tray to cool slightly, drizzle it with just a little more whisky so it sinks in as the filling cools and firms up.

Let everything cool completely before you trim off the edges to make it look neat and put on a cake stand, ready for serving.


And then, of course, you are ready to serve it with a wee dram to go alongside it at the end of the meal..


Slice it…..


… and serve it with a dollop of really good, thick cream.


It really was lovely.


Was it a success? Well, that picture was taken after we’d had the whisky toffee and almond tart, at the end of the meal. I think the blurring of the shot says it all.

I can’t blame the tart for that, I suppose, but it certainly was a fine ending to a lovely meal with our friends.

A fitting goodbye to those we were leaving behind us and an excellent start to the laughing and dancing that followed.

Maybe you could make this? Not necessarily because you are leaving the country… but how about as a dessert for a Burns’ Night supper? Then the whisky is justified… not only justified but essential.

Mulberry and Honey Polenta Cake

It’s been some time since I managed to sit down and tell you about something delicious… but as you know, I have rather a lot on. I’ve been so busy trying to sort out our move to Malaysia.

I swear, I thought I was a relatively organised and tidy person… but going through all the paperwork I have to sort out before we go, it appears I have been slowly, but surely, turning into one of those women you see on television programmes where their hoarding has got out of hand. I must have just filed every single bill and statement that I ever received and do I need them? No, I don’t.

Ballpoint pens…. who needs over a hundred half used ballpoint pens? I mean, hardly any of us write any more – we email, we text… but there they were…pen after pen in drawers  and on shelves, in handbags. And the paperclips? Where did they come from?  I am almost certain that I have never in my life bought a box of paperclips so they must have come with stuff I’d received and I kept them, thinking they’d come in useful at some point. There were rubber bands, half used Post-It pads and that peculiar dust and grit that seems to collect in any drawer that has Stuff in. I reckon we all have a drawer with Stuff in – it’s where we put things that don’t have a natural home anywhere else. That might explain why I also found two Swiss Army penknives, a small toffee hammer, a ball of string, my old cat’s vaccination record, a nail file, instructions from an old iPod shuffle, a broken travel alarm… oh the list went on.

And that was without starting on the clothes.

Twelve huge  bags of clothes on the first sort….. The Great North Air Ambulance were getting the lot.

After all, we are going to south east Asia for three years and the temperature there is roughly 28 degrees C all year round. I wasn’t going to need all the warm things I had to have so I could live without frostbite on the north east coast. I wouldn’t be working for a start, so all of my business suits were going.

I seem to have kept every pair of jeans I ever owned……

……..and I have finally come to the conclusion that I will never fit into those 24 inch Levi’s again. I looked at them and wondered how I ever did get into them…and why I thought that with a little cutting back I would get anywhere near them. Still, it shows my optimistic side, which is always a good thing.

It also seems that I won’t be getting anywhere near the 26 inch, the 28 inch and the 30 inch Levi’s….. there’s a pattern emerging, do you see? I have grown fatter, year by year. It’s been gradual and it has been over couple of decades… I always thought, though, that maybe one day I would regain my teenage litheness.

It wasn’t to be, of course.  Age does that to a person. As does eating delicious things.

Delicious things are one of the great joys of life and sharing something delicious with friends increases the general happiness quotient of any get together. What follows is one of the delicious things I can blame for the no-longer-fitting Levi’s.

The Bear and I had gone to our friends’ house for lunch so we could take a break from packing and sorting and all talk about our move to Malaysia. C&C had lived there for 18 months, some years ago and still go at least a couple of times a year, so they are an absolute mine of information. They were doing the main bit of lunch and I said I would do the pudding.

I wanted to do something different and I had something in mind.

Remember when I took it into my head to make Strawberry Surprise Marshmallows? I’d found some freeze dried strawberries at Healthy Supplies and realised that their sweet almost-crunchiness would be perfect hidden inside some home made marshmallow. Healthy Supplies really is a treasure trove because I also found freeze dried strawberry powder there that made the most delicious sweet coating to stop the marshmallows sticking together. There are things in their on line store that you’d never get in a supermarket – go and look, you’ll be amazed and delighted at what they have.

Brendan from Healthy Supplies had liked what I’d written about his freeze dried fruit and asked if there was anything I’d like to have a go with and after looking through the list, I spotted mulberries.  How could I resist that? Something I’d read about but never tried… AND they were called Pearls of Samarkand! With a name like that, they just called out to me…

There are two kinds of mulberrries, black and white.  Aren’t they strange? Knobbly and bulbous – but what really matters is the taste of them. The white ones taste almost honeyed – they are sweet and musky – and the black ones are sharper and fruity and after nibbling a couple I’d started to get an idea…

I’d made a polenta and honey cake before and I liked it but I thought there was room for improvement. Polenta in a cake gives it a wonderful dense and grainy texture; adding honey to the cake and serving it with cream makes it into a wonderful dessert.

Because the white mulberries tasted like honey they would be marvellous with a honeyed cake and the black, sharper mulberries could go in the cake to add a deliciously fruity contrast.

So… to begin.

First of all, get the oven going to preheat – you will need it at 170 degrees C/325 degrees F. The cake takes only a few minutes to prepare so you need to have the oven on at the start.

330g of plain flour was mixed with 150g of fine polenta (cornmeal) and 2 tablespoons of baking powder and a teaspoon of salt.

I sliced up some good butter and melted it in a Pyrex jug in the microwave on a low setting

I was going to need 250 ml, so just pack it into the jug till you get the rough measure – anything extra you can use to grease the baking tin.

Mix the melted butter with 2 eggs, 180ml of runny honey and 435 ml of milk and pour it into the mixing bowl.

Then whizz it all round gently – don’t whip it to death, just make sure it is blended.

This is going to be a lovely deep and square cake, to be sliced easily at the table so I used a smallish baking/roasting tin (if you’re interested, it measured 13×9 inches) That was greased with the residue from the melted butter

You can see the graininess of the polenta – that will add fabulous texture.

Because I didn’t want all the fruit to sink to the bottom of the cake, I scattered most of the packet (saving a mainly white ones) on top of the mix. I dusted the fruit in flour to stop them sinking too quickly and then put the tin in the oven for half an hour.

While the cake was cooking, I needed to make the honey syrup that was going to be drizzled over the cake so in a pan I gently heated 125ml of Acacia honey

And because I wanted it to have a light and flowery hint about it (and because I had a bottle of it and I need to use it before we move) I added a good amount of English Provender Essence of Orange Blossom Flower water… maybe 4 tablespoons or so. Don’t worry if you haven’t got any – you can miss it out… or perhaps use orange juice instead?

Stir it all round, over a gentle heat until it comes to the boil and blends beautifully,  thickening slightly, making a rich and fragrant syrup.

Check whether the cake is done after 25 minutes or so. Does the skewer come out cleanly?

Now it is out, make sure you have the cake on a rack and you can wipe up any mess from this next step…. you are going to pour the honey and orange blossom syrup over the cake, covering it completely. It needs to cool before you serve it…..

That was the easy bit….we then had to get it from my kitchen to our friends’ house without making a mess.

Still, we got there and settled down for a marvellous time.

I’d brought along the rest of the mulberries and when we were ready for pudding I added them to a bowl of whipped cream…

The cake was firm and studded with mulberries. It wasn’t  too dense… there was a light crumbliness to it that you get when you use polenta.

And with a dollop of whipped cream and those honey flavoured white mulberries it was the perfect summery mouthful.

It was even worth eating knowing I would never get back into those jeans. Some things are worth more than being able to wear the jeans of my youth. I know when I was younger I’d never even eaten polenta, never mind had it in a cake and mulberries were the stuff of nursery rhymes. I like being older. I eat better for a start!

So. Mulberries? A definite yes. They were perfect in that honeyed cake. They were delicious to eat by themselves…. thanks Brendan! Keep on sourcing such delicious and original ingredients – I just wish I could have shared a slice of cake with you.

Potato Focaccia

One of the big loves of my life is reading. I can do without television quite easily but I could not manage if I couldn’t occupy myself with something to read. I have shelves groaning with books and magazines are stacked in piles… I have an  eReader so I can read when I can’t carry piles of books with me and when I can’t read, (because I’m driving, say) I listen to audio books. So maybe it’s not reading? Maybe it is that I don’t need the visual stimulus of pictures… I just need the words and my mind fills in the gaps.  So, maybe I should say one of the big loves of my life is writing.. that is, writing done by others.

It has to be good writing though, so that I stay interested. I will, honestly, read almost anything, from any genre, but as you’d imagine a big part of my reading involves food – cooking it, eating it, growing it, preparing it… telling stories about it.

I have shelf after shelf of cookery books. When I’m in the north, I love to sit in that chair, with a cup of green tea, steaming quietly beside me as I read recipes or books on food writing –  from Brillat-Savarin’s “The Physiology of Taste,  or transcendental gastronomy”  – he, who famously wrote, “tell me what you eat and I will tell you who you are” and described the first version of what became, in essence, the low-carb diet. Brillat-Savarin (1755-1826) believed that white flour and sugar made you fat and prescribed protein rich meals. If you haven’t read him yet and you’re curious you can read it for free online, thanks to the University of Adelaide or on Project Gutenberg, or, you can do as I did, and buy a copy.

I love reading modern cookery writing too and I have shelves of that in the apartment… that’s a picture of the shelves when I had only half unpacked and there’s 132 books there. The shelves are full now. Those shelves are half way up the stairs and I sit there, leaning against the wall, reading whatever takes my fancy.  Probably my favourite book of all time, MFK Fisher’s The Art of Eating, an anthology of all her works is on that bottom shelf  and I regularly take it out and start reading it again. There are  fascinating books that the Bear finds on his travels and brings back for me because he knows I will love them. He found Laurie Colwin’s Home Cooking when he was travelling through the USA and I know I wouldn’t have stumbled on that easily but it is now one of my dearly loved books. He also brought home the wonderful Ruth Reichl’s  Comfort me with Apples and that started me on a search through Amazon for more books like that.  The whole point of it is, I love to read something that makes me think, that captures my imagination and makes me explore just what it was they felt, what they tasted and what it meant to them.

When I’m not reading books, I’m looking on line and reading blogs and searching out great writers there, too. I was reading the fabulous Gin and Crumpets and something she wrote made me stop and think….it made my mouth water. Potato Focaccia, or as she says, a fancy chip butty. Who doesn’t like a chip butty? Well, apart from Brillat-Savarin and his purely protein meals, but he’s long gone, so it doesn’t matter…

A soft and savoury focaccia with potato…. perfect. Imagine how that tastes…

Gin and Crumpets had used, so I surmised from the photographs, smaller potatoes than I had and she’d left the skins on. I had a bag of my favourite Rooster potatoes  (excellent all rounders, good as either chips or mash or roast) so I washed and peeled 250g of them and cooked them in gently simmering water. You need them still to have some body about them as they are going to be cooked again on top of the focaccia, so don’t boil them to death.

The next thing was to start on the focaccia so 350g of strong bread flour was mixed with one 7g sachet of fast action dried yeast, a teaspoon of caster sugar and two teaspoons of Maldon sea salt.

Four tablespoons of olive oil and roughly 150ml-200ml of lukewarm water need to be added to bring it together into a loose dough.

If you haven’t got a mixer with a dough hook, just use your hands.  Drop it onto a floured board and upend the bowl over it to stop it drying out. Let it rest for a few minutes.

Then knead it… you’ll feel it change into a beautifully bouncy, smooth and silky dough.

You need to roll it into a smooth oval

And then lie it on a silicone sheet, ontop of a baking sheet and brush yet more lovely olive oil over it.

Lay a loose piece of clingfilm over it and leave it to rise gently. That depends, of course, on how warm your room is but it shouldn’t take too long.

Start the oven pre-heating to 210°C or 410°F and check the potatoes.

They should be tender so drain them and leave them to cool and then have a quick wipe round while you are waiting…

A sprig of rosemary would be good to add, so strip the leaves off the harder stems and chop them lightly.

By now the potatoes are cool enough to slice without burning your fingers…

I drizzled the oil over the potato, in a bowl, so I got an even covering and each piece was glistening, then laid them on top of the puffy dough, sprinkling it all with the chopped rosemary and a sprinkle of salt…and into the oven it went.

Just under half an hour later and this emerged… golden and glistening, smelling deliciously sweet and savoury – you know just what I mean…

The focaccia bread was light and aerated and the potato on top? It was heavenly… it really was like the best chip butty ever. The taste? The taste was sublime. The potatoes were soft with that sweetness that comes from being cooked properly and then baked, the salt and the rosemary made it savoury, the focaccia was warm and delicious. People looked at it, sniffed it and then tore at it…all of them saying how wonderful it was.

This is what you need to make for parties – it’s warm and delicious and it will to help soak up the alcohol and keep people happy and cheerful….

…this is what you need to make it when there’s just the two of you and a bottle of wine to share as you curl up on the sofa….

… and you need to make it when there’s just you, needing something to sustain you through upset or cheer you through gloom or give you a much deserved treat on a cold Saturday night.

This is heaven.  Really, it is.

Honey and Muscat Wine Jelly and Salt Water Crackers, for blue cheese.

One of the many great things about being married to the Bear is that we can sometimes manage to travel to lovely places together. If he is going to a conference and has air miles that would pay for my ticket, it’s the perfect opportunity for me to go too and then we extend our stay so that we can explore and have a little holiday.

Our last trip was to Argentina  (OK, so he was flying Business Class and I was in the cheap seats at the back but I did get to make new friend, Maria and we have stayed in contact ever since) but at the end of the conference we set off and explored the north of the country..

We saw the amazing Iguazu Falls that act, in part, as the border with Brasil

They stretched for miles and miles… so many falls, so much water….

….and we even walked out, on a perilous walkway, getting drenched as we looked up at one section of the falls above us. I have to say that this will stay with me  as one of the most memorable and astounding sights of my life.

We travelled up the Andes on a train, the Tren a las Nubes , so high that I got altitude sickness

and was given coca leaves to roll into a ball and put in my cheek to absorb the coca….the train hostesses hand them out and spend their journey with their own rolls of coca leaves tucked into their cheeks. The effects of the coca minimise the worst of the symptoms of altitude sickness and here, everyone chews and sucks the leaves.

The train company also makes coca tea  to help, but in the end, I had to have some oxygen. I suppose it was a big change for someone brought up at sea level.

But the view? That was worth it. I sat quietly and gazed at the mountains falling away below us.

We hired a car at the top and drove down through the mountains, gazing at the beauty of the red earth desert

and headed to Tucuman, where the parents of our friend, Natalio,  lived…

All of that had been organised by his wonderful mother, Perla, and it allowed us to see the real Argentina. We wouldn’t have known about the Falls or the train journey, nor the wonderful villages we passed through on our days of driving. When we got to Tucuman and met Perla and Leonardo, we were shown the most incredible and generous hospitality. We were treated to barbecues and evenings of drinks and empanadas  (something I am certainly going to make in the future) and had the most fantastic time. I really think our time there was one of the best holidays we’ve ever had.

There’s no way we could have managed to see so much without Perla organising everything and we swore that when she came to England we would try and repay her, just a little bit, for the outstanding efforts she made for us.

On the flight home, I passed the time thinking about what I could possibly cook… I wanted to make her a special meal. I had it all sorted in my head by the time we landed. All I had to do then was wait for her to say she was coming to the UK.

And then the call came! Perla and her sister were coming over and I had bagged the Saturday night to cook for them.

I planned to end the meal with cheese and crackers and I had seen in the Australian Gourmet Traveller Annual Cookbook of 2008 a really interesting way of doing it….This is probably my favourite food magazine ever and luckily my sister, who lives in Sydney, sends it to me every year. When I read this issue I was stuck, with the Bear, in Melbourne airport, waiting for a delayed flight to Tasmania. In the nine hour delay, I read every word and then imagined cooking most of the recipes. This one, however, stood out.

Honey and Muscat Wine Jelly to serve with blue cheese and Salted Water Crackers… and I would be making the honey jelly and the crackers. It was to be served with a blue cheese…..  That would be something special to end the meal with, I knew it….. A soft and sweetly quivering jelly made from honey to spoon onto crisp water crackers, scattered with sea salt, to eat with blue cheeses.

The first thing to do was to make the honey jelly….

And the first part of making the jelly was to soften the gelatine leaves. You’ll find packets of these in the baking aisle of the supermarket – I use the Super Cook Platinum Grade – and three of these clear, hard sheets need to be soaked in a bowl of cold water.

While they are softening, mix 250 gm of clear, runny honey….

…. with 100 ml of a sweet dessert wine (you can serve the rest with the cheese course)  and 60ml of water.

Heat it over a medium heat, stirring gently until it simmers.

By now the gelatine leaves are soft and you can lift them out of the bowl and squeeze the excess water out of them before adding them to the gently simmering honey and wine mix.

The gelatine dissolves almost instantly, so stir it round and get your prettiest jelly dishes ready

Choose the prettiest things you have because they are going to go onto the table…

All you have to do now is strain the jelly mix into the bowls…

… and then put them to set in the fridge for at least three or four hours.

The easiest thing to do is to make this the day before so you are quite certain everything has set to a soft and quivering jelly. But how easy is it? Maybe twenty minutes work? If that?

Now, of course, you must make the crackers…

I decided to use the finest flour I have, my ’00’ pasta flour, but it doesn’t matter if you haven’t got that. Any plain flour will do.

Add two thirds of a spoon of baking powder to 200g of the flour and a teaspoon of sea salt  and stir round to get an even mix.

Mix 30 ml of vegetable oil (remember those cough medicine measuring cups? They are ideal for small quantities like this)  with 120ml of warm water and add it to the flour mix, to make a dough.

Knead it lightly until it is smooth

And then cut the dough into 16 evenly sized pieces.

Then, you take each piece and roll it flat …….the Australian Gourmet Traveller suggested until it is a 2mm thick oval, but that wasn’t working. Oval? That required more rolling skill than I had and anyway, I liked the look of the oddly shaped crackers that were emerging. There’s no way they could be mistaken for anything manufactured by professionals ………..

The oven needs to be pre heated to 200 °C or 400 °F and while that gets to temperature, whisk up an egg white and then brush those rolled out pieces of dough.

They look artisinal, don’t they? Let’s not mention the fact I couldn’t roll out the dough neatly…..

Prick them all over with a fork

Then scatter them all over with sea salt, before putting them in the oven for ten to fifteen minutes until they are golden and crisp.

You’ll have to do them in batches but it’s not a big deal… they cook so quickly you can have one batch cooling while another cooks. Once they are cool, store them in an airtight plastic box, where they will be perfectly all right for up to a week.

See? Another thing done in less than an hour. Pretty good for what will be a marvellous course….

And then it was Saturday, time  for dinner with Perla… and Sylvia her sister, Nat and Lenka , Jaume and us….

We ate and we drank, we laughed and we toasted each other for getting here, for being friends, for getting engaged, for getting promoted, for having a Saturday night together and anything else we could think of until finally it was time for the cheese course.

The jelly was soft and quivering and the smell of the honey and muscat wine was sweet and aromatic

I’d got a selection of blue cheeses and piled them on a cheese plate with grapes

There was Roquefort and some amazing British ewe’s milk and buffalo milk cheeses

The crackers were crisp and golden…

And with a morsel of cheese, a spoonful of jelly piled onto a piece of the cracker… it really was the perfect mouthful.

The combination of sweet and salty flavours, the softness of the jelly and cheese and the crisp snap of the cracker were wonderful.

And you know what? I was happy… I had done what I could to welcome Perla to our home as she had welcomed us to hers.

And you know something else? This was easy. Try making it yourself. Your guests will be pleased and you will feel proud. It can be made the day before (always a plus point in my book)

It’s simple and delicious. And a perfect ending to a lovely evening.

Baked lemon cheesecake with blueberries

When I was growing up, I remember the excitement when Marks and Spencer introduced the baked cheesecake into their ready made food section. This was the 70’s, you know, and British food was hardly at its finest.

We’d had cheesecakes before of course, just not the baked ones. We’d had those  strange pre-frozen cheesecakes where the middle seemed to be made of some kind of whipped creamy nonsense and laden with luridly coloured strawberries….well, we’d had them when our mothers had got them for a dinner party and, if we were lucky, the following day there may have been a slice or two left over to be sneaked before (or even instead of, if Ma didn’t catch us) breakfast. Food like that was far too good to be specifically given to children. Maybe we’d had some at a friend’s birthday party where the mother was trying to outdo every other mother and you know, they were pretty fancy for the 70’s but they weren’t the be all and end all of desserts. They were OK.  Real cheesecakes? They weren’t available. Or at least if they were they never made their way to the North. Maybe it was something lucky young Londoners had.

I’d read in stories that Americans had cheesecake and they loved it but as far as I was concerned, as far as I knew, cheesecake… well it came out of a frozen packet and it was nice, but not brilliant.

Anyway… one day my friend F got a slice and let me taste it. I couldn’t believe the rich, dense filling. No lurid strawberries, just a lemony hint. I couldn’t believe how deep it was. A solid wedge.

I loved it. I loved the way it stuck, almost, to the roof of my mouth in its glorious clagginess… the way the flavour seemed to be so luxurious. Now I understood why people loved cheesecake.

Of course we still didn’t make it (there was no internet to look up recipes in those far off days) and sometimes we were lucky when we ordered cheesecake in a restaurant… and sometimes we weren’t. Sometimes we got real baked cheesecake and usually, I suppose, we got the defrosted thin one from the packet.

I don’t know when I first made a real baked cheesecake but it wasn’t so many years ago. I do know that I realised just how simple it was and how much I had been missing out on. This really was the stuff of that amazing childhood memory – that delicious, thick, sumptuous and dense filling. So very different to the thin whipped and set filling that appeared so often elsewhere.

I suppose it is because of that that I think of cheesecake as a special treat. It has to be a special treat, really, because if I made that just for the Bear and I we would end up eating it all and let’s face it, we are fat enough.

Anyway, the one I was going to make was for a special occasion – we had friends coming for dinner and we wanted to have a good time. There may have been an element of hoping (just like back in the 70’s) that it wouldn’t all get eaten and then I could maybe have some for breakfast……

I’d  used a recipe from Good Food before and it had turned out very well  and would be worth doing again. All I needed were some digestive biscuits; 100g of butter; 250g of mascarpone, (that’s one tub); 600g of soft cheese, (that would be two tubs of Philadelphia); 4 eggs, ( but you won’t need two of the whites. Save them for something else… or maybe have an egg white omelette the following day to make up for any indulgence. Maybe not, eh? Maybe make meringues instead!);  3 or 4 lemons and some caster sugar and some plain flour.

Once it was baked, a small pot  soured cream and some lemon curd and fruit were to go on top. Simple. But oh so delicious.

So, I needed my springform tin and to make sure there were no leaks I got out a preshaped baking paper liner.

I decided that Hobnobs would make a lovely crumbly, rich base… because I love them.

And as I needed 225g – which came to 16 Hobnobs in case you are interested (or can’t find the scales to weigh them) then that also meant, I thought, that  there would be a few Hobnobs left over to have with a cup of coffee. Always thinking, that’s me.

Making the base is the simplest thing ever – and with such crumbly biscuits it is so easy to give them a bash with the end of a rolling pin to crumble them.

100g of melted butter (heat it gently and carefully in the microwave) was poured in and stirred round until the butter was absorbed. Pour the buttery, crumby mix into the lined springform tin and press down.

Using a spoon round the edges means you get a good firm base and then put it in the fridge for the butter to set firm again and the base to chill.

Heat the oven to 160°C (fan assisted)/320°F.

Then start to get everything else ready. This is so easy.

Zest all of the the lemons, add the two whole eggs and the two egg yolks, the pot of  mascarpone, the two tubs of Philadelphia cream cheese and  the juice of two of the lemons to a mixing bowl.

And then add 175g of caster sugar and 4 tablespoons of plain flour

And start whizzing it together.

The colour changes  as it becomes smooth and delicious.

Now, take the chilled crumb base out of the fridge and spoon in the lucious filling.

If you give it a gentle side-to-side shake the mixture settles and the top smooths slightly… though this will also happen in the oven.

Put it carefully into the oven for thirty five to forty minutes and when you check it, give it a little shake…. it won’t (or it shouldn’t) slosh, it will just have a gentle wobble to it.

Turn the oven off and leave it to cool completely in there.

That was handy for me because I had to get things ready. There were floors to wash, a table to lay, cushions to be plumped, surfaces to polish…. and a mad rush to get me looking half way presentable before the guests came.

Now, you may have read about the mushroom pate with caramelised red onions, and the squash and goat’s cheese lasagne and the singing. This cheesecake was the final part of the meal and I was going to put the topping on just before serving it.

And, as I am sure you will agree, if you are eating you will probably have been drinking….not to excess, you understand, but enough to laugh happily.

Enough to laugh happily and cover the top of the cool cheesecake with some lemon curd and then spoon the soured cream over the top and, still, laughing happily, make attractive patterns with a fork on it before realising that photographs should have been taken.

Oh well.

Imagine it instead… the top of a baked cheesecake, looking pale and beautiful has a few spoons of  good quality lemon curd spread over it. I used lemon curd I made but any good brand will do.

Then the soured cream was poured over the top of that… and then I got artistic.

Right, we are caught up with ourselves and the pictures now.

In the freezer I had some frozen blueberries so I grabbed a handful and dotted them over the top.

(Look, you can see the lovely lemon curd poking through the swirled sour cream!)

The blueberries defrost quickly when you put them on top of the cake and the beautiful juices run down through the tracks of the fork in the soured cream.

Oh… it was delicious.

The beautiful baked cheescake filling had the perfect mouth-sticking texture that dissolved into lovely creamy lemon-ness.

The soured cream and the blueberries were the ideal match to the rich smooth sweetness.

I say again, ohhhh it was delicious.

And the next morning, while I stood, waiting for the kettle to boil, looking out of the window at the early Sunday morning city below us, I might (just as I did back in the 1970’s)  have cut myself the tiniest sliver of cheesecake to eat as a pre-breakfast, post dinner party treat.

Except this was far better than any 70’s cheesecake. This was a perfect baked cheesecake.

Shortbread

Sometimes… when I have a  few minutes, I loiter around the web, looking at things I might want to buy. I’d spotted that lovely madeleine tin on Amazon and I could justify buying that because I’d never made madeleines before and I was absolutely sure you’d all want me to make them… and I was right, wasn’t I?

Anyway, on my idle perusal of other things I hadn’t got (yet) and possibly wanted to get, I spotted a shortbread mold.  A beautiful stone mold with thistles and segments.

I love shortbread. I love its buttery, crumbly, sweet but not too sweet, sandy- textured biscuitness.

A good slice of shortbread with a cup of tea can make the whole world seem better.

It was obvious, then, I had to buy the shortbread mold.

What happens if anyone drops in and I don’t have anything nice for them to have with a cup of tea? What happens if there’s a crisis and I have to offer comfort, tea and shortbread to get them through it? I can’t take risks like that with my friends’ happiness.

Well, that’s what I told the Bear when he found me smuggling in another package from Amazon.

So, I set to.  The oven was switched on to 150 degrees C/300 degrees F

250g of unsalted butter and 125g of golden caster sugar were creamed together.

250g of good, fine plain flour and 125g of cornflour were sieved in and stirred lightly together.

If you had fine polenta (cornmeal) or semolina that would be a lovely thing to add, giving it a lovely crumbly texture. I didn’t have any so I stuck with cornflour.

I used the butter wrapper to wipe out the stone mold and get a thin layer of butter into all the crevices. (I’m thinking that one of those sprays of cooking oil might be good here)

Because I love it and because I wanted it, (what better reason do I need?) I added a quarter teaspoon of vanilla bean paste to the butter and sugar.

The flour I had chosen was a good ’00’ (extra fine) so it will be smooth but just to make sure, I sieved in the flour and cornflour mix.

Sometimes, you know, I do like to faff about in the kitchen and sieving isn’t essential it just panders to my inner domestic goddess…

Bring the mix together but don’t go at it too heavily – overworking the flour will make the shortbread tough and that would never do.

See? It looks almost sandy. That’s what you are after.

Now, just pack it into the mold and press it down firmly.

Once it is flat, prick the shortbread with a fork before putting it in the oven for about 50 minutes.

It will cook to a delicate golden colour.

Look! Out of the mold you could see the thistle pattern.

Next time I do it, I shall pack it down harder to make the pattern more defined but, as it was the first time I used that mold, I didn’t mind…. it all tastes the same anyway.

Lovely. And I could eat it happily… there was no crisis (but how comforting that shortbread would have been if there had been one) there was just a cup of tea and the rest of the afternoon to enjoy it all.

It was crumbly, buttery, sweet enough but not too sugary… it was shortbread. Plain and simple shortbread.

Perfect.

Remembrance of Things Past… madeleines for an anniversary tea.

One year ago today I started this blog. I can’t believe how many things I have cooked since then. One good thing about writing about what I cook is that I have been forced to cook new things. I know how easy it is to rely on the same old favourites all the time. I have been inspired by reading all the blogs my new friends have written or have pointed me to. I have made things I had just previously read about and discovered that things are never as tricky as they might seem. All it ever takes is a bit of time to read things through so you understand the process and love and determination in your heart. My main inspiration is the Bear – I just want to make good things for him… and after all, this blog is named after him.

When I look back at all the posts I’m amazed that anyone read them or that they continue to read them.

I had to celebrate a full year of blogging and all the friends I have made because of it. I’d love to be able to celebrate with you all here.. maybe laughing and talking about the past year over cups of tea and cakes….

And that made me think of Marcel Proust. And madeleines. Proust talks of eating a madeleine with a cup of tea and being transported back to earlier times….

She sent out for one of those short, plump little cakes called petites madeleines, which look as though they had been moulded in the fluted scallop of a pilgrim’s shell. And soon, mechanically, weary after a dull day with the prospect of a depressing morrow, I raised to my lips a spoonful of the tea in which I had soaked a morsel of the cake. No sooner had the warm liquid, and the crumbs with it, touched my palate than a shudder ran through my whole body, and I stopped, intent upon the extraordinary changes that were taking place…at once the vicissitudes of life had become indifferent to me, its disasters innocuous, its brevity illusory…”

— Remembrance of Things Past, Volume 1: Swann’s Way.

What better cakes to bake for a wet Sunday afternoon when I want to look back on the last year?

The rain was lashing against the windows and all over Britain people were staring at the dismal weather and deciding to stay inside. We were going to do the same but I was going to make tea time special to celebrate this special day.

To make madeleines you need a madeleine tin. These have a wonderful scalloped base that are essential for the perfect madeleine. You won’t regret buying one (if you need any encouragement, that is) If you are looking at kinds to buy, avoid the silicone ones – the metal heats better and is  much easier to handle than a wobbly, rubbery tray.

You also need good instructions and the best I have found (after intensive searches) is from David Leibovitz  on “Living the sweet life in Paris”

First of all melt, then let cool, 120g unsalted butter.

You will use most of it in the cake batter but just lightly brush the madeleine tins with a quick wipe of melted butter.

Sprinkle the buttered tins with flour

Then upend the tin over the sink and shake off the excess.

Put the tin in the freezer to chill down properly.

In the bowl of a mixer, put a pinch of salt, 130g of golden granulated sugar and three large eggs (that have been allowed to come to room temperature)

Whisk them together for five minutes until the mix becomes pale and thickens slightly.

Weigh out 175g of fine plain flour – I always use ’00’ (it’s available in most supermarkets now, in the baking aisle) and add 1 level teaspoon of baking powder. The baking powder makes them rise well, giving the traditional (and desired) “humpy” effect on the back of the finished madeleines.

Sieve the flour mix into the egg and sugar bow and fold it in carefully.

Zest a lemon and add it to the melted butter. Remember to scrub the lemon if it is a waxed one.

Once the flour is in, add a little of the melted butter and fold it in gently.


Gradually, add it all slowly and carefully. Don’t overwork it because all that will do is toughen the gluten. Just fold it in as lightly and smoothly as possible.

Pour your beautifully smooth and silky batter into a jug and put it in the fridge for at least an hour. You can make the madeleine batter up to 12 hours ahead, if that will suit you?  What a great thing that would be if you had people coming round!

When you are ready, heat the the oven to 220 degrees C/425 degrees F

Get your beautifully frozen tin from the freezer

… and spoon in a dollop of the madeleine mix

The madeleines will only take between 8 or 9 minutes, so while they are baking, make some  tea.

We love beautifully fragrant green tea and I think the pure, delicate taste would be perfect with the light, sweet cakes.

As the tea infuses the leaves unfurl.

At the same time,  the madeleines are ready.

Beautifully humped and golden.

They are tipped out onto a wire rack to cool slightly. The underside has the gorgeous scalloped markings of the perfect madeleine.

Golden, sweet, warm cakes. Light and delicious.

We ate them with our steaming cups of tea as we looked back over the past year. We used the random post picker button on the main website page (which you can also get to by clicking on the Bear in the top corner) and read about meals and treats and smiled as we did so.

The weather may have been awful but the madeleines were fabulous.

Happy Anniversary to the blog!

Cheese and Sweetcorn Scones

When I made the delicious Roasted Garlic and Marrow Soup, I wanted something to go alongside the soup to make it a substantial lunch as I knew we weren’t going to be eating until late that night. What better, I thought than a savoury scone? One still warm from the oven? Maybe a good cheese scone would be just the thing.

Those of us who are British will know what I mean by a  scone – it’s what American’s call biscuits. What they call cookies, we call biscuits. Confusing, eh?

(A scone is an essential part of a British tea and  as Wikipedia points out ” According to one academic study, two-thirds of the British population pronounce it /?sk?n/, rhyming with “con” and “John”, with the preference rising to 99% in the Scottish population. The rest pronounce it /?sko?n/, rhyming with “cone” and “Joan”. British dictionaries usually show the “con” form as the preferred pronunciation, while recognizing that the “cone” form also exists”. I say “skon”  and as my husband will tell you, I am invariably right……..)

When I walked to the local shops I saw that the greengrocer was selling corn on the cobs, locally grown.

I knew from experience that these were sweet and delicious so I bought a couple. I’d seen a recipe in Good Food for cheddar and sweetcorn scones  so I thought this was the ideal opportunity and recipe to try out. I got some really good Cheddar from the Farm Shop and came home, knowing that it wouldn’t take more than half an hour to get them made.

The first thing to do was to cut the sweetcorn kernels off the cob. The easiest way to do this is to stand the cob in a Pyrex jug or bowl and run the knife down so the kernels fall into the jug. If you don’t do this then the kernels scatter everywhere. I know this because I have done it. What that means is that you then waste time looking for the sweeping brush and clearing up the mess. Do it in a bowl or a jug, eh?

It’s quick and its easy.

The next thing is to cook the kernels quickly. I  put a knob of butter in the bowl and microwave them for a couple of minutes if I am serving the corn as a side dish, but as these were to go into scones I decided that a small amount of water would do just as well. Adding extra butter to the recipe would skew things. It will only take a couple of minutes and then you can drain them, ready for the next step.

Start by heating the oven to 220 degrees C/430 F.

Mix, in a large bowl, 350g self raising flour, 1 teaspoon of baking powder, ½ teaspoon sweet smoked paprika, 1 teaspoon of salt  and some thyme leaves.

The original recipe called for mustard powder too, but mustard is one of the Bear’s Big Hates so I tend to avoid it whenever possible.

50g of unsalted butter must then be rubbed through until the mixture looks like fine breadcrumbs.

Grate 175g of good strong Cheddar cheese and add most of that to the flour mix.

Add all of the cooked and drained sweetcorn and mix it all well, so there’s an even distribution of ingredients.

Add the juice of half a lemon to 175ml of semi skimmed milk.

My mother always used to save soured milk for scones when we were little… which makes me wonder, did milk go off more quickly years ago? I hardly ever have soured milk nowadays. maybe it is that fridges are better?

So, with no soured milk available, lemon juice does the job.

You can see that the milk looks almost lumpy… the lemon has acted on the milk, souring it and that’s the way to get perfect scones.

Mix it all together.

The dough will be sticky, but don’t despair and DON’T faff about with it. You need minimal interference for scones, otherwise the gluten in the flour toughens then and you end up with hefty, solid lumps, when you were wanting light and delicious morsels.

Sprinkle some flour on the board and knead the dough briefly so it comes together.

Make into 10 or 12 little balls by roughly rolling them.

Flour a baking tray or a silicone sheet on a baking tray and put the scones on.

Brush them with some milk, then scatter them with the rest of the cheese, some paprika nd any remaining thyme leaves.

Into the oven for 10 to 15 minutes until they are risen, golden and sound ready… that is, when you tap the bottom, they should sound hollow.

And just look at them!

Of course, we had to try one with some butter to see how they were……..

Before I served them with soup for lunch.

A perfectly light and deliciously tasty scone makes a great accompaniment to soup and now that the weather is changing I’m going to be making a lot more. Whyever wouldn’t I when in half an hour I can have beauties like these emerging from the oven?

Apple Butter Cake

I do love autumn. As a season it suits  me better than any other. I love the cooking I do then… I like the cooler weather.. I absolutely adore the darker nights and getting home to our warm and cosy apartment and putting the lights on so the place glows. I love the colours of the trees and the crispness of the air. When I get up in the morning the skies are just starting to lighten and the view is magnificent.

In autumn I start to bake again.

I decided that as it was getting cooler it would be fine to have a nice cake to have with coffee. I wanted something  that could be classed as a plain cake… but not too plain. If you having a cup of tea or coffee you want a cake that will enhance the experience, not fight against it.

One of my great favourites is the Blueberry Yoghurt cake but right at this time? I had no blueberries  but I did have a lot of apples. All that foraging we did meant that there are still lots of apples left.

I thought I could adapt the recipe and add in apples… and as I have a lot of Apple Butter I could use that as well.

In my reading about apple butter, before I made it, there were mentions of it being used in baking as a fat substitute. The apple keeps moisture in the cake just as fat does. Now I wasn’t going to go all the way along that route as I’d never cooked with it before and I was using a recipe for another cake entirely, but I was going to give it a go.

Plenty of apples to work with, anyway.

First of all, the oven was put on at 180 degrees C/350 degrees F and I lined a springform cake tin with a siliconed paper liner.

I peeled, cored and diced 6 smallish apples and put them in a bowl with the juice of half a lemon to stop the apple pieces turning brown.

250ml of yoghurt was measured out and put in the mixing bowl’

with 200g of sugar and 60ml of vegetable oil.

Two eggs and a teaspoon of  vanilla extract went in next.

I would have liked to have added Calvados  to the mix as a good apple brandy will enhance the flavours… thing is, we had had Calvados and as it was good, so good that we no longer had any….well, we’d drunk it. Ordinary brandy would have to do instead. I poured a good sloosh…maybe a couple of tablespoons.

All of these wet ingredients were gently mixed together. Gently, you note, not thrashed to death in a high speed mixing frenzy.

Next, the dry ingredients had to be mixed

300 g  of plain flour and 1 ½ teaspoon baking powder and  ½ teaspoon bicarbonate of soda have to be mixed together properly to make sure everything is evenly distributed because then you have to add that to the cake mix.

Before that went in though, I got my jar of Apple Butter 

and added two heaped dessertspoonfuls of apple butter to the mix.

Now this, I thought, would add a beautiful spiced apple flavour and, if the theory was right about reducing the fat content, still keep the cake moist. The recipe I was tinkering with had specified 80ml of vegetable oil so I had effectively reduced the oil by 25% when I only put 60ml in.

I mixed that through, gently then added the flour, bicarb and baking powder mix

Again, another gentle mix

And then the apple

Once in the springform tin, I gave it a little shake, from side to side to even out the mix and then put it in the oven on the middle shelf.

I had a feeling that this was going to be a good cake because when I was clearing up, I just happened to run my finger over the mixer blade… and tasted the mix…..it was delicious.

I felt like a little kid again, scraping out the bowl and eating the mix.

Now, my original recipe had said that 35 minutes would do the cake to perfection but I HAD added what would be extra moisture with the apple butter… and apples do make cakes very moist whereas the original recipe specified blueberries. I was prepared for extra cooking time.

Which was just as well because I kept checking and the skewer kept coming out sticky and the top started to brown. I decided the thing to do would be to turn the oven down slightly  to 160 degrees C/320 degrees F and keep going.

Eventually, a good fifty minutes after I put it in the oven, the skewer emerged clean.

It looked pretty good and smelled even better

I sprinkled just the faintest dusting of golden caster (superfine) sugar over the top

And cut a slice.

It was excellent. Not too sweet and with little nuggets of apple and the hints of aromatic spiceness from the apple butter it was more than just a plain cake for tea or coffee. I wanted to eat more of it but I couldn’t. I had promised to take it round to my friend’s house to let the children try.

These are the children who came round to learn how to make Bear Bars and helped to make pasta and they are developing a keen interest in cooking. They were waiting to try the apple butter as well as the cake.

Their verdict? They want more. This cake is perfect with a cup of tea or coffee but they had it as a pudding with an extra spoonful of apple butter and a spoonful of cream.

And you know what? They were right. It makes a pretty good dessert.

And as that was done in a haphazard fashion and I want you to try baking this cake I shall set out the recipe:

Apple Butter Cake

Wet ingredients: 6 small apples/3 medium apples, peeled, cored and diced;  juice of half a lemon; 250ml natural Greek yoghurt; 200g golden caster sugar; 60ml vegetable oil; 2 free range eggs; 1 teaspon of pure vanilla extract, 2 tablespoons of brandy; 2 heaped dessertspoons of apple butter (if you have it. Otherwise increase oil to 80ml)

Dry ingredients: 300 g  of plain flour; 1 ½ teaspoon baking powder and  ½ teaspoon bicarbonate of soda.

Heat the oven to 180 degrees C /350 degrees F and line a medium sized springform tin with a cake liner.

Mix all of the wet ingredients first, bar the diced apple which goes in after the flour mix has been added. Only mix it gently.

Mix the dry ingredients together to ensure an even mix then add that to the cake batter, again only mix gently.

Now add the diced apple . The apple will sink in the mixture so don’t bother to stir it through – it will settle of its own accord.

Pour the cake mix into the lined tin and shake slightly to let it setlle and place it in the middle of the preheated oven.

After 40 minutes turn the oven down to 150 degrees C/ 320 degrees F and check with a skewer to see how the cake is doing.

After 50 minutes check again and leave in until the skewer emerges clean.

Take out and let cool.

And that’s it.

Put the kettle on, will you? Make a cup of tea and have a perfect slice of cake!