Wild garlic buds

You know how some days you just long for something different to eat? Perhaps the weather is getting you down or the work you are doing seems rather tedious and your mind starts to wander….. you feel hungry (oh, how often I feel hungry. Goes with the territory of being a greedy old thing, I suppose) anyway, you feel hungry and you start to think of nice things to cook. A treat seems to be called for. Something to brighten up your evening…..

And then I thought of my wild garlic.

I’d cut away at the leaves the other week but I still had plenty of buds and as my mind was still unoccupied by pressing problems I started to think of how I could use the buds.

I’ve had them in a light tempura-style batter (but I didn’t want the fuss)

And in risotto (but I didn’t want to eat rice)

And I started to think about the shape of the buds….

Perhaps if I cosseted them in some butter, like tiny tender stems of asparagus…..

I could serve them with some lovely roast lamb. I had a lamb henry in the freezer…that would be quick. Forty-five minutes in a hot oven would get me a deliciously cooked piece of lamb and a few seconds in a pan and I could have the wild garlic ready.

Sometimes it’s worth letting your mind wander.

Besides the weather was awful

The rain was lashing down and if ever a day called for something tasty to cheer me, this was it.

Out in the rain I went and snipped away to get a good handful of slender stemmed garlic buds. I  got a few leaves as well as they would be lovely sauteed with a drop of cream as a base to balance the buds on. It doesn’t have to be like that of course… it’s just I had an abundance of sweetly mild leaves and some cream.

And I’m greedy. Have I mentioned that before?

So, a good handful of leaves

And some juicy buds … all I needed now was a knife, some butter and a pan or two.

Roughly chop the leaves while a knob of butter starts to sizzle in a pan

Then pop in the shredded leaves with a pinch of salt and let them saute gently.

A lovely dollop of thick Jersey cream makes a deliciously smooth and savoury sauce for the sofetened leaves.

Pop those tender buds and stems into more hot butter and quickly (very quickly) let them cook through.

And that was it.

My lamb was ready and all I did was serve those soft and buttery wilted garlic buds and stems over the lamb alongside a smooth and rich spoonful of creamy, shredded wild garlic leaves.

Remarkably delicious, though I say it myself.

Puys, peas please me

As the Spring advances, I seem to be getting more lively, almost as if I am speeding up.

I walk faster and I feel brighter and more alert. Must be the increased sunshine, I reckon.

The same goes for my cooking. I am moving away from slow cooked food and wanting faster results. I want to get in from work and make something quickly. Something brighter tasting and lively.

And who would have thought that lentils would fit the bill?

Not red lentils – these are lovely nutty, green and brown speckled  Puy lentils.

They cook really quickly, too.

Before you dismiss lentils as dark and stodgy, try them. They are packed full of protein and deliciously tasty and  make a perfect accompaniment for fish or meat. Sometimes potatoes just seem so… potatoey. Sometimes you want a change and lovely Puy lentils give you that.

They take the same time to cook as does roasting a piece of salmon in the oven… how about that as an easy supper option?

All you have to do is pour some Puy lentils into a pan, add some water and a stock cube (for added flavour) and start to boil gently.

The stock absorbs within a few minutes  – just try them and see if they are at the state of tenderness that you would prefer. They aren’t going to go mushy like red lentils, they keep their shape so don’t guage by looking, taste them. Maybe ten minutes or so should do it.

Then, just as you are ready to serve, add a handful or so of frozen peas.

Stir them round so they defrost.

And the surprise secret ingredient that changes this to a really lovely side dish that you will want to make again and again?

A spoonful of mint jelly. Stirred in, once everything is cooked, it  adds a lovely sweet brightness to the finished dish and really lifts it.

Don’t be put off by this – it doesn’t give it an over powering taste of mint, more of an elusive sweet sharpness that works wonderfully with fish and meat.

In actual fact, I am happy to eat this all by itself it’s so tasty.

Go on… you really should make them.

Wild Garlic

It’s been a long and hard winter and so much of the food we have wanted to eat has been, of necessity, warming and comforting. Delicious though that is, there comes a time when you want fresh food. Eventually, though, things start to sprout and poke through the earth and fresh vegetables of all kinds start to make their appearance.

You know Spring has arrived when the wild garlic is out. You can smell it, for a start, if you are walking in the woods. You might know it as ransoms and its botanical name is Allium ursinum.

Back home, in the North, there are swathes of it running round the edges of my mother’s garden, underneath the trees. Gardeners who care about formality would probably be horrified and, like the Royal Horticultural Society, class it as a weed.

But I come from a family that believes in food rather than manicured flowerbeds, so Ma lets it romp away and we reap the benefits.

Best of all, I have a brother who thinks about what his sister might like, now she is living in an apartment, high above the city.

One Sunday last year he had the inspired idea of digging up a clump of wild garlic and putting it in an old bucket so that I could drive back to the city and pot it up to keep on the balcony. It was marvellous. I could wander outside, cut off a handful of wonderfully fresh leaves and cook away.

Wild garlic is a perennial and after eating our fill of it last year, it died down and just last week I realised that what had been a bare pot was now bursting the bright and shiny leaves. The wild garlic was ready for the first harvest. 

It was Sunday and we were having a friend round for supper. I was cooking lamb and the thought of eating sweet roast lamb with a lovely side dish of wild garlic suddenly seemed to be the best idea I had had in a while.

All I had to do was snip off a pan full of leaves

I cut relatively carefully, taking the leaves because I wanted to leave some  buds so they can flower later

I will use them in something else.. maybe a risotto? I shall see what takes my fancy when they are ready.

Anyway, back in the kitchen, I heated a knob of butter in a large pan and looked over my leaves.

They were young and tender so they would only need the slightest bit of cooking… a quick rinse and into the pan they went.

Oh the smell……and a sprinkle of Maldon salt  was all that was needed after that.

They were served quickly with roast lamb… beautifully tender and with a gentle garlic flavour and an underlying almost-sweetness to them.

How about that,  wild food foraged from my balcony?

I have plans though…I am going to go out in the dead of night and plant some in the hedgerows. I shall turn this part of the city into a wild garlic foraging zone!

The Beautiful North – Part One

As some of you know, I was born and brought up in the far north of England. I’m only living in the Midlands now because I married the Bear…… I try and get back there at every opportunity. That’s where my family and and also where some of the most stunning places in the UK are. The Bear, being a Cockney, from the south of the country, doesn’t  know much about the North and hasn’t really travelled around there. I kept saying I had to show him how beautiful and wild the countryside is and how stunning the coastline.

As you might also know, it was my birthday recently and we decided to make the most of it, so both of us had time off to celebrate and to head north… which kind of explains my absence from the kitchen and the blog. This then, isn’t about cooking… just eating and travelling. Travelling to somewhere that most people know nothing about and have never visited.

Maybe it will inspire you to visit Northumberland.

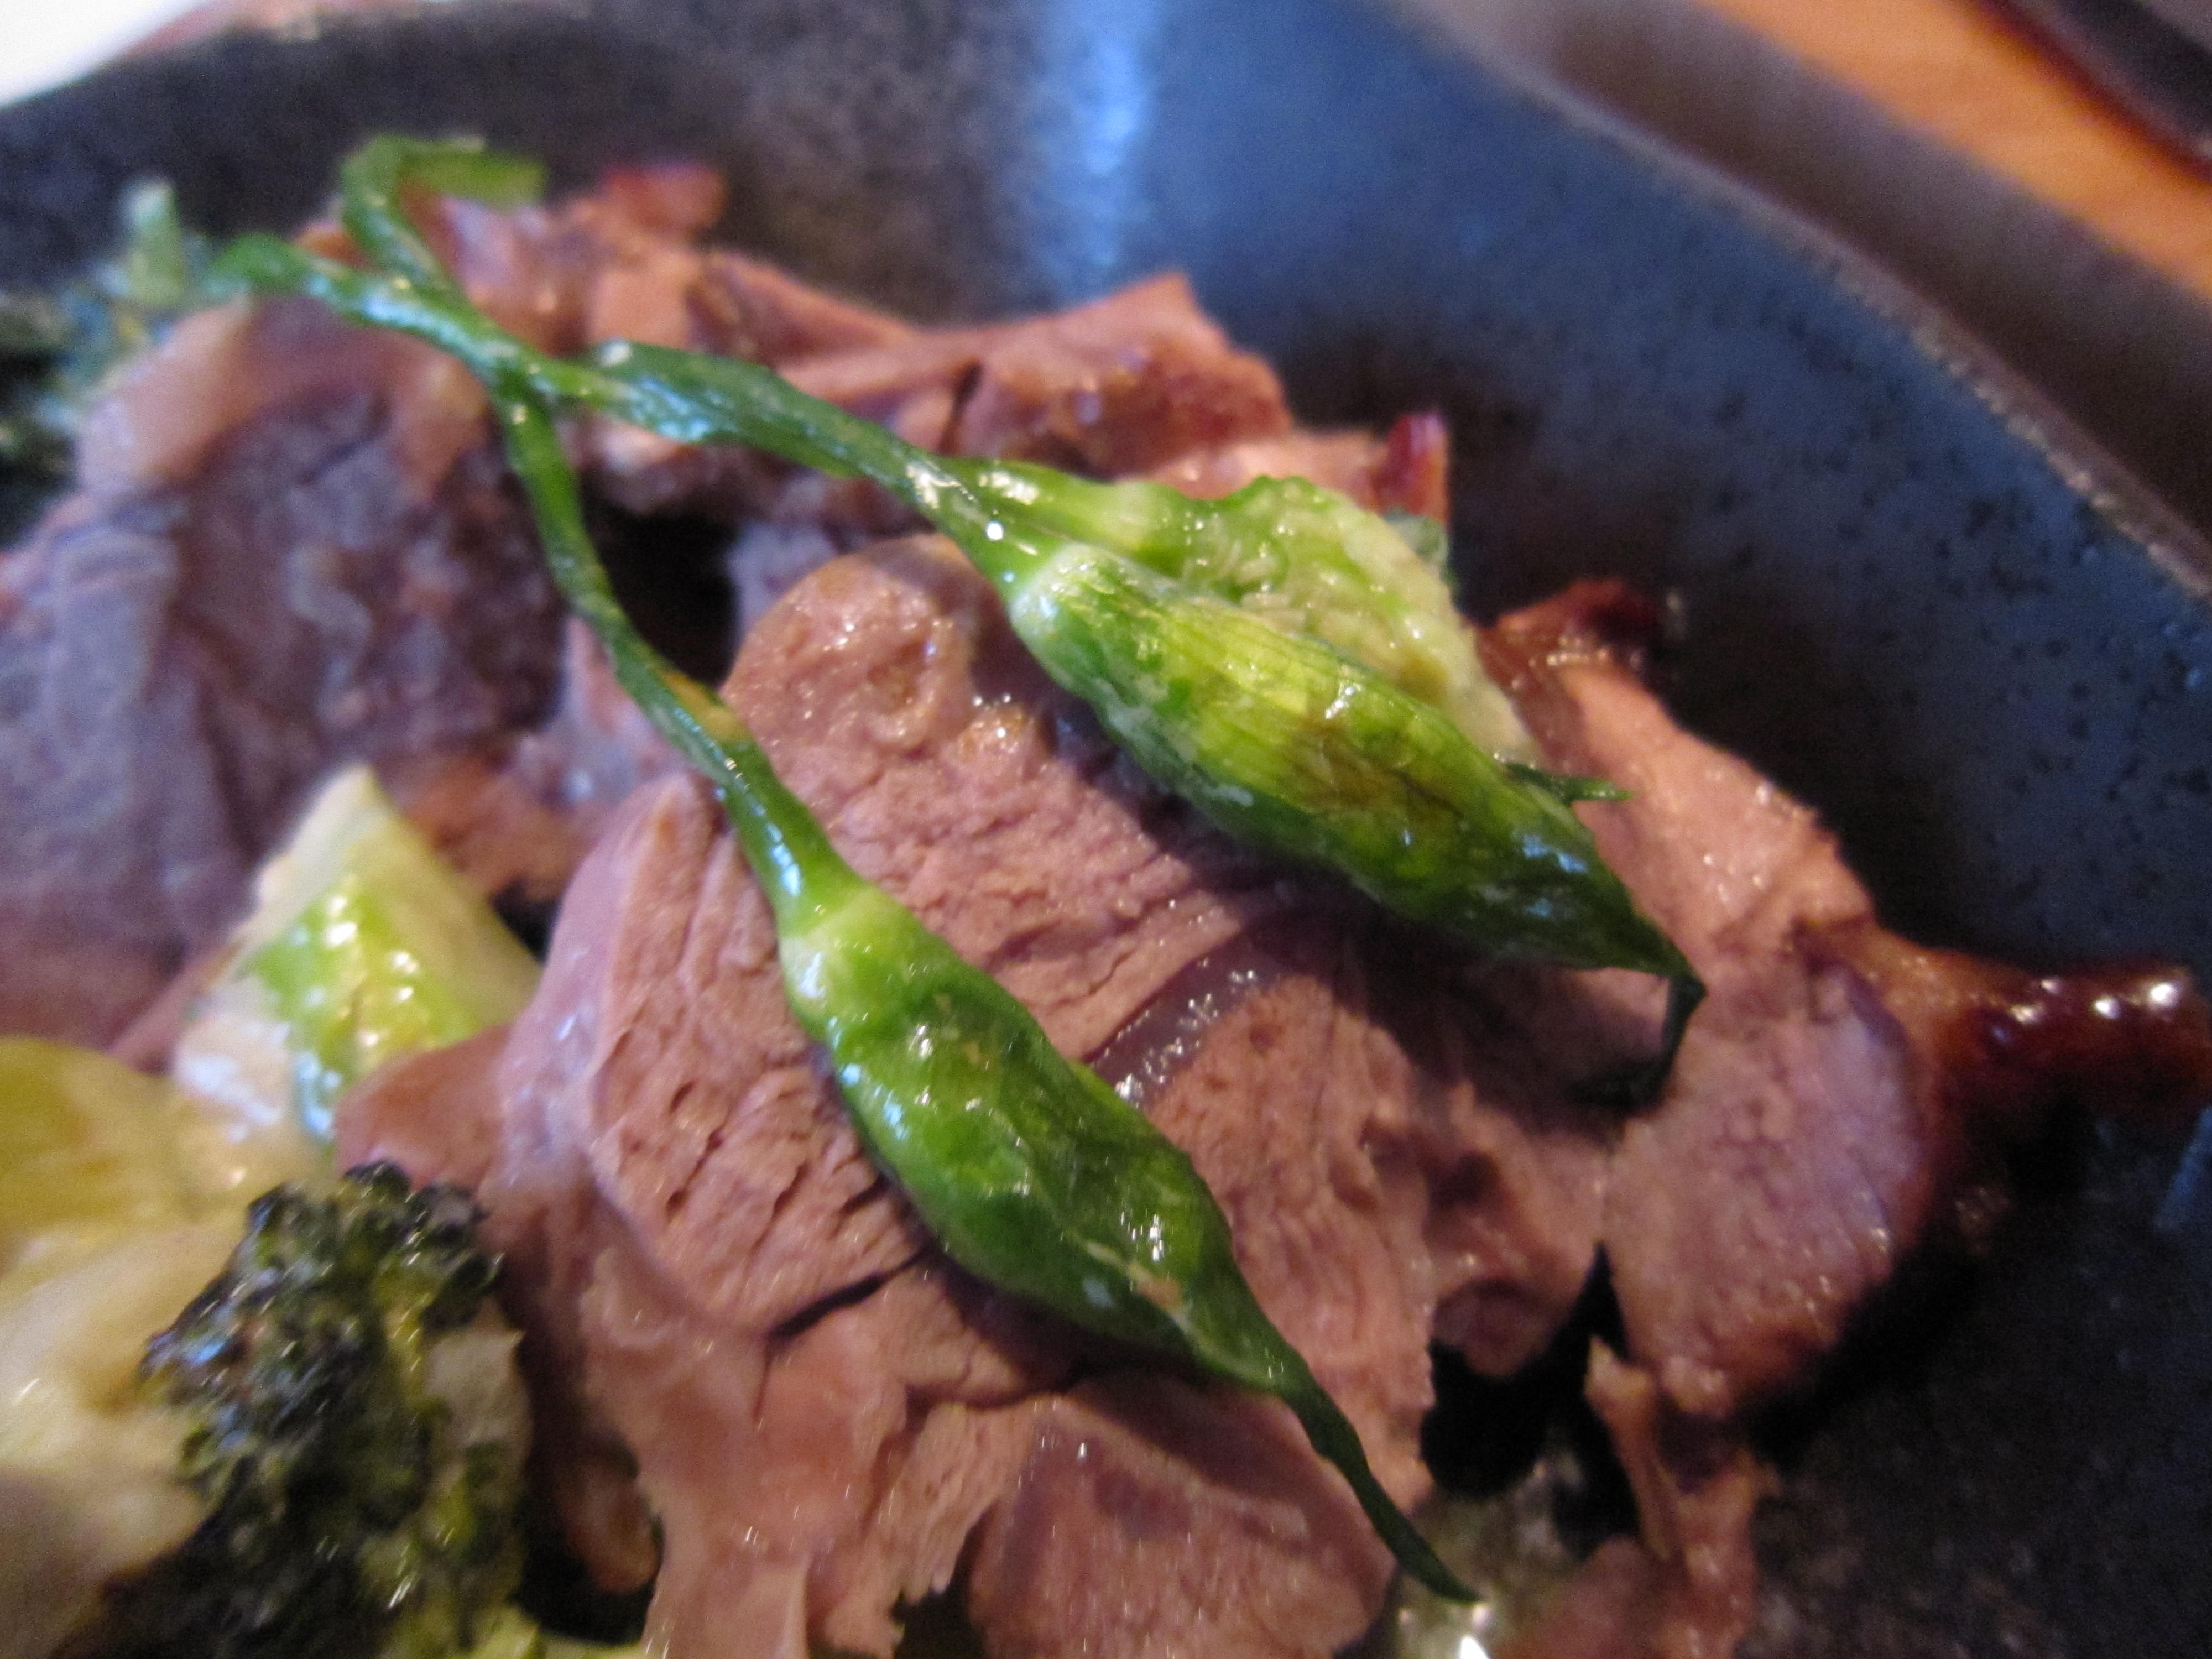
Before we started out on our trip north we had a meal at Iberico World Tapas – one of my favourite ways of eating…. what greedy person wouldn’t love tapas? Instead of having just one delicious thing to eat we chose lots of delicious things – cheeses and hams; salted squid and stuffed courgette flowers; patatas bravas and beef…… and belly pork…so many wonderful tastes, textures and flavours. The menu is on the website if you want to look…..

The next day we started driving north.

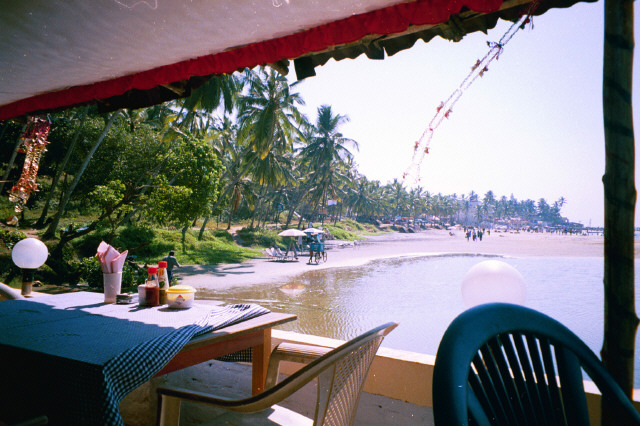
To those that don’t know, the industrial towns of the north can look dark and grim and people assume that is all there is, but once you get past Newcastle and take the coast roads heading further north you get to some of the wildest and most spectacular coastline anywhere. All I ask is that you look at the pictures and follow the links for more information. I am so proud of the north and its wild beauty and I hope that some of you will make your way there at some point.

On our way North we stopped, first of all at Alnwick (pronounced Annick, for those of you not brought up in the North) because there is the most wonderful secondhand bookshop there called Barter Books and one of the things I wanted to do was to see if they had any old cookbooks to add to my collection. What you can do is bring your old books (if they are good quality) and barter them for credit or other books…. It is the most fascinating place – in the old railway station at Alnwick – with a model railway running round the top of the bookshelves in one part of it. It is the perfect secondhand bookshop, with tables and comfy chairs amongst the stacks. Imagine the bliss….. look at their website and you will get a far better idea than I can give you.

And look what I found  in the cookery book section…

… an old cookbook, printed just after 1963, “The First Ladies Cookbook – Favourite Recipes of all the Presidents of the United States”

It starts with George Washington and goes right through to Lyndon B Johnson who was President of the USA at that time.

All those Presidents…. all those recipes!

I had to buy it. Well, when I say buy… I had arrived with two bags of books I didn’t want and handed them in – Barter Books assesses whether they want them and if they do, how much they want to pay for them and that amount is put into your account… so you can spend it on books in the bookshop. So, not exactly bought, but bartered.

At first, I thought I would play Cookery Lotto , thinking that would really broaden our cooking experience, but as I started leafing through it I realised that this may mean I was being forced into making something like this

Calvin Coolidge’s favourite… Pineapple Salad, which involved covering a fresh pineapple with cream cheese, glace cherries and strawberries…..

I have to say, that just isn’t going to work for me.

(But you see that tea pot? My mother has one like that… it has a little burner underneath to keep the water hot!  Isn’t it gorgeous?)

Anyway, the more I looked, the more danger I was in of having to cook something that really wouldn’t be to our taste at all, so Cookery Lotto was out.

There were recipes I was interested in… how about this…

Tomato Pudding.  Adored by Dwight D. Eisenhower.

If you can’t quite see the recipe, here it is

1  10-ounce can of tomato puree, 1/4 teaspoon of salt, 1 cup of white bread, cut into 1 inch cubes, 1/4 cup boiling water, 1/4 cup of melted butter and 6 tablespoons of light brown sugar.

Add sugar and salt to the tomato puree and water and boil for 5 minutes. Place bread cubes in a casserole. Pour melted butter over them Add the tomato mixture. bake uncovered for 30 minutes at 375 degrees F (that’s about 190 decrees C for us in the UK) Serve with quail or roasted meats.

Not written to be the world’s most tempting recipe, but, you know, I can see that Dwight may have been onto something.

I bet that bread goes deliciously soft and develops a lovely crustiness to the top… the tomato would make it savoury…..and to serve it with meat?

Well, I am going to give it a whirl.

I may have to tweak it a bit, perhaps using chopped plum tomatoes to lighten the texture and decreasing the amount of sugar… but there’s something about it that appeals. What do you think?

And then I looked at Herbert Hoover…

Well that’s not Herbert Hoover, obviously. That is a picture of his Maryland Caramel Tomatoes.

8 ripe tomatoes of equal size, white pepper, 1 tablespoon of salt, 1 1/2 cups of brown sugar 1/4 cup of butter

Method:

Skin the tomatoes. Carefully cut off the tops. Place them in a buttered baking dish, suitable to serve them in. Sprinkle with salt, pepper and brown sugar. Dab each of them with butter.

Preheat the oven to 400 degrees F (200 degrees C in the UK) and bake for half an hour. Then, remove to the top of the stove and over a low flame, reduce the juice until it is a thick syrup. The, once again, balke them in a hot oven (400 degrees F/200 degrees C) for half an hour. Serve hot.

Again, it might need a tweak or two… AND a baking dish that can go in an oven and on top of it…. but perhaps to serve alongside pork?

So. Pretty much of a result. A fascinating book and potentially a few great ideas in there. I was feeling very happy with myself and really, we hadn’t even started our little holiday.

We left Alnwick and carried on heading north… driving out to the coast, first of all to  Craster, a tiny village famous for its kippers, with a tiny harbour

and walked from there, along the coastline to the ruined castle of Dunstanburgh

before driving further north to Bamburgh where we were staying for the next two nights. Bamburgh is a beautiful village, once the capital of Northumbria, with yet another huge castle, high above the village.

Click on the links and see just how lovely the Northumbrian coast is.

That night, sitting in a tiny restaurant, we toasted each other and congratulated ourselves on choosing the far north as my birthday trip.

And there were even more lovely things to do the next day!

Superfood salad

Right then. Celebrations  are over and spring is on the way. 

I have a new job and a new bounce to my step. Everything is looking bright and cheerful and I am filled with optimism. Not only about having a real job but I am optimistic about starting a diet. Well, when I say starting… I seem to remember saying I was starting one some months ago but the horribly cold weather and gloom got in the way.

The brighter days and increasing warmth make me feel lively and less in need of solid, warming foods. Lovely though that Toffee Apple Crumble was, it seems my tastebuds are shouting out for brighter, fresher things too.

One of the things the Bear and I like to eat when we start to feel like this is Superfood Salad.  Lovely chopped salad with fresh, raw vegetables and quinoa with a lovely savoury, light dressing.

It makes a delicious meal by itself, or perhaps served  as a side salad alongside salmon or chicken. 

The basis for the salad is quinoa (and if the spelling confuses you, it is pronounced “keenwa” ) It was important to the Incans of South America (who called it the Mother of all Grains”) but nowadays, according to Wikipedia,

” In contemporary times, this crop has become highly appreciated for its nutritional value, as its protein content is very high (12%–18%), making it a healthy choice for vegetarians and vegans. Unlike wheat or rice (which are low in lysine), quinoa contains a balanced set of essential amino acids for humans, making it an unusually complete protein source.[4] It is a good source of dietary fiber and phosphorus and is high in magnesium and iron. Quinoa is gluten-free and considered easy to digest. Because of all these characteristics, quinoa is being considered a possible crop in NASA’s Controlled Ecological Life Support System for long-duration manned spaceflights.[4]

I don’t suppose you can say fairer than that, can you? And if you add a good selection of fresh, crisp and crunchy vegetables, well, you have Superfood salad.

So, first of all, get your quinoa.  About a half a cup full would make enough, when cooked, to make a decent sized salad for maybe four people. Or, if you are us, it makes enough for supper with two portions left to take to work for lunch the next day.

Give it a rinse and then put it in a pan to boil. It will take maybe ten minutes.

You will know when it is ready, because it goes from looking like little grains into grains with little sprouts appearing

See what I mean?

I often put a sprinkle of stock powder into the water to give the quinoa a bit of a hint of taste… you could try that.

Next, start on the vegetables.

The Bear won’t eat anything “stringy” (he thinks celery will strangle him) so I peel the outside with the potato peeler to get the worst of the strings off.

Once the celery has been transformed from a Bear-strangling-vegetable into a crisp and juicy stick of fresh greenness, I chop it into cubes.

And do the same with baby courgettes

And after scooping out the wet, seedy middle of a cucumber, I chop that into bits, too.

Get carrots, baby corn, spring onions, red pepper and baby plum tomatoes and do exactly the same to them.

A ripe avocado makes a good addition as well.

Now it really is a case of just putting it together – I put a handful or so of sunflower and pumpkin seeds in a bowl, then having rinsed in cold water and drained the cooked quinoa

I add that to the bowl and stir it round

Then add the chopped vegetables, stirring them into the quinoa and seeds

A good handful of chopped nuts  gives the salad an extra crunchy dimension

I make a light dressing with some walnut oil, some balsamic vinegar and some lemon juice and pour that over the salad.

And that’s it!

Look at it, isn’t it pretty? Fresh and crispy and delicious?

By itself it is gorgeous but I want to add a little extra to make it the perfect spring meal….

I have a lovely crisp pear and some organic feta cheese that, if I cut up, will go perfectly.

All that needs is the juice of half a lemon pouring over it to stop the pear turning brown and you have a sharp, sweet and salty extra to add to the salad.

So…. all you have to do is get some quinoa, a selection of vegetables that you like and with the aid of a sharp knife you can make yourself a really tasty salad that will not only brighten up your day by the sheer colourful crunchiness of it but it will also do you the world of good.

Spring is here – let’s eat something light and bright and good for us!

Dal. Delicious dal.

It’s obviously the weather for comfort food…the cold and damp and gloom affects everyone’s mood and general levels of happiness.  I am still working as a temp and that is not helping matters either. It’s good that I have work, but how I long for a real job with some sense of security because working week by week means I can’t plan anything. The uncertainty just nags away at me.

Ho hum.

I seem to have been working my way through my favourite comfort food recipes…recipes that can be relied upon to make me feel safe and happy. I was reading one of my friend’s blogs, Anne’s Kitchen, and her take on dal reminded me just how much I love it… and how long it had been since I served dal for supper.

One of my favourite things to eat (and, now, a favourite of The Bear’s, too) is dal. Beautifully soft and fragrant lentils, or split peas, chickpeas or beans, spiced with chillies and assorted spices and served with steamed basmati rice.

 There are hundreds of recipes for dal but this one is one I have developed over time and one that we love.

I travelled round the south of India (surely one of the most beautiful places on earth?) before I met him and ate dal all the time…

and what follows is  an amalgam of all the lovely dals I ate on trains, in cafes,  in railway stations….at  beachside huts

I saw some brilliantly fresh coriander in my local Asian supermarket. It was a sign, I felt, that I had to buy it and go home straightaway and start on dal.

Before you do anything else, you need to get the spice mix right. I love the slight popping effect of the mustard seeds in the finished dish. I start by heating the frying pan with a splash of chilli oil and adding chopped onion to soften slightly before adding heaped teaspoons of kalonji (black onion seeds, or nigella), brown mustard seeds and fenugreek seeds.

They pop slightly as they heat and add a delicious fragrance and flavour to the finished dish.

A teaspoonful each of tumeric and cumin powder add a deep rich smell and taste… and a pinch of asfoetida gives it a pungent, almost garlicky hit

Just put them in and stir them round mixing everything so the ground spices cover everything

I adore coriander and I have that lovely big bunch, so I like to chop the stems and add them at this stage too – layer upon layer of delicious herbs and spices transform a simple dish of lentils into something truly marvellous

I do need to add heat, of course, and I have some fantastic dried chillies

That can bubble away in the dal as it cooks…..

So, to the mix, add a cup full of yellow split peas

And a cup full of lentils.

Two different sizes, you’ll notice, which adds a delicious variation in the finished dal…

Add two cups of water and stir it round….

and add a tin of coconut milk

Look at that lovely rich cream…. stir it round…

and just leave it so simmer away…..it will take about an hour.

While that is chugging away gently, I make the rice, the way I was shown by an Indian friend

I heat some the indispensible chilli oil and throw in 6 cloves. Count them, don’t just thrown in a handful, because at the end, it is a good idea to know how many you are looking for. Cloves are marvellous but biting on one, unexpectedly, suddenly makes you think of the dentists, not of comfort and happiness.

Throw in a cup full of rice and stir it round so it gets a coating of chilli oil and the slight scent of cloves, then add a scant cup and a half of water a decent pinch of salt  and bring it to the boil.

Turn down the heat and let it cook until the water is absorbed.

Now, all you do is take it off the heat and lay a clean teatowel over the top of the pan and put the lid back on

What this does is absorb any extra steam and moisture and your rice turns out beautifully fluffy, with each grain separate and perfect.

Perfect!

All you need now is to serve up the dal….with fresh coriander

Look at those little mustard seeds… the split peas and the lentils…but to make it absolutely perfect and in homage to my love of the south of India, some shavings of raw coconut add the finishing touch

Utter, absolute luxury from the most basic of ingredients.  Utter and absolute comfort food, costing pennies.

What more could I want?  (Well, apart from a job!)

Crushed potatoes

Working full time is, as most of you will know, a pretty tiring business.

Working as a temp in an office is actually not that lucrative, so there’s always a fine line to be drawn between saving money and making things taste good.

This cold, dark winter seems longer than usual and it affects everyone’s mood. We get up in the dark, go to work in the dark and come home in the dark. If it’s not snowing then it’s raining or just bone-chillingly cold. The street lights come on mid afternoon and the freezing fog just hangs about.

I feel permanently exhausted and everything seems so much effort. Even cooking – my great joy – seems to be suffering. I want to come home and do the minimum…. the minimum, that is, until I have to eat it. I want something to cheer me up and make me feel marginally more special than a cold, dark and miserable Thursday warrants.

The answer is, of course, make something that takes the least effort imaginable, in the shortest time, with the loveliest taste.

When your mood is low then the thing to do is to get some potatoes… life always seems better when spuds are involved

The answer, therefore, is….. crushed and roasted (sort of) potatoes.

You’d be happy, I take it, with something that takes less than half an hour to make and serve? Some of those packet meal things take 40 minutes.. so something fresh and easy would be better? Surely?

So, you get some potatoes, peel them and cut them into manageable pieces… put them in a microwavable bowl with a sprinkle of salt and some water.

Put the oven on at 180 degrees.

Cover it with a plate and cook on high power for 6 or 7  minutes. (I say cover it with a plate because that is quicker and more economical than covering it with cling film and then throwing it out. Besides, that’s what I always do)

That’s just enough to mainly cook them but them still to keep their shape. Jab them with a knife to check there’s give in them.

Drain the spuds and put them on an oven tray… and get out your potato masher.

(Funnily enough, when I make mashed potato I won’t use the masher, I always use a potato ricer to make sure the mash is as smooth as can be. The masher is, however, perfect for part crushing the potatoes)

Now, don’t go mad. You aren’t mashing… you are bashing.

The potatoes need to be broken down around the edges… not flat, just bashed about.

Drizzle oil over it… garlic oil is good… as is chilli oil if you want your potatoes to have a bit of a bite … then shove them in the oven on a top shelf for ten minutes or so.

See how the littler bits have gone golden and crispy?

And the bigger bits have crisped up round the outside?

And there you have it… perfect to serve with (as I did) some roast lamb…. or maybe left over sausages, heated through, or maybe some roast chicken.

Sometimes, it is just enough to have a bowl of potatoes.

That really did take just about 30 minutes to make. 

And it really did take the edge off a bad day.

Broccoli Bliss

Sometimes, the way to brighten a dull day is to imagine a treat. Something to look forward to when you get in from work. Something that probably you can only get away with when your significant other is away.

Well, the Bear is away…and that means I can indulge myself. I can go wild and he won’t look at me with a slightly anxious expression, worried that I will force him into joining me in my chosen delights.

It’s not drink…. or illicit substances… or even some strange practice… it’s…..

Broccoli.

Beautiful, bold brassica.. the bright green and slightly bitter broccoli. I love it.

And when I can, I come home to a huge bowlful of it. One of my favourite ways to eat it is with a pseudo-Thai green curry sort of sauce, except it is not a sauce, it is a fragrant and sweetly spiced cooking liquid.

It’s quick to make and incredibly low calorie and oh-so-good for you.

I always have the ingredients for the Thai green curry sort of sauce in my cupboards because you never know when you may be able to get away with making broccoli, just broccoli, for supper. They also come in handy for when I want to make Thai Green Curry soup.

Onion, ginger and garlic. Some coriander.

Some green Thai curry paste

Thai basil, if you can get it

and kaffir lime leaves.

You will also need coconut milk – either a tin of it, or coconut milk powder that you can make up – and some stock granules.

Start by chopping some onion into  decent sized pieces and start to saute them in a large pan.

Chop your broccoli  stem into pieces and separate the florets.

Add the stem to the pan with half a cup, say, or water so it doesn’t burn and and a quarter inch of peeled and finely chopped ginger, and a clove of garlic, also finely chopped.

Add a heaped teaspoon of Thai green curry paste, the same of kaffir lime leaves and Thai basil. Stir it round and smell that gorgeous, aromatic spicy steam billowing up.

Let the stem and the onion soften slightly then add the florets.

Give them all a stir and let them steam for a couple of minutes

Mix three heaped dessertspoonsful of coconut milk powder (or a can of reduced fat coconut milk) and add a teaspoonful of vegetable stock granules, mixing it round well

Pour that delicious mix over the broccoli and let it steam through for another couple of minutes….

And then?

Dish it up, my darlings!

A beautiful bowl of broccoli… think of it as thai green broccoli soup… without much soup.

Packed full of goodness…. and that, well, that is one of my secret delights.

Pappardelle with mushrooms, lemon and sage

“99, column 2”

As statements go, that has to be, when taken out of context, one of the most random and mysterious comments ever.

If you had been following our adventures in Cookery Lotto, you would have known instantly that this was the answer we had been waiting for.  We had (great team effort there, everybody) managed to get a number that led us to finding the cookery book that I was to cook from, but to make sure I couldn’t deliberately pick something that I knew I liked, or that was easy to do, someone had to suggest a page and column number.

I said at the time I was glad it was column 2 – column 1 involved making a ragu from a kid goat’s shoulder. I would have tried, of course, but I was almost certain that Mick, our butcher, didn’t have any on his meat counter.

Luckily Caron picked column 2, which led to me making pasta yesterday with two little girls.

It  just goes to show that if we three could make pasta successfully in less than an hour then anyone could do it.

The girls set off home with their tagliatelle and I was left with, as instructed by the rules of Cookery Lotto, a bowl of pappardelle.

I wanted to make something delicious with this, my beautifully soft and silky, hand-cut pasta ribbons. And I didn’t have any part of a goat at hand.

I did, however have mushrooms, a lemon , some garlic and sage.

Which, as Good Food pointed out, was exactly what I needed for a “light but filling Italian supper, ready in just 20 minutes”

And even better, delicious though this sounded, gave me just 386 calories per serving. That meant it could be included in my 400 and Under category – diet food that tastes divine but with minimal calories. Things were just getting better and better.

On with a large pan of well salted water to get it to a brisk boil, while I chopped 250g of mushrooms.

They needed to saute in 25g of butter and after a couple of minutes, stir in a crushed clove of garlic

Squeeze a lemon and chop a handful of sage

Stir in the sage and add the lemon juice.

Check the papparedelle – as it is fresh pasta it will only need a couple of minutes cooking – drain it but leave a tablespoon or so of water in there.

And then toss it in the delicious lemon and garlic sage-scented buttery mushrooms

Perfection.

Beans…. for beans on toast

When I want to cheer the Bear up, or give him a special treat,  I tend to make him beans. It’s probably his favourite meal.

When he’s been travelling, he will phone from some far-flung corner of the world and ask me if I will make him beans on toast when he gets in.

This isn’t the ordinary, open a can, heat through and serve on white sliced sort of beans on toast… this is something that has developed in the time we have been together.

It all started when he asked me to marry him and I accepted (but you guessed that bit, right?) and then I went to Florence with my best friend for a little holiday. I have to point out, though, that this had been arranged for ages.. it wasn’t a reaction to being engaged. Anyway, D and I had a marvellous time, visiting her son and while we were there, often had cannellini beans with tomato and sage and pancetta, served with good Italian bread…. a traditional Tuscan dish. It is truly delicious – very simple but beautifully tasty.

I asked the chef at one restaurant, La Giostra how it was done. Now, I said these weren’t just any beans, nor was this just any chef…he is Prince Dimitri Kunz d’Asburgo Lorena.

It’s just beans he said…… cannellini beans in stock from vegetables, with some sage, olive oil, garlic, tomatoes and pancetta. But it’s slow…. you take your time. The flavours reflect the care you put into it.

When I came back I was telling the Bear about this wonderful restaurant, in a 16th Century building in the heart of Florence and how one of my favourite things had probably been this incredibly simple dish. He asked me to try and make it for him. And I did. I remembered what Prince Dimitri had said and I produced beans Tuscan style and it became a favourite of ours …. but as with all cooking, things change over time. I replaced, at one point, the pancetta with streaky bacon and chorizo, giving it a deeper, richer flavour and, after going out one day and leaving the beans bubbling down in the tomatoes until it became a thicker, more concentrated tomatoey bean dish, realised I liked it more with a thicker sauce. Maybe that’s because I’m not eating it in Florence….

I serve it with toasted No Knead Bread and we call it beans on toast.

First, get a bag of cannellini beans  – you will need about 250g for maybe 4 or so healthy sized portions. Dried beans need to be soaked overnight to get them ready for their proper cooking.

I once had dried beans that no matter what I did with them, they just refused to soften. Maybe they were a rogue batch, so after that I always made sure I had some cans of cannellini beans in as well. They are just as good and means that you can make beans that day, if you want them rather than waiting for the following day after they have soaked overnight.

So… either soak your beans and start the recipe the next day.. or open 3 cans of beans….

Give the beans a good rinse and then put them in a pot with some fresh water, some sprigs of sage and a carrot to add flavour to the stock.

Peel and chop 3 or 4 cloves of garlic (I cut it to roughly the size of the beans) and put them in the pot with a good slug of olive oil.

And then set the beans away – bring the pan to the boil, gently and then let them bubble softly away at a simmer until they soften. When I had that batch of beans that refused to soften I started adding a sheet of kombu to the pan (remembering to fish it out later) This is Japanese seaweed and it is supposed to help beans soften… it also adds a savour to the stock – more of the umami hit that makes everything taste so rich and full. Not seaweedy at all, so don’t worry.  It’s not hard to get hold of if you want to give it a go – it will be in the health food/world food sections in supermarkets.

Let everything bubble away until you know the beans are softening. Or, if you are using cans of beans, just get them heated through for a few minutes in water, with the garlic and sage.

Now add two tins of chopped plum tomatoes

Stir it round – see how the beans are still distinctly white against the tomato? You want to get them to the stage where they are infused with tomatoey colour and flavour.

If you have some spare red wine, add a sloosh of that – maybe half a glass or so.

Turn the heat down so that you get the pan to bubble softly – the effect you are aiming for is for the occasional lazy bubble to pop to the surface. You can leave it doing that for an hour or so. You might need to add some more water – just keep half an eye on it and watch how it goes.

Now, get your chorizo and slice it

Don’t forget to pull off the covering around it… you don’t want to eat that.

Then dry fry it gently – see how the oil comes out?

You need to colour both sides and then take it out of the pan to cool before cubing it. Don’t throw that oil out… you pour that into the beans.

If you have streaky bacon, slowly fry that too and then cut that into pieces, before adding that and the chorizo to the beans.

Stir it all round and add another glug or two of olive oil.

Give it time to relax together – taste the sauce.. is it to your liking? Does it need some salt? It’s really only at this stage you add salt – if you do it as the beans are boiling you will toughen the skins.

Chop some sage leaves finely to scatter into the pot

It should be a rich tomato sauce with hints of the paprika from the chorizo, a slight muskiness from the sage, aromatic from the garlic and olive oil….

Slice and toast some good bread – and by that I mean sourdough or the lovely No Knead Bread, or maybe good Italian bread… just as long as it isn’t white sliced, which would just dissolve into nothingness.

And serve proudly, knowing you have made a meal from simple ingredients, that cost pennies and makes people smile.